When I first heard about the Renovation Sensation project my mind went into overdrive – so many ideas went whizzing around my mind and I was super-excited to get started. The challenge was set by Direct Blinds and I knew straightaway that it was right up my street: I love the thrifty nature of a makeover project to ‘get the look for less’ and I’m always keen to recycle and renovate old or unwanted items to keep them out of landfill. I headed to the car boot sale and kept my beady eye open for a suitable project to get started on.
Many of the furniture items at the boot fair had rather hefty price-tags and I quickly excluded anything that had already been painted or renovated in the past. I also didn’t want to take a gorgeous piece of wooden furniture in good condition just to paint over it, so I kept hunting for the perfect piece. At a particularly ‘junky’ stall, I spotted a mini-desk/shelving unit tucked away at the back. The wood on the top of the unit was peeling off and the entire unit was crying out to be sanded down and painted. It would be the perfect desk for my workshop and in my mind’s eye I was already imagining all the things I could do to improve it. I tentatively asked about the price (worrying that it would be outside my budget) and was delighted when it was being sold for a ‘secondhand’ rather than ‘antique’ price! I snapped it up and enlisted my husband to help me carry it back to the car.
As we loaded it into the car I noticed that a butterfly was sleeping beneath the shelf, so the cabinet would forever more be known as ‘the butterfly unit’ and it inspired my choice of colour and designs for decorating the desk. I picked up a couple of cans of pink spray paint from the car boot sale too and stopped off at the local hardware shop to find a new drawer knob. The butterfly fluttered off during the journey home, presumably to find somewhere new to sleep! That same afternoon, I sanded down the old varnish and wiped it over with a damp cloth to clean off the dust. After the cabinet had dried in the sun, I began spray painting in earnest and covered the unit it a couple of light coats. I left it to dry and came back to the project the following day to spray another fine coat of pink paint to get a smooth finish. I didn’t worry about spraying the back of the cabinet too much, because I knew that I wanted to decorate the inside with paper and fabric.
My tips for renovating a piece of furniture:
- Clean thoroughly before you begin work on your furniture – inside and out!
- Sand down wooden furniture to create a surface that paint will adhere to
- If you’re keeping the wood-grain visible only sand in one direction with the grain
- Use a vacuum with brush attachment to suck up the dust and wipe over with a damp cloth to get the last of it
- Make any repairs before you start to paint
- Make sure the unit if fully dry before painting
- Spray in long strokes and about 30cm away from the wood to get a smooth finish
- Build up layers of paint – it’s better to do three or four fine layers because the paint is more likely to run with one thick layer
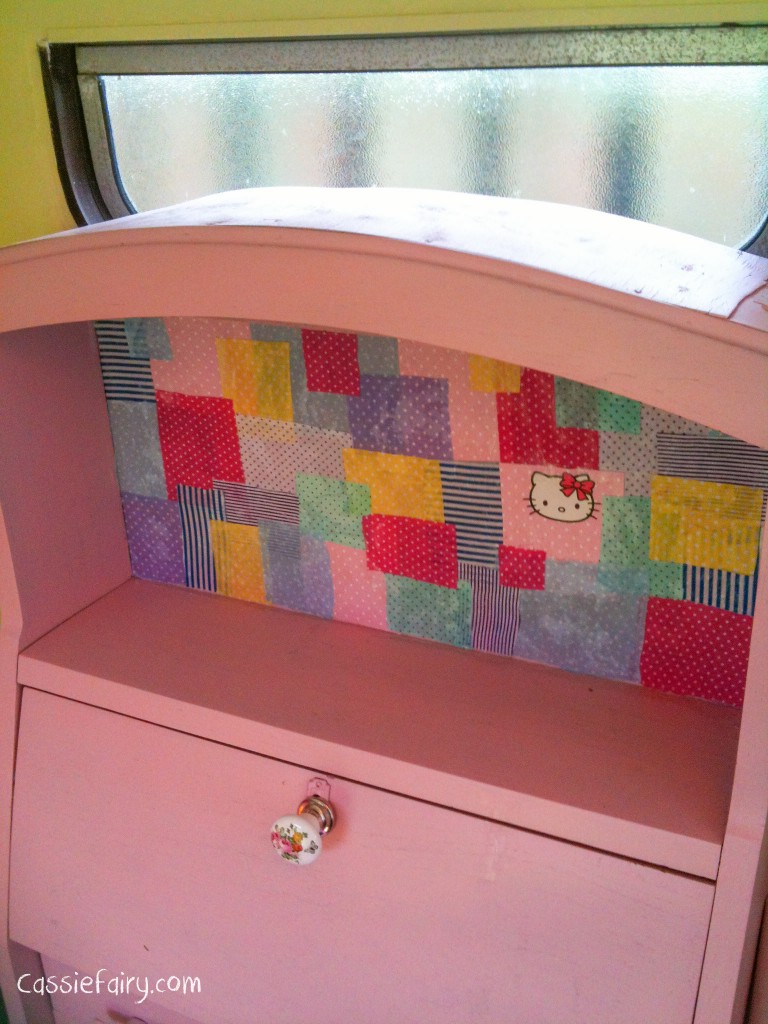
It looked like the drop-down desk had previously opened with a key, which had been lost long before I bought the cabinet, so the only way to open it was to prise it open with a screwdriver – not the most practical option for everyday use! So once the paint was completely dry, I added a ceramic knob onto the front of the desk. The colour of the roses matches the pink paint, and I love the fact that the design features a butterfly and will continue to remind me of the sleeping butterfly that came with my piece of furniture.
To finish off the project I pasted a patchwork of paper and fabric inside the unit using PVA glue. Initially I thought that I would only use paper in the same way as my patchwork wall project but seeing as the desk will be in my sewing workshop, I thought it was only fitting to use scraps of fabric too! So I’ve included lots of off cuts from other projects in there – such as my blue star curtains & my spotty cushion covers – which ties the whole space together. I pasted the cabinet itself, stuck down the fabric and paper squares and painted another layer of glue over the top to set it in place. I love the pretty, hand-crafted effect of this decoupaged patchwork and I couldn’t resist including a little Hello Kitty paper in the design!
Overall I’m really pleased with how the unit has been transformed from a tired old cabinet (that may well have ended up in landfill or on a bonfire if I hadn’t bought it) into a perfectly usable mini desk for my workshop! I will get plenty of use out of it, and the size is just right for the space available in my little vintage caravan workshop.
This article is a sponsored collaboration. The pink links in the content indicate a sponsored link or information source. The blog post reflects my own experience and the sponsor hasn’t had any control over my content 🙂


