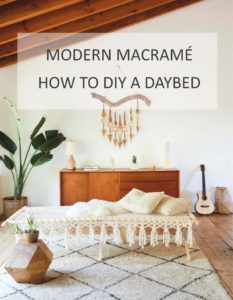
Macramé is everywhere these days, isn’t it? I can barely open up Pinterest without pinning countless designs for plant hangers and knotted wall art. Today I’m sharing a step-by-step guide to making your own macramé daybed – it’s a rather impressive project but it’s one that you definitely can make at home.
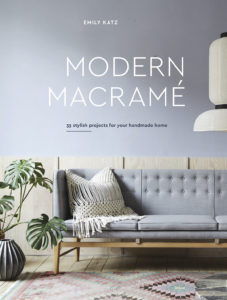
This project is taken from Modern Macramé by Emily Katz and the great news is that I’ve got an extra copy of Modern Macramé to giveaway to one lucky reader so be sure to enter the giveaway through the Rafflecopter widget below.
This contemporary craft book contains 33 projects to DIY, from a simple planter to a complicated tent-like structure. Nonetheless, the tutorials throughout the book are easy to follow and give you the feeling that you could easily take on a macramé project yourself.
It’s amazing just how many different types of homeware you can make with just a few pieces of string and a couple of knots. Have a look at this PDF of Macramé Knotting Techniques to get to grips with the techniques and get you started. I bet those first few rows of knots will have you hooked!
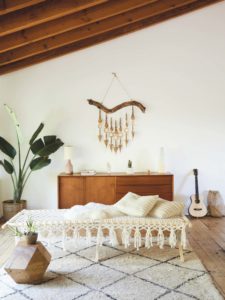
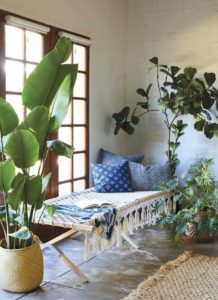
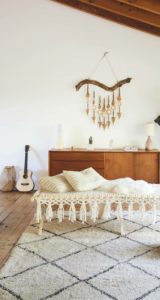
So now, onto the daybed project. I was so impressed when I flicked through the book and spotted this DIY. I’d love to have this kind of daybed in my own home (if only I had the loft apartment to go with it, eh?) so it’s definitely a project that I want to try out for myself one day. Here’s the extract from the book – enjoy!
DAYBED ++
I’m obsessed with thrift-store shopping and going to estate sales. You never know what kind of treasures you might find. Most discoveries are in pristine shape, but some things that I have collected over the years have needed fixing. Recently, my sweetheart placed a moratorium on bringing anything home that needed repairs, for both our sakes. We are optimists at heart, but the piles of objects that needed fixing were growing.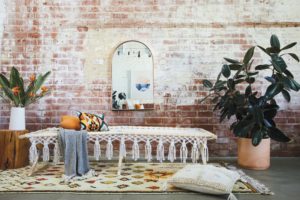
This daybed project came from one of those “needing love” objects. I found a cool vintage army cot at a yard sale; the canvas was rotting away and had a few tears, but my plan was to get nice new canvas and re-cover the wooden frame. I pulled off the old fabric and decided instead to use the frame to macramé on! A unique piece of furniture was born. Since then, I’ve found a great supplier of new cots that are sturdier (and sans mold) on which to make macramé, but I am still grateful for that original yard-sale find.
FINISHED SIZE
84½” long by 37½” wide by 18″ tall
KNOTS & TECHNIQUES
Reverse Lark’s Head Knot (RLHK), see PDF
Square Knot (SK), see PDF
Sinnet of Square Knots, see PDF
Alternating Square Knots (ASK), see PDF
SUPPLIES
1,036′ white cotton rope (5mm diameter)
Cot frame
CUT LIST
Two 25′ lengths
Fifty-eight 17′ lengths
In this pattern, the “sides” of the frame are the long sides of the rectangle. Work your knots tightly throughout this project. This helps prevent the cot from sagging excessively with use.
PREPARATION
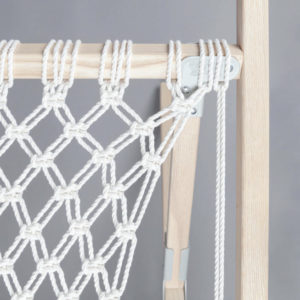
Assemble the cot frame per manufacturer’s instructions. Mount all of the 17′ ropes onto one side of the frame using RLHKs. Make sure that half of the ropes are mounted to the left of the centre leg and half to the right, and that the farthest rope on either side is mounted on the outside of the leg next to it. This enables you to anchor the corners of your knotting around the legs at the head and foot of the frame.
KNOTTING
3 Work a row of SKs. If you have mounted your ropes correctly, you will have worked an SK directly above each of the three legs. [A]
4 Work 16 rows of ASKs, 1¼” apart, or until your knotting can just barely be stretched to reach the other side of the frame, ending with a row that has SKs at both ends.
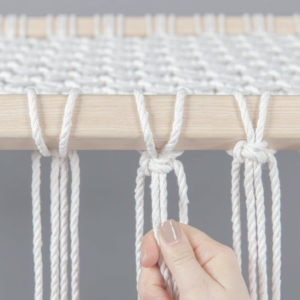
5 To prepare the cords for knotting around the opposite side of the frame, first bring the leftmost cord to the left of the leg next to it and underneath the corner of the frame. Then bring the cord on its right over the side of the frame. Repeat with the 2 cords on the far right. Position all of the remaining filler cords from the previous row under the frame and the working cords over it.
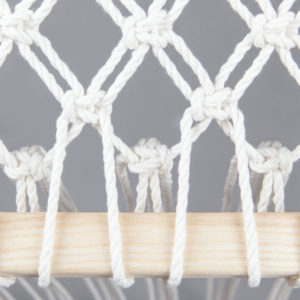
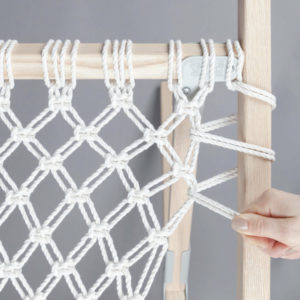
6 Skipping the outermost 2 cords on either end, work a row of SKs beneath the frame. You should still have about 1¼” of rope between the knots in this row and those in the previous one. [B]
7 Pull each pair of filler cords down and toward yourself until the last SK rests below the edge of the frame. [C]
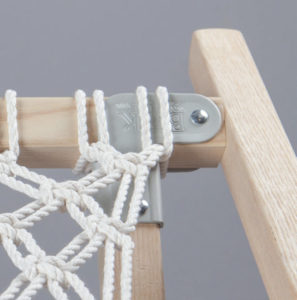
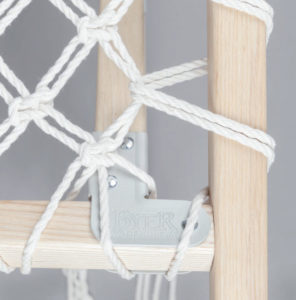
8 Mount one of the 25′ ropes onto the far right end of the side of the frame. [D] Wrap both of its cords around the bar at the end of the frame and between the rows of ASKs, stretching the knotting taut. [E]
9 When you reach the opposite corner, bring 1 cord up through the frame and the other underneath, and bring them together again at the outside edge of the frame. Combine both cords with the 2 cords to their left. Then pull all 4 cords taut and use them to work an SK in line with the others at the edge of the frame. [F]
10 Repeat steps 8–9 on the left.
11 Work 2 rows of ASKs, ½” apart.
12 The next row is a row of 2 SK sinnets with the cords held double, worked 1″ below the previous one; however, it needs to be offset by 2 cords to achieve the desired look. To do this, work the leftmost sinnet of 2 SKs with 6 filler cords and the rightmost sinnet with only 2 filler cords. Work all other sinnets with 4 filler cords. Work all with the working cords held double.
13 With the exception of the outermost sinnets of the previous row, use the centermost 4 cords of each group to work an SK 1″ below.
FINISHING
14 Trim the cords of each tassel in a V-shape that extends 5½” below the knotting at its lowest point, and unravel them. [G]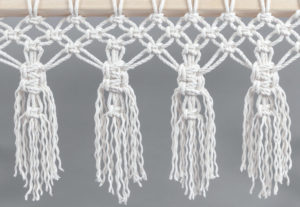
Reprinted with permission from Modern Macrame: 33 Stylish Projects for Your Handmade Home by Emily Katz, copyright (c) 2018. Published by Ten Speed Press, a division of Penguin Random House, Inc. Text and tutorial photographs (c) 2018 by Emily Katz; Interior design photographs (c) 2018 by Nicole Franzen
And there you have it – a fabulous daybed that could have come straight out of a design exhibition. I love it! Sure the instructions might sound odd if you haven’t read through the Knotting Techniques PDF but it’s just like knitting: once you’ve understand the terminology, you’ll have no problem reading the pattern.
So, how would you like to win a copy of Modern Macramé for yourself? Don’t worry, there are plenty of beginner projects in there – and it’s the nicest coffee table book too. There are plenty of ways to earn entries in the Rafflecopter widget below so enter the competition now and best of luck to you all!
Giveaway open to UK residents only. The competition runs from 20th September to 7th October 2018. One winner will be chosen at random via Rafflecopter after the contest closes. The winner will be contacted via email and will need to provide a delivery address to receive their prize.
PIN THIS POST FOR LATER..!
Some items in this blog post have been gifted to me and the pink links indicate a gifted product, affiliate link or information source. All thoughts and opinions in this post are based on my own experience and I am not responsible for your experience 🙂


20 Responses
Thank you for this tutorial! I have been looking at the flower house flying saucer and the macrame version at “floating bed dot com,” which costs thousands of dollars, and wanting to find a less expensive option. This seems like it could be suspended quite easily.
Hi Ileana thanks for getting in touch. This project is taken from Modern Macramé by Emily Katzfollow so you might be able to find the information if you search for that book 🙂
Where can I find the wood cot and what kind of rope do I need for this project?
I know it’s abit early but I’m making Christmas treat boxes for my nephews x
DIY Christmas tree ornaments 🙂
I am in the process of making a quilt for our spare room. I’ve cut out all the pieces of fabric, now I “just” need to sew them together. The only other quilt I have made was one for a cot bed, this one is double bed size, so will take me a lot longer. I hope I have learned from the many mistakes I made with the cot quilt and actually get the sewn pieces all square instead of wonky!
We do a lot of card making ready for Christmas.
I’m doing a Christmas diamond painting of Santa’s train at the moment for my little grandson I love all crafts so always trying something different
Lots of Autumn projects. I am completing an intricate hemline on a cardigan that i am knitting and also starting creating some Christmas cards and needle felting.
A mural for my landing.
At the moment i’m in the middle of making all my Christmas cards
Trying to finish an embroidered The Snowman scene. I started this time last year & want to have it finished in time for Christmas this year!!
I’m thinking a fabulous hot water bottle case and matching eyemasks. I’d like to do a glamorous drinks trolley too
i make cross stitch cards for Christmas as my grandma used to make them every christmas when she was alive so i carry on tradition 🙂
We have just very recently acquired a venue. Should hopefully be life long, and is easily accessible. Aim to reduce social isolation. A knitting class will be starting this week. Hoping to be able to provide / facilitate a large and good range of arts, crafts, and other activities. Will enquire as to local preferences again in order to gain more clarity. As many just mentioned arts and crafts, rather than being special on which particular ones are of greatest interest to them.
Seeking funding, and will need to access resources :- Group responsibilities.
We’re making Christmas Cards xx
I am going to make some Christmas Cards
What crafts projects are you planning this autumn? . . . .going to make cards . . . .in time for Christmas
Lots of Halloween decorations.
I am currently working on a Jolly Robin tapestry cushion, which should be complete in the next few weeks …. then I’ll be cross stitching Christmas cards for my family! I love crafting for Christmas!