Here’s a guest post treat for you all today – a craft project from my photographer friend Claire who blogs over at Lacey in Places. She’s going to share her experiences of lampshade making with you and give us a step-by-step tutorial on how to do it ourselves. Take it away Claire…

When planning my next visit to my good friend Becky in Bath, she suggested rather than going for our normal post-hangover Sunday brunch, we were productive and opt for a lampshade making class.
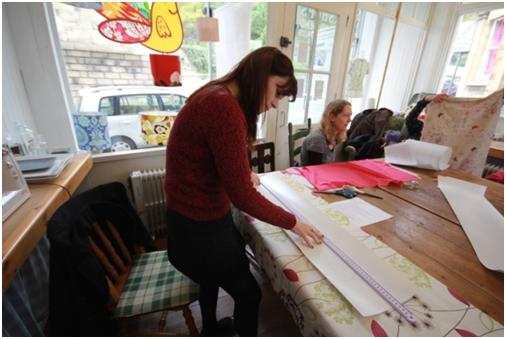
Armed with our well ironed lampshade fabric we arrived at the class at 10am. Everyone was quickly reassured by our tutor Ruth, that in three hours time we would have our own lovingly made, professional looking lampshade. After a quick cup of tea and introductions, we got to work.
If you want to try this at home, you can buy kits and instructions which include the lamp rings and tape or to find out where lampshade making classes are run nationwide, visit www.needcraft.co.uk
Otherwise follow the steps below, to make your own custom-made lampshades – enjoy!!
- Start by carefully measuring the circumference of the lampshade ring with a tape measure, then add a further 2cm to this length. This measurement is the final length of PVC needed for both your lampshade and covering fabric.
- Decide on the height of your lampshade – we thought the bigger the better – going for 22cm in height
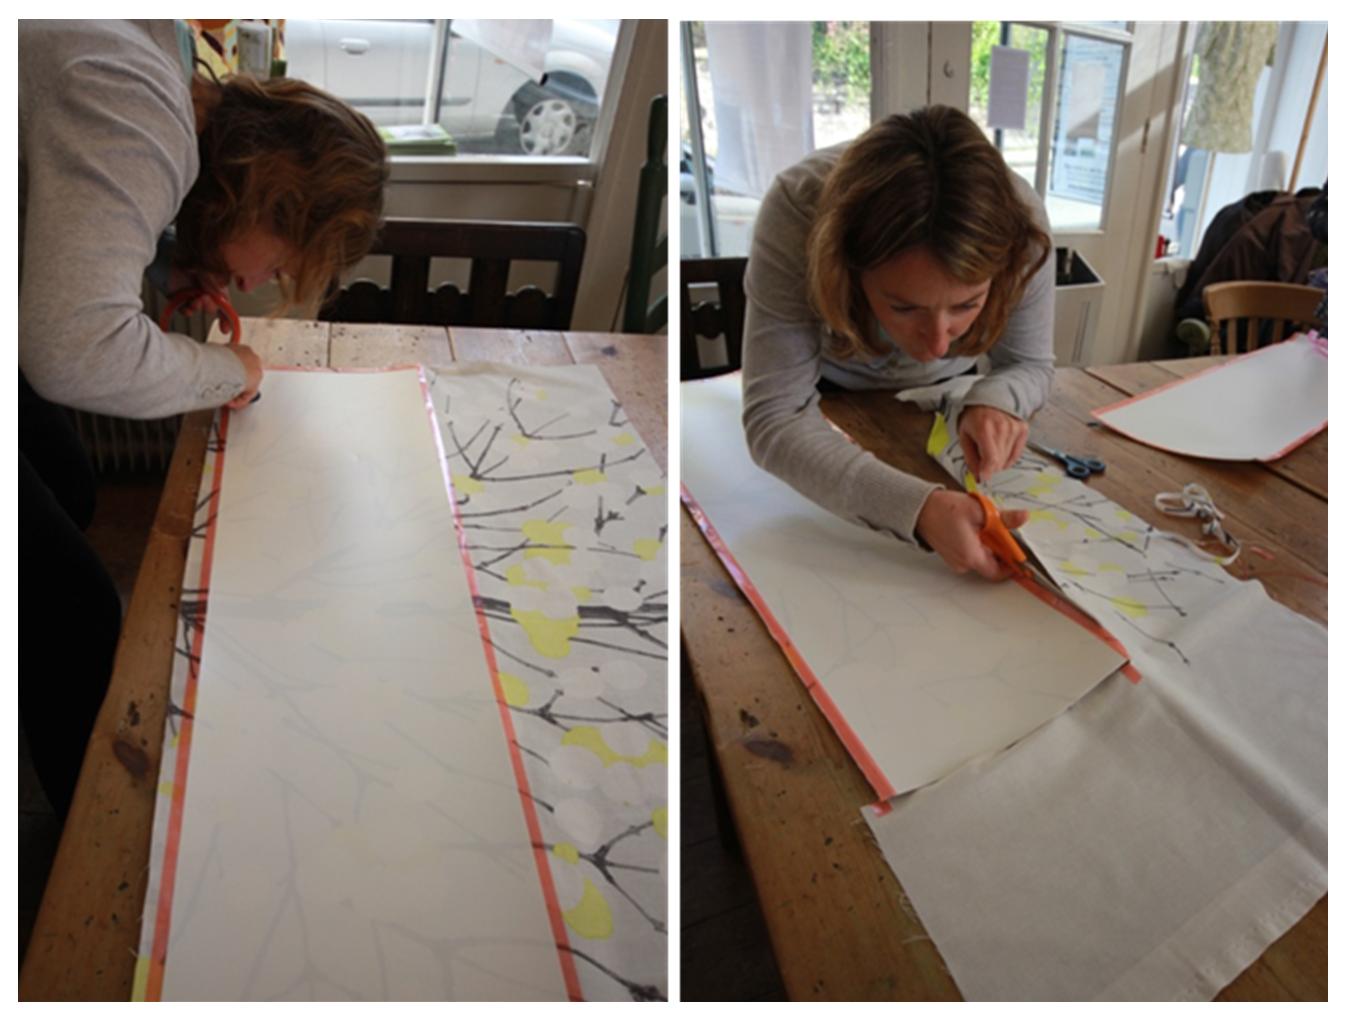
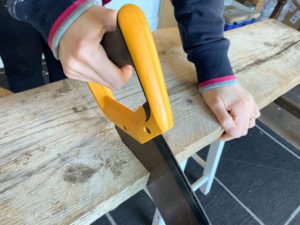
- With a steady hand, we then cut out the white back, double sided, extra sticky backed PVC – this is special PVC especially for lampshade making which is stiff and fire retardant – the PVC you used to make a Barbie doll mansion off Blue Peter as a kid won’t do!
- Make sure the chosen fabric is at least 3cm wider and 2cm longer than your PVC
- Lay your fabric pattern side down on the table and decide on the placement of the PVC, removing any dust or loose threads
- Then hold the PVC in place and peel away the first 10cm of the release paper so it sticks to the fabric. Then slowly peel away the remainder of the release paper
- Turnover and smooth the fabric over the PVC, pressing down firmly
- Apply 9mm double sided tape (seen here in red) to the seam side of the fabric, so it lies right up against the side of the PVC and make sure it is 1cm longer than each edge of the PVC.
- Cut the fabric along the edge of the red tape
- Remove the backing of the tape and fold over the fabric, so it sticks to the PVC to create the good edge of the lampshade.
- Apply 9mm double-sided tape to both of the long edge sides of the fabric so it is right up against the PVC. Ensure that it starts exactly at the good edge of the lampshade and runs 1cm beyond the other end/(inner) edge
- Apply 9mm double-sided tape to the fabric of the good edge, butting up to, but not overlapping the 9mm double-sided tape of the long sides
- Apply 3mm double-sided tape to both the long edge sides of the PVC so that it butts up against the 9mm double-sided tape. Ensure that it starts next to, but not over, the fabric you turned over to make the good edge.
- Smooth over all the sticky tape, applying pressure.
- Cut the fabric along the long edge sides, cutting as close to the 9mm sticky tape as you can. Cut the fabric along the short edge as close to the PVC as you can.
- Remove 3mm sticky tape backing on both long sides
- Starting at the inner edge, places a lampshade ring onto the 3mm sticky tape. If you’ve decided on a ceiling pendant, ensure that the light fitting ring is at the top of the pattern. If you’ve decided on a shade for a base, ensure that the light-fitting ring is at the bottom of the pattern.
- At the same pace, roll each ring along the 3mm sticky tape.
- Continue rolling to the good edge, so that you have completed the drum of the lampshade – tucking the edge under the good edge. Apply pressure to the PVC to ensure the edges have stuck together.
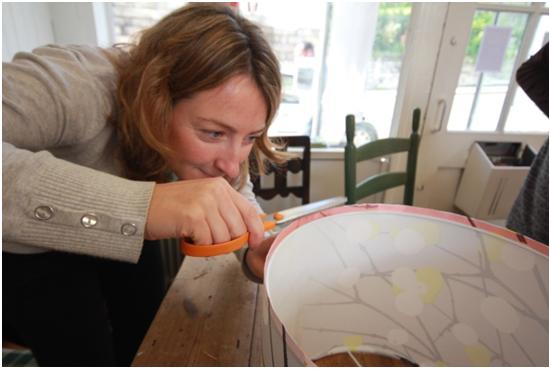
- Cut away any loose threads from the top of the shade
- Remove the backing from the 9mm tape
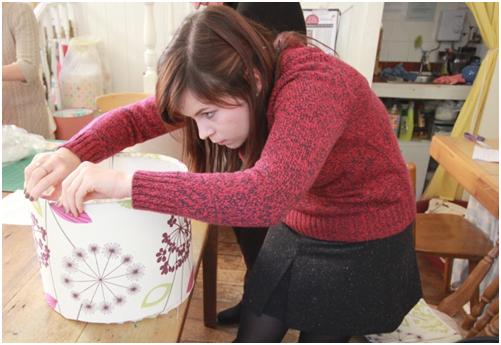
- Fold over the edges of the fabric so it makes contact with the ring
- If working on the light-fitting ring, cut small triangles next to each spoke of the ring
- Fold the fabric over the ring, applying pressure to ensure smoothness
- Repeat process on other ring
- Hey presto – your own finished lampshade!!


2 Responses
I’m not sure, my friend Laceyinplaces.com wrote this guest post – maybe try online fabric shop http://www.abakhan.co.uk/ they are great!
Where can I get the white PVC for lamp shade making