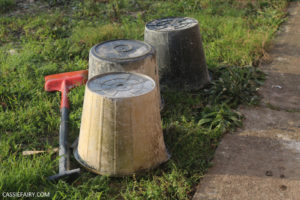
When it comes to the aesthetic appearance of your home often the smallest chip or crack can look unsightly and stand out a mile if the rest of your home is in a good state of repair. The trouble is that repairing concrete can be a difficult and problematic process. But it is possible to DIY it yourself.Of course, the restoration of historic buildings, commercial buildings or any major work on your home should be left to expert contractors of concrete repairs to get the job done – and avoid causing any irreparable damage. But, that being said, if you find a small amount of cracked concrete in your back garden patio or in an exterior wall – and you’re comfortable with DIY – then it IS possible to fix cracked concrete yourself. To top it all off, it can be done on a budget!
What you will need:
- Cleaning equipment
- Nails
- Hammer
- Tape measure
- Injection ports
- Crack sealer
- Putty knife
- LCR cartridge
- Caulk gun
It’s easier than you might think to do this repair yourself and, with a little time spent planning, the results you can achieve are every bit as good as if had paid a professional – but at a fraction of the cost.1. Begin by ensuring you have a clean surface ready for your concrete repair. The best thing to use would be a pressure washer if you have one, or can borrow one. If this is not possible then you can use a hose or spray bottle. Research the best way to clean your specific concrete surface and then set to work on getting it clean. After this, you will need to clean out any cracks and remove anything left behind like debris, loose concrete or paint, then brush off excess water.
2. The next step of your concrete repair is to locate and block the injection ports. For this, you need a hammer, nails and a tape measure. Gently hammer in 3-inch finishing nails along the length of the crack, ensuring they are spaced evenly – roughly 12 inches apart. These are to help you align the crack with the injection ports.
3. Now open up your containers of crack sealer and spread a little on the base of the injection ports. Try not to fill the hole; just a small amount of crack sealer is sufficient. Then slide the plastic port over one of the nails your prepared earlier. Press the injection port into the wall gently but firmly. Repeat the process for all remaining ports.
4. Now it’s time to fill the crack. You need to apply your crack sealer to the entire crack. It is best to use a small putty knife for this. Spread the sealer an inch wide either side of the crack, ensuring this is not too thick. You should cover the injection port with sealer leaving only the extended neck portion showing. The concrete repairs are nearly finished, just smooth the sealer and neaten the edges with a paintbrush.
5. Now you need to leave this for 6 to 10 hours before the next stage. This is vital as it allows your work to dry out fully and finish curing. When it is completely dry and settled, load the caulk gun with the LCR cartridge. Begin at the bottom of the crack and your lowest port and direct the contents into the crack until full.
6. Now the only thing that’s left to do is to seal the injection points. Insert the cartridge tip into the uppermost port and squeeze the trigger. This will plug up and seal the injection point. Repeat this procedure for all points and then you’ve completed your concrete repair. You should allow the repairs to cure for up to five days; once five days have passed you can remove the port necks.
That’s your simple and on-a-budget guide to small concrete repair. Follow the instructions on the packaging of any materials you use carefully to ensure a successful job. If you’re not confident, it’s best to call in the specialists as you don’t want to cause further damage. And obviously, if the procure involves any restoration of historic buildings or listed buildings then do not attempt to solve the problem yourself, this is a job for the contractors!
I hope this DIY guide will come in handy if you ever need to repair some concrete in your own home. We’ve moved on to repairing larger holes with concrete now and it’s not been too challenging! Let me know if you have any tips for repairing concrete by leaving me a comment below 🙂
This blog post is an advertisement feature that has been written in collaboration with a sponsor. The pink links in this post indicate a sponsored link 🙂