Do you enjoy making things? Do you love to save money? Do you want unique decorations that no-one else has? Then it’s time to make your own! I’m getting a head start on my Christmas preparations this month and have made three scandi-style decor projects that you can easily replicate at home. Or you could use these ideas as a starting point for your own designs – it might be the inspiration you need to get you started on crafting your own festive decor…
These projects really couldn’t be easier, especially if you have a cutting machine to hand. But even if you don’t there’s no reason why you couldn’t use these same designs as a template that you cut out of paper, card or sticky vinyl, or as a print-out for gluing onto your festive decor items.
When I started crafting my own Scandinavian style festive decor I’ll be honest and tell you that I didn’t know what I was going to make. That’s because I wanted to save money on my decorations by shopping in charity shops to find the items to upcycle. So it really depended on what I could find in my local shops and at the car boot sale.
Luckily, I was able to pick up this wooden box for just £3.50 from the Cats Protection shop and I got this secondhand frame for just £1. I had also bought a pack of shatterproof clear baubles in the January sales this year for a couple of pounds so I had some ready to upcycle with my own Scandi designs.

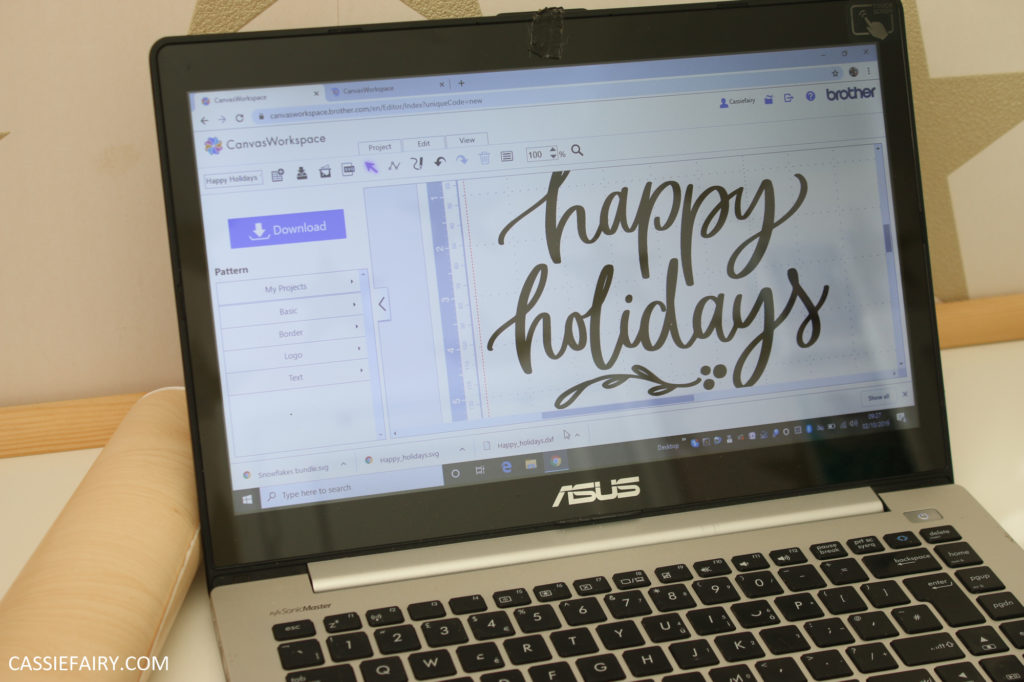
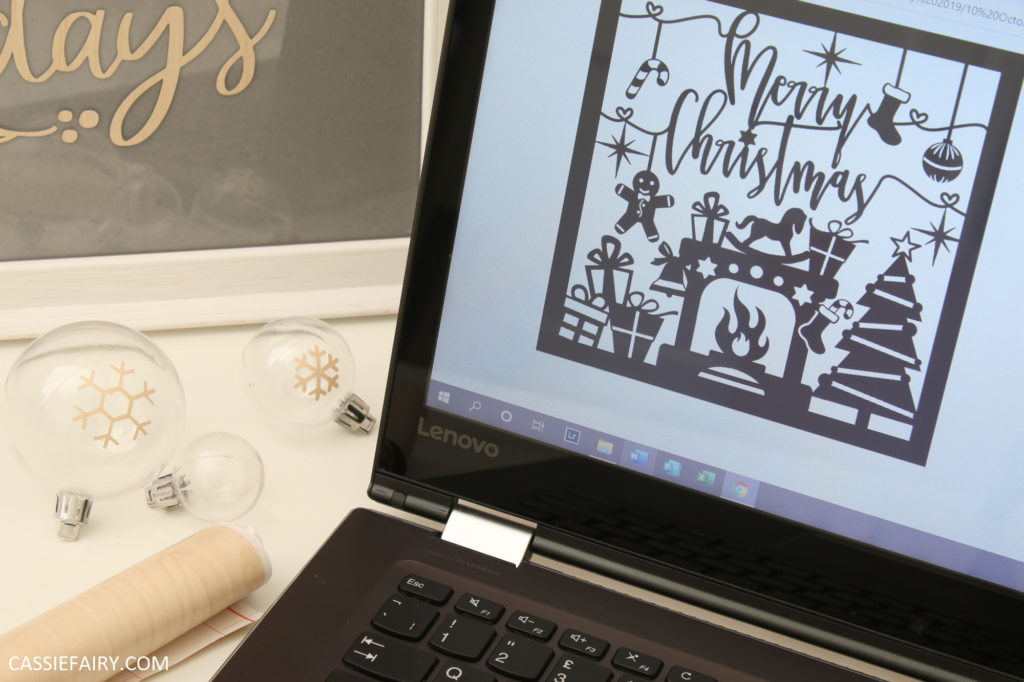
I downloaded some festive SVGs – the pack I used was called The Christmas Craft Bundle Vol 3 if you want to find the same Christmassy designs for your own projects. I picked out a few festive designs that I loved, including some snowflakes, a paper-cut style scene and a text design. Here’s what I made and how to make these Scandi decor pieces too…
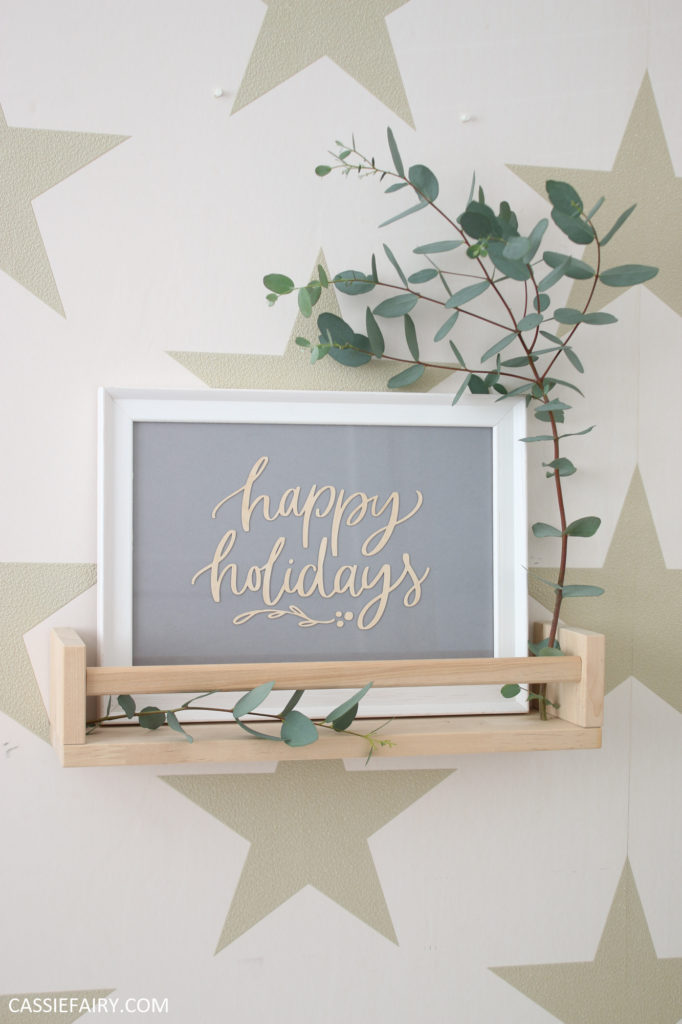
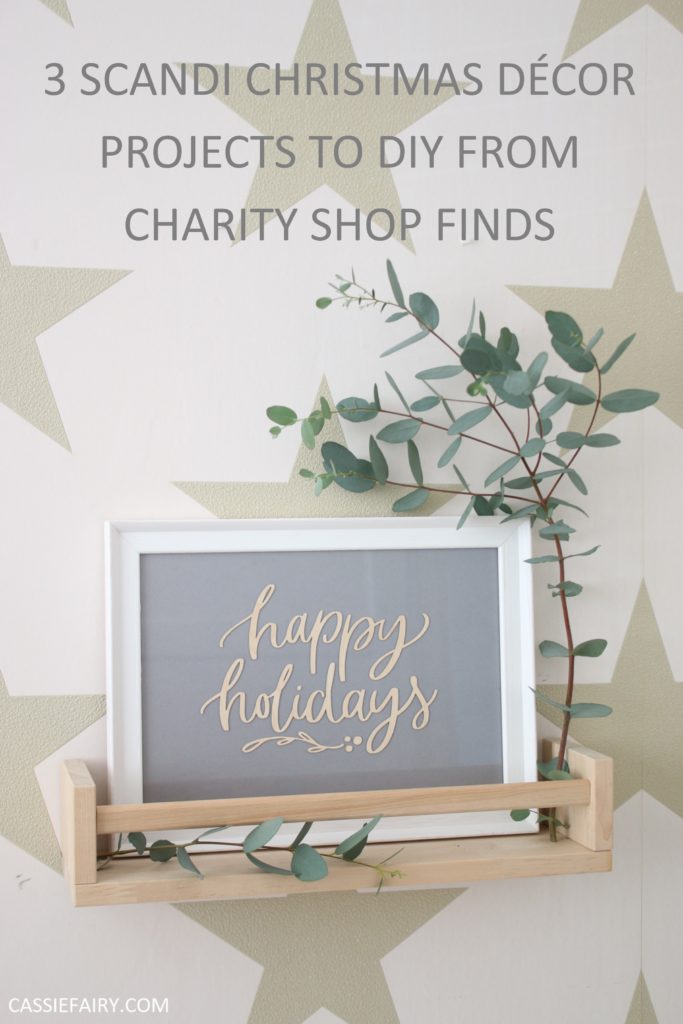
HAPPY HOLIDAYS SIGN
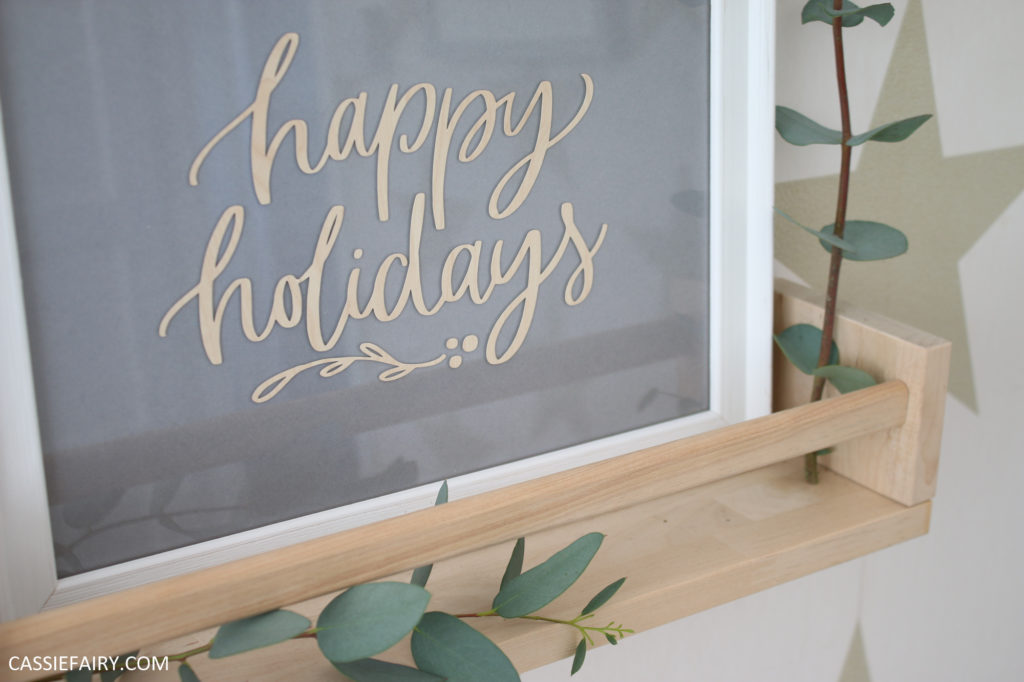
This is a cute home decor item that’ll add a festive touch to your mantlepiece, gallery wall, shelves or desk. You could use any old picture frame you have lying around or pick up a secondhand frame from a charity shop or car boot sale. The size doesn’t matter and you could even paint the outer frame to match your festive decor if you wish.
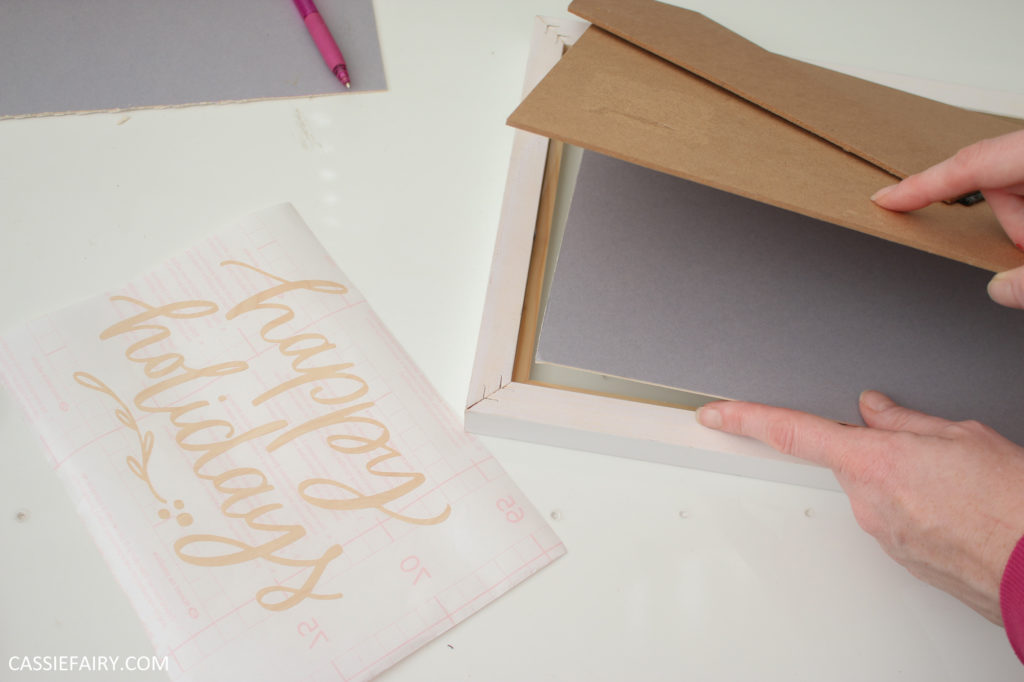
The first step is to clean the frame (paint it if needed), and add a piece of coloured paper inside the frame. This will give your festive sign a background to make it easy to read. Alternatively, if you don’t have a cutting machine or don’t want to use textured vinyl like I have, you could simply print out the design onto the paper and pop it inside the frame. And you’re done!
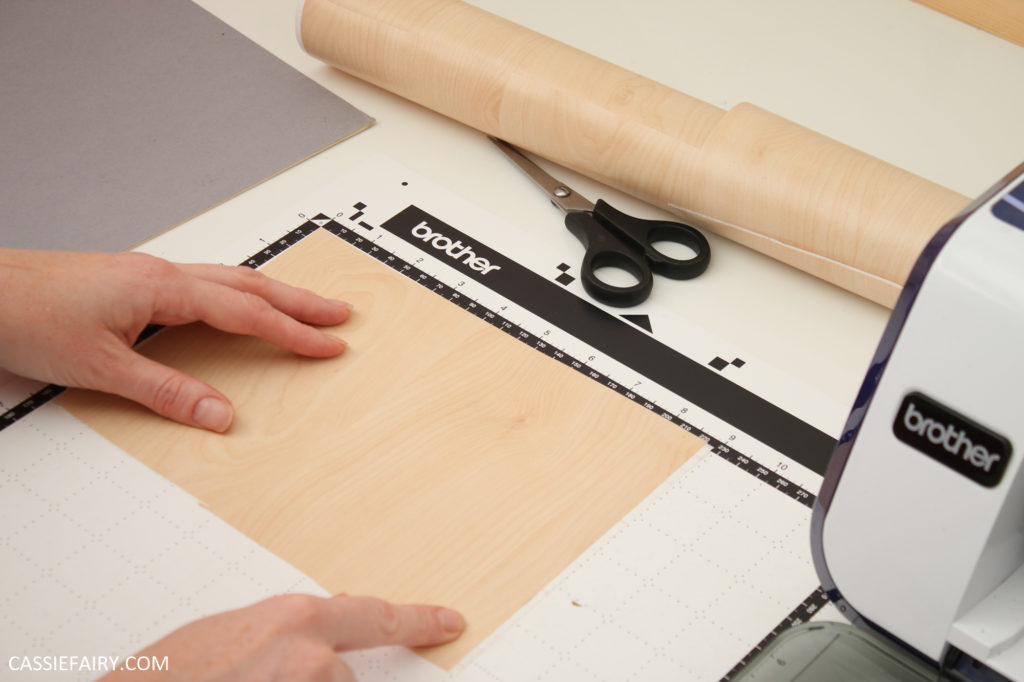
If you want to go for Scandinavian style Christmas decor like I did, you can use a pale wood grain adhesive vinyl for that Scandi birch wood effect. I smoothed the sticky vinyl sheet onto the cutting mat and fed it into the cutting machine. I’m using a Brother Scan N Cut for all of these projects and SVG files that I downloaded from the Design Bundles website.
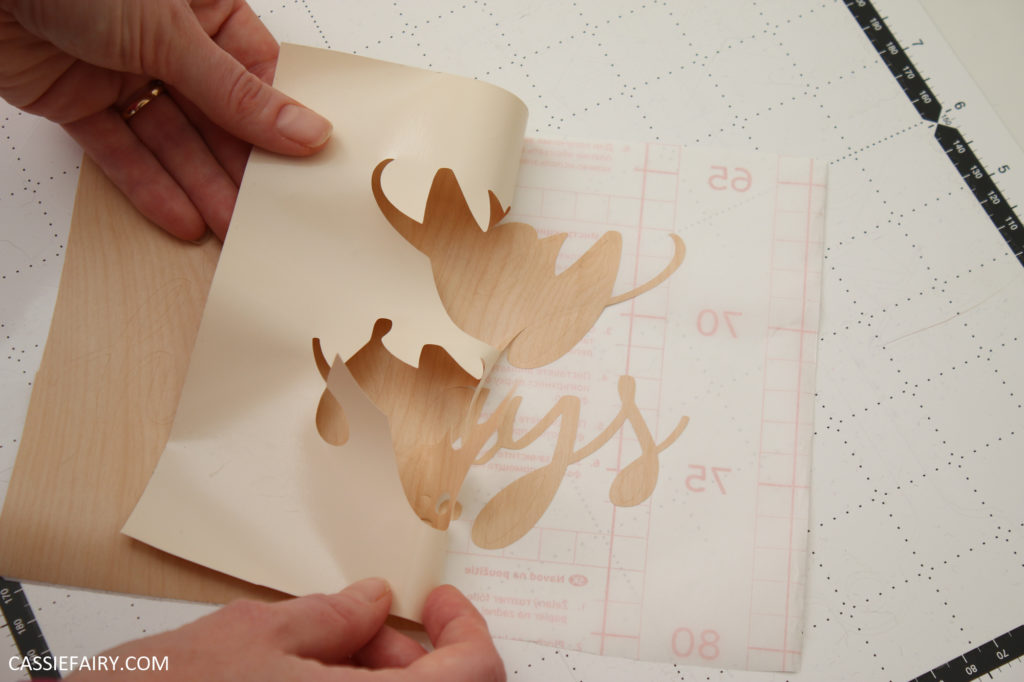
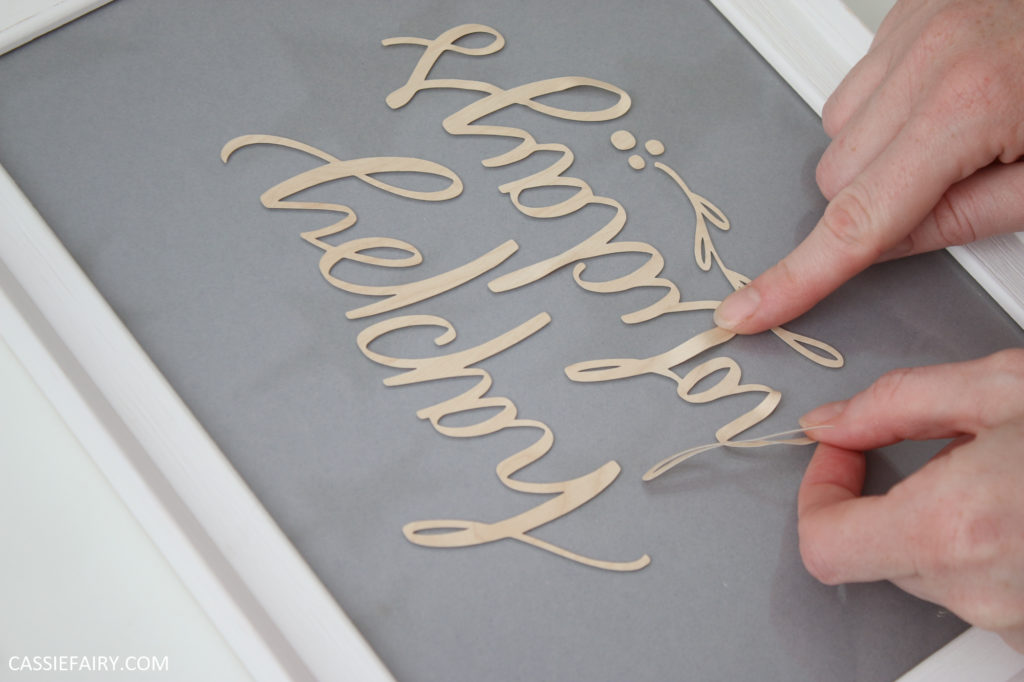
On your computer, simply scale the SVG to fit the measurements of the frame you’re using then transfer it over to your cutting machine and cut out the design. Make sure that the blade is set at a height that cuts through the vinyl but not through the backing sheet. This will make it easier to peel away the excess vinyl from backing.
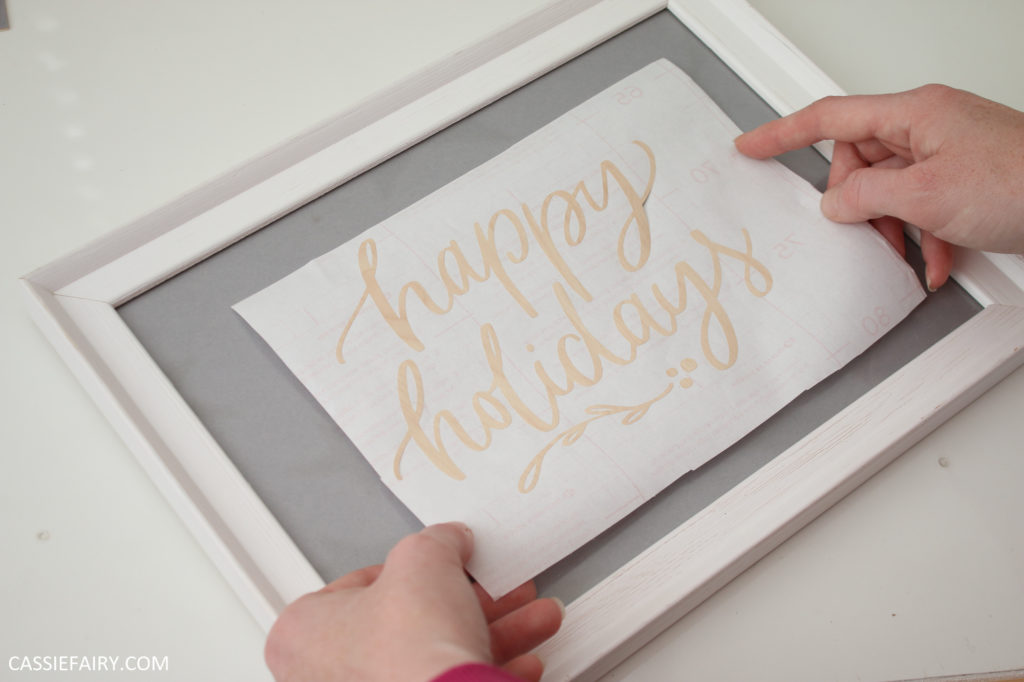
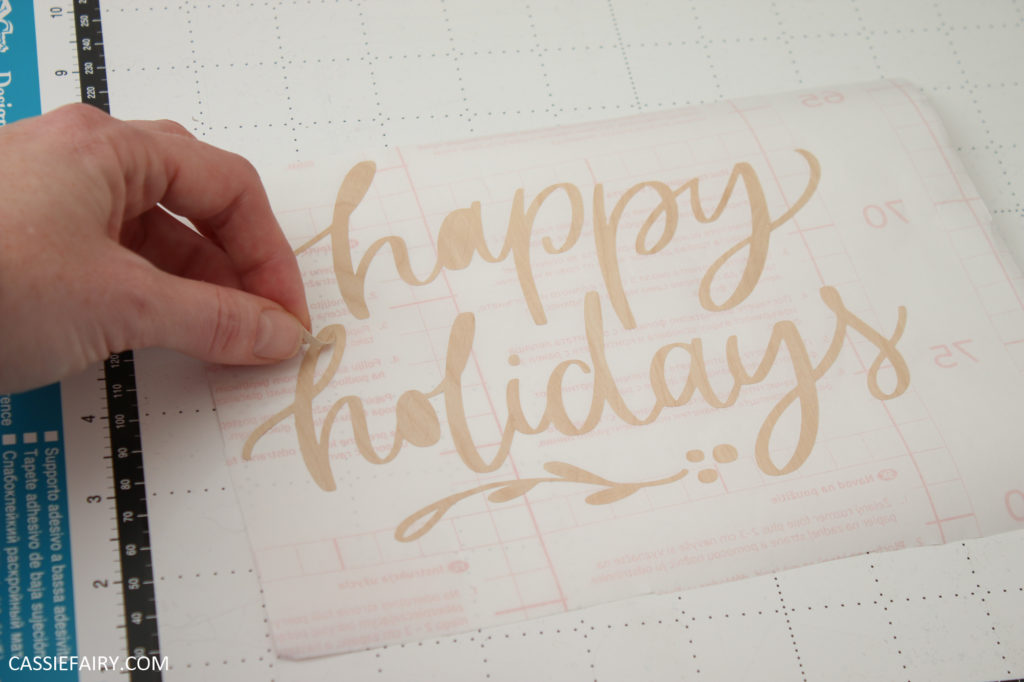
Apply your ‘sticker’ sign to the front of the glass of the frame, smoothing out any bubbles as you go. You can do this by rolling back the backing paper while you stick down the image.
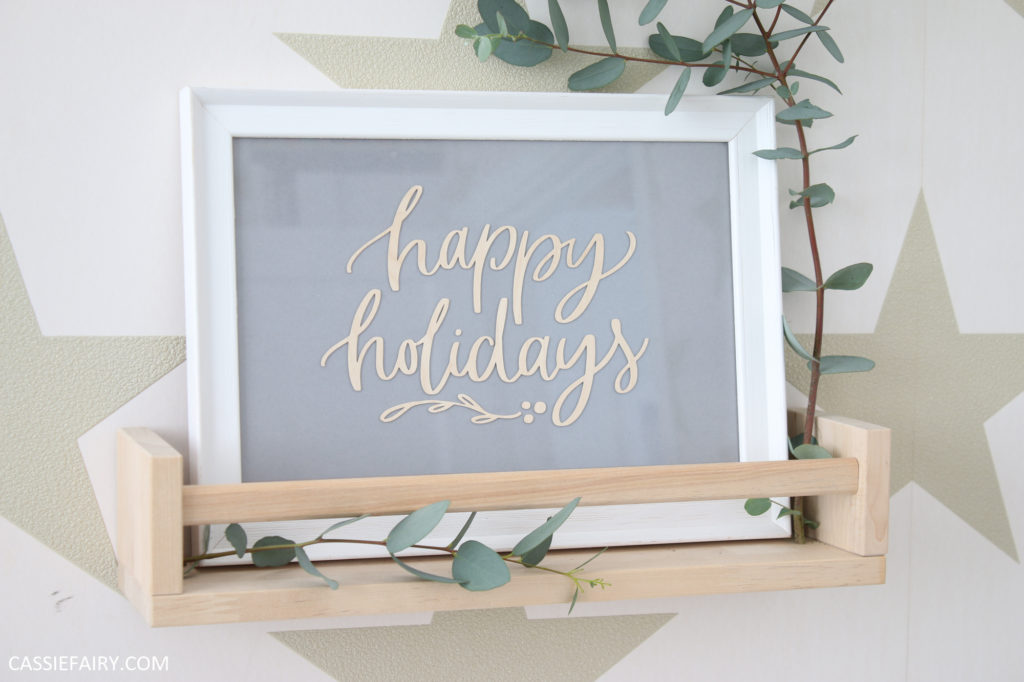
I’ve decided to position this sign on the little shelf in my home office to bring a festive touch into the space while I work – especially as I’m currently writing Christmas articles for magazines!
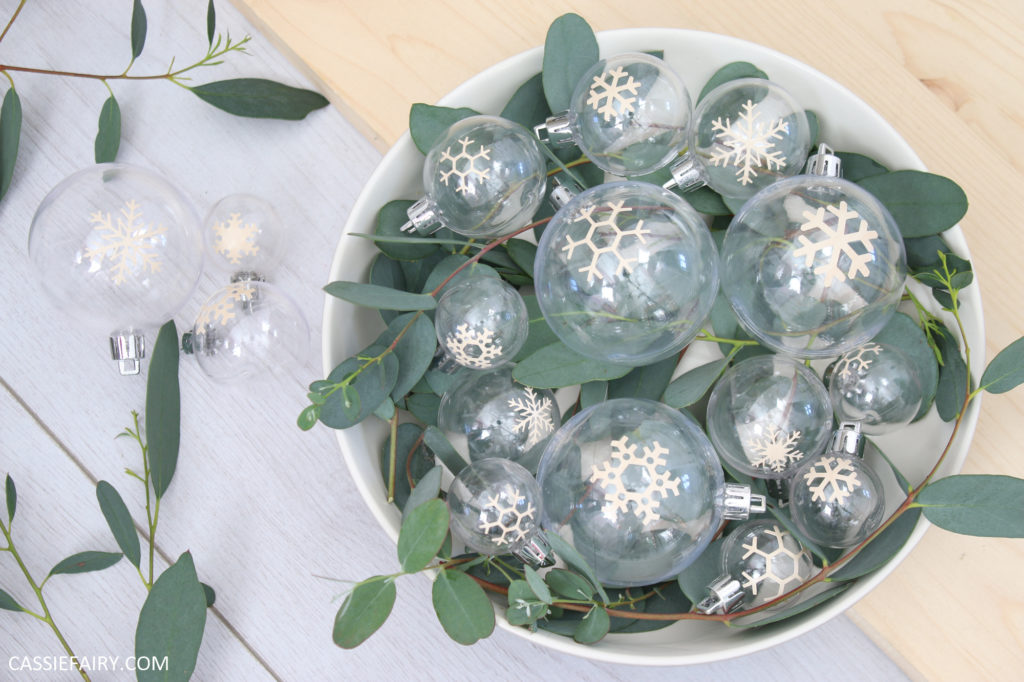
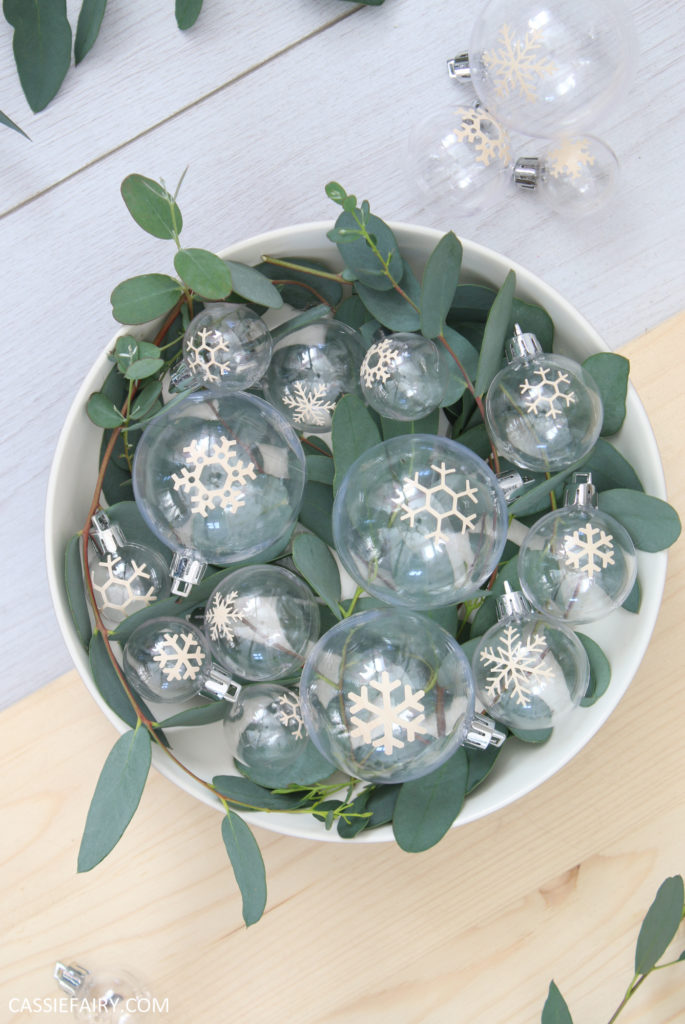
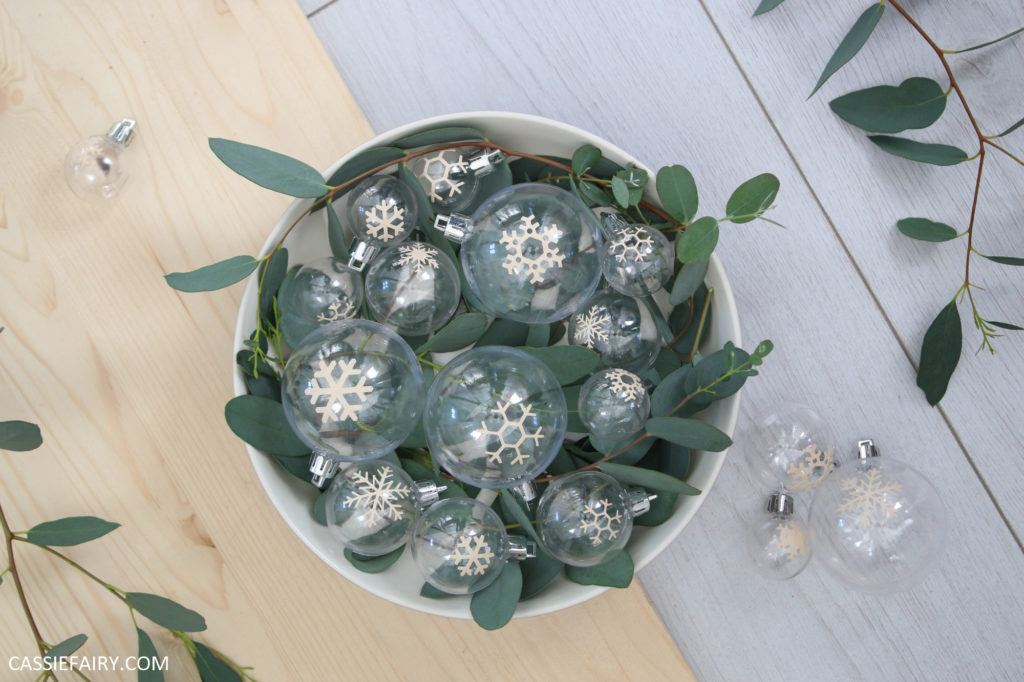
SCANDI SNOWFLAKE BAUBLES
After snapping up these bargain baubles in the January sale, I knew I wanted to add something to these plain pieces. I used up the leftover adhesive vinyl in a pale wood grain to cut out some mini snowflakes to stick to the baubles.
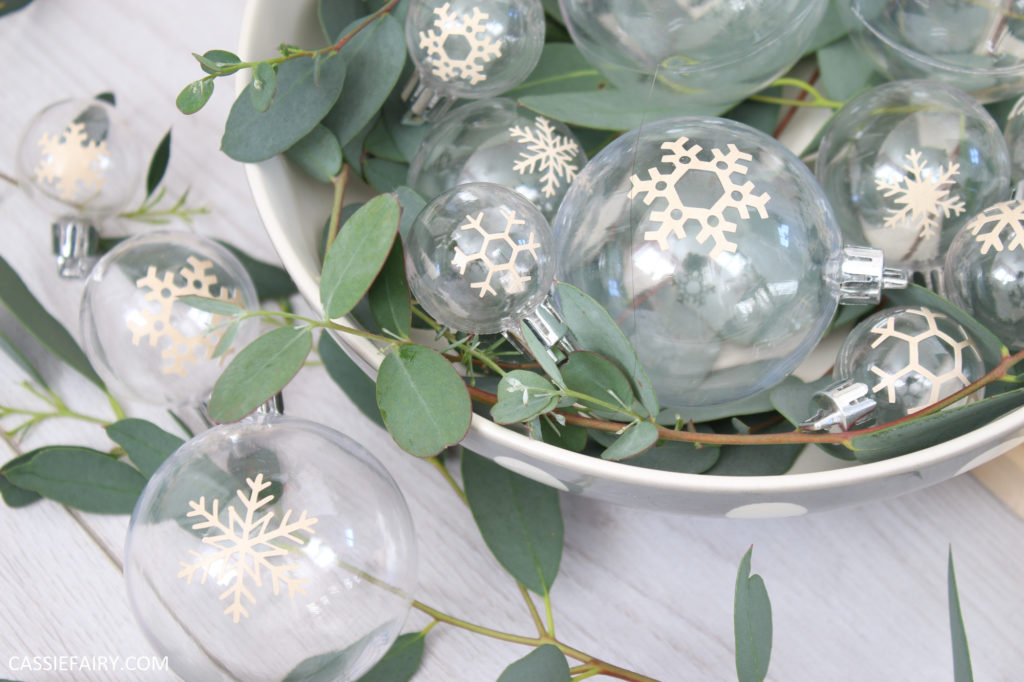
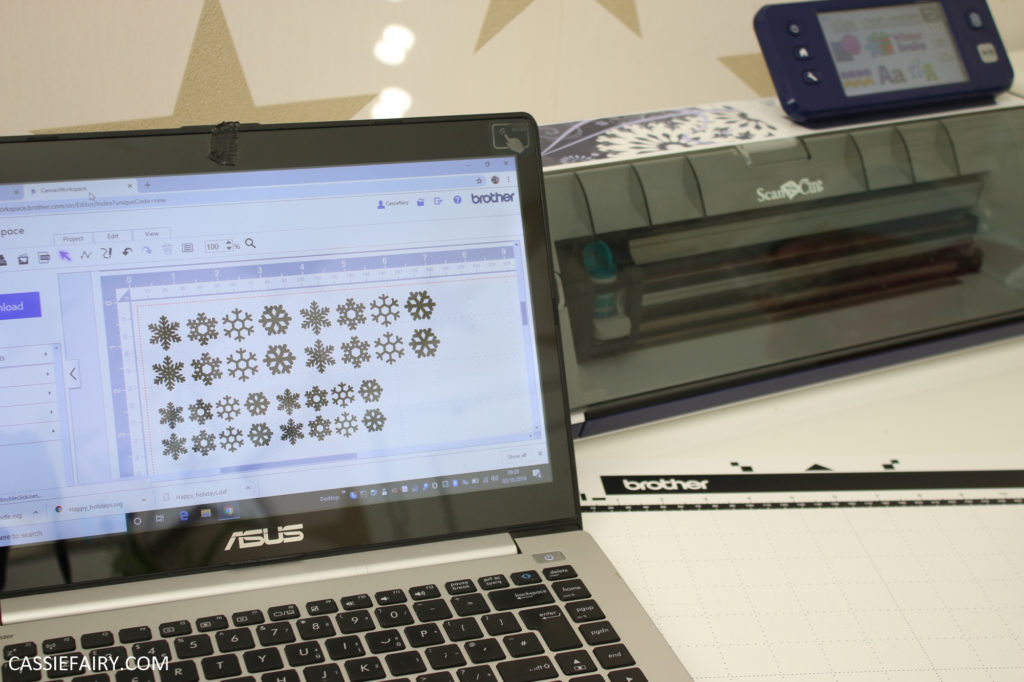
The snowflakes SVG comes in a sheet of different styles so I picked out the designs that I thought looked the most ‘Scandi’ and transferred these to the cutting machine. I scaled them to fit onto the different sized baubles and cut out multiples of each design.
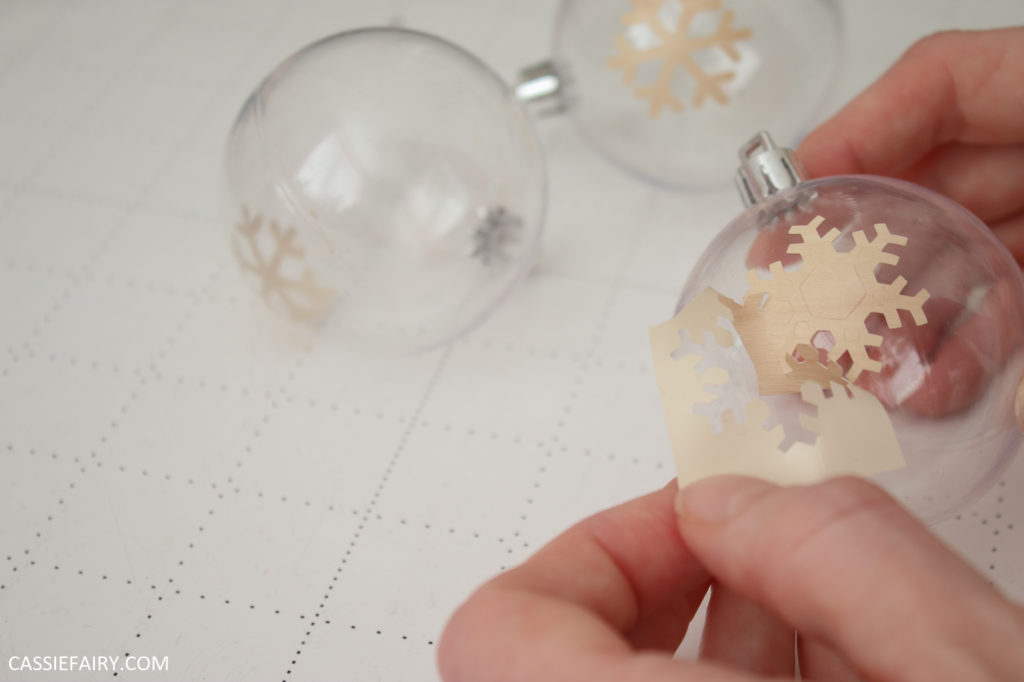
Then it was just a case of peeling off the backing and smoothing the adhesive snowflakes onto the surface of the baubles. Ta-da!
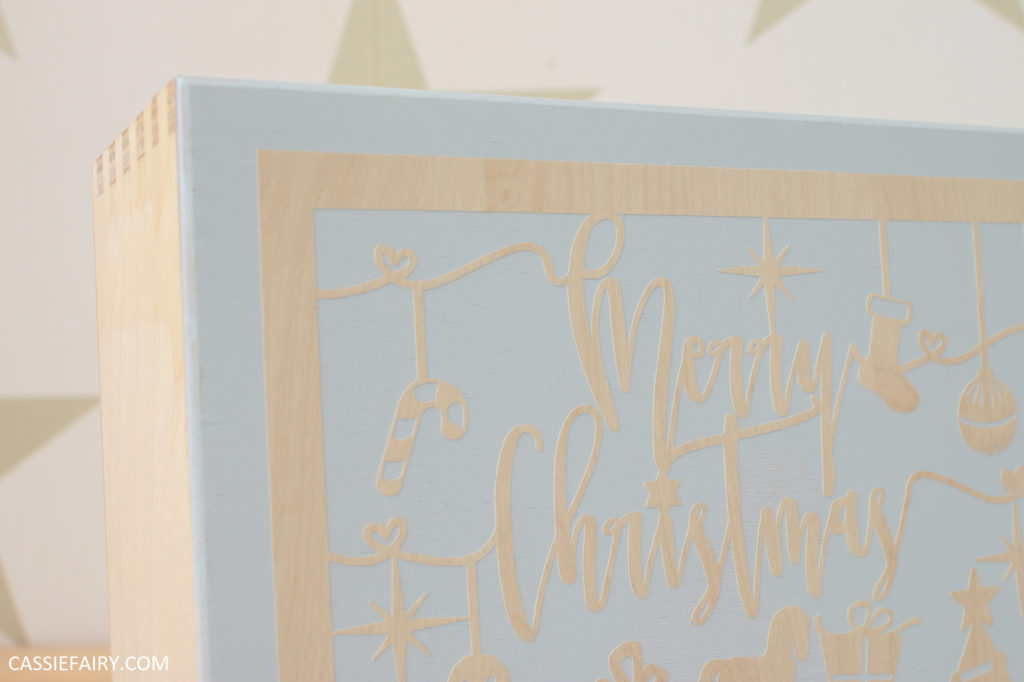
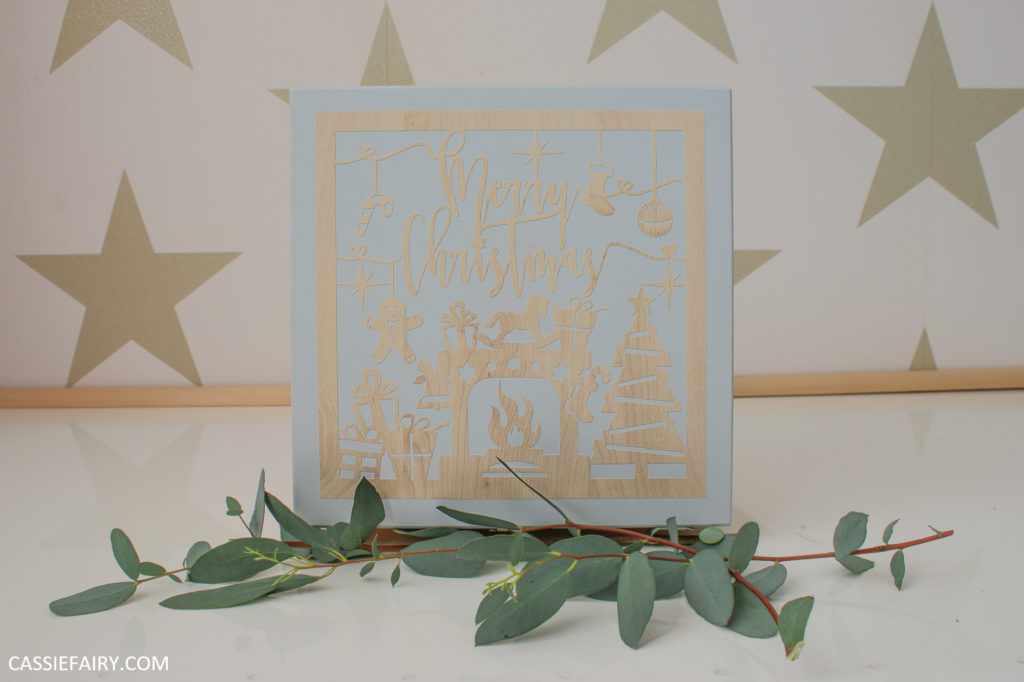
CHRISTMAS EVE BOX
Have you noticed how popular Christmas Eve boxes have been in recent years? It’s a great idea to have a gift for all the family to open on Christmas eve, that’s full of things to entertain them before the big day. Include a festive DVD and popcorn, a board game, a craft project or a gingerbread cookie decorating kit.
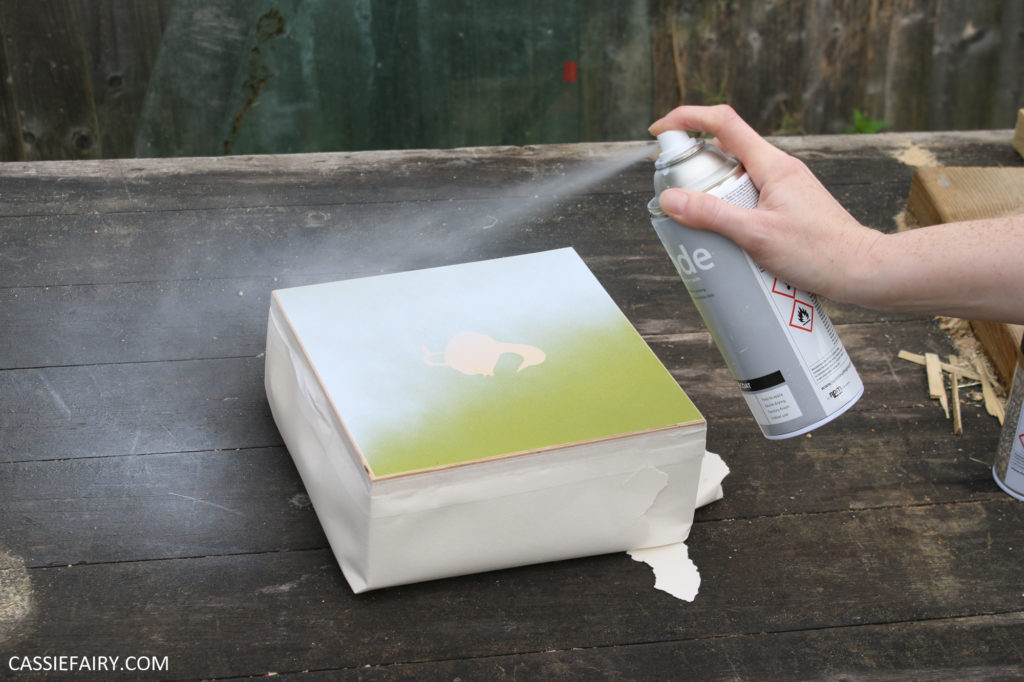
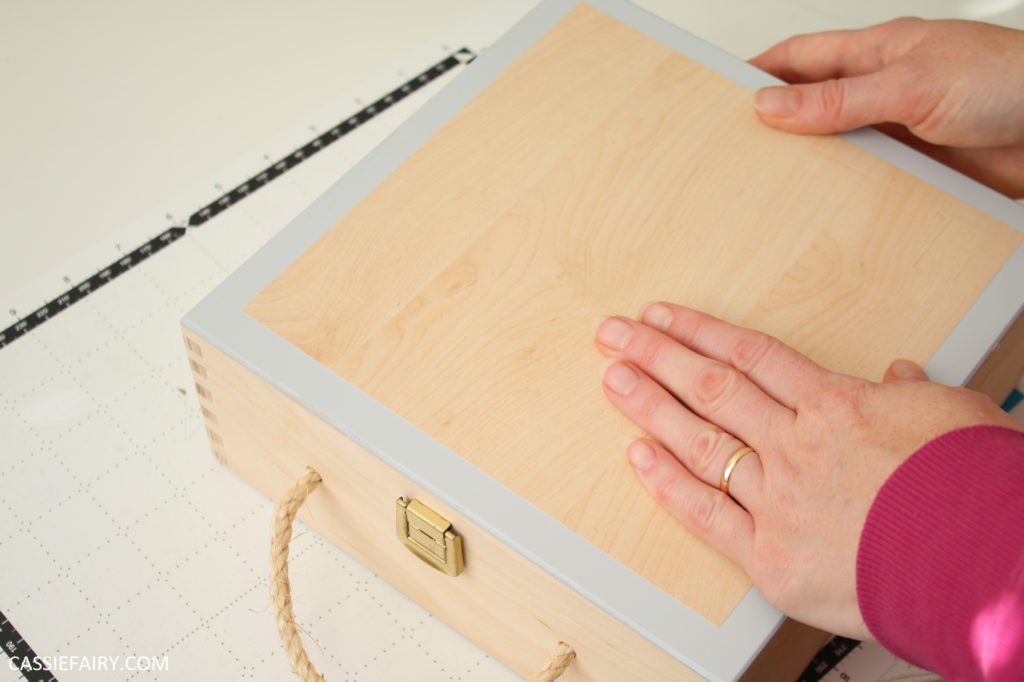
The first step in creating the Christmas Eve box was to paint the lid of the box. It was already green with a duck design and I wanted to give it a coat of grey paint to contrast with the pale wood. While the paint dried I moved on to cutting out the SVG design.
This paper-cut style design is already a square shape so it’ll fit onto the lid of the box perfectly. I measured the box and scaled up the SVG file on the computer so that it was big enough to fill the lid. I then transferred the SVG to my cutting machine and set the blade deep enough to cut through the wood-grain vinyl and but not the backing layer.
If you don’t have a cutting machine, you could print out the design and position it on top of a sheet of sticky vinyl, with the vinyl side facing up. Then you could use a craft knife and cutting mat to cut through the paper print-out and through the vinyl beneath. Alternatively, you could print the SVG design onto thin card and cut out the printed papercut design to make a stencil, that you then use to spray paint or stipple paint the design onto the lid.
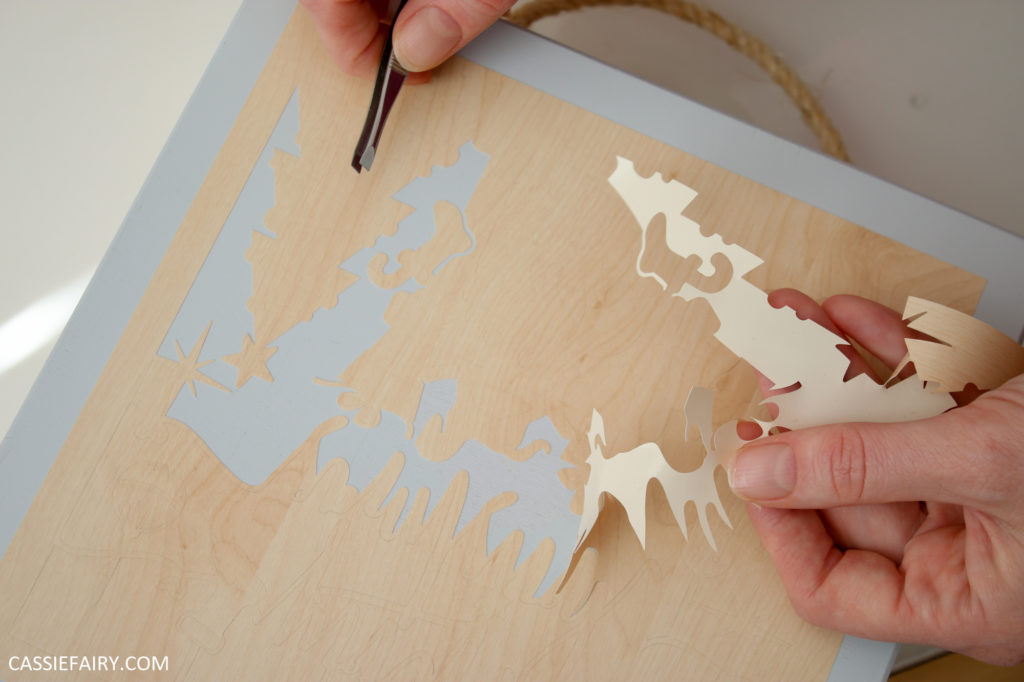
I carefully stuck the vinyl design to the lid of the box, gradually peeling away the backing as I smoothed out the design. I then used tweezers to pick out the cut pieces, leaving only the design stuck to the box.
The only thing left to do is fill the box with treats and gifts for the family to enjoy on Christmas Eve!
What do you think of these ideas for upcycling secondhand finds into Scandi-style festive home decor? Let me know if you have a go at making any of these yourself in the comments below and I’d love to hear how you adapt the Christmas Craft bundle designs for making your own decorations 🙂
PIN IT FOR LATER


2 Responses
Thanks so much Lucy, these decorations were really satisfying (and loads of fun!) to make 🙂 Ahh brilliant, you’ll love having a cutting machine – it makes so many projects possible & I love making my own slogan tees with it!
These are incredible – I love how easy you made the tutorials look! A cutting machine is on my xmas list this year, and you have inspired me for next xmas now!