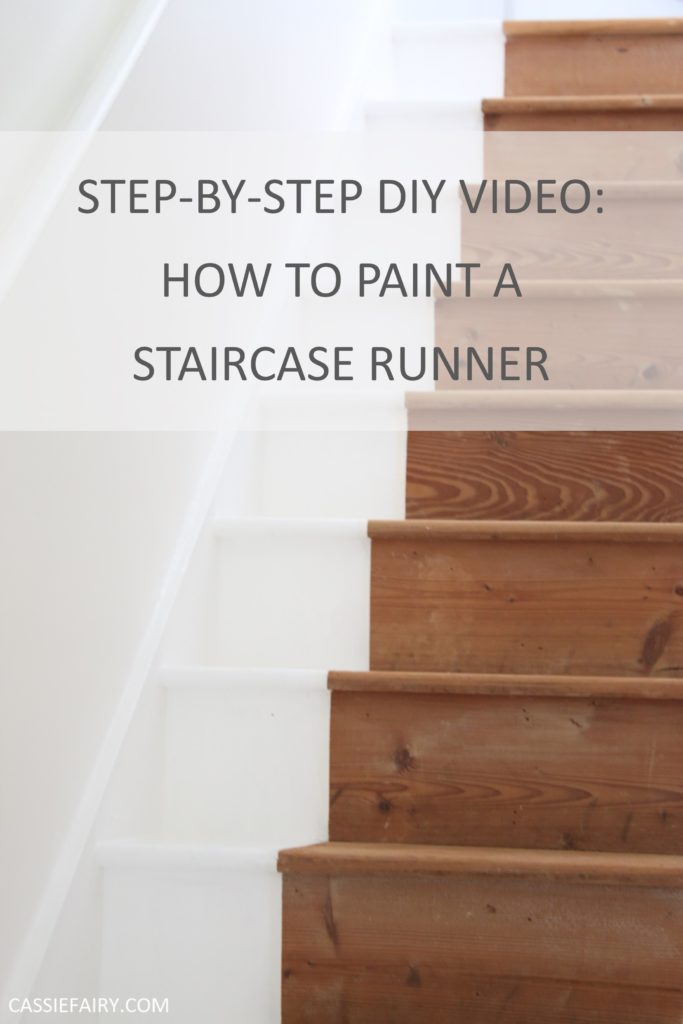
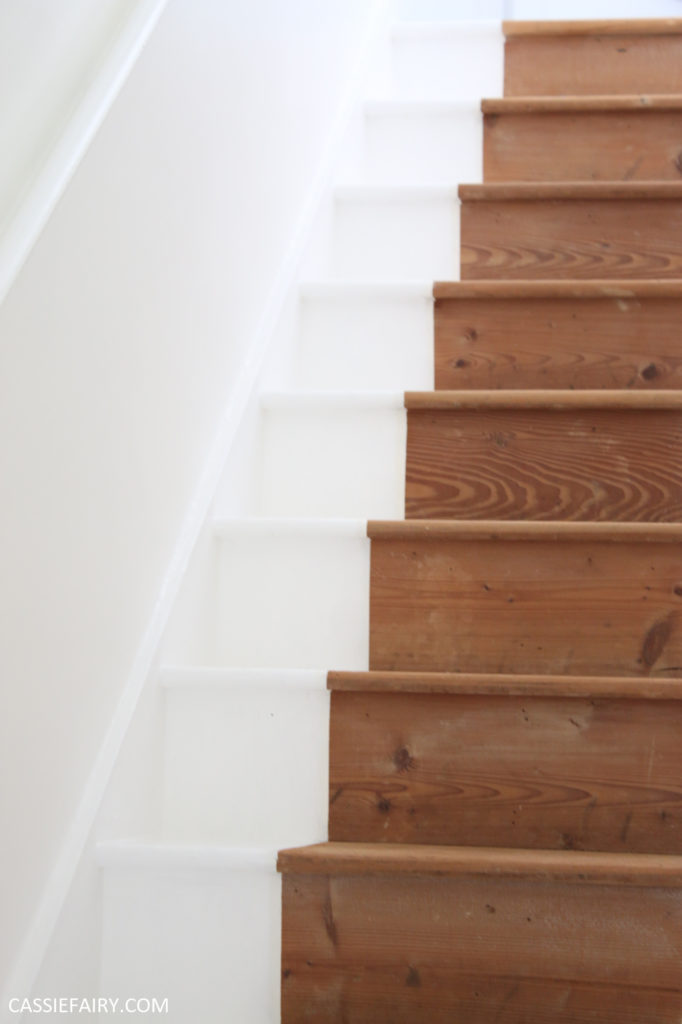
Actually, it’s kind-of the reverse of a runner because we’ve left the centre of the steps in wood and have painted the sides. But you know what I mean..!
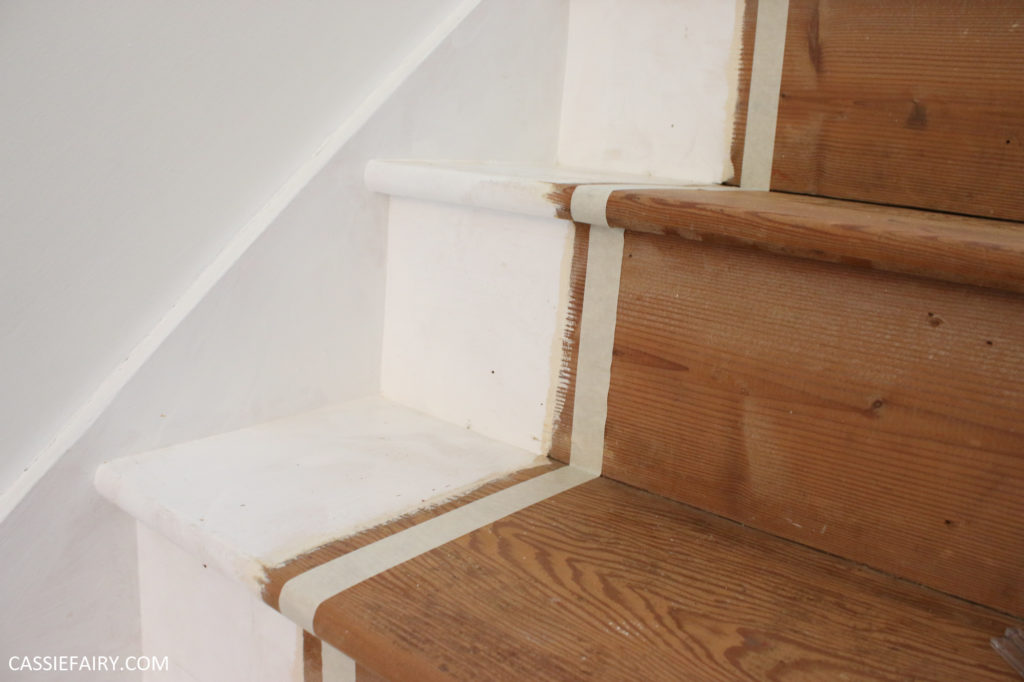
This technique can be used either way – painting the centre or the sides – so I think it’s a DIY staircase runner project. Anyway, here’s what we’ve been up to…
I’ve got emulsion in my hair, a blister from weilding a paint brush and gloss all over my jeans. Can you guess what I’ve been up to this week? It was finally time to tackle the hallway after nearly 3 years since we moved into our fixer-upper home.
And seeing as we were doing something a little fun with the staircase, I thought I’d make a little video so that you could see how we did it.
I’ve shared the video on YouTube if you’re interested in watching a little step-by-step on how to paint a lovely neat line on the sides of your staircase to create a runner. Have a watch here:
As long as you’re using wood paint, you can use any colour, on the sides or in the centre, and could even create a rainbow effect on the way up the stairs. The possibilities are endless!
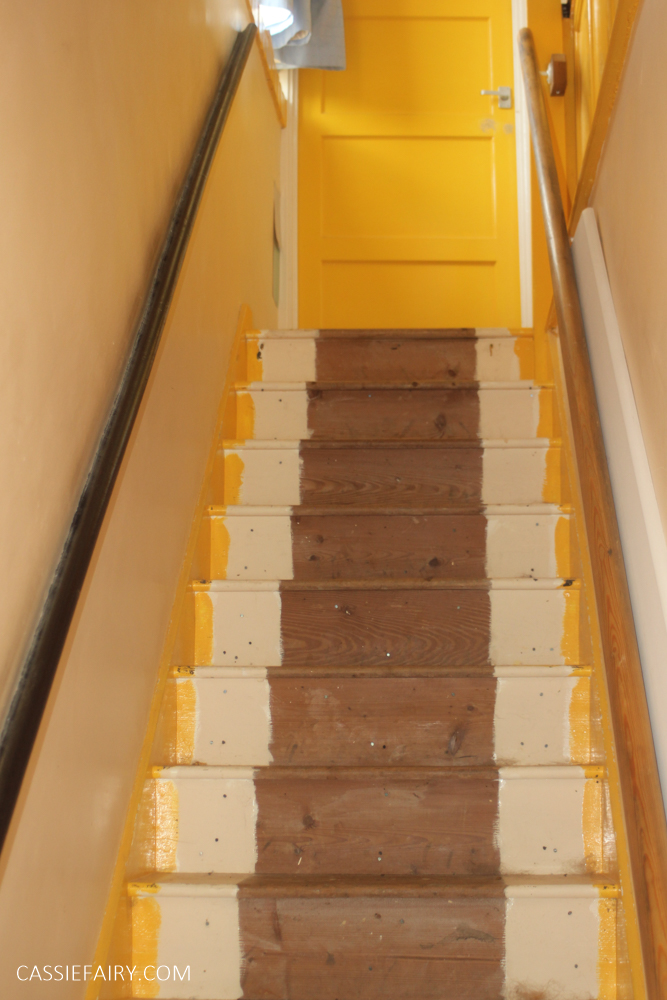
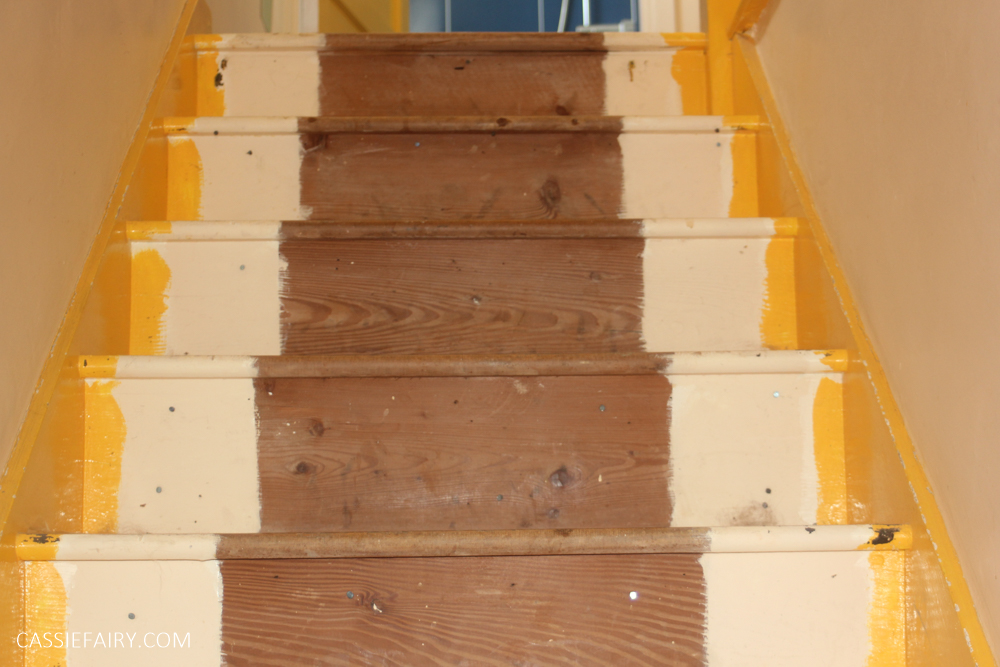
The horrible, roughly-painted yellow and cream edges were already on the staircase when we moved in (pic above). And we’ve lived with the hallway like that for years. In fact, it’s almost the last space left to decorate (the kitchen is 50% done – more on that soon!) so I’m really pleased that we’ve tackled it this week.
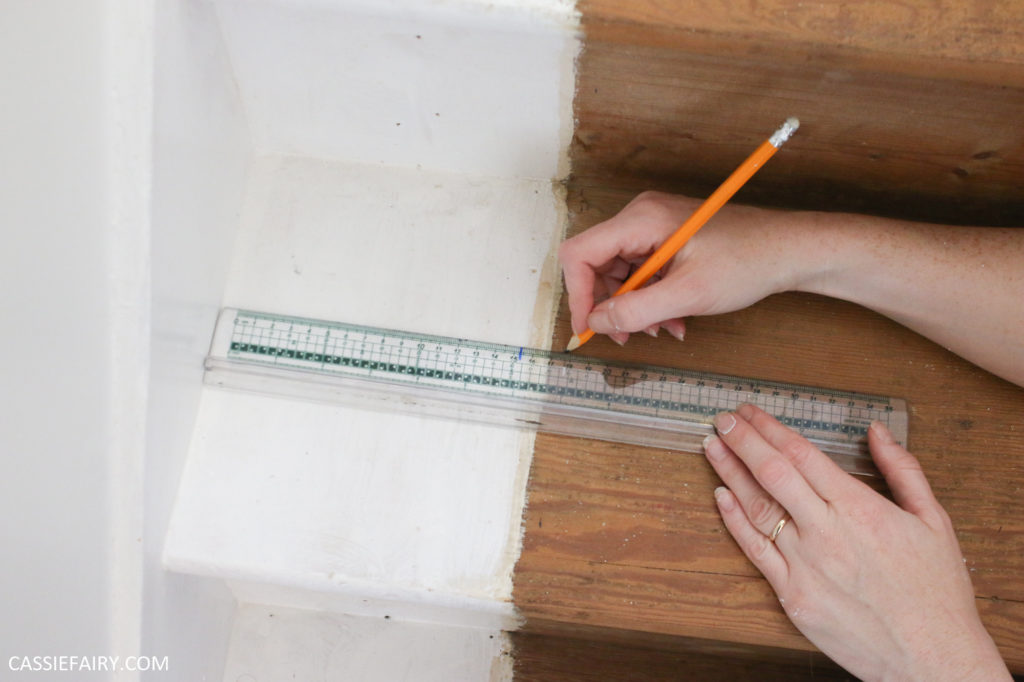
A couple of important tips:
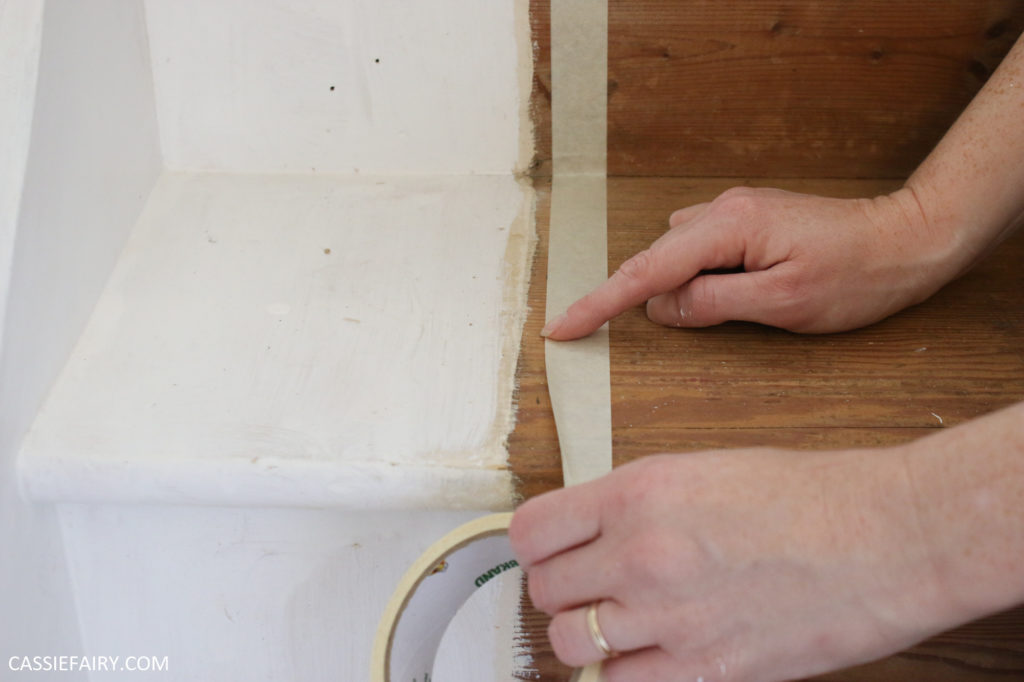
- FIRMLY press down the masking tape along the edge that you’re painting. Press it right into the corners and joins otherwise you’ll end up with paint seeping underneath it.
- Remove the masking tape almost immediately after you’ve painted over it. If you allow the paint to dry and then take up the masking tape, you’ll probably end up pulling off some of the painted edge with it.

What do you think of the finished staircase? I’m so much happier now that the wood is sanded back and we have a crisp white edge to the stairs. Let me know if you have a go at this staircase runner painting technique for yourself in the comments below 🙂
PIN IT FOR LATER