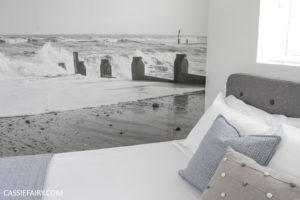
After installing a massive photowall in the bathroom last month, I’ve had an urge to ‘makeover’ the room, taking inspiration from costal homes. I’ve shared my moodboard so that you can get an idea of how I’d like the bathroom to turn out and have been pinning like crazy to my bathroom ideas board on Pinterest. One of the common design elements of these inspirational images has been wood and I love the idea of turning my bathroom into the interior of a beach hut.
As you can see, the floor needed to be updated and the cheap vinyl tiles that have been gracing the bathroom floor since the house was built had to go. So after visiting a few DIY stores and looking at the off-the-peg flooring options available, hubby and I decided that none of them were quite right for the bathroom. Vinyl ‘planks’ of self-adhesive tiles with wood-grain effect came in a great range of colours but looked rather plasticy and laminate flooring probably wouldn’t last very long with all the splashing that goes on in our bathroom! So a real wood floor seemed to be the only option, but boy was it expensive! So that idea went out of the window too.
Interestingly enough a house nearby had been having a new path laid and a quick peek into their skip showed us that they’d been using shuttering to make a frame for the poured concrete. Having spotted this waste wood, hubby and I quickly measured up the bathroom and realised that our tiny floor space could actually be covered using this shuttering so we asked permission to use the wood and dragged it home.
It’s a pressure-treated timber so it should be fine for our water-resistant flooring needs and the width of the planks was very similar to that of a beach hut floor. Hubby is really good with a saw and took all the measurements before working out which pieces could be slotted in where – like a giant jigsaw puzzle on the floor. My job was cleaning up the wood so that it was usable, which meant scraping off all the concrete tidemarks on the wood, using a wire brush to get rid of any dust and mud, and then sanding down the wood to make it smooth enough for bare feet to walk on. Okay, this took quite a bit of time and I was very grateful to have the use of an electric sander but at least we were able to save the wood from landfill!
After using a grab adhesive to ‘glue’ the floor down, hubby planed down any raised parts of the planks (yes, I had a go at planing and I was not good at it!) and I gave it a second sanding on any rough areas using sandpaper and elbow grease. I’ve still not decided on the finish of the floor; whether to white-wash it for that true beach hut look or whether to varnish the natural wood, which is already a pale limed colour after scraping the concrete off. At the moment it’ll stay as it is until the rest of the woodwork is finished.
We had some wood left-over so we’ve decided to build a false wall and create some storage behind the wood cladding. As you can see from these photos my husband is a dab-hand with a screwdriver and he create this storage cabinet behind the loo in order to hide all the exposed pipes, while still giving access to the service handles and cistern. He incorporated shelves within the false wall which practically doubled the amount of storage space we have! This is accessed by two cupboard doors which hubby made using a wide plank of pressure treated wood that we had left over from our garden project this summer. Again, I was on sanding duty and I really came into my own when I was needed to hold things in place!
We went for a white-wash effect for the wall, as it seemed a little imposing in the wood and the larger planks of wood were a slightly darker shade so this make the effect look more uniform. I’ve painted on three coats of the white wash and so far the wood is just soaking it up so it’s not quite the shade of white that the finished wall will be but it’s getting there. By the way, the hole a the bottom of the wall is for the cats’ litter tray so that they too can go to the bathroom in privacy! The next job is to build a small cabinet beneath the sink and get to work on painting or varnishing the floor so please come back soon to check on our progress.






3 Responses
nice post
Thanks Suze! Yes there is a gap around the edges which I hope to finish off with some kind if silicone beading (that might be another job for hubby!) to make it look neat 🙂
Wow! The floor looks amazing and the fact that you paid nothing for the timber just makes it even more fab! Just wondering, did you leave a gap around the edges (by the skirting) to allow for the wood expanding?Just picking your brains in case I have a go at this myself 🙂