If you need a bed but are on a budget, why not make one yourself? Today’s blog post shows you how to build a platform bed on wheels using pallets, with step-by-step photos of the whole process. If, like me, you’re a fan of upcycling and like to build things with pallet wood, the newly published book Pallet Style by Nikkita Palmer and Billy Barker is the one for you. And the great news is that I’ve got a copy of the book to give away to one lucky winner so read on to enter..!
This new DIY book just goes to show that there isn’t much you can’t build from pallets. Whether you want to fill your home with furniture or boost your storage, the step-by-step projects by Nikkita and Billy show just how easy it can be. I especially like all the photos of each project, showing every stage of the build. I find it much easier to follow along with photos than to figure it out from instructions – so this book is ideal for me.
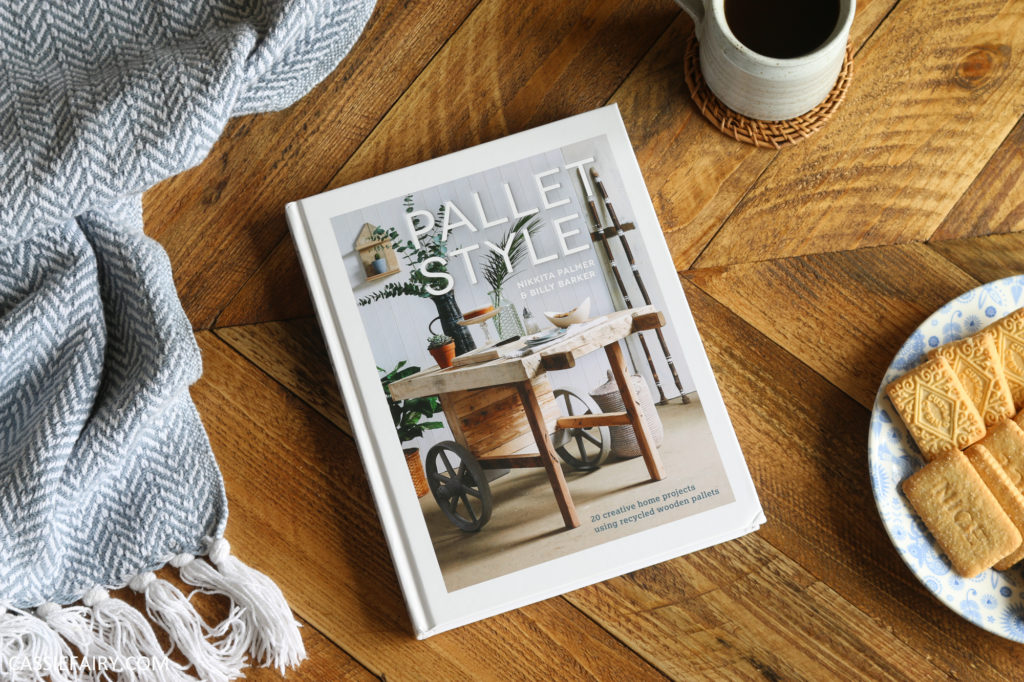
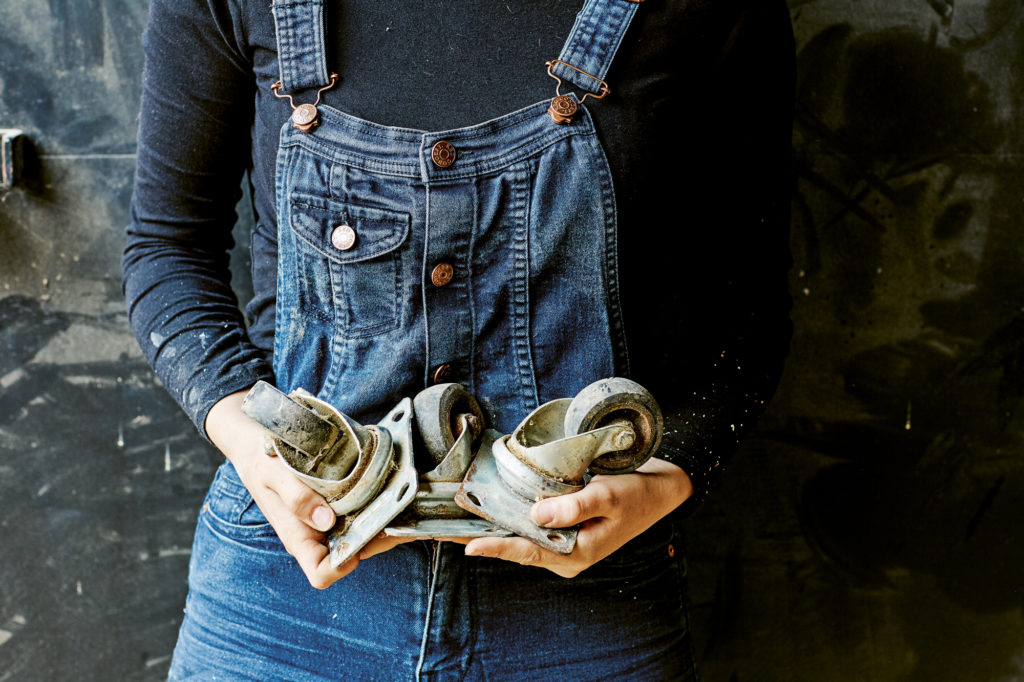
I’ve been following Nikkita on instagram for years and have always admired the projects she creates from upcycled materials. So it’s amazing to have a whole stack of her inspirational projects in one place in the Pallet Style book. And it’s not just pallets that she’s recycling – there’s old wheels, corks, fixings, scaffolding, leather belts and even old toys in her projects. The DIYs are fun and sustainable so I do hope you’ll have a read of the book.
And in the meantime, here’s Nikkita and Billy’s pallet bed project:
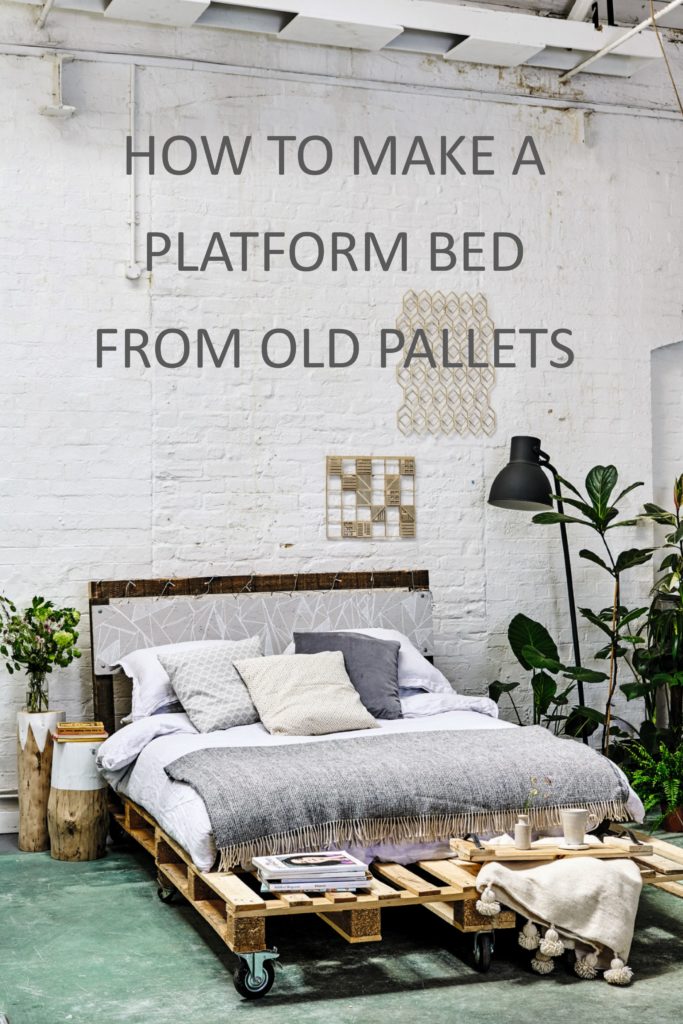
PLATFORM BED
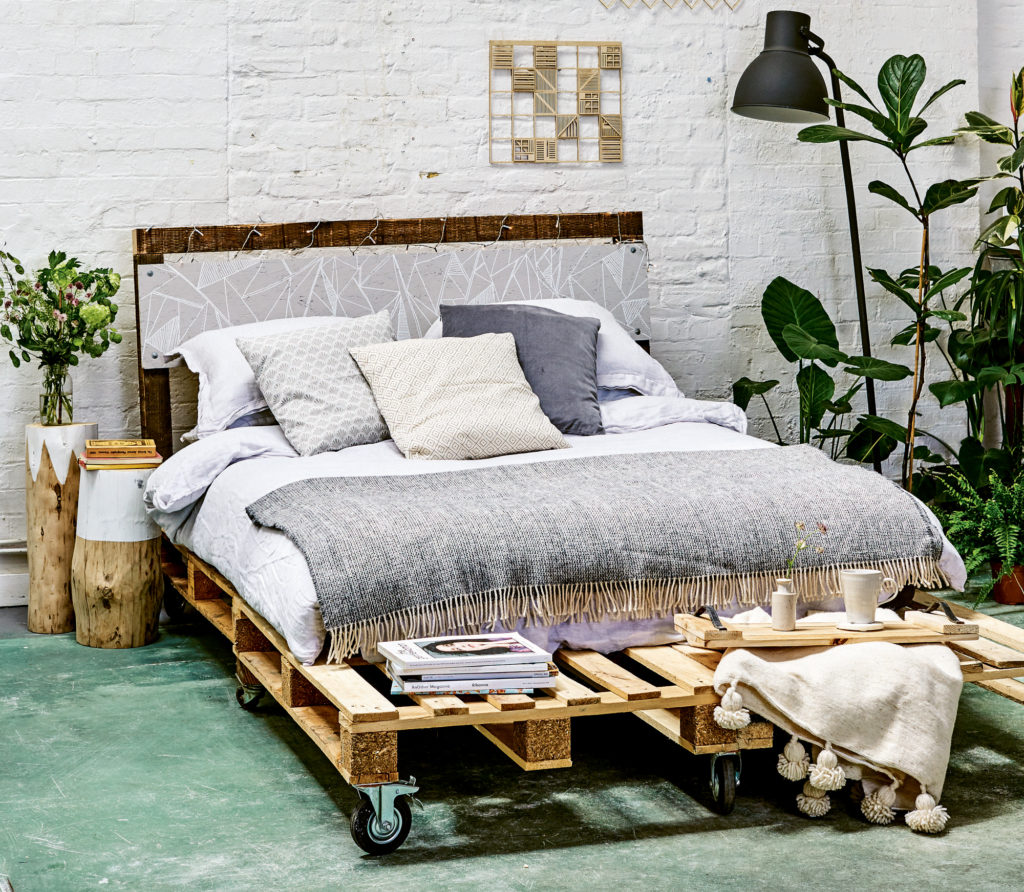
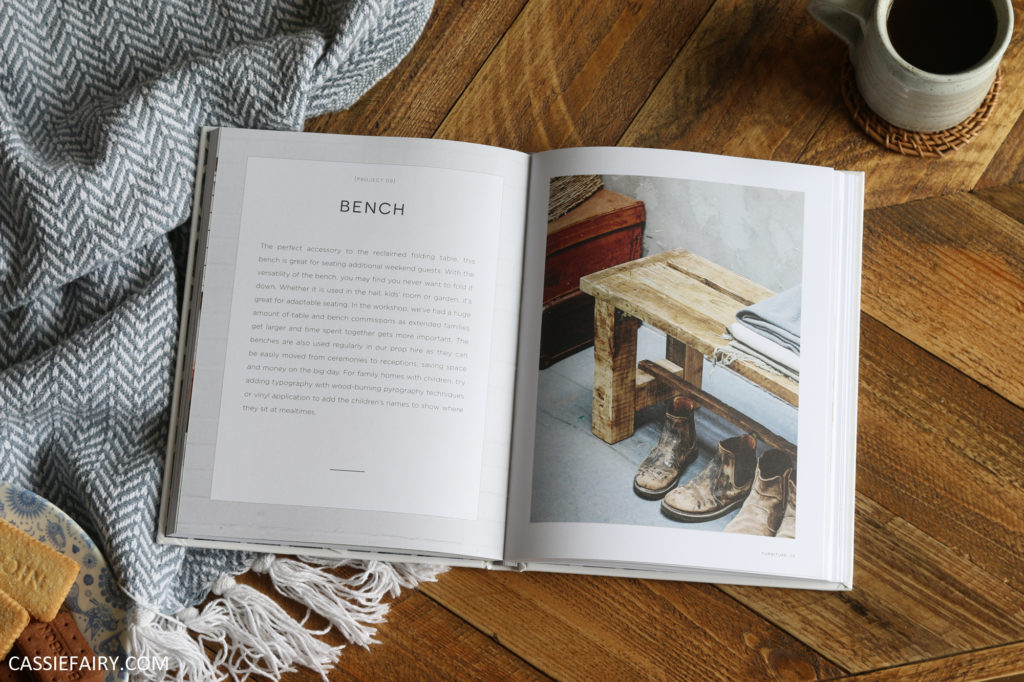
Extract from Pallet Style by Nikkita Palmer, published by Kyle Books www.kylebooks.co.uk Image credit: Brent Darby
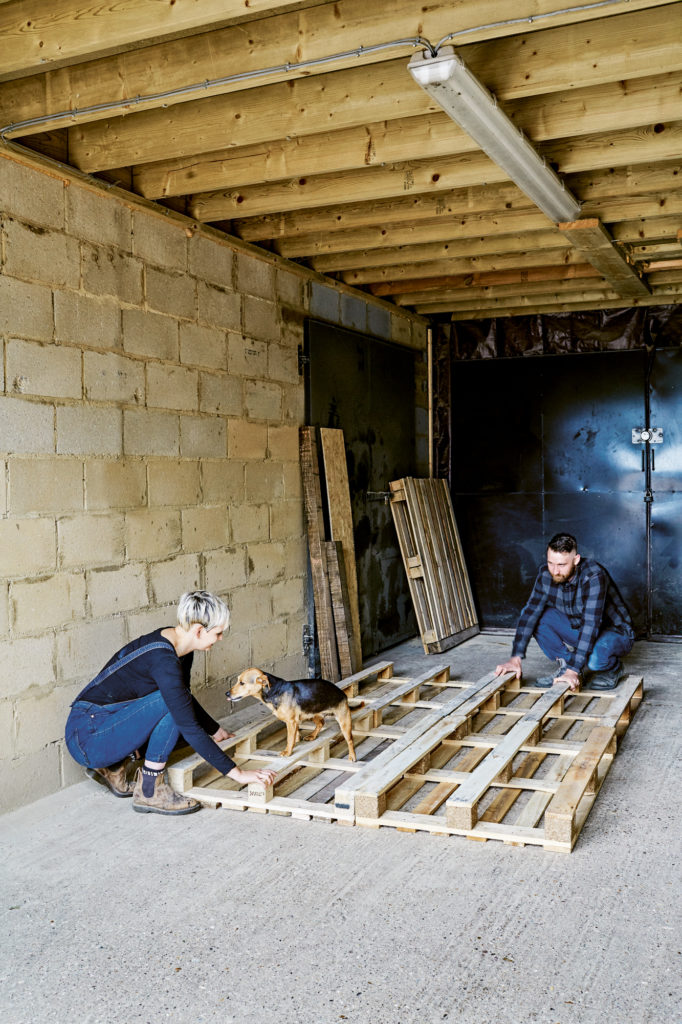
Although one of the larger projects in the book, our platform pallet bed is the most simple and can be carried out by all abilities. Perfect for those starting out in new and first homes, this bed is super cheap and can look really effective. Using whole pallets as a base gives the opportunity to experiment with many designs. Try including stepped platforms to give more height, or using the hollow cavities to store shoes or books.

Having recently moved from our tiny boat and with little income to spare, Billy and I made one of these for our own room, which looks great. Not only is this design practical and simple, but it gets lots of compliments from anyone who sees it. Our main advice for this project is to ensure all of the pallets are the same height and style to give an even and secure surface. These are easier to source from industrial sites where they only deal with one kind of product.
TOOLS AND EQUIPMENT
- Tape measure
- Pilot drill bit
- Countersink drill bit
- Electric Drill
- Screw-driver bit
- Electric sander and sandpaper
- Ventilation mask
- Combination square
- Hand saw or Table saw
- Paint brush
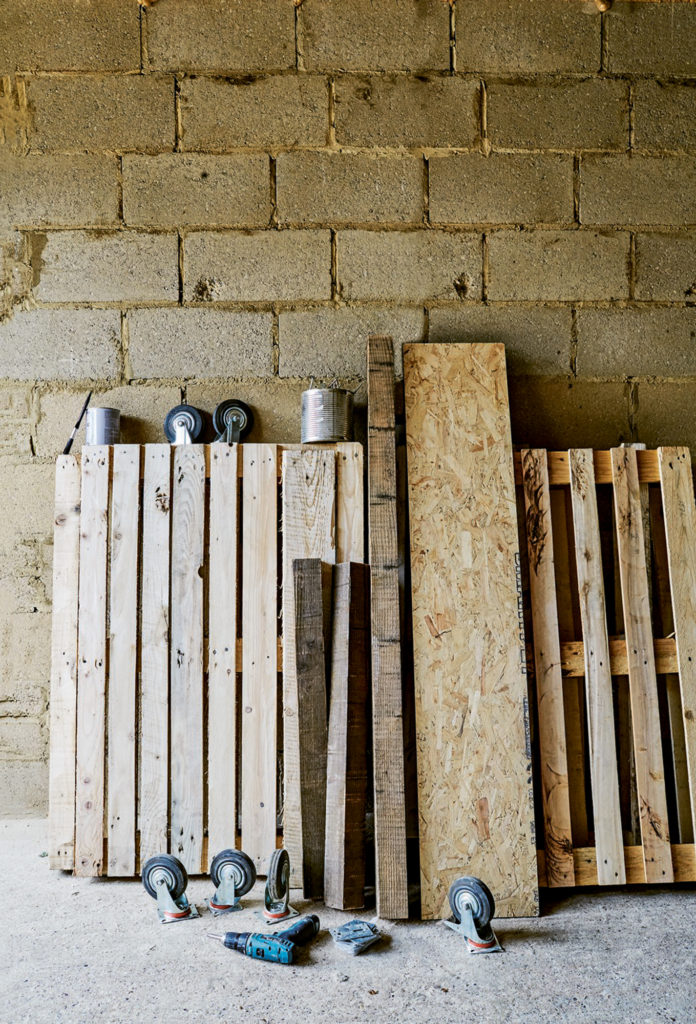
MATERIALS
- 4 identical pallets (the total dimension must be big enough to fit your chosen mattress), plus extra pallet boards to fill in gaps if needed
- Connector plates
- Wood Screws
- 9 industrial castors (2–4 lockable)
- 40mm (1½in) panel pins
- OSB (oriented strand board)
- Grey chalk paint
- 4 Spring head nails or copper clout nails
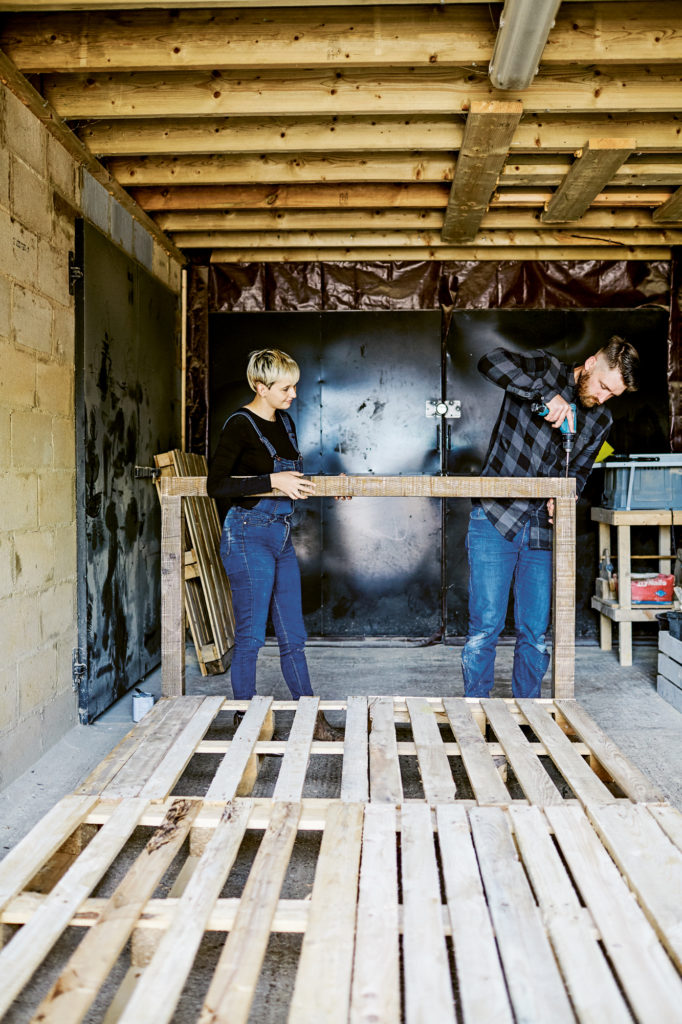
STEP 1
Lay four identical pallets (underside facing up) on a flat surface to create the main base structure. Ours came to 239 x 159.5cm (95 x 63in) (see note under ‘Materials’).
STEP 2
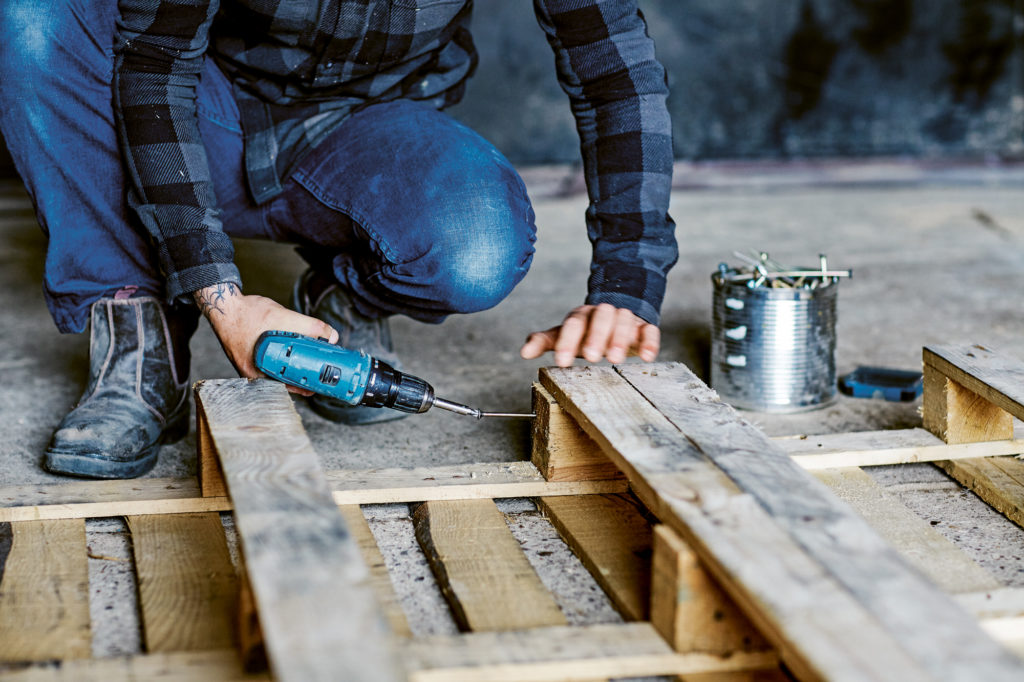
Attach the pallets together at the blocks by making a pilot hole and countersink in each one. Using an electric drill and screwdriver bit, screw the pallets together using long screws.
STEP 3
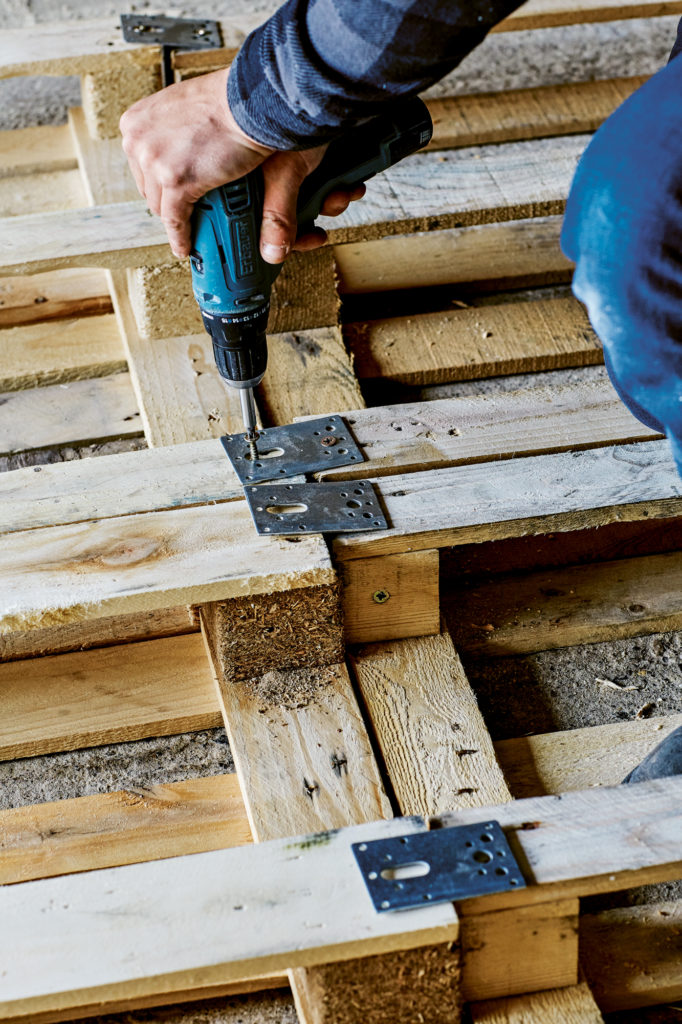
You can also attach flat connector plates to the centre to strengthen further. Fill in any gaps on the pallets with additional pallet boards. Ensure there is a dense structure to give strength to the base.
STEP 4
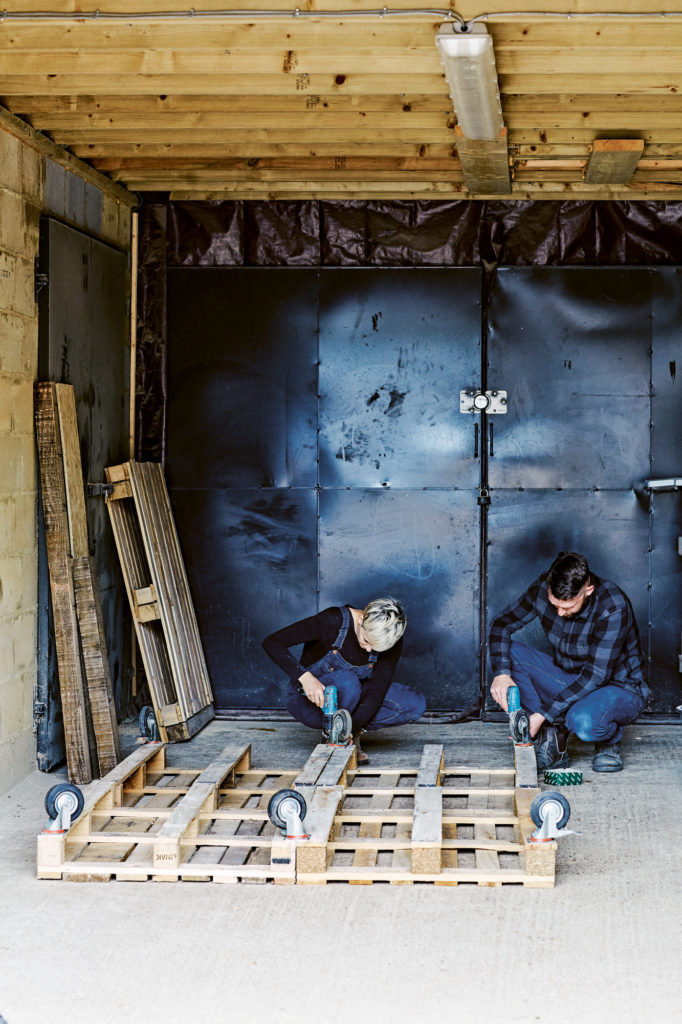
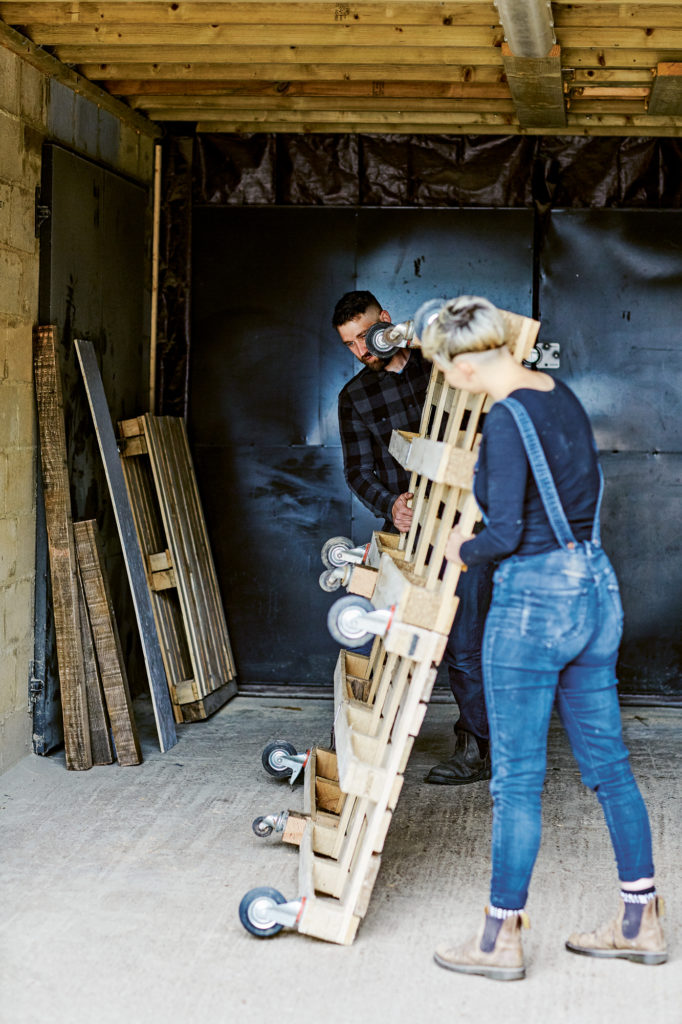
Secure 3 castors on each of the top and bottom edges and 3 more along the centre using an electric drill, screwdriver bit and screws. Try to attach these to the pallet blocks to give additional strength and position the lockable castors diagonally opposite each other.
TOP TIP:
We salvaged some of our castors, so they aren’t all the same size. We just attached blocks of wood to the smaller ones to give the same height.
STEP 5 Turn the entire structure so that the castors are on the floor.
STEP 6
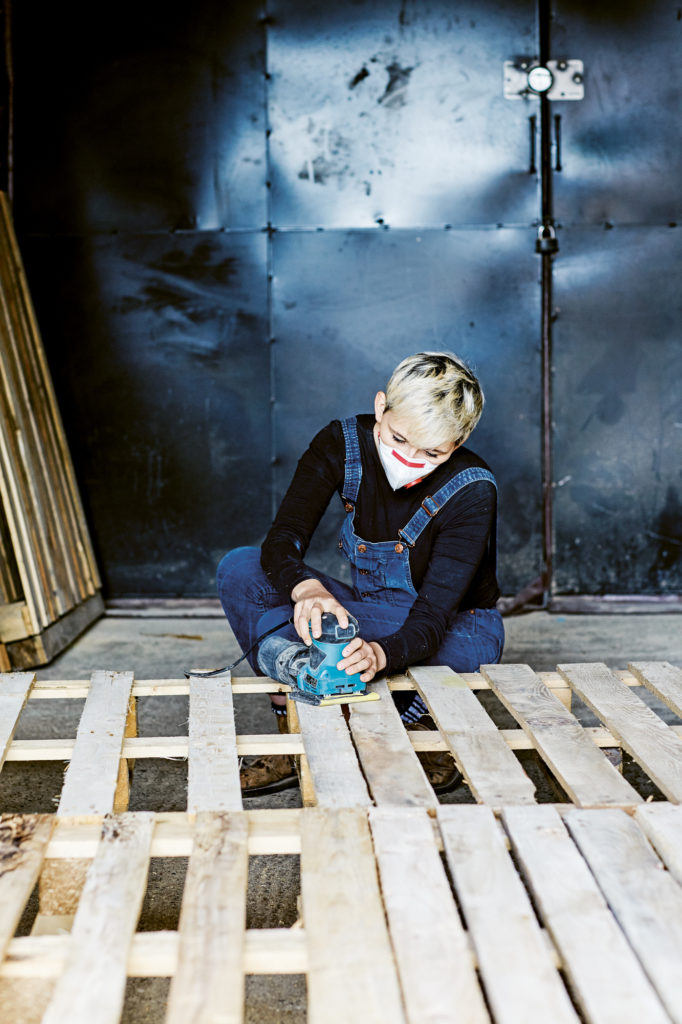
Lock the castors to reduce movement and sand all of the pallets to remove splinters.
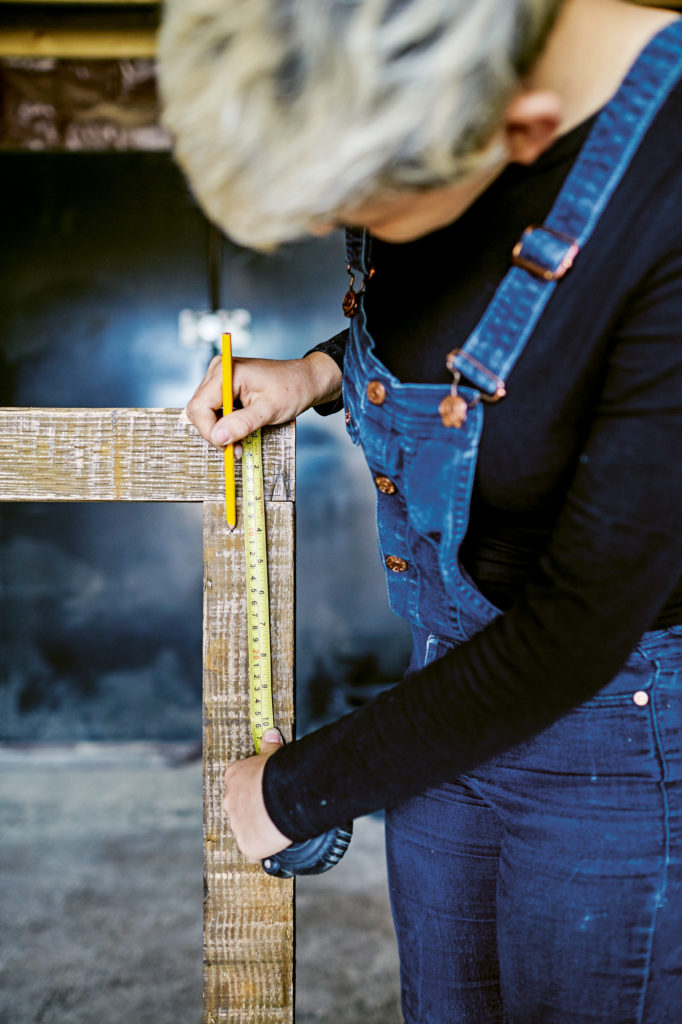
STEP 7
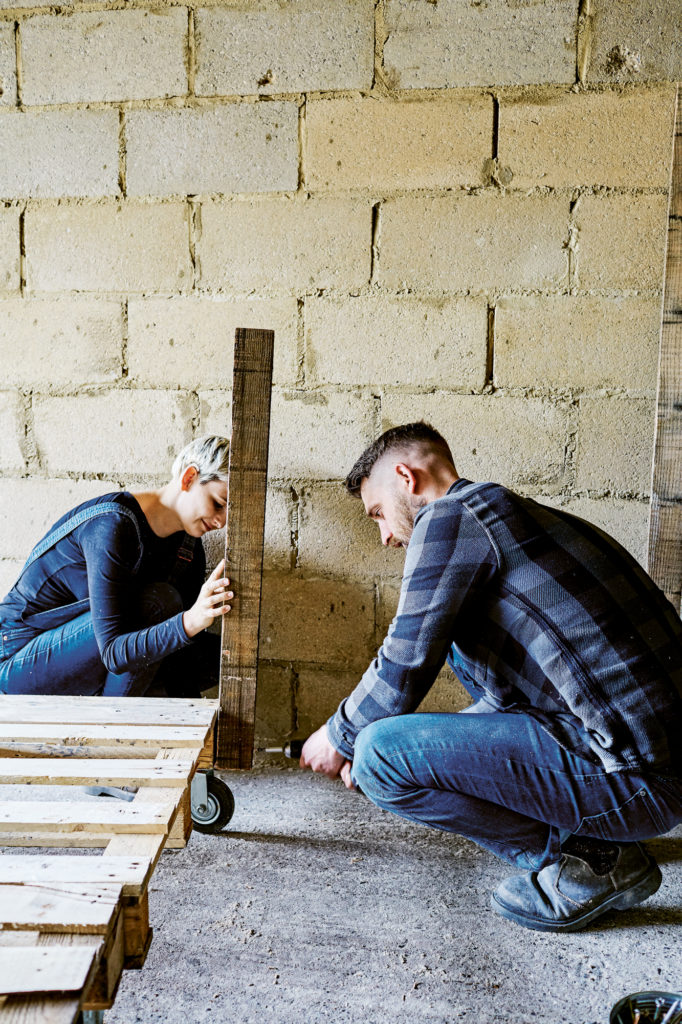
Measure, mark and cut two industrial bearer/stringer beams at 90cm (35in) and one at 159.5cm (63in) or the width of your bed. These will create the headboard. Sand the beams. Secure the two 90cm (35in) beams to either end of the top edge of the pallet using an electric drill, pilot, countersink, screwdriver bit and screws to create the headboard uprights.
STEP 8
Place the remaining beam on the top of the two shorter beams, ensuring they’re flush at both ends. Secure using an electric drill, pilot bit, countersink, screwdriver bit and screws.
STEP 9
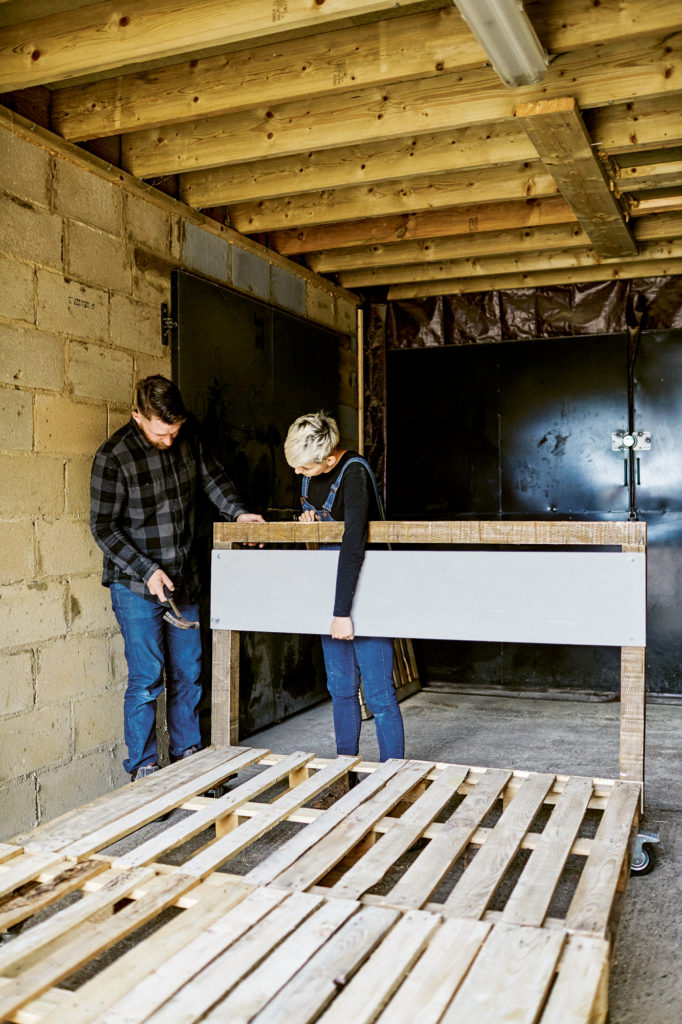
Cut the OSB board with a table saw/handsaw at 30cm (1ft) wide. Cut the length of the OSB at 159.5cm (63in) or the width of your bed. Sand the OSB to give a smoother finish. Paint with a grey chalk paint to create the chalkboard. Decide where you would like your chalkboard to sit on the headboard and measure and mark down the headboard to ensure it is level.
STEP 10
Attach the OSB at each corner to the side beams on the headboard with spring-head nails to add an industrial decoration. Decorate the headboard with chalkboard pens.
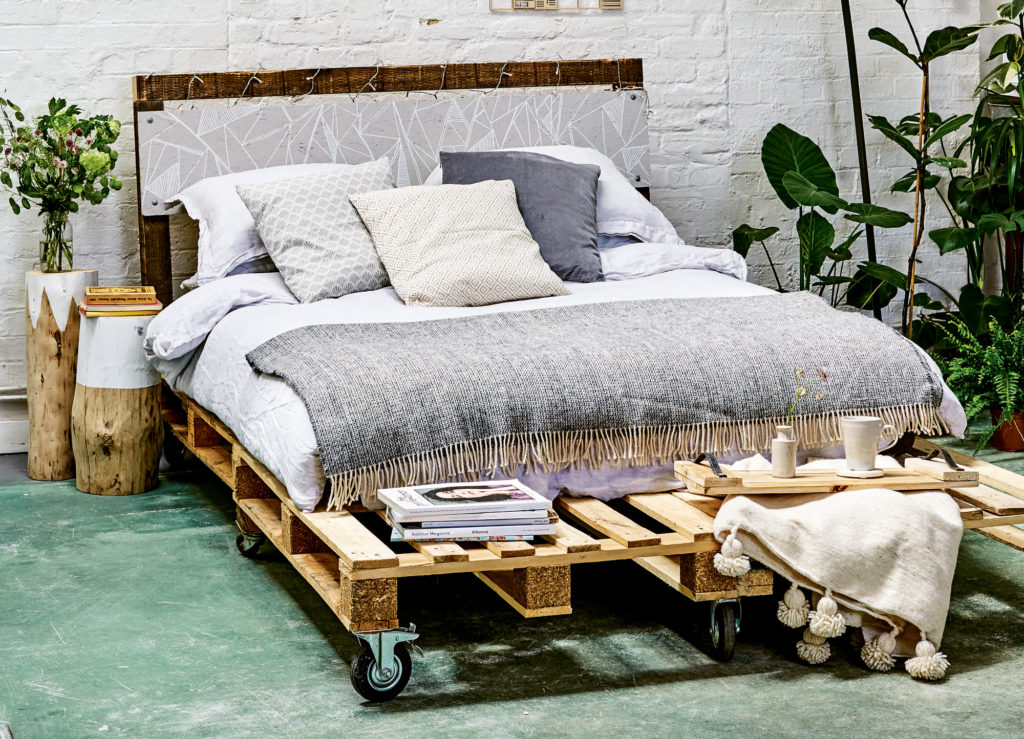
What a great project, eh? It seems really achieve after seeing all the step-by-step photos, doesn’t it? And this book is FULL of easy to follow tutorials like this, so it’s well worth a read if you want to fill your home with unique upcycled furniture and accessories.
And the great news is that I have an extra copy of Pallet Style to give away to one lucky winner. There are plenty of ways to enter the competition via Rafflecopter so be sure to click to enter below – and if you already follow me on social media, that’s a few free entries you can claim straight away through the Rafflecopter widget!
a Rafflecopter giveaway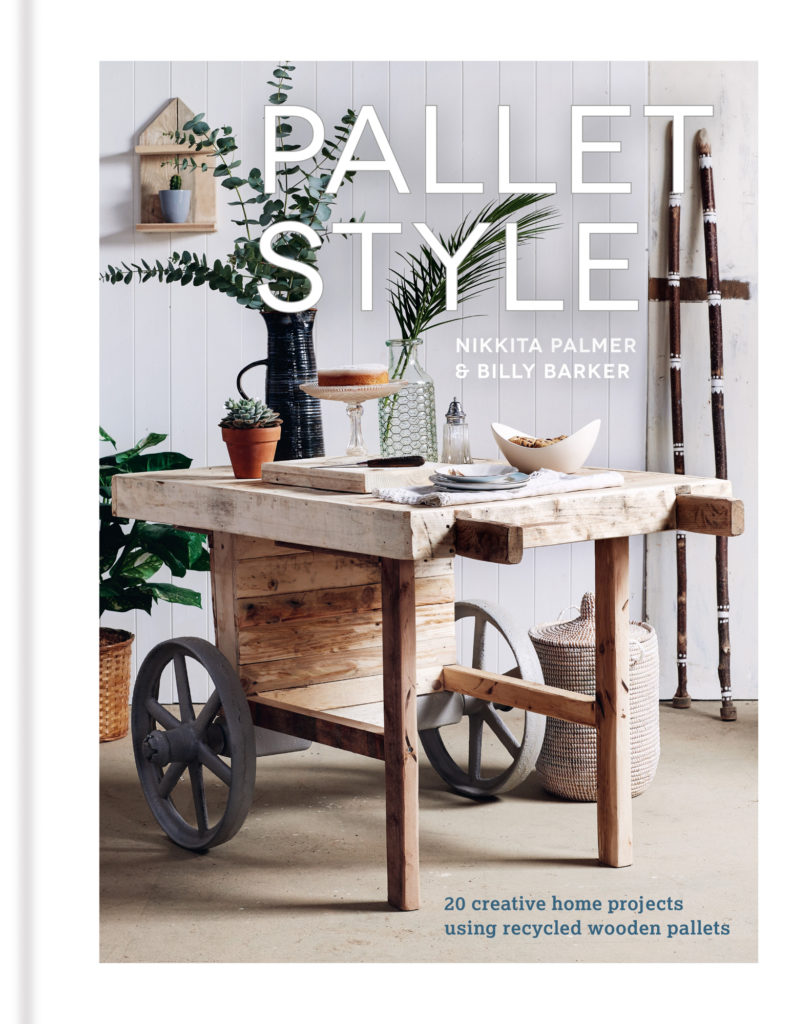
Giveaway open to UK residents only. Competition runs from 1st May 2019 to 1st June 2019. The winner will be contacted by email after the closing date and will need to provide a UK delivery address to receive their prize.
PIN IT FOR LATER…


27 responses
That sounds great! Best of luck with your projects 🙂
Thank you for sharing step by step details. I am a single grandmother (54) and love to do projects with the grandchildren. They have their own rooms and we are going to make everything together. I am going to purchase your book.
my dining room table i want to sand it down and paint it so it looks more modern
Repainting a shelf x
Cushions and a throw but would love to try and make the pallet bed it’s fabulous with help from my hubby
To make storage units for art equipment.
Curtains, cushion covers and blinds
This looks amazing! My husband loves DIY, I’d love a pallet table/desk
I’d like to upcycle my old cabinets
painting my lounge
Our spare bedroom is the next project which we’ll be tackling sometime during the Summer.
Painting the walls.
We are working on our garden and making a wild area for the hedgehogs. Will be making hedgehog houses!
My next project will be doing up my bedroom
Hoping to upcycle our kitchen next, paint the cupboards and change the handles etc. Might use pallets for some wall art/make a wine and gin display 🙂
Nothing right now but I love to repurpose items. Thanks.
I am going to use some old wood to make a bin store.
Planters – they will look FAB in the garden
Making raised planters to make it easier for me to do my gardening
I’m planning to upcycle a broken old violin to make it into a small champagne cabinet. Not sure if my skills are up to it but I’ll give it a go!
Making and decorating wooden pots for plants with my little girl
I want to upcycle an old coffee table.
I am currently upcycling an old G-Plan armchair I got off Freecycle. I have removed the hideous sludge green flock velvet covers, which took ages as they had been held in place with millions of staples. I now plan to sand it to remove the old varnish on the legs and arms, revarnish, and then make new cushion covers in navy blue twill.
Building a small greenhouse in my back garden
The next thing on my upcycling list is making some signs out of old pallets, as well as upcycled table decorations, bunting and and other decorative items for my daughter’s festival style wedding. It’s going to be fantastic!
I want to upcycle my bedside cabinets.
to renovate an old cabinet