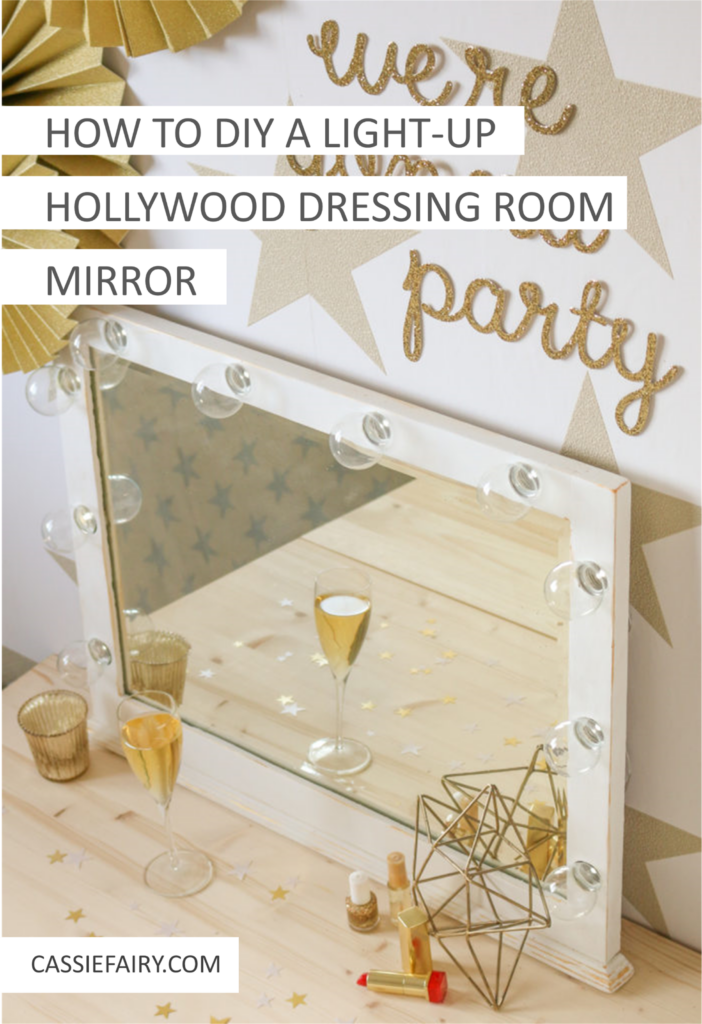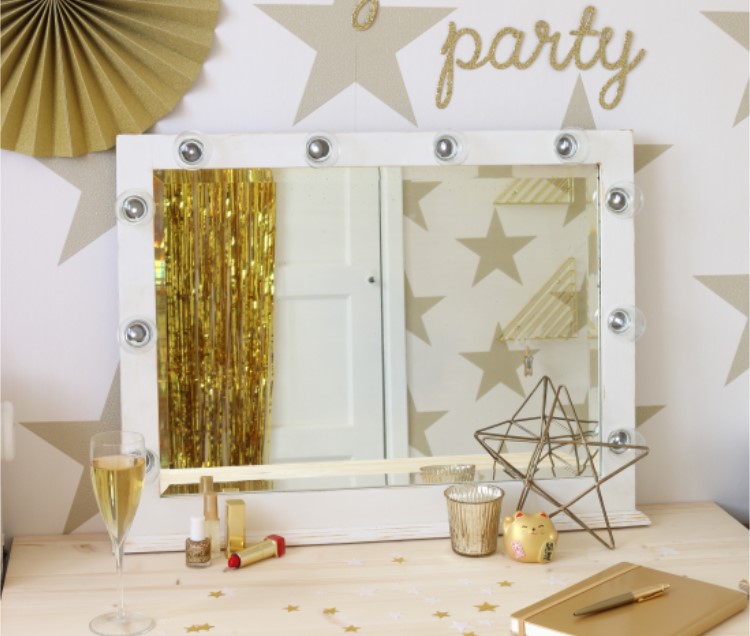
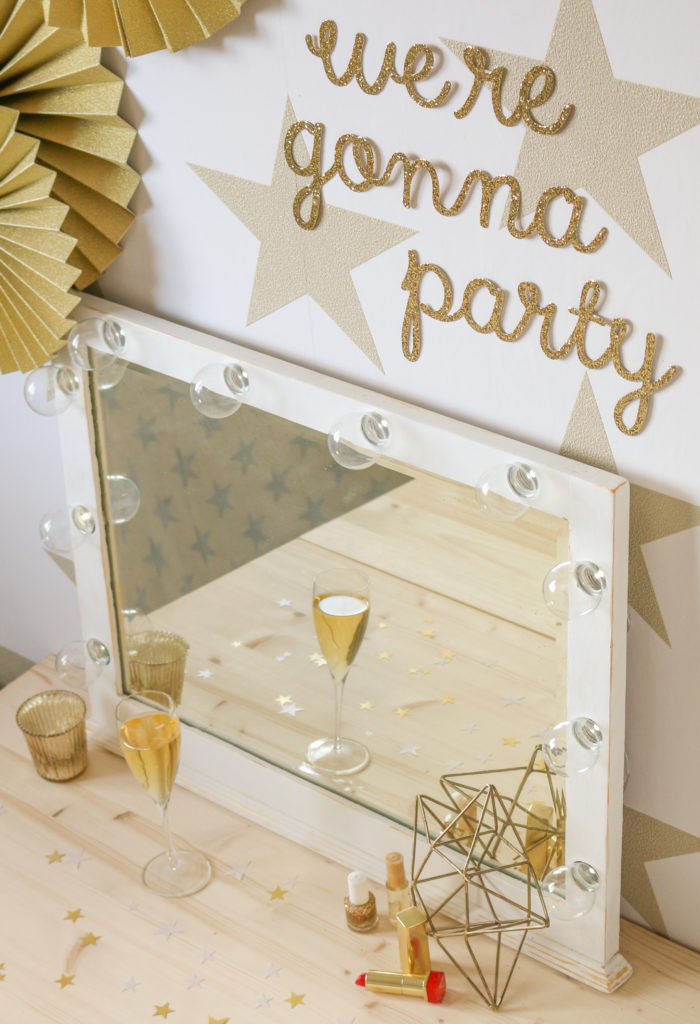
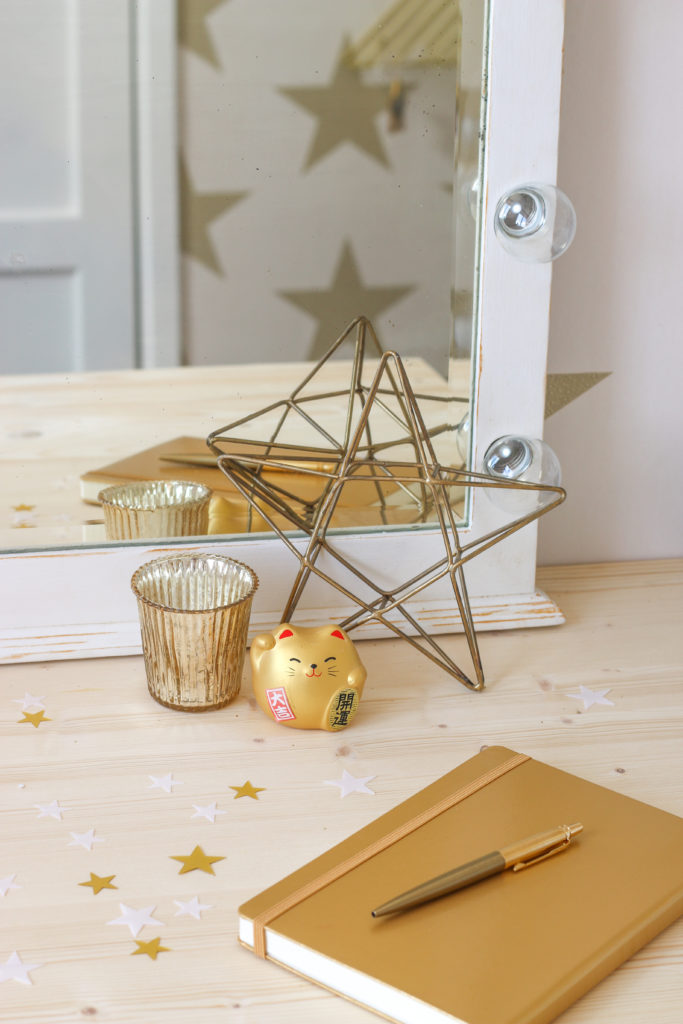
Add a touch of vintage Hollywood glamour to your interior with a bulb-lit mirror. And the best part is that you can DIY one yourself!
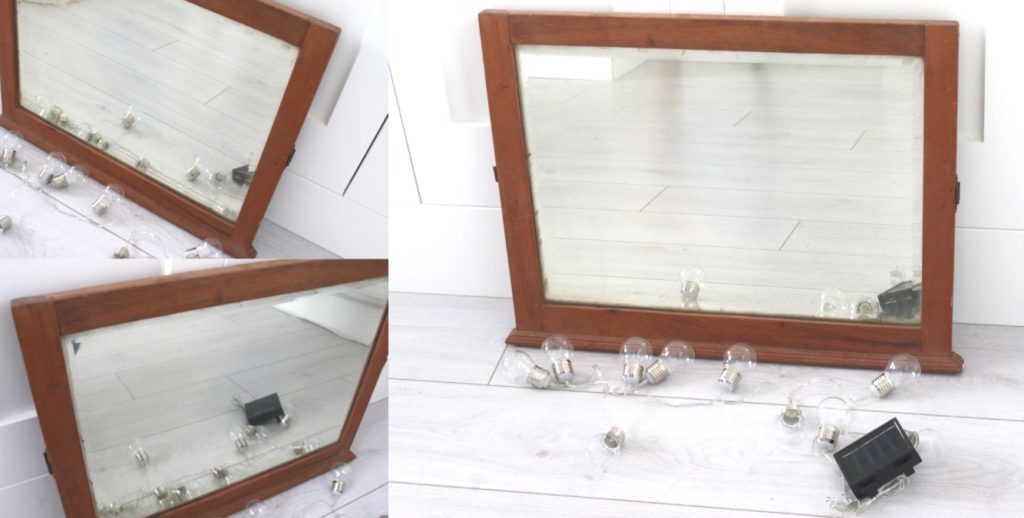
A wide frame is essential for this project, as the wood needs to be wide enough to drill holes that are the same diameter as the bulb covers. You could use fairy lights with smaller bulb covers if you want to recreate the same look on a narrower or smaller frame.
Solar-powered fairy lights are ideal for this project because the solar cell can be kept on a windowsill and attached to the lights when needed, allowing you to take advantage of free energy from the sun. Let’s get started with this fun project:
You will need:
- Wood filler
- White chalk paint
- Gold paint
- Low voltage solar-powered bulb fairy lights
- Screwdriver
- Drill
- Forstner drill bit to match the size of your fairy light bulbs
- Sandpaper
- Paint brushes
- Glue gun with glue
Step 1
Carefully dismantle the mirror so that you can work on the frame without damaging the glass. Lay the mirror face-down on an old towel to protect it as you work. Unscrew any old fixings or hanging brackets.
Step 2
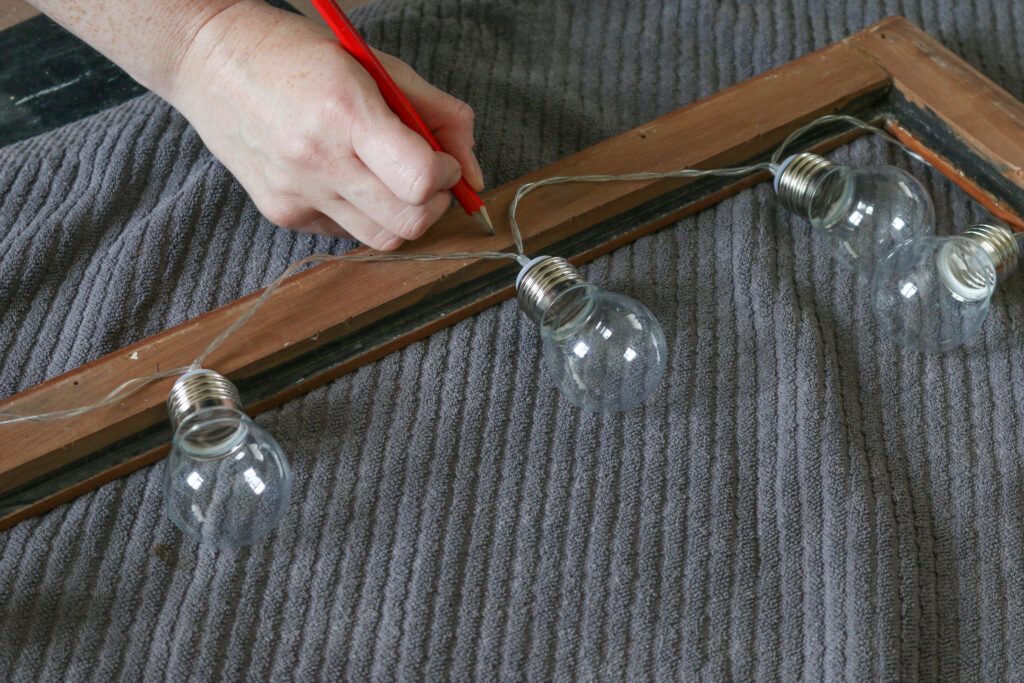
Working on the front of the frame measure and draw a line along the centre of the wood on both uprights and across the top.
Space out the fairy light bulbs so that they are evenly distributed around the frame. Measure equal distances between the lights and mark these points on the central line. These are the spots to drill the holes.
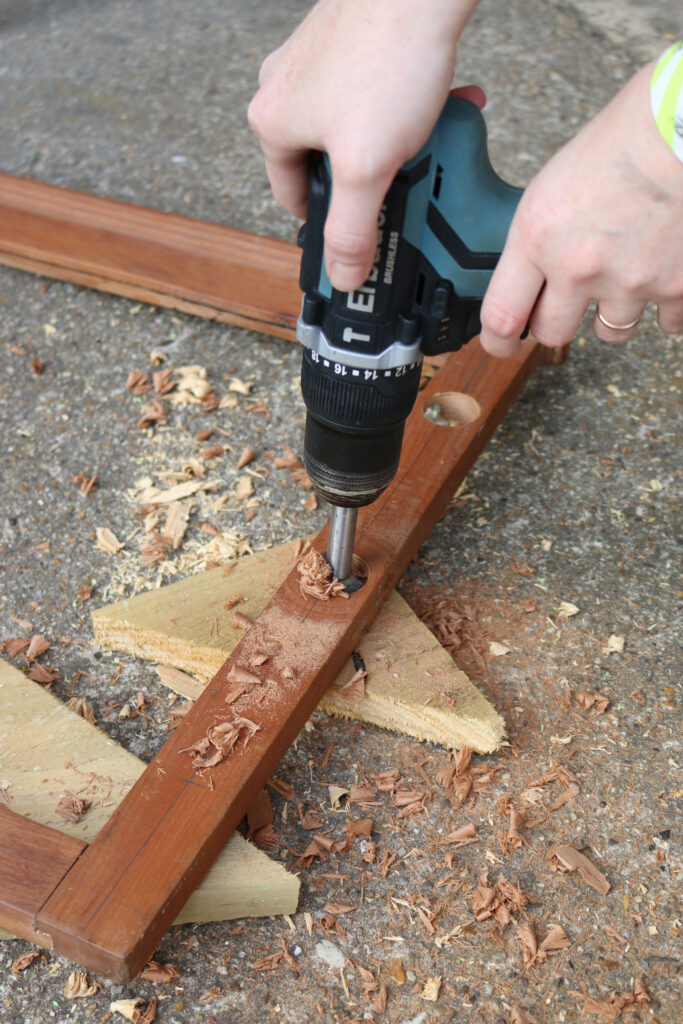
Step 3
Choose a Forstner drill bit that is slightly wider than the diameter of the light bulbs. Use the cutter to drill holes at all the marks around the frame.
If you want the light bulbs to sit further forward you can use a smaller Forstner drill bit to cut smaller holes, or recess them into the frame by using a wider drill bit.
Step 4
Sand all the edges of the holes and give the entire frame a quick sanding down. If there are any old screw holes or dents in the frame, use a wood filler to fill the holes and, once dry, sand it smooth.
Step 5
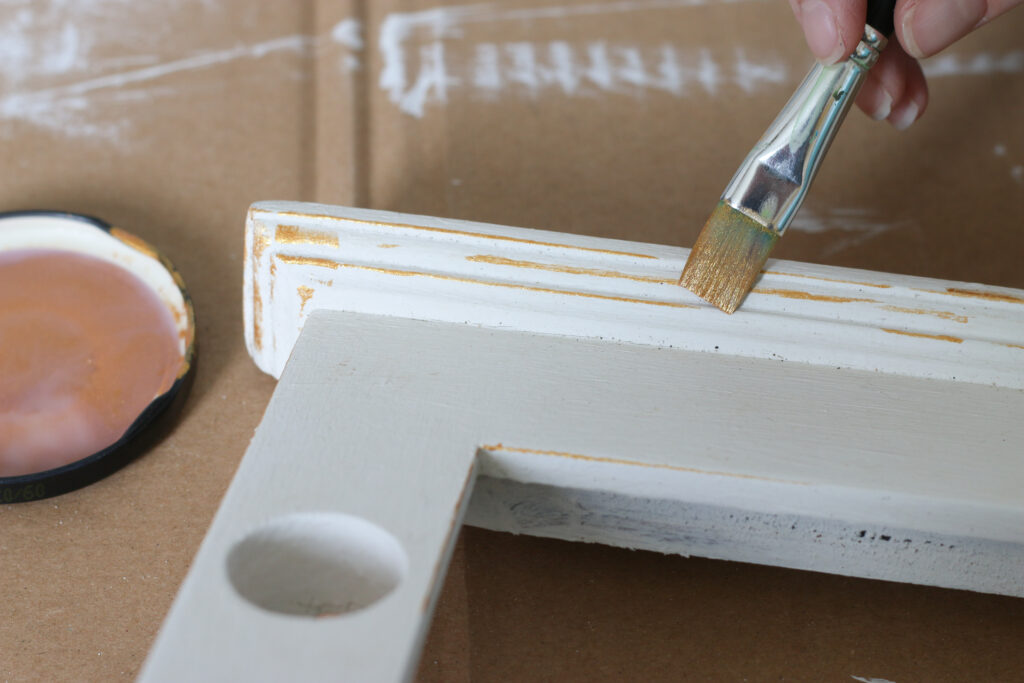
Paint the frame on all sides, including the inside edge, as this will be reflected in the mirror once the glass is reinserted into the frame. Paint as many coats as needed to get the coverage you require.
Once the paint is dry, use a small paintbrush and gold paint to highlight the edges and details around the mirror.
Step 6
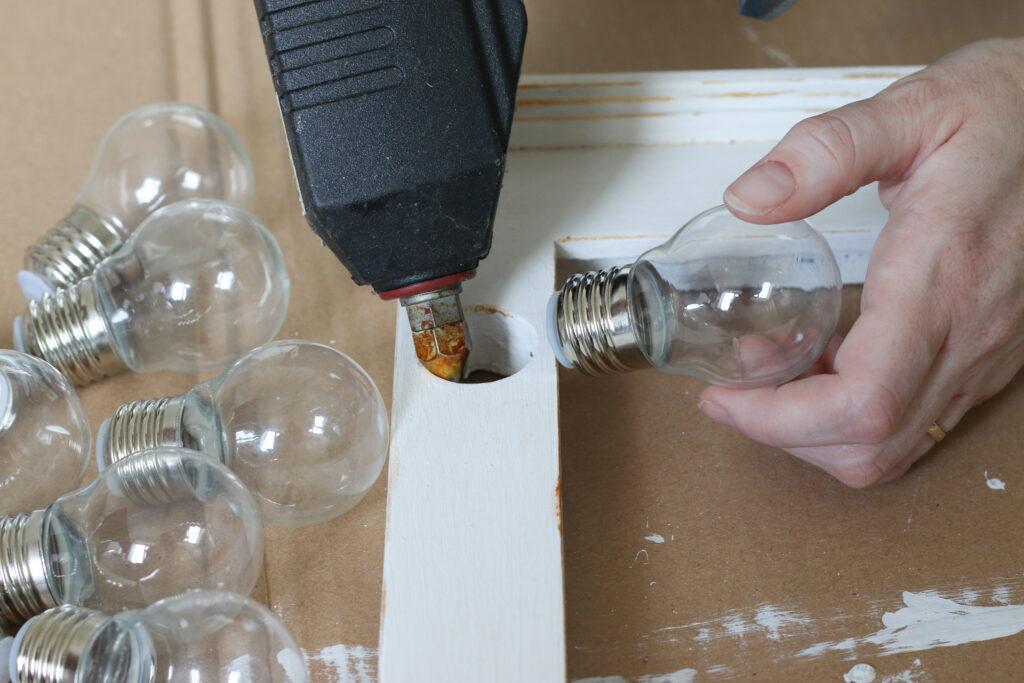
Remove the fairy lights from their bulb covers. Use a hot glue gun to add a ring of glue inside each hole and glue the bulb covers into the front of the frame.
Once the hot glue has set, push the fairy lights into the bulb covers from the rear. Use electrical tape to attach the flex of the lights to the back of the frame.
Step 7
Put the mirror back into the frame and add a hanging hook to the back to hang it on a wall, or stand it up on a dressing table.
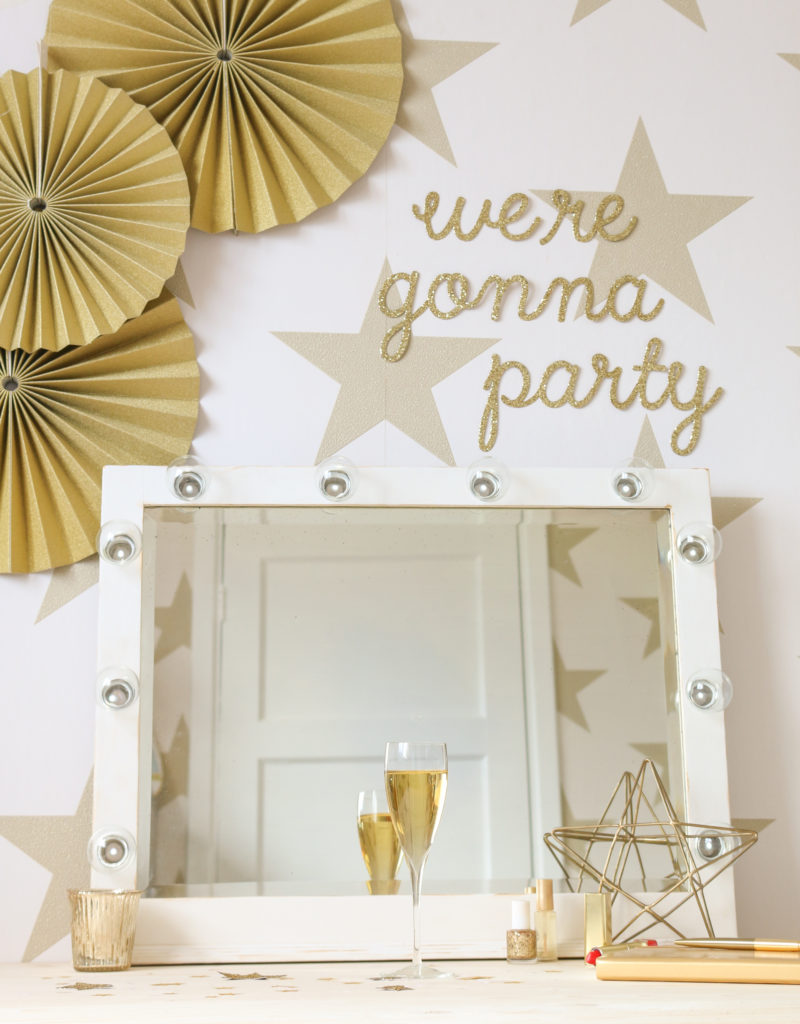
And there you have it – a vintage Hollywood-style mirror to light up your bedroom or dressing table – ideal for getting ready for a glamorous night out.

Let me know if you have a go at making your own light-up mirror in the comments below and I’d love to see your projects so please tag me in your photos on Instagram @cassiefairy.
Pin it for later