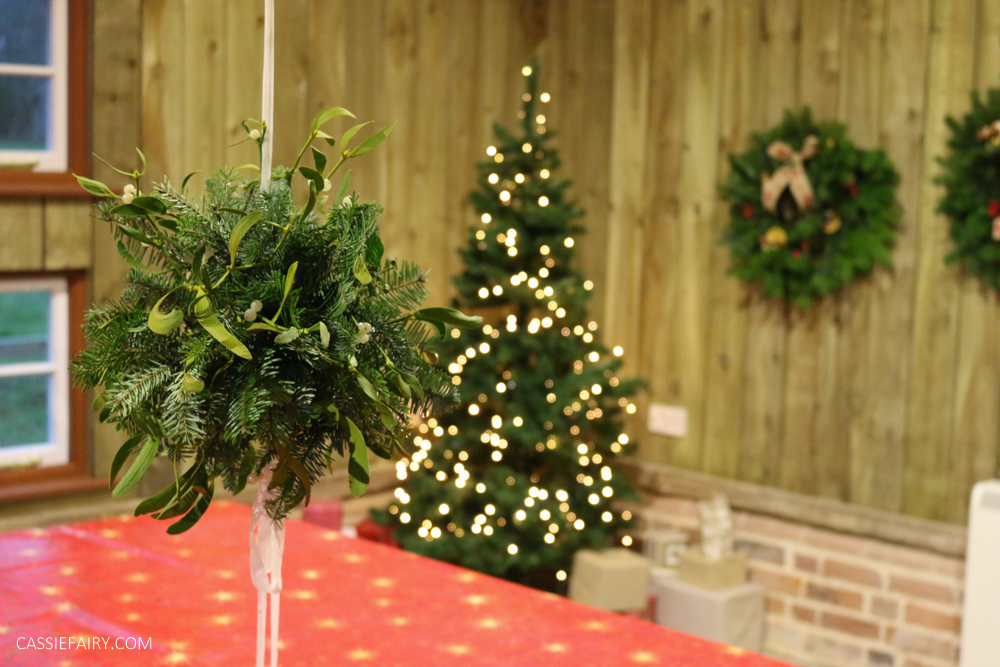
It can be difficult to fit a big bushy Christmas tree into your home, can’t it? Especially if you’re living in a cosy cottage or an apartment. I mean, how do you even get it up the stairs?! Plus, fun fact – if you live in Philadelphia in the US, you’re not allowed to have a natural Christmas tree in a flat, it’s the law!

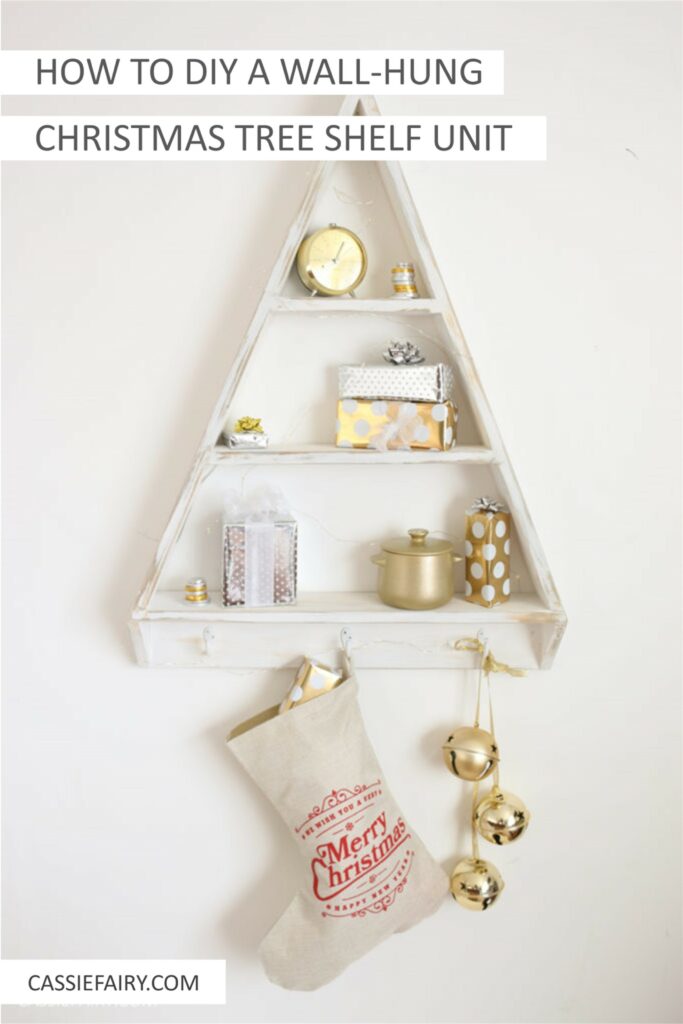
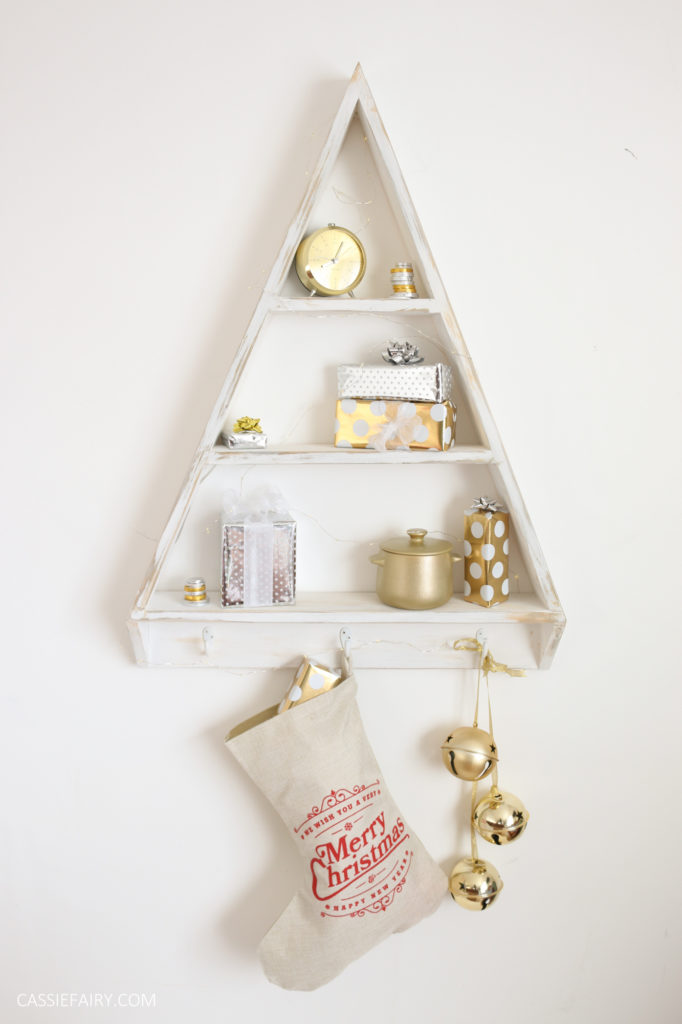
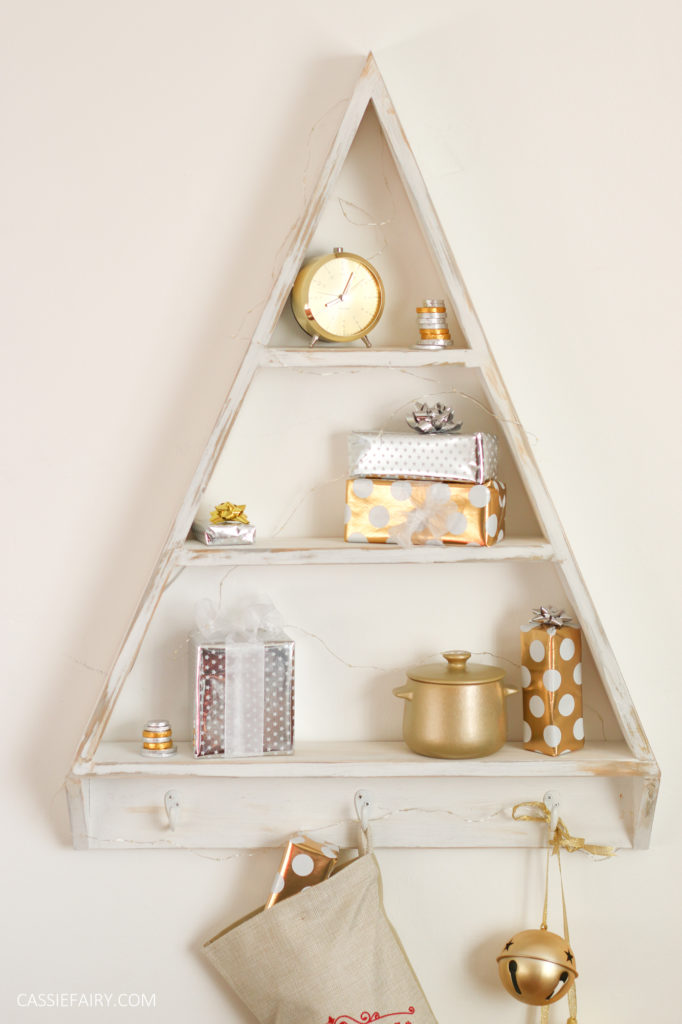
If you’re lacking in space but still want to feel festive, how about making my Christmas tree shelving project? I made this a few years back and it was a really handy space for little gifts and festive treats in December, and then we continued to use it all year round too.

The little hooks underneath the unit provide space for hanging your stockings, which is handy if you don’t have a mantlepiece and fireplace – at least Father Christmas can still fill your stockings if you’ve hung them up on this shelf!
You will need:
- Tenon saw
- Mitre box with mitre slots at 45° and 22.5° angles
- Palm sander and sandpaper
- Paint brush
- Drill and countersink drill bit
- 2 x 2.4 metre lengths of planed softwood timber 13mm x 94mm
- White chalk paint
- Gold spray paint
- 1 ¾” x 10 (45 x 5.0) pozi countersink screws
- Wood filler
- Wood glue
- 3 x Coat hooks
- 2 wall brackets and wall plugs
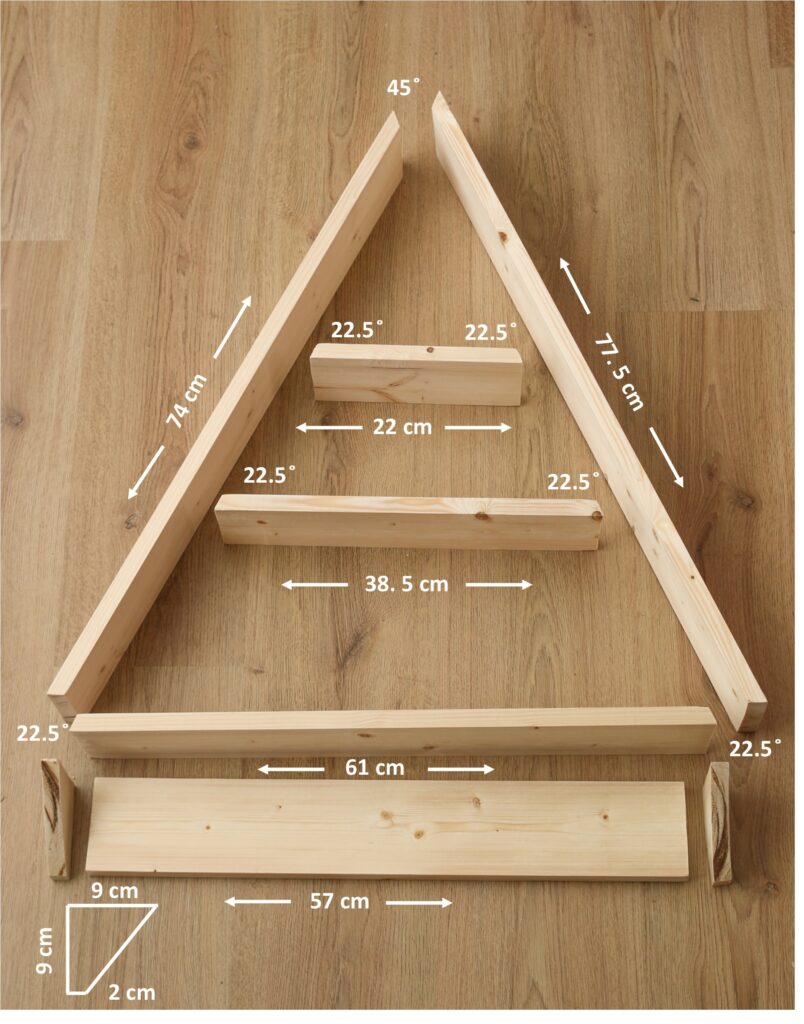
The measurements of the wood will depend on the size that you want your finished shelves to be. The measurements provided in this tutorial create a finished unit that measures 61cm wide x 82cm high x 9.5cm deep.
Step 1: Cut the timber
Measure out and cut the following pieces of timber:
- Longest length 77.5cm with a 45° angle at the top and a 22.5° angle at the bottom
- Longest length 74cm with a 45° angle at the top and a 22.5° angle at the bottom
- Longest length 61cm with a 22.5° angle at both ends
- Longest length 38.5 cm with a 22.5° angle at both ends
- Longest length 32.5 cm with a 22.5° angle at both ends
- Length 57 cm with straight ends
- 2 x triangles 9.5cm x 9.5cm with a 2cm return to form the brackets
Step 2: Sand the wood
Use a palm sander to smooth off the rough edges of the timber where the cuts were made.
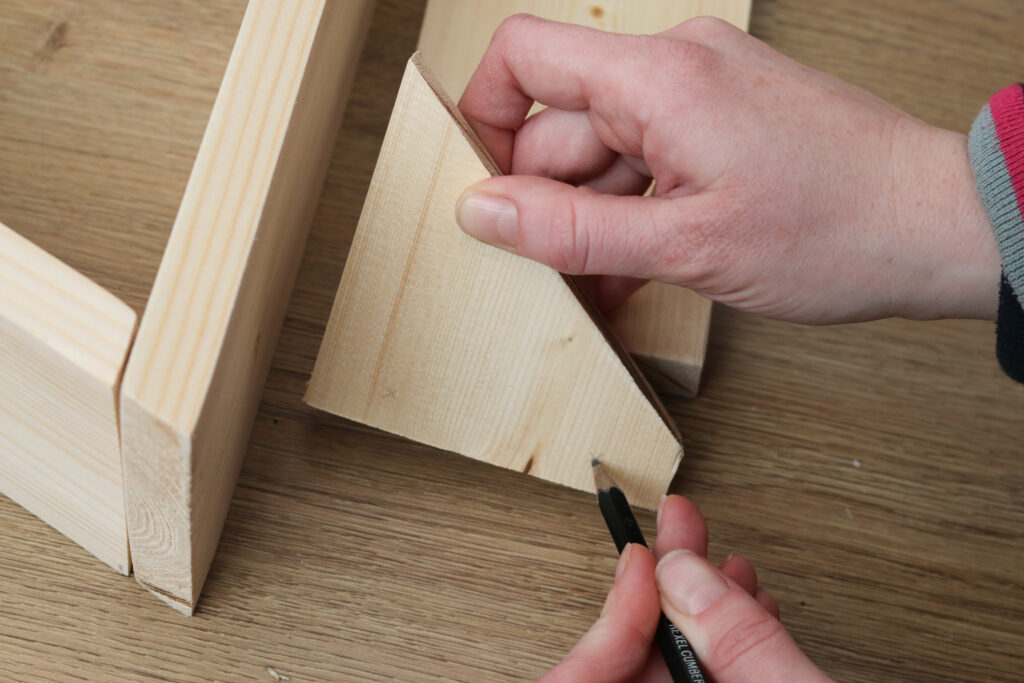
Step 3: Pilot drill the screw holes
Put the pieces into a ‘tree’ formation and mark where you would need to make holes to screw the pieces together. Use a drill with a countersink bit that matches the size of your screw heads to make holes where these marks are. Line up the pieces and use a fine drill bit to pilot drill through the first hole, into the piece you’re attaching it to. This will prevent the wood from splitting.
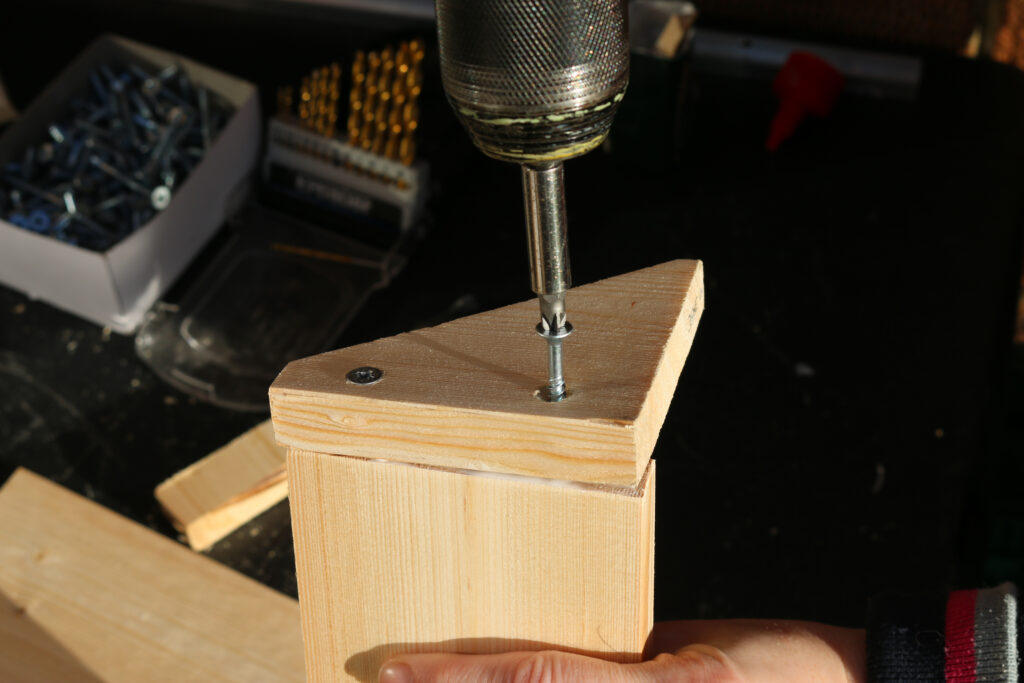
Step 4: Glue and screw
Apply wood glue to the joining edges of the wood. Screw all the pieces together using countersink screws. Begin with the outer triangle, then add the shelves.
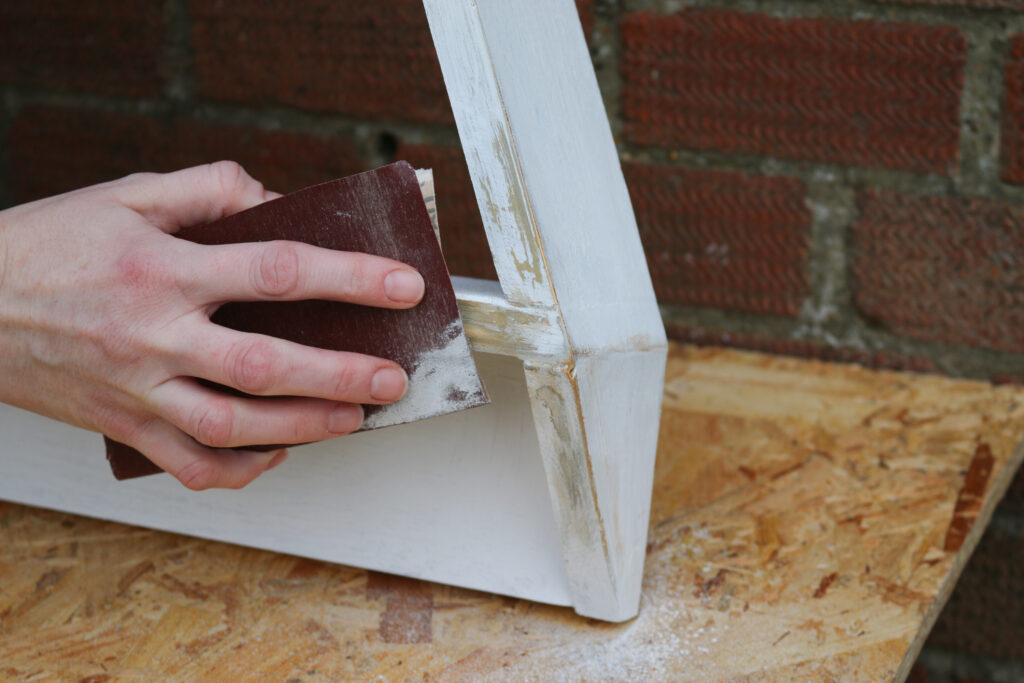
Step 5: Fill and sand
Use wood filler to cover any screw-heads or gaps between joins. Allow to dry thoroughly before sanding smooth.
Step 6: Paint
Cover the whole unit with a couple of coats of chalk paint, allowing it to dry between layers. To create a distressed effect, begin by spray-painting the shelves gold. Let this layer dry thoroughly before painting on a coat of chalk paint.
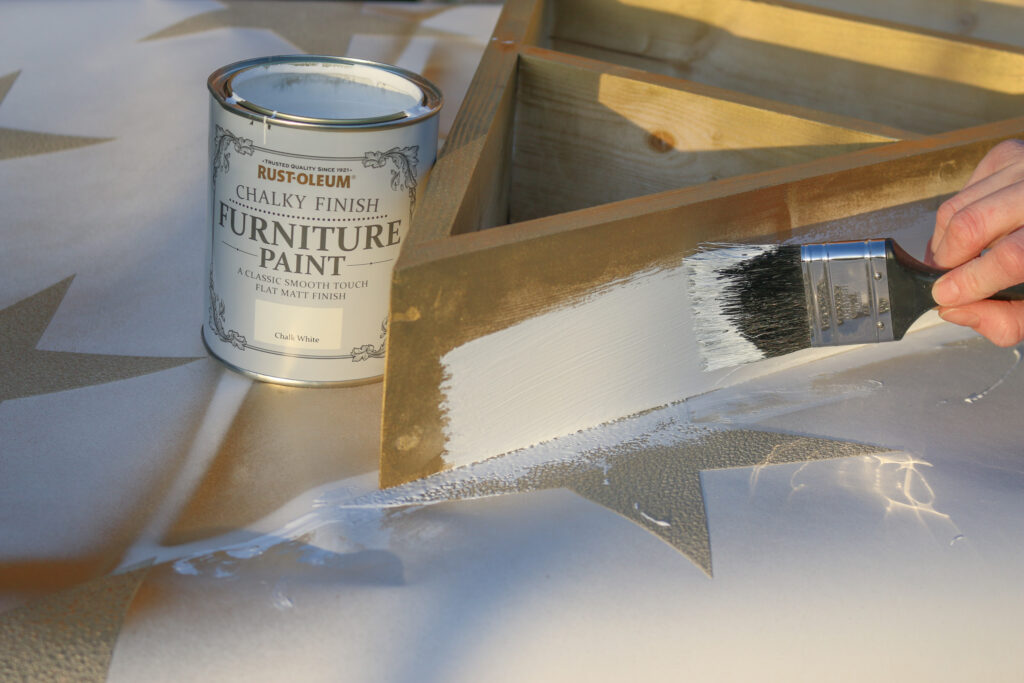
Once this top coat is dry, use wire wool or fine sandpaper to distress the edges so that the gold glints through the white paint. Alternatively, you can paint gold paint onto the edges, on top of the white paint.
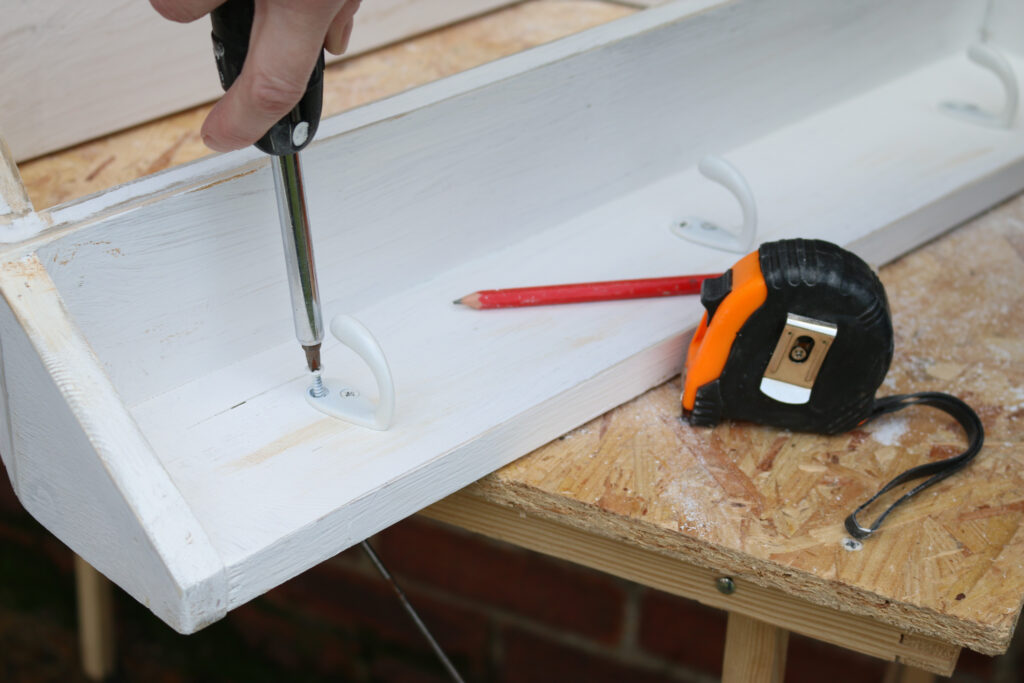
Step 7: Attach coat hooks
Drill pilot holes in the base section and screw in three coat hooks. Attach two brackets to the centre shelf and securely affix to the wall using wall-plugs and screws.
And there you have it – a space-saving wall-hung Christmas tree, which doubles up as a contemporary shelf throughout the rest of the year. Let me know if you have a go at making this project yourself, I’d love to see photos of how you get on with the project!
Pin it for later