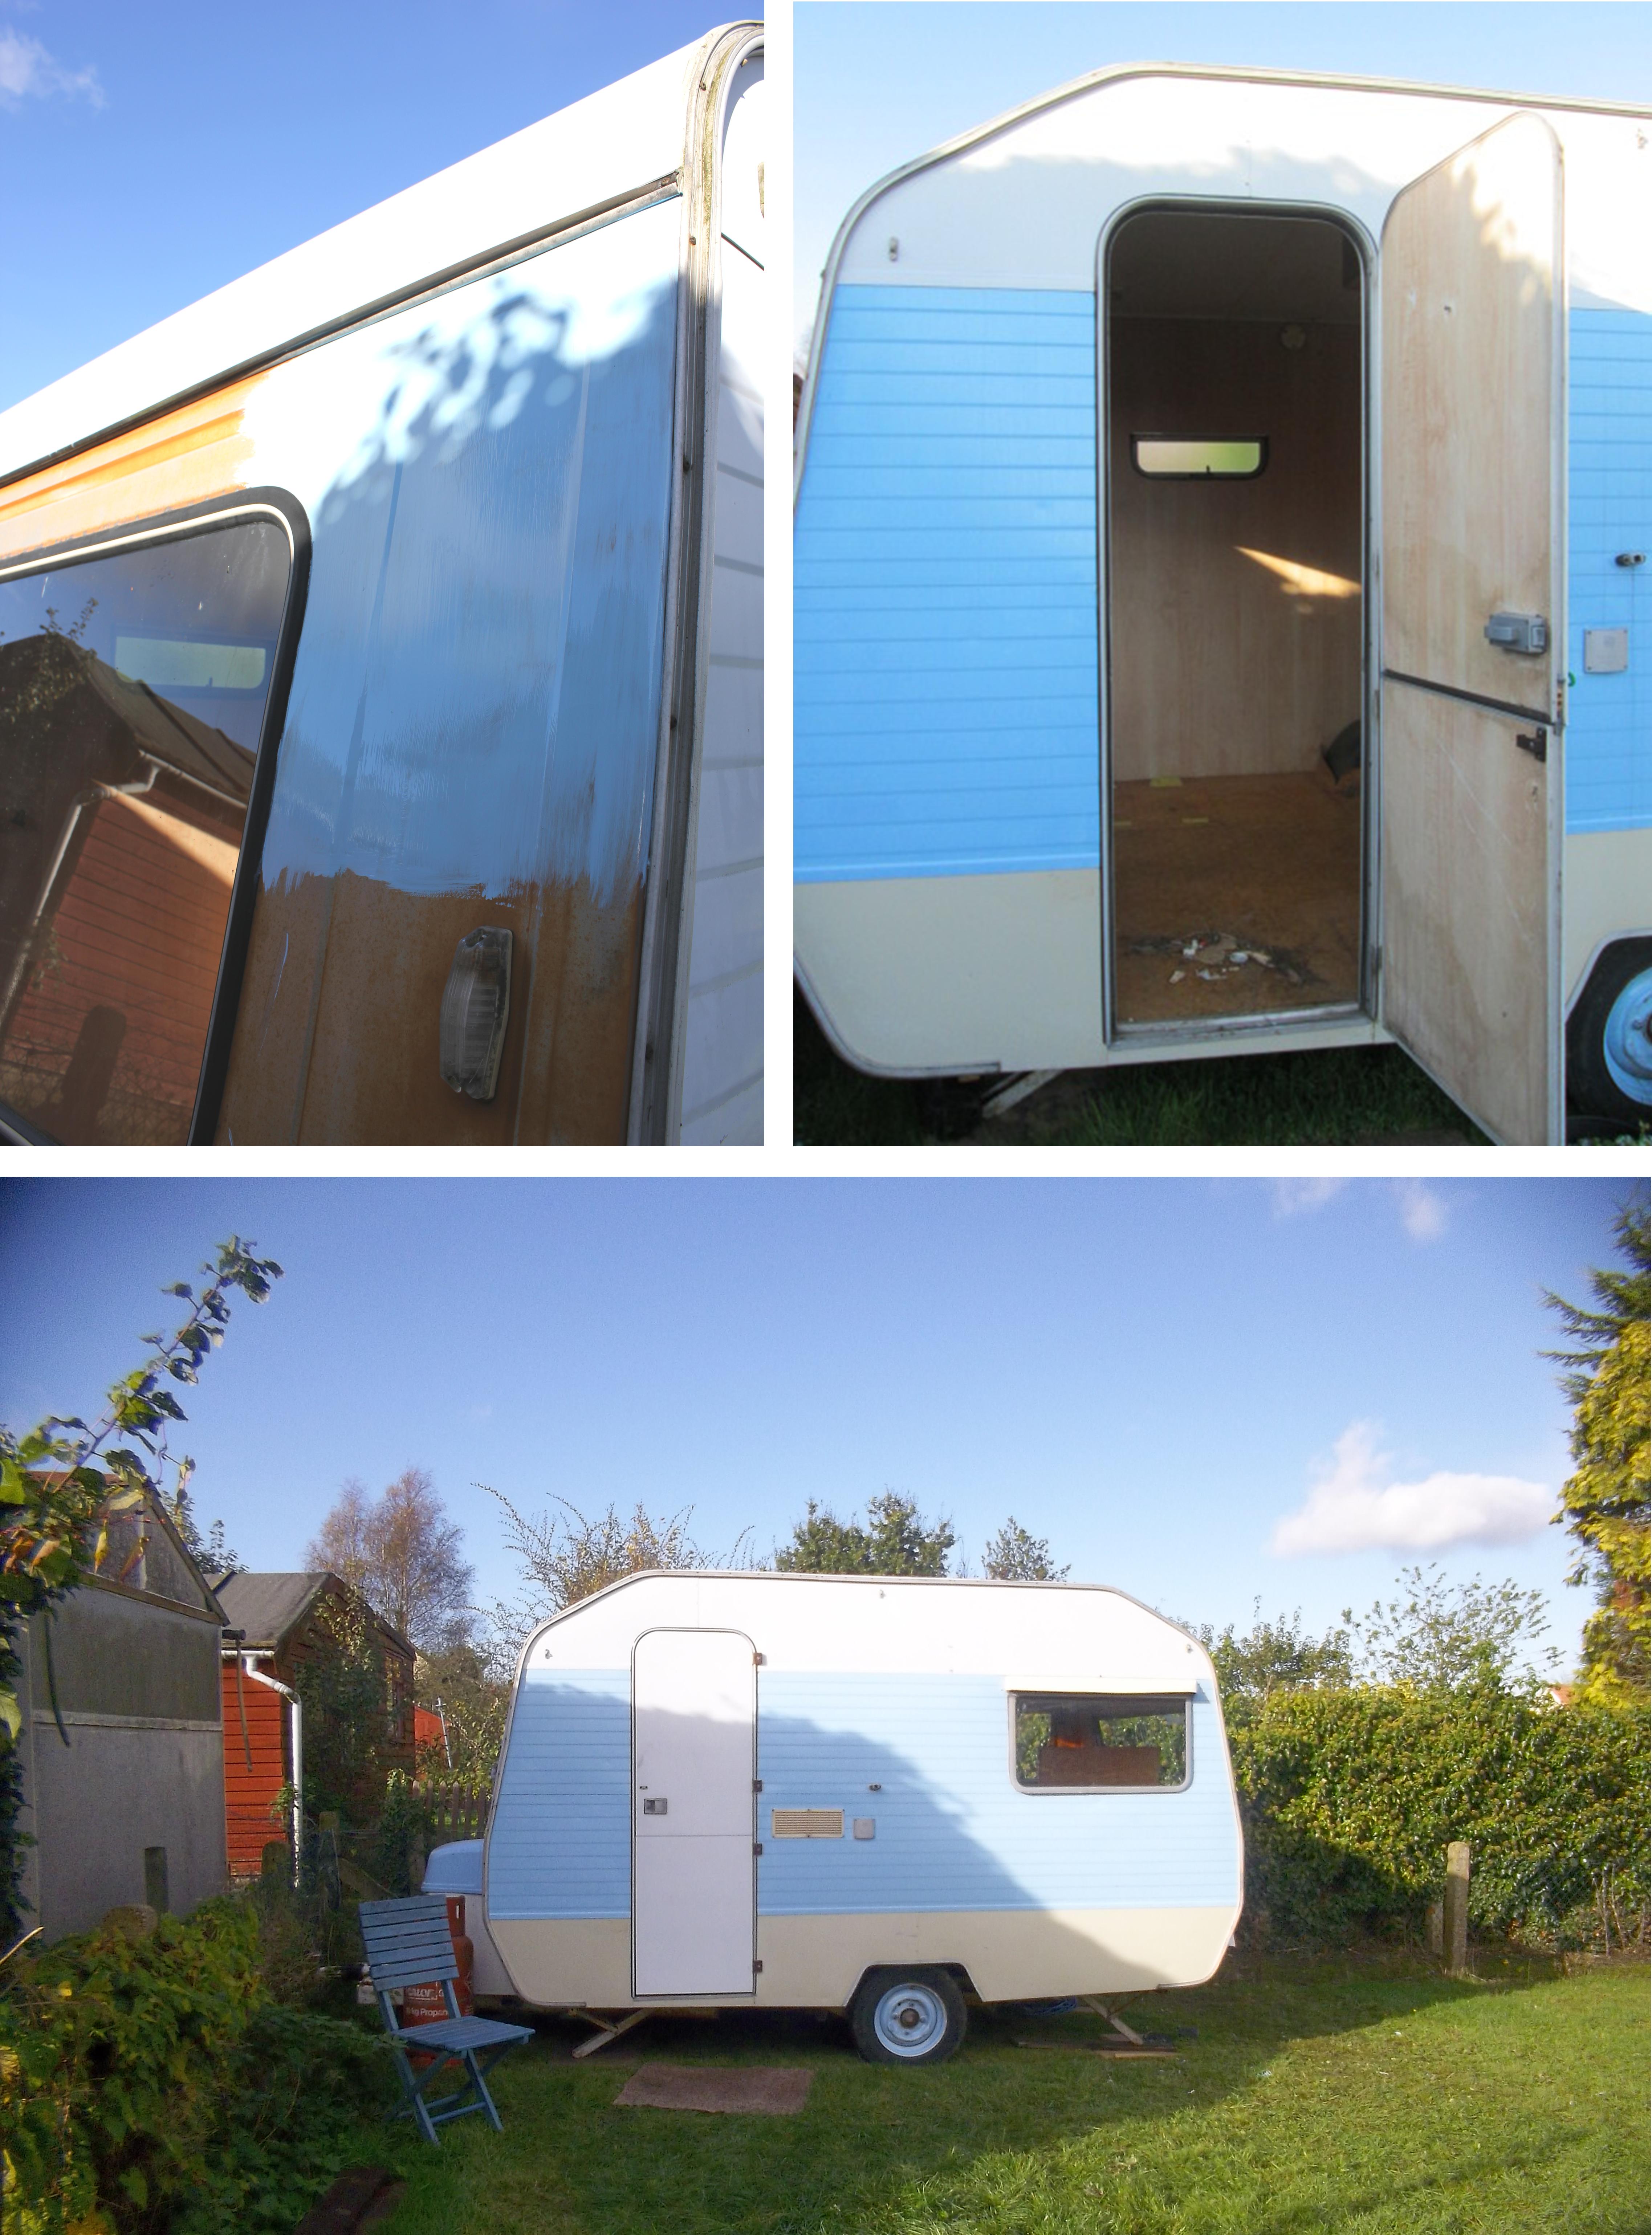
If you’ve not already read about my new caravan workshop project, please have a read of how I came across my little caravan (and all about clearing it out in preparation for painting) the links are below. I like the shape of my caravan – I think it’s small and round and cute, but I don’t really care for the colour. It’s white on the sides, cream above and below and orange at the ends. In fact, the orange was the only bit that I liked – but unfortunately it was mostly rubbed off and worn away. When I cleaned my caravan for the first time, quite a lot of the orange disappeared and I was left with a mottled mess (you can actually see the aluminium coming through on the orange section in the photo below!). So that was my decision made for me. It had to go.
Seeing as I’m not planning a retro restoration, I decided that now would be the time to start afresh and choose a new colour. As I was cleaning the caravan I also removed a lot of green gunge from the surfaces and in the end, the cream sections didn’t look too bad, so I decided to keep these cream (and the little cream ‘eyelids’ over the windows were cute too!) and choose a colour that would look nice with this base. I used exterior paint suitable for metal and I chose a colour to be mixed up to make sure that I got exactly the cheerful, sunny-sky blue that I wanted for my little caravan. I only needed about half of a 5 litre pot, and I rollered it onto the surface. I’m sure that some people would criticise me for painting it this way, but it’s not going to be travelling anywhere and it looks great. If it wears off at all in the future, I’ve got another half of a tub of paint to re-paint it with anyway!
The paint took about a day to full dry with two coats and it looks like a brand new caravan now. The cream and blue works well together and it’s starting to look like the vintage caravan on my dreams. For more caravan inspiration from Pinterest check out my Caravan Love board
Related caravan articles
- A massive new project for Cassiefairy ~ my little vintage caravan (cassiefairy.com)
- My little vintage caravan project ~ clearing out the old… (cassiefairy.com)





11 responses
Thanks so much Liddy, I’m glad you like it! I used an exterior paint from B&Q that is suitable for use on metal. The colour was custom-mixed 🙂 One thing to note: make sure you’re painting on a dry day – as soon as I finished painting the exterior, it started to rain. This unfortunately made little pitted marks in the drying paint. It’s not too noticable now, but the finish definitely could have been smoother if the paint had been able to dry complete without any rain!
Good morning
Super cute caravan ♡
What paint/make did you use, new to this
Hi Ginny, I don’t have a canopy for my caravan but I have just been given an awning, which is more like a tent that attaches to the outside of the caravan and almost doubles the usable space! 🙂
Where did you get the canopy? It’s perfect for my project
Great blog!!! I’m doing up my parents sad and old sprite exactly like yours!! I’ve been struggling to find the right paint and colour. Found a retro blue in dulux but they don’t do a Matt finish just a satinwood. What did you use?? Any help appreciated as I want to surprise them. 🙂
Hi Sally, ooh that sounds like a great idea! My caravan is an Alpine Sprite 🙂 Have a look at all my other caravan posts, I’ve written lots of posts about the project over the years & have forgotten exactly what I’ve done/how much things costs – it’s all in my caravan category on the blog though: https://cassiefairy.com/category/home-design/caravan-home-design/ Let me know how you get on with your own project! 🙂
I am thinking of doing this for my daughter as a room separate from the house. I was wondering what car brand is it, how much did it all cost and where t find such a thing.
It’s getting there! I am spending lots of time on it during the summer holidays 😀
Wow that’s quick work! Looking good 🙂
I think this is my new favourite colour! Thanks for your lovely comment 😀
It’s looking so much better already! Lovely colour too!