* New post – How I repurposed the original pallet bar to create a plant bar!*
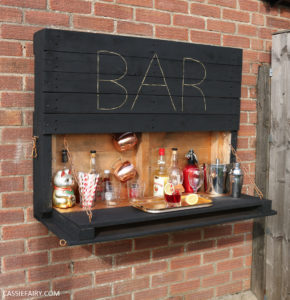
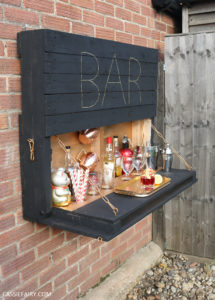
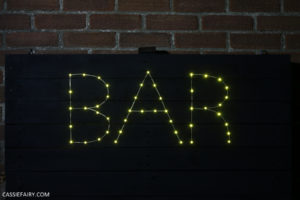
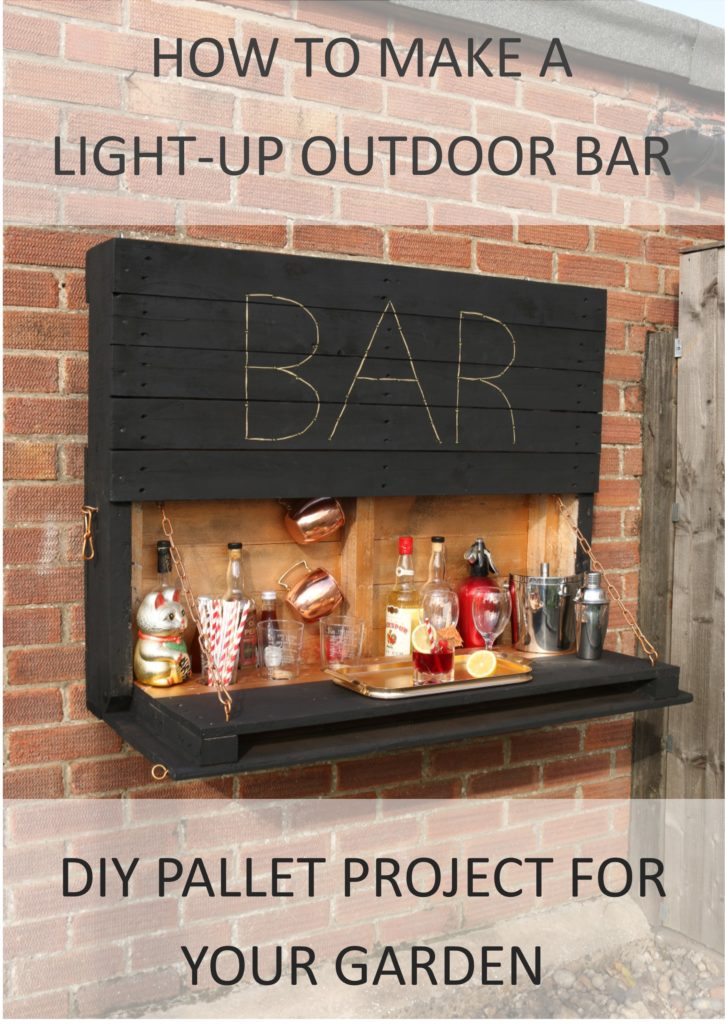
Although most of my garden renovation plans have been put on hold while hubby’s fractured arms healed, one project we did manage to make together was this outdoor pallet bar. It’s wall-mounted, self-supporting and has solar-powered fairylights that spell out the word ‘BAR’ – what more do you want?
If you can get hold of 3 identical pallets, you’ve got all the wood you need to make this project yourself. Add a couple of left-over paint tins and you’ll have a rather swish garden bar on your wall in no time. Hang it beside your patio as the ideal spot to serve drinks to your guests.
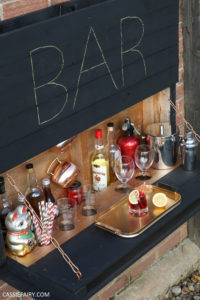
 It can be used in the summer for garden parties and BBQs, in the autumn for Halloween and Bonfire Night events and in the winter for festive gatherings and New Years Eve celebrations. You need an outdoor pallet bar now, don’t you?
 If you fancy DIYing this project for yourself my step-by-step pallet bar project is below and our photos will hopefully guide you through every stage of the project.
YOU WILL NEED
Wrecking bar, hammer, stapler saw, electric sander and sandpaper, holesaw kit, drill and drill bits. 3 x identical pallets, coach bolts, wood screws, steel chain, eye hooks, carabiners, exterior paint, solar fairy lights.
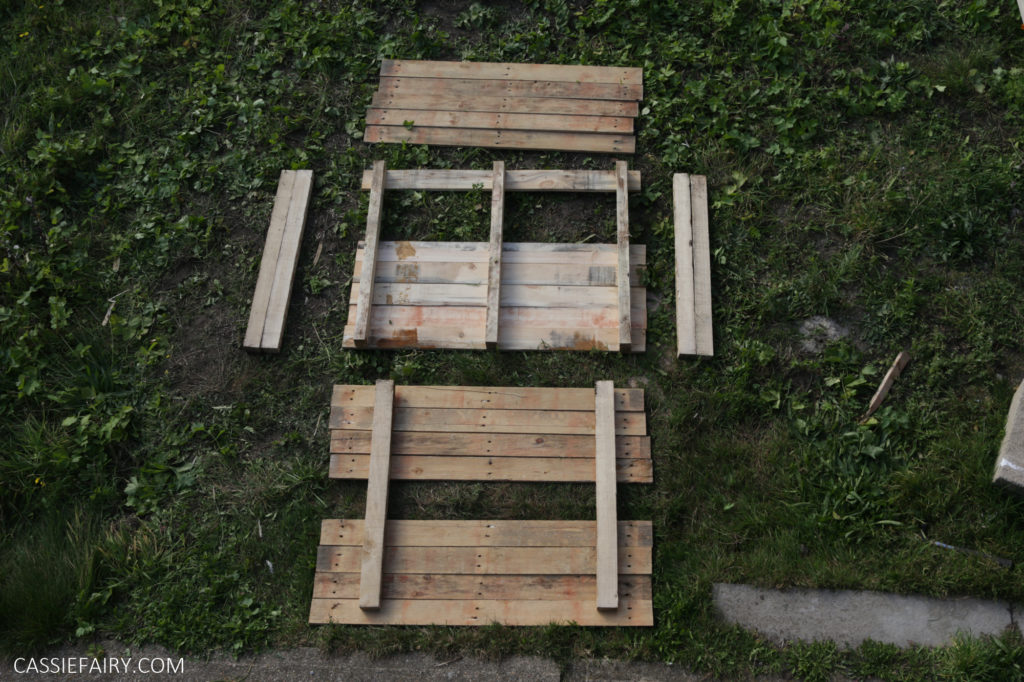
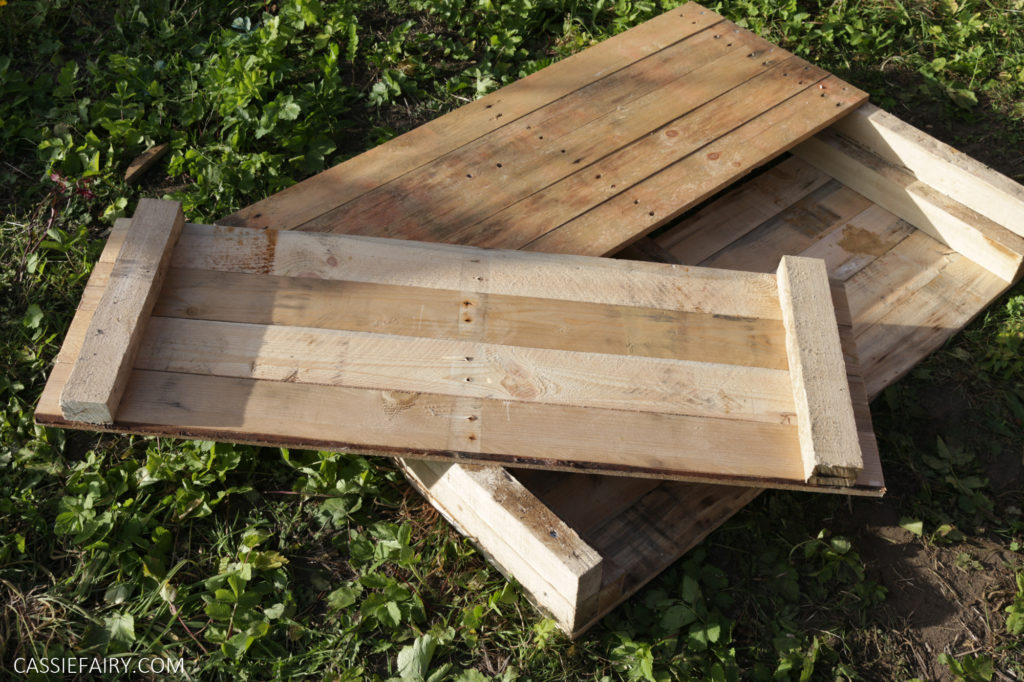
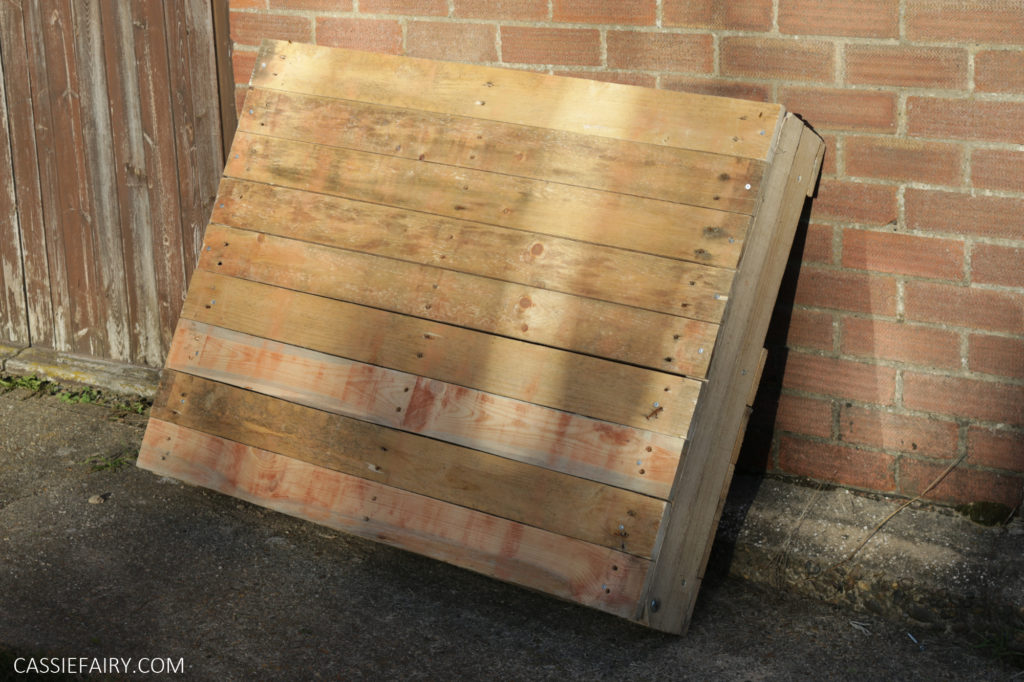
Above is a deconstructed version of the pallet bar so that you can see what pieces of wood you’ll need to complete the project.
STEP 1
Use a wrecking bar to carefully remove the planks of wood from all 3 pallets. Use the supporting beams for the structure of the bar and the planks for the ‘cladding’.

STEP 2
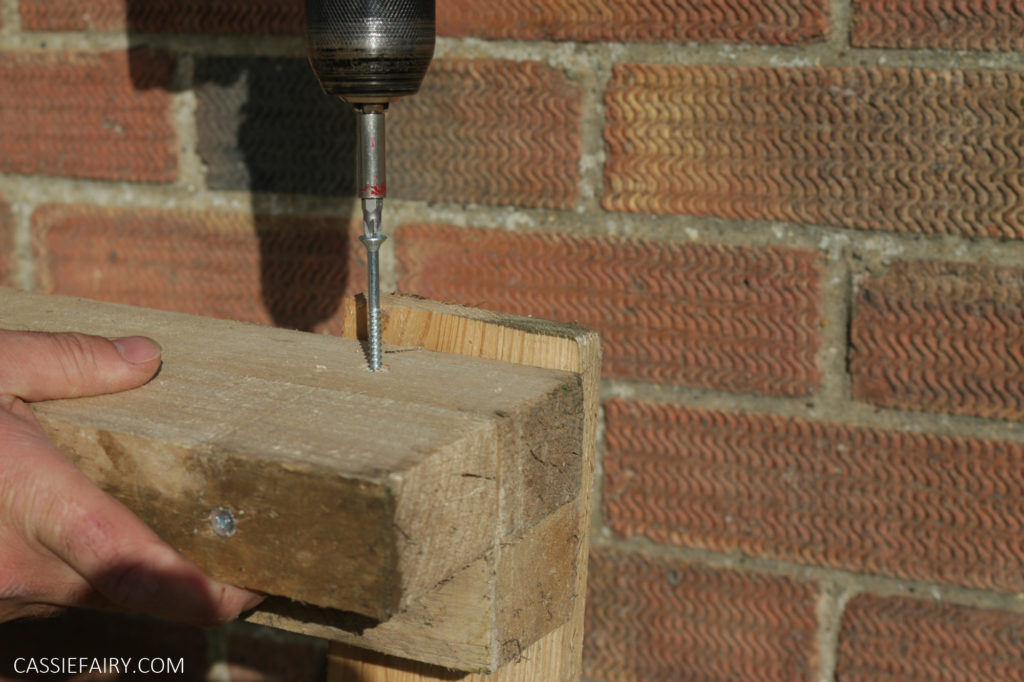
Position two supporting beams together and use wood screws to attach them to each other. Add a third supporting beam to make a chunky ‘L’ shape for the side/back corners (like the shape below).
STEP 2
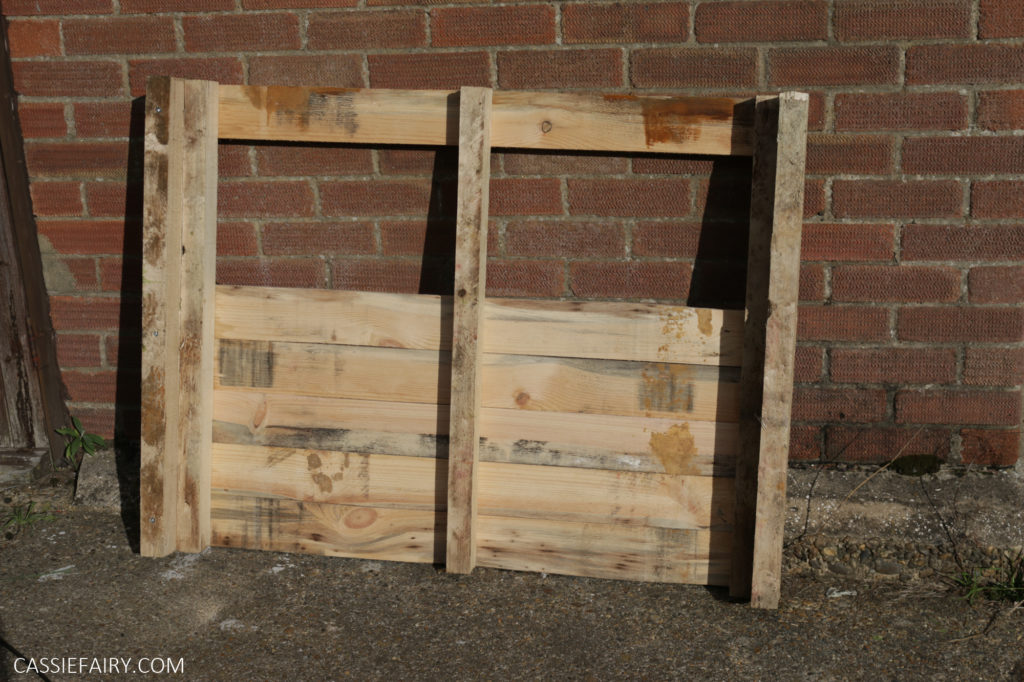
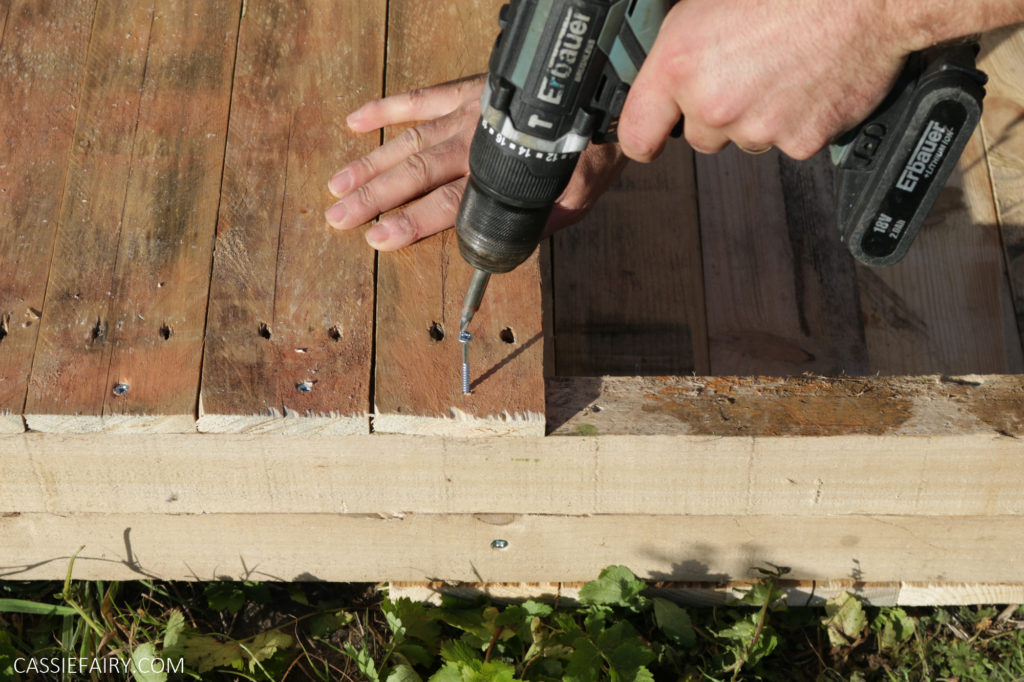
Use two corner supports as the uprights for the back of the bar. Cover the bottom half of the bar (which will be visible from the inside) with 5 planks and screw them into the side supports.
STEP 4
Add one plank across the top for structural integrity and add a central support beam (above). Leaving the gap on the back gives you access to add the fairy lights later.
STEP 5
Turn the back over and nail five planks to the top to form the front top section of the bar (where the light-up sign will be).
STEP 6
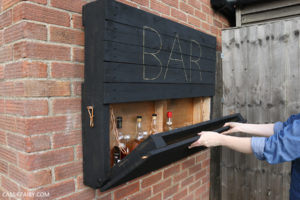
To make the drop-down front, measure from the base of the bar to the plank section at the top. Cut 2 side supports to this measurement and attach planks. Set the supports a few inches in from the ends of the planks so that the piece will fit inside the corner supports of the bar when closed.
STEP 7
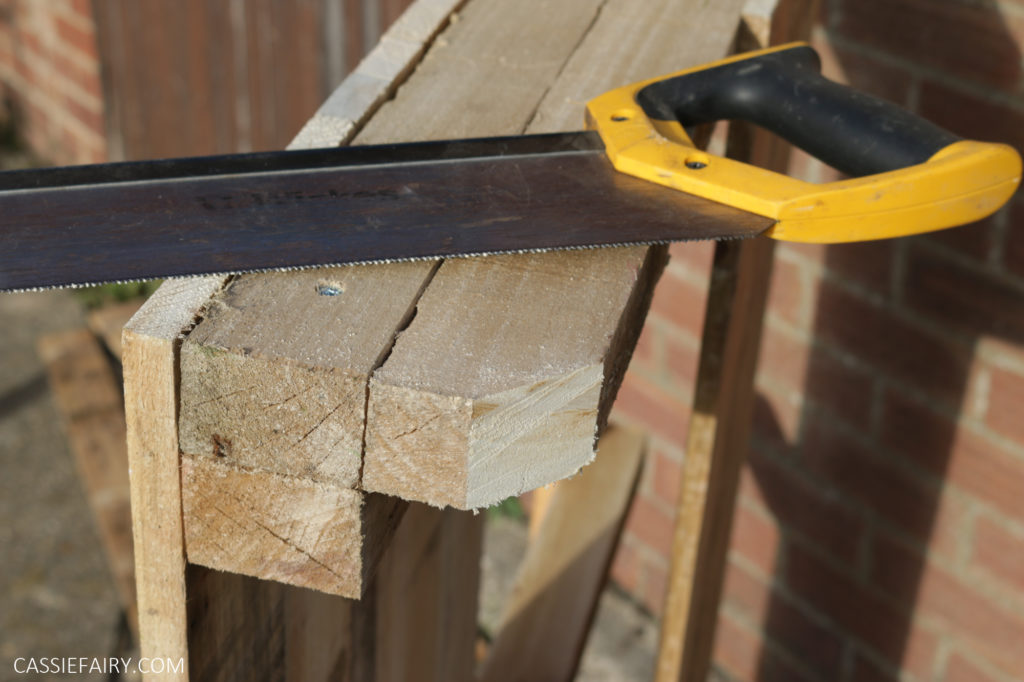
Turn your attention back to the main frame of the bar. Cut an angle across the corner supports at the bottom front of the bar.
STEP 8
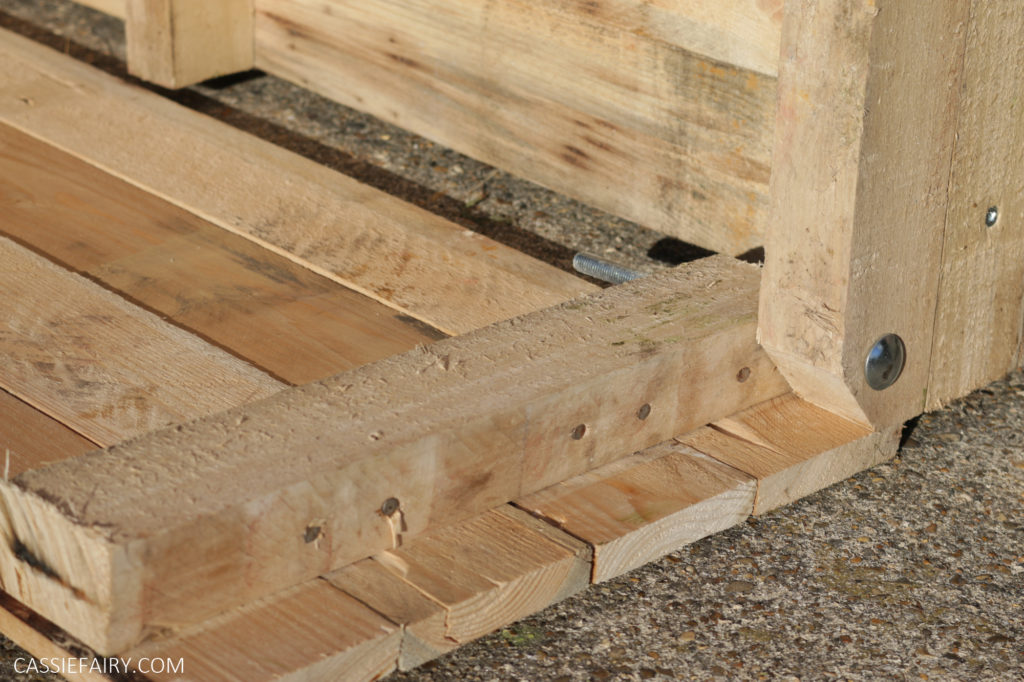
Place the drop-down section in position on the front of the bar. Then drill through from the outside of the corner support and into the supporting beam of the drop-down support. Add a coach bolt through the hole to act as the hinge. Repeat on the other side.

STEP 9
Use more planks to clad the inside of the drop-down section.
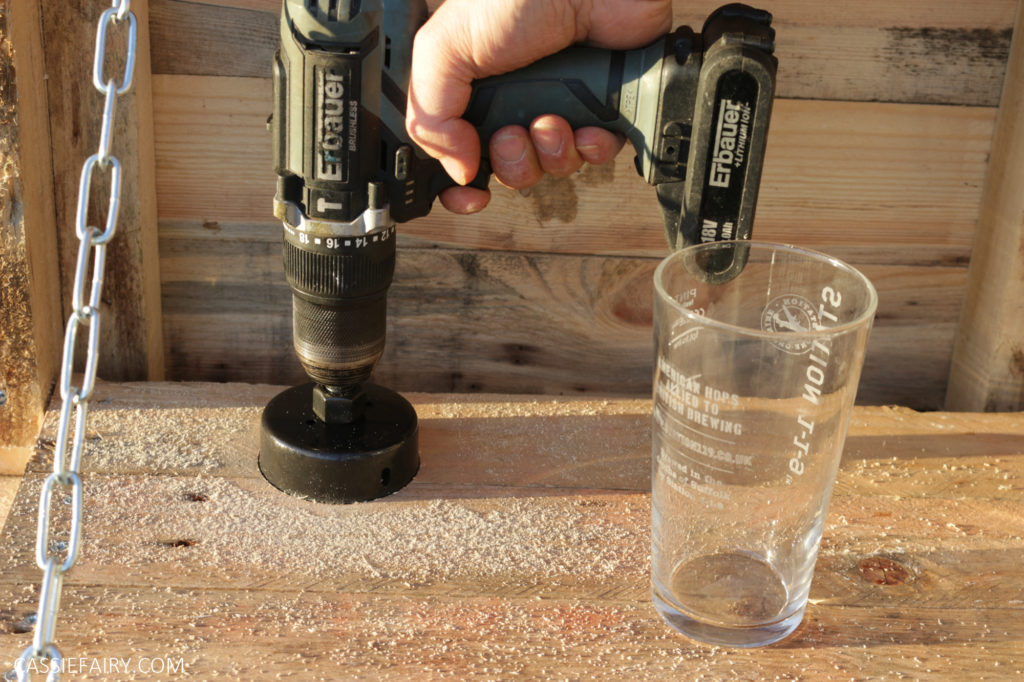
STEP 10
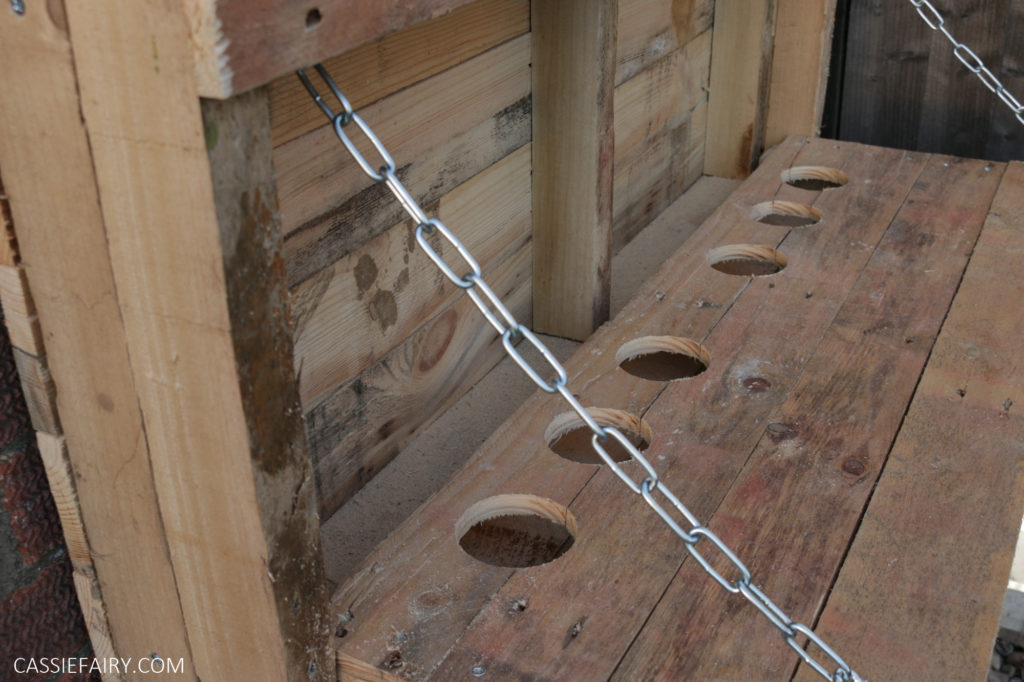
If you like, you can use a holesaw to cut holes along the back plank of the drop-down section. The holes can be used to hold glasses or bottles.
STEP 11
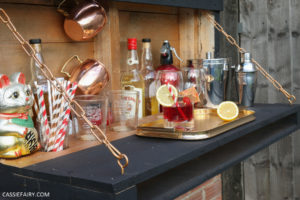
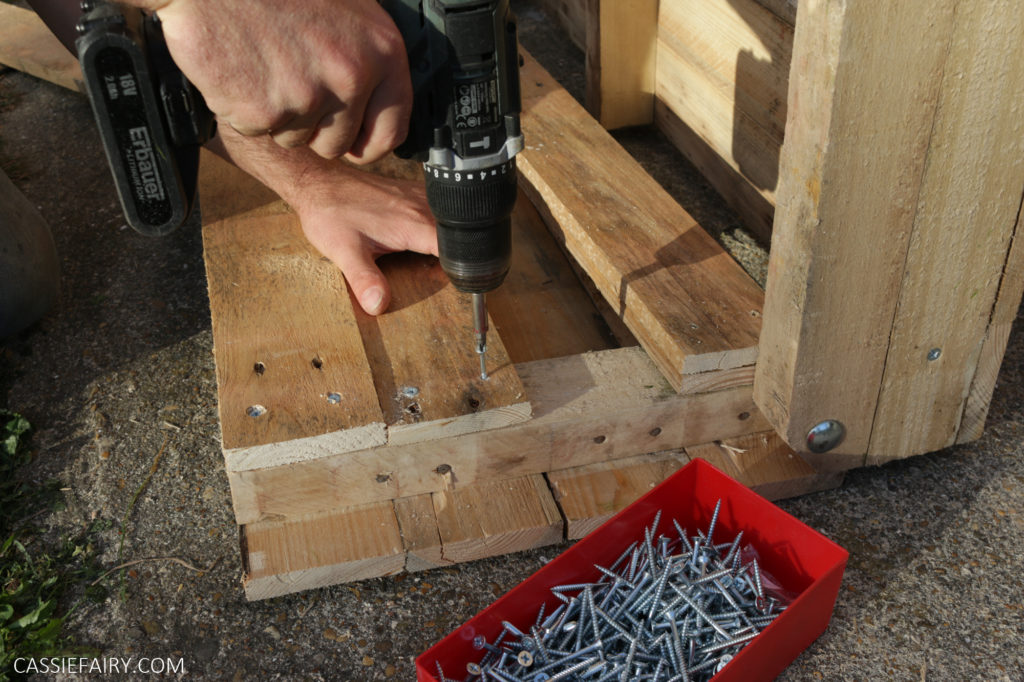
With the drop-down section closed, you’ll see a gap on the underside of the bar, which you can fill with a support beam or plank. This creates a ‘shelf’ behind the drop-down section when it is open.
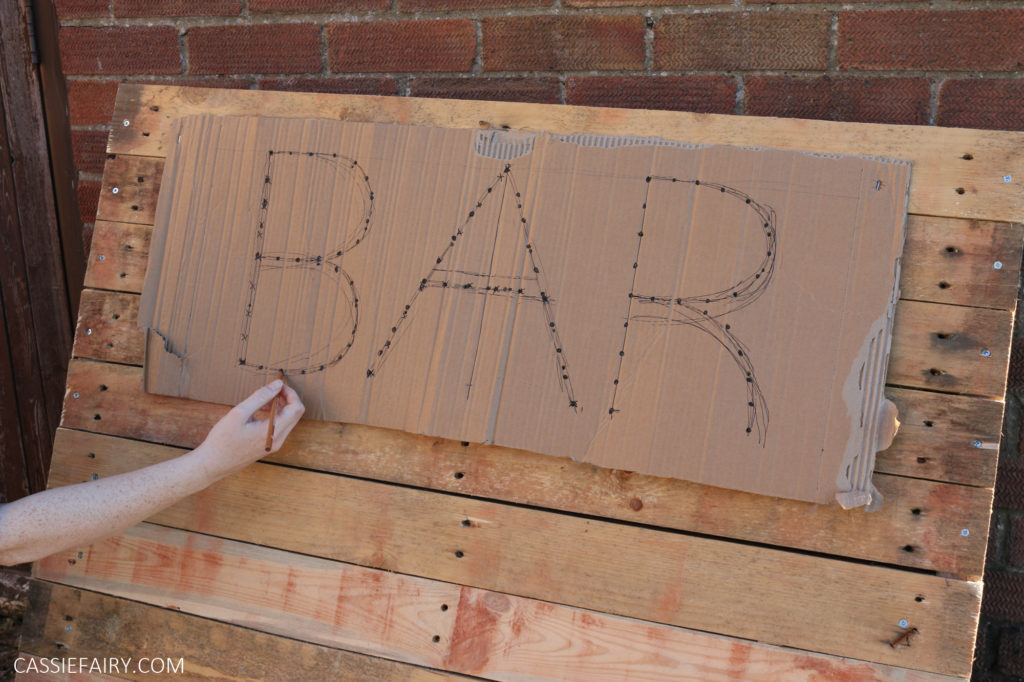
STEP 12
Mark out the lettering for “BAR” and make a mark where each of the fairy lights will be postioned.
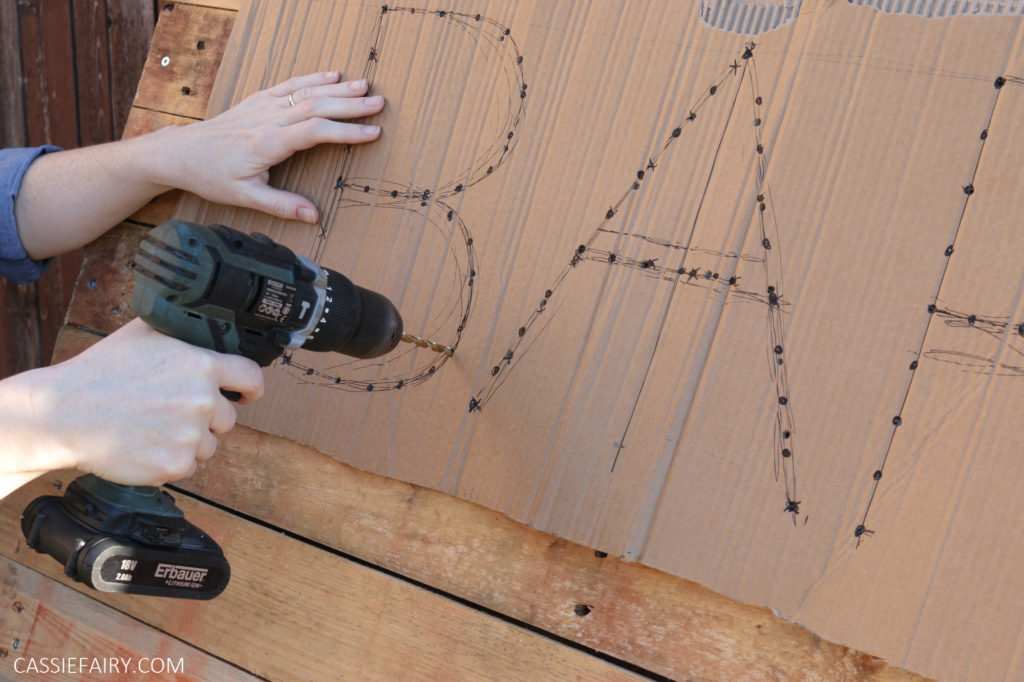
STEP 13
Use a drill bit slightly larger than the fairy light bulbs to drill holes through front of the bar.
STEP 14
Use an eye hook and carabiner to attach a chain to the inside edge of the corner support. Add another eye hook and carabiner to the front of the drop-down section and clip on the chain.
STEP 15
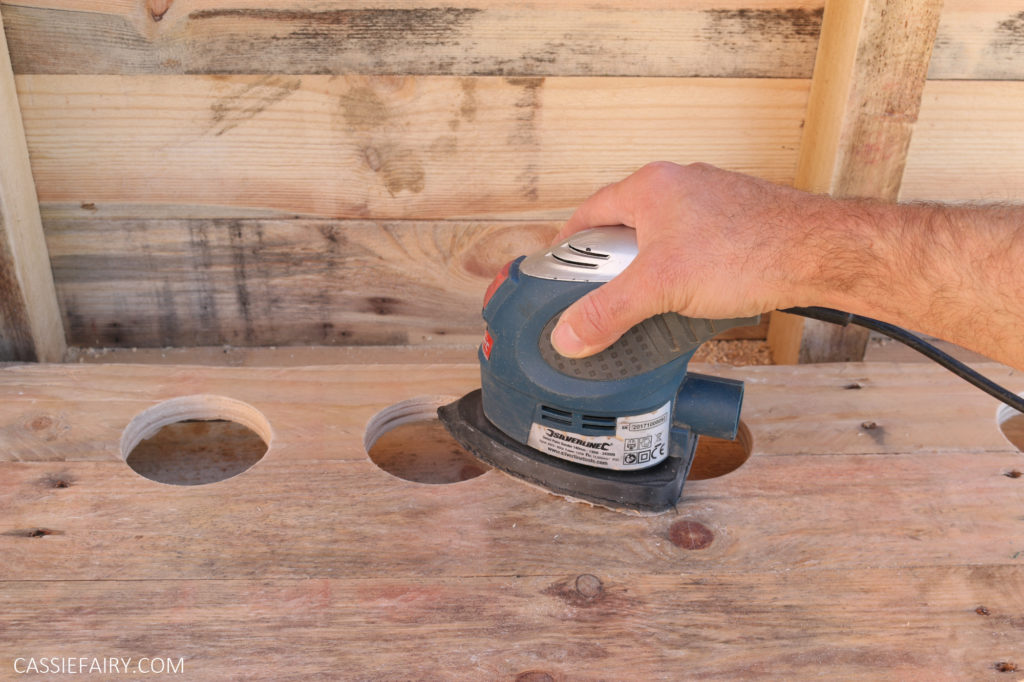
Use an electric sander to sand the entire bar so that the wood is smooth and here are no rough edges.
STEP 16
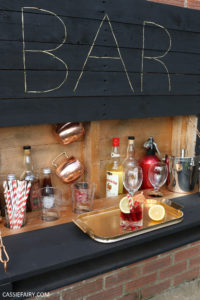
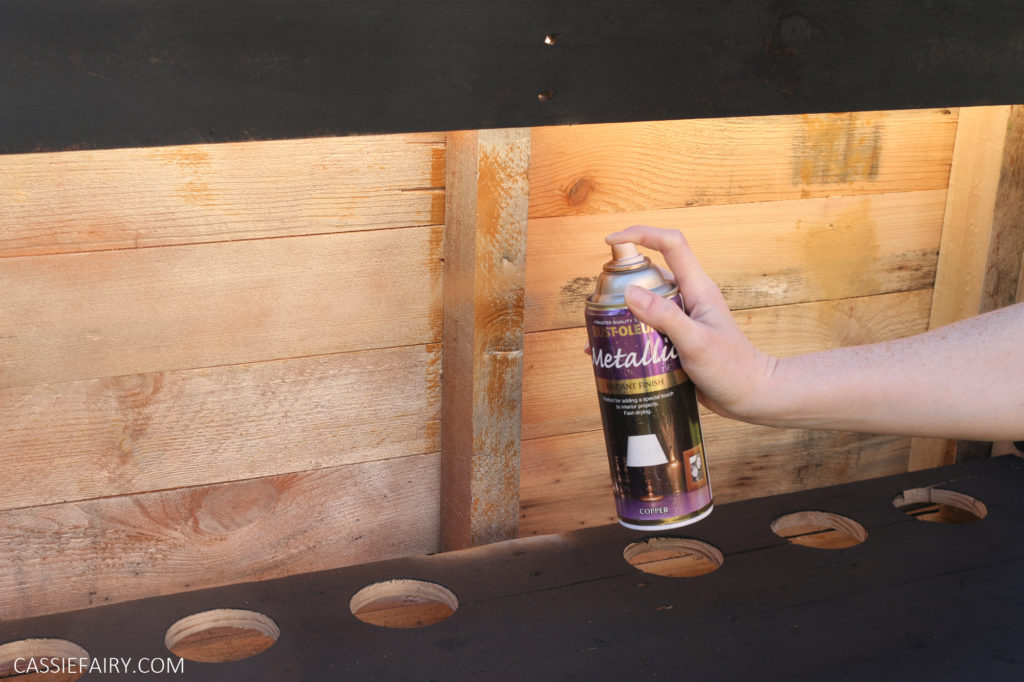
You can then paint the exterior with garden paint. We decided to paint the inside with copper spray paint to contrast against the black.
STEP 17
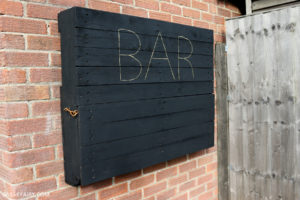
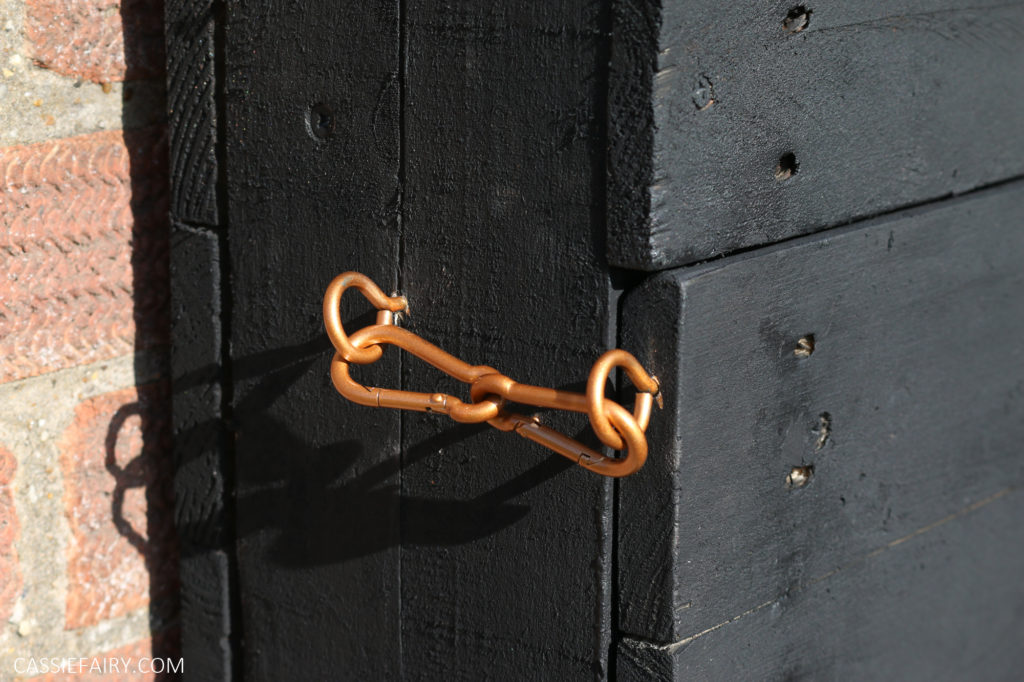
To close the bar, add 2 eye hooks on each side and close with 2 carabiners.
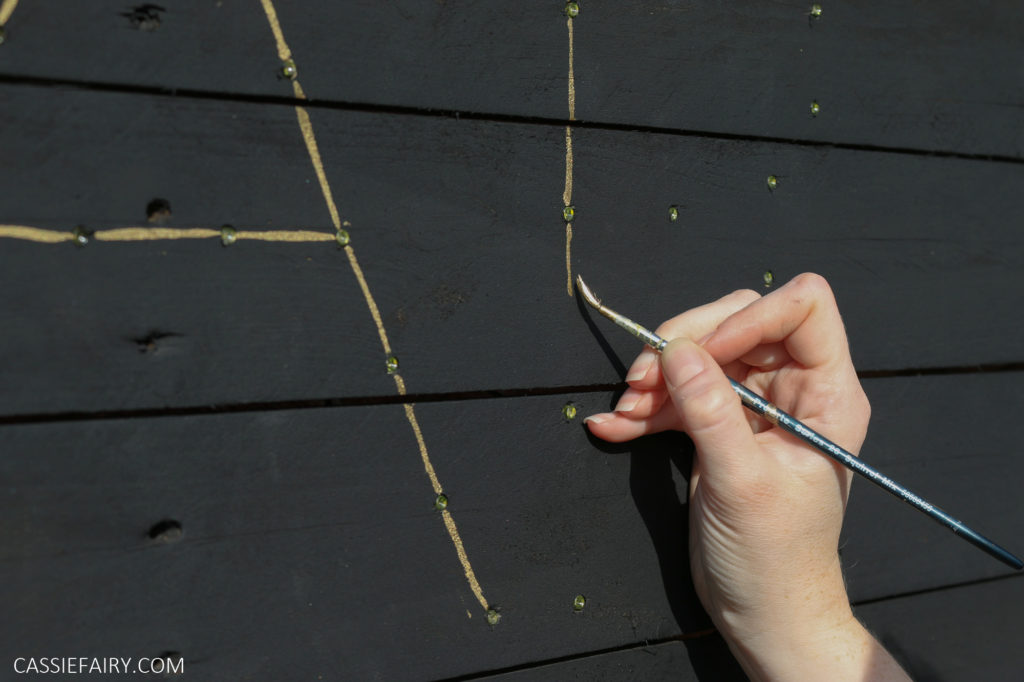
STEP 18
Paint a line of contrasting paint between the holes to spell out the word ‘BAR’. ThenWorking from the back of the bar, poke the solar-powered fairy lights through the holes. Position the charging solar panel on the top of the bar.
Use the correct mounting method for your wall to hang the bar up – and enjoy!

PIN THIS PROJECT FOR LATER
NEW POST:
YouTube video will be published soon!


38 responses
Ahh good luck with it Aaron! 🙂
Love this bar and hopefully I can get mine finished taken over a years haha, got to step 7 & 8 tonight and messed it open doesn’t open put the bolt in the wrong place, need to replace the wood section and attempt again. Fingers crossed
Aw brill, thanks Jessica – I’m glad you liked it! 🙂
This is awesome!! I look forward to binging the rest of your posts.
Hi Casey, actually I didn’t get the fairy lights online so I don’t have a link for this specific set of lights – I think they were just low-cost solar-powered ones from B&M or QD. Hope this helps and good luck with your project 🙂
Hi Cassie! Do you have a link for the fairy lights you used?
Hi Eileen, thanks for getting in touch. We used huge coach bolts to act as a hinge on both bottom corners. The hole goes through the side of the bar and into the supporting beam on the planked ‘bar’ surface. So basically, put the front of the bar in place as if it is ‘closed’ then drill the hole through both pieces from the side (pic in step 8 is taken while the whole bar is upside down). We then pushed (well, hammered!) a huge bolt through the hole from the outside on both sides. Then secured the bolt with the nut on the inside of the drop-down bar surface.
Hi Cassie! Trying to make the bar but struggling with the hinge mechanism! Do you have any further details or photos on how to do it? Thanks!!
Hi Matt, We didn’t film the making of the outdoor bar at the time, we just took some photos of the steps 🙂
Is there a video?
Hi Bonnie, yes it’s just an outdoor bar made from pallets so if it rains it will get wet! It’s not for storing items – just take glasses and drinks outside when you want to use it and bring them indoors afterwards. Hope this helps 🙂
Does this not leak water into it?
Yes, please do – I’d love to see a photo Vicky! 🙂
Thanks Kev! We used some really strong screw eye bolts through the back of the pallet bar and then used sturdy carabiners to clip it to the screw-in masonry anchor hooks 🙂
Thank you! I’ll let you know how it goes!
This looks great, can I ask what hooks you have used to mount it to the wall?
Thanks
Hi Vicky, I’m so happy to hear you’re going to have a go at building your own pallet bar! The final measurements will depend on what pallets you are able to get hold of from building yards or skips etc (be sure to ask permission before taking anything) – just work with the wood you have available and make it whatever size you like! 🙂
Hi Cassie!
I love this so much! I’m just planning what we need and where ours will go and it would be so useful to get the final measurements if that’s ok? Especially for ordering the pallets xx
Hi Natalie, I used some solar-powered fairy lights that I got from Waltons in the colour ‘amber’ – although you could use any solar-powered lights or outdoor Christmas lights 🙂
Hi Dave, behind the top portion of the pallet bar is where the cables for the solar fairy lights are – we drilled holes through the word ‘BAR’ and poked the fairy lights through from behind to illuminate it and the solar panel is on the top of the unit. If you don’t wish to add lights, you could always adjust the project to suit your needs 🙂 Thanks!
OK found the pink link, but I don’t get why you haven’t utilised the space above the fold down section for storage?
Hi Cassie, I signed up for the newsletter but can’t see the plans? Does the top half lift up too? If not, does it have a purpose?
Brilliant idea! Can I just ask what lights you used to make the Bar sign?
Hi Rich, we used some really sturdy screw eye bolts through the back of the frame and then used carabiners to clip it to the wall hook. That way we can unclip it when not in use and store it in the garage over winter. Hope this helps 🙂
Hi Cassie, could you provide a photo or link to the hooks you used to mount to the wall please as I really like the way you did it. I can find the wall hook just not the hook attached the the wood frame. Many Thanks
Nice DIY pallet bar. I will build like this too and besides I will build a koi pond
Hi Philip, there’s a link to the step-by-step project photos in the blog post 🙂
how do i get the plans for illuminated pallet bar please
Perfect thank you
Hi Stewart, sure thing – you can mount the bar any way you like to suit wall/surface you have. For our brick wall, we drilled and screwed into the brickwork to provide an anchoring point on which to hook the fixings that we added to the back of the pallet bar 🙂
This is amazing !!
Can I ask how you mounted it on the wall? It didn’t mention in the guide and don’t understand how the too would screw in with the planks on the front.
Thanks
Wow, that sounds really unique! 🙂
I was shown your post of the bar ,which got my brain working overtime,so I decided to build a wall mounted BBQ. It is now mounted to the wall,and just a couple of things to add,and I’ll be done. It was built out of an old carpenters carry case,and bits and pieces from my shed.
Thanks so much Olivia, I’m glad you like it! 🙂
OMG this is fabbbbb can’t wait to make always wanted my own mini bar without take up room or been costly this is brilliant I look forward to more of your great ideas thank you
Hey, this would work great in a small apartment as a fold out desk/work station too!
Thanks so much Claire, I’m really chuffed that you like it! I’m a bit of a lucky cat collector – this one is my biggest 🙂
I love the bar it looks fabulous. I love the touches of copper too!. Being from Hong Kong originally I’m also a sucker for a lucky cat!