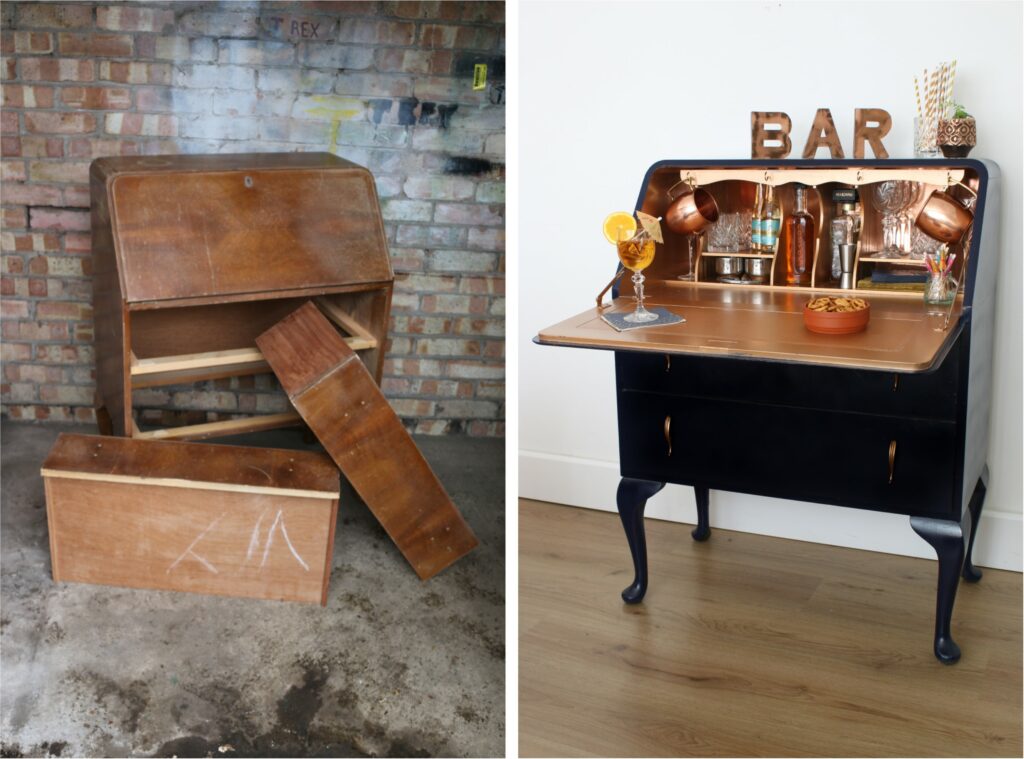
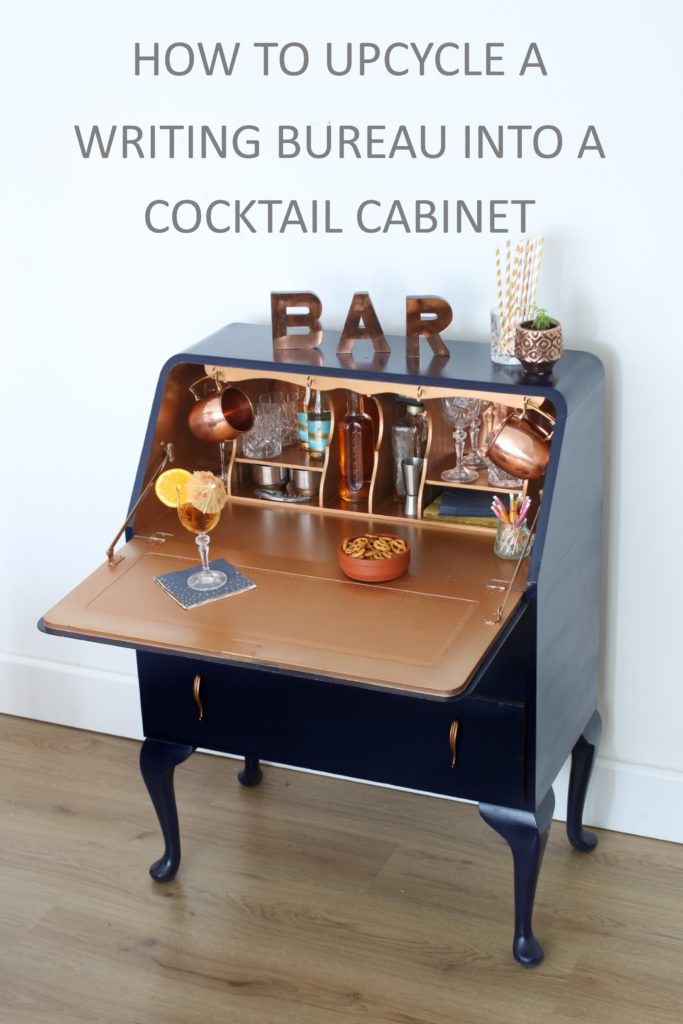
If you want to create a space to serve party drinks and mix up cocktails, why not DIY your own drinks cabinet? It’s easy to turn an unwanted piece of furniture into a glitzy cocktail cabinet so keep an eye out for second-hand cupboards and desks to upcycle.
Here I’ve used a battered old writing bureau and have given it a Great Gatsby-style makeover with plenty of copper, cut glass and inky indigo paint. Here’s how you can do it yourself…
If you’ve got an old piece of furniture that has seen better days in your garage or if you’ve spotted a second-hand item at the charity shop or car boot sale, it could be just the thing for this project. You can upcycle any king of cabinet or cupboard by simply adding legs and using the top as your surface for preparing drinks. A writing desk like this one works well because you can easily close it up when it’s not in use and it still looks like a lovely piece of furniture. Or why not revamp an existing drinks cabinet with a fresh coat of paint and some glittering backboards to give it a little extra sparkle for the festive season?
Step 1
Start your makeover by preparing the surface. If your furniture is scratched and stained like our writing desk, you’ll need to give it a light sanding first. Wipe away any dust with a lint-free cloth and remove any handles or fixings from the unit.

Step 2
Give the entire cabinet a coat of primer to create a surface that will allow your top-coat to adhere well. Be sure to spray paint the print inside the cabinet too, if you’re planning to paint the interior.
Step 3
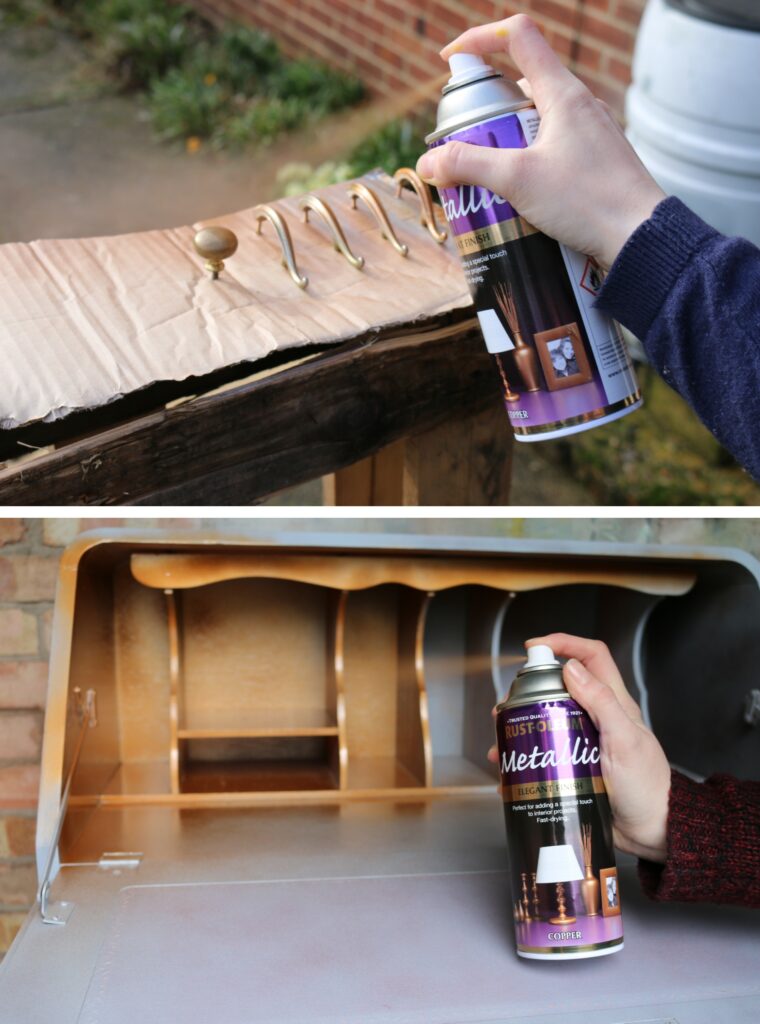
Choose your colours for the cabinet – here we’ve used a dark inky indigo blue for the exterior and a metallic copper for the interior. Use the interior colour to spray paint the handles, knobs and fixings for the cabinet and allow to dry.
Step 4
Give the interior of the unit a couple of fine coats of metallic spray paint. If your unit has cubby holes like our writing desk, make sure you spray into all the corners, sides and nooks. Move around the unit to check that the interior is painted thoroughly before moving on to step 5.
Step 5
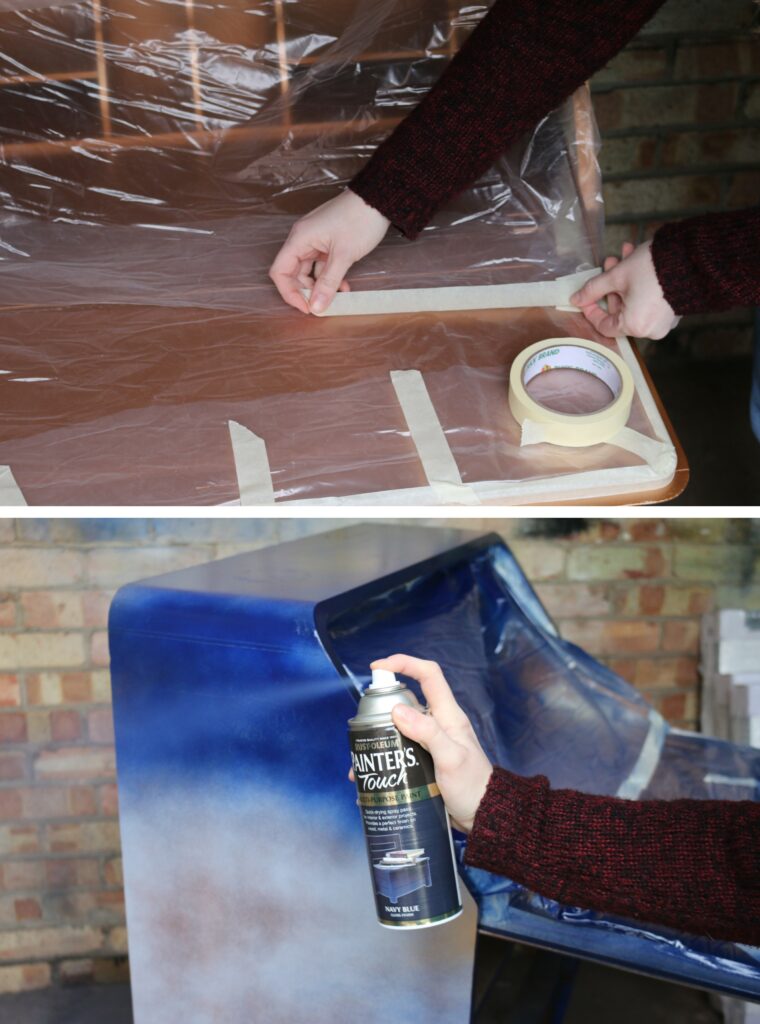
Once the interior has been completely painted and has dried, it’s time to move on to painting the exterior. Mask off the painted interior using masking tape around the edges and use newspaper or old carrier bags to completely cover the interior.
Step 6
You can now move on to spray painting the exterior of the cabinet. You will need to add multiple layers to get the depth of colour so it’s better to add lots of fine coats of spray paint rather than one thick coat, which might drip. Allow the paint to dry thoroughly between each coat of paint and keep going until you are happy with the finished colour.
Step 7
While the painted unit is drying, you can turn your attention to a little bit of decoration for your new cocktail cabinet. Here, we’ve used low-cost cardboard craft letters to spell out the word ‘BAR’ and have spray-painted the letters with the same indigo blue paint. Again, you’ll need to use multiple coats of paint and make sure you’ve painted between all the gaps in the letters.
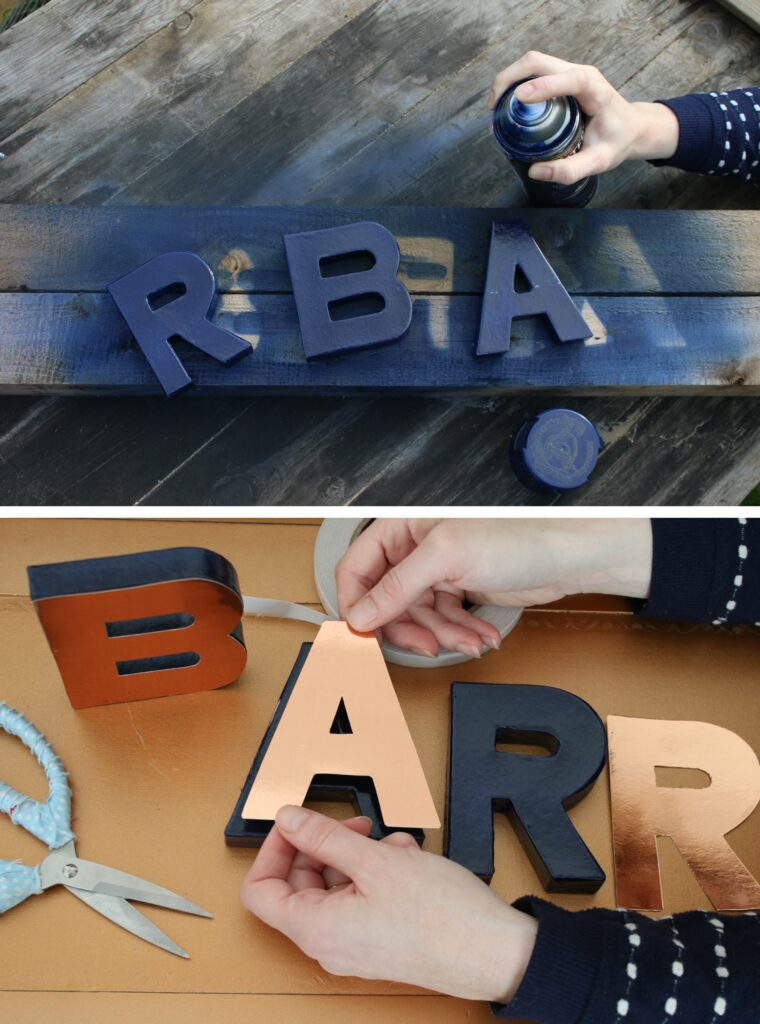
Step 8
When the paint is dry you can move on to adding a glitzy metallic front to the letters if you wish. We’ve used mirror card in copper (around £1 for a pack of 10 A4 sheets), which we will be using as the back-board for the unit. To create the BAR sign, we’ve traced around the cardboard letters and cut out the shape with scissors and a craft knife. Then, simply used double-sided tape or glue to stick the metallic layer onto the front of the letters.
Step 9
Once the painted unit is fully dry, you can peel off the masking tape and newspaper to reveal your beautifully painted unit. You can, of course, use the cabinet as a writing desk whenever you’re not using it as a drinks cabinet, and painting it is a great way to make an old piece of furniture fit into your existing décor.
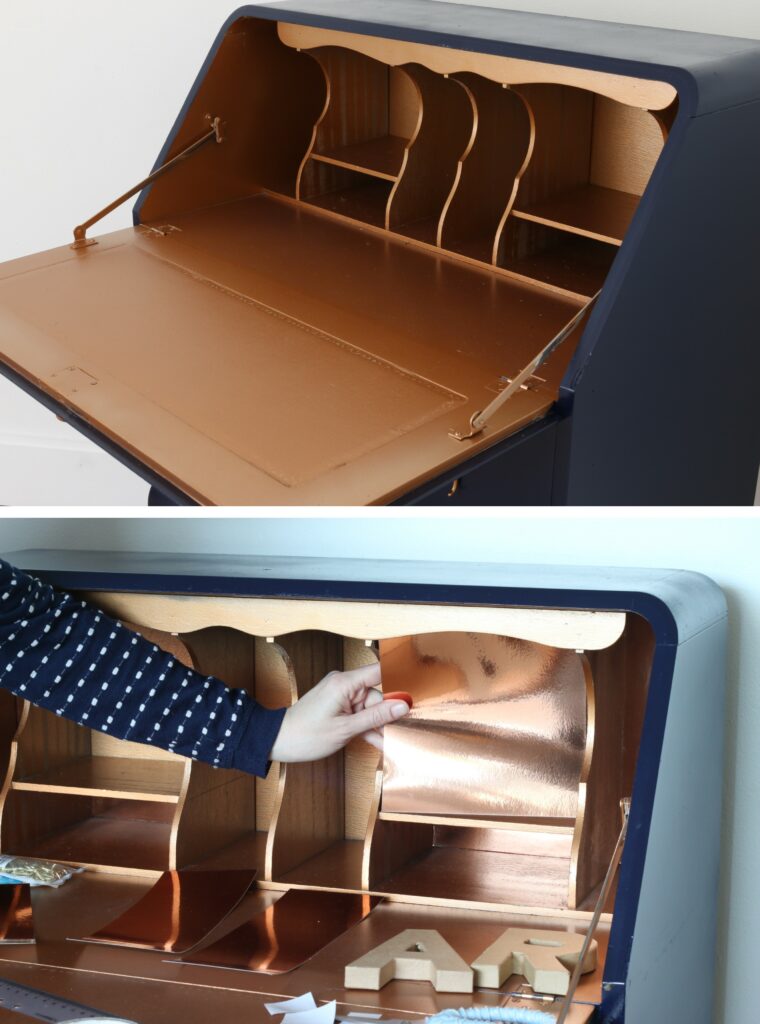
Step 10
To add a reflective, mirrored effect on the back-board (that most retro drinks cabinets had!) you can use the mirror card in a shade that matches the paint you’ve used for the interior. Simply cut the cardboard to the right sizes to fit into the cubby holes in the writing desk. Then add glue or double-sided tape to the back and stick in place on the back of the unit. This ups the glam-factor no end, and instantly turns the unit into a drinks cabinet.
Step 11
The final step is to screw some hooks into the top of the unit, on the inside. This will provide space to hang copper mugs or cocktail-making utensils, like a sieve or muddler. Make sure that the depth of the screw thread on the hooks isn’t too deep for the thickness of the unit, otherwise the tip may pierce through the top from below. In this instance, we were able to screw into the decorative trim on the writing desk cubby holes.
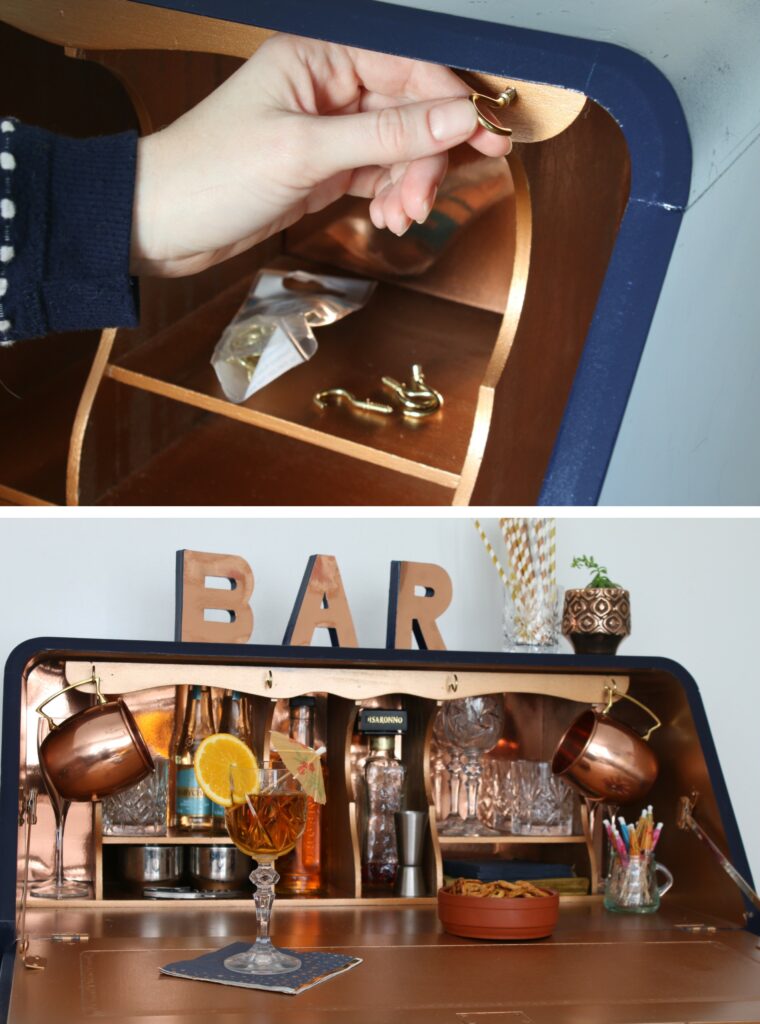
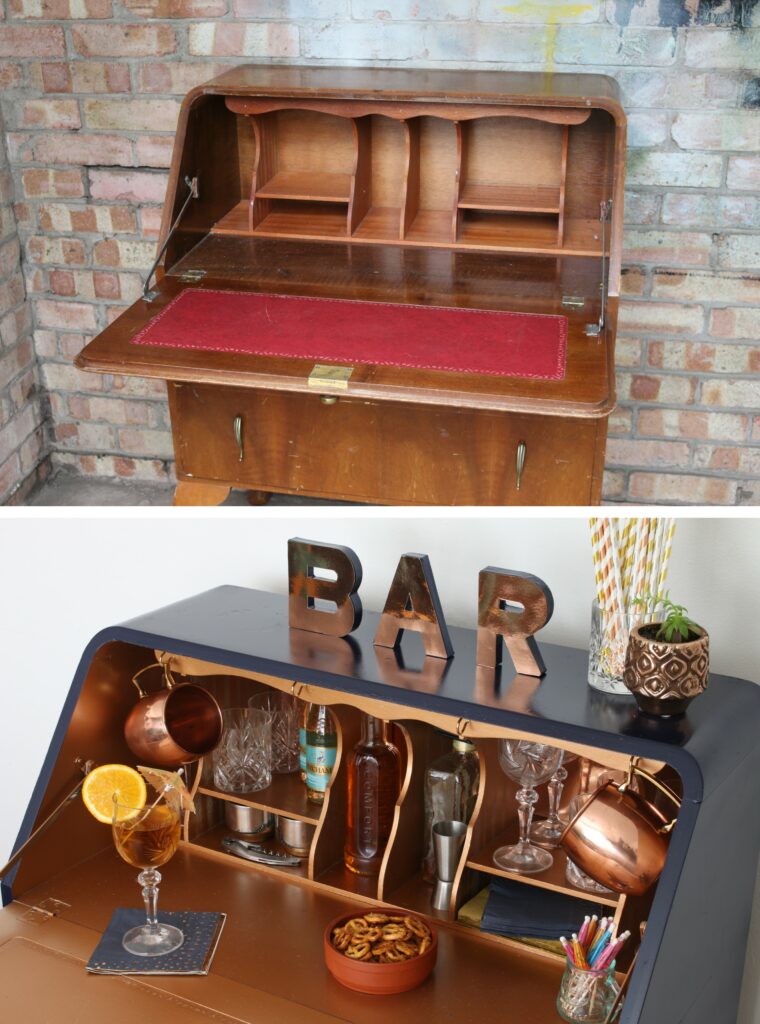
The only thing left to do now is fill the cabinet with cut-glass goblets and tumblers to give it that glamourous Great Gatsby feel. I’ve hung copper Moscow Mule mugs on the hooks and have added vintage paper umbrellas. You can use the cubby holes to hod spirits, a cocktail shaker, metallic paper straws and indigo napkins. Choose accessories that coordinate with the colours of your cabinet for a cohesive party look.
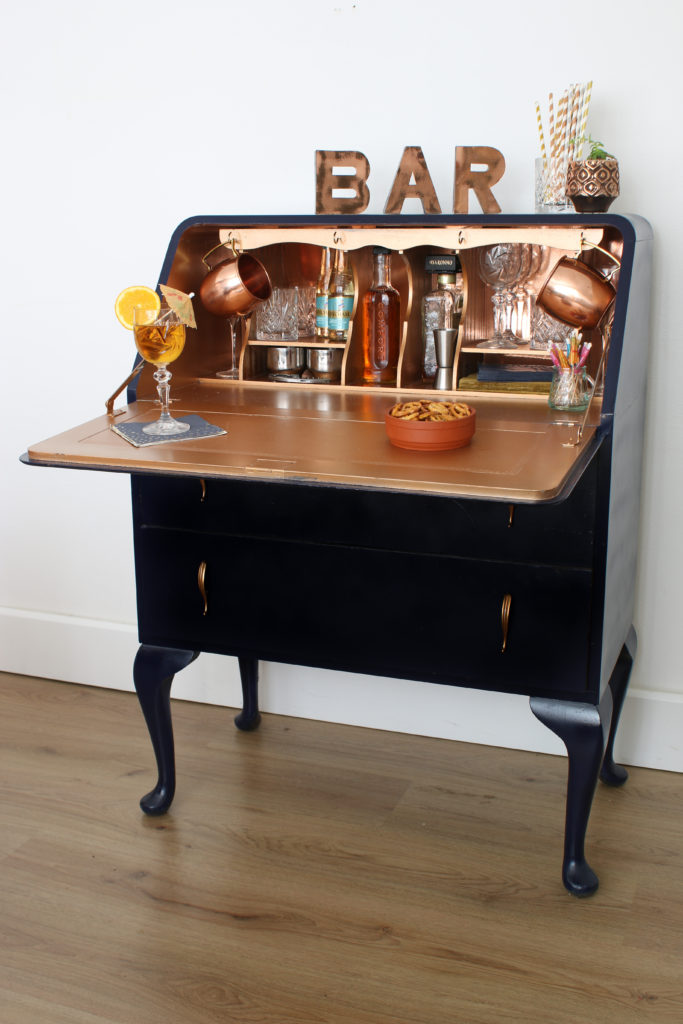
Et voila! You’ve got a gorgeous space to mix up drinks and serve party snacks. With the upcoming festive season there’s sure to be plenty of times that you’ll use your glitzy new unit to prepare Christmas cocktails or to pour out a glass of bubbly to see in the New Year.
Let me know if you have a go at DIYing this glamourous drinks cabinet for yourself and keep an eye on the blog for my tablescape project: How to decorate a party table on a budget, Great Gatsby style!
Pin it for later


9 responses
Hiya, no I didn’t sell it, the cabinet is still here in my home 🙂
Did you sell it? If so, about how much did you make off the finshed product?
Hi, I didn’t make any changes to the interior of the drawers but I did paint inside them with the same copper spray paint so they look really luxe! Good luck with your project and I’d love to see it when you’ve finished! 🙂
Did you make any changes to the drawers? I love this, and want to do the same. thanks
Aw, thanks so much, that’s really kind! 🙂
Looks great!!
Why don’t you just leave it as a antique why ruin it
Aww, thank you so much! 😀
Wow that’s awesome!!