Today I am delighted to be able to share a DIY tutorial with you from the expert jewellery-making team at The Bead Shop in Manchester. This family run company has been supplying beads, teaching workshops and sharing craft techniques for more than 20 years, so if anyone can make me into a pro jewellery maker, it’s them! I’ve never tried creating my own jewellery before, but now that I have more space in my newly-organised workshop, I want to make time to try out new crafts and beading has always intrigued me.
I remember getting a library book about beads when I was a young girl and I kept renewing that library loan for about a year because I loved it so much, and that fascination is still with me today. If you’ve never been to The Bead Shop in Manchester, I suggest you make a trip there and be inspired by all they have to offer. In the meantime, the fabulous workshop team have sent me this DIY tutorial for making handmade beaded rings, which can be kept simple or ornate. These beautiful rings are easy to make and they make great gifts for friends and family. Here’s how to make a few different types of simple rings.
Stretchy slider ring
Large slider beads have more than one hole to act as a bridge between strands of smaller beads. String one side or hole of a two hole slider bead onto about 35 centimetres of stretch cord, using a beading needle to help. Put the slider bead in the centre of the cord, and then use the needle to add five seed beads to each end of the cord. Join the two ends of the cord together by putting one single seed bead on both strands. They should connect in a V shape. Keep adding beads until there are between 10 and 15, depending on their size. Then, separate the two strands again and string five beads onto each tail. Thread each tail through the open side of the slider, stringing them from the outside toward the inside. Pull the strands through the slider make a circle and complete the stretchy ring. Finally, tie knots and trim the cord with scissors. Use clear jewellery cement on the knots for extra security. Just make sure to let the glue dry for about an hour before wearing your new ring.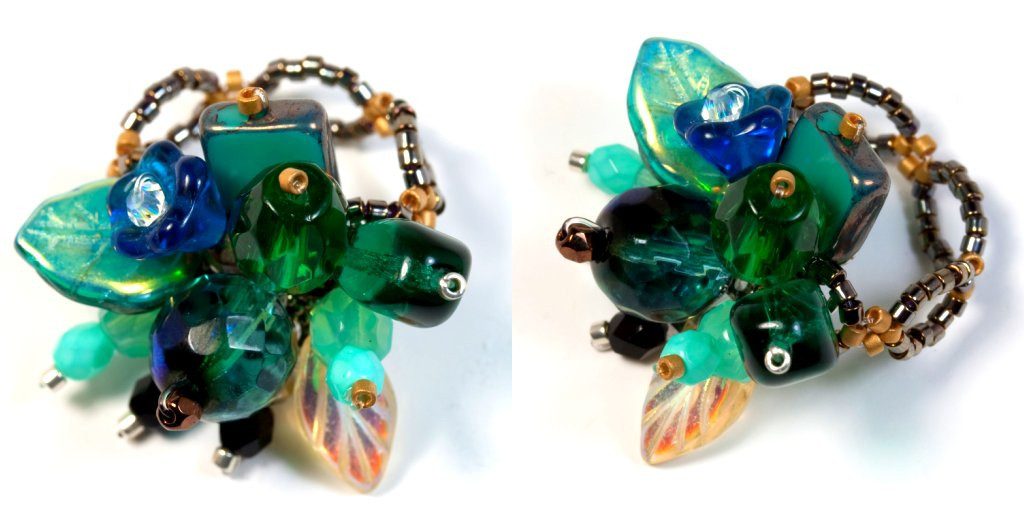
Wide ring
With about 20 centimetres of the same stretchy cord used in the slider ring, people can make a beaded ring that looks like a wide band with or without a pattern. Use a beading needle to add three seed beads, and then bring them toward the middle of the thread. Put a fourth bead through one end of the thread and pass the other end through it as well. Pull both ends of the thread tight to bring all four beads together. Next, put another bead through each end of the thread. Add a third bead, cross the thread, and then keep repeating the steps until the band is long enough. Close the ring band by crossing the two ends of the thread through the first bead. Finally, tie knots, cut the excess thread, and use jewellery cement if desired.
Wire wrapped ring
Not all rings need to be covered with beads. Leave some beading wire exposed and bend it into different shapes and styles to make a wire wrapped ring. Use a six to eight millimetre wide round or faceted bead as the centerpiece. Thread it onto a piece of thin wire about 30 centimetres long. Use wire cutters to cut the wire to the correct length. To make sure the ring is the right size, wrap the wire around a ring mandrel or your finger three to four times. A mandrel is a thin metal or plastic rod that gradually becomes thicker so people can use it to measure ring sizes. Gather the wire underneath the bead and keep it as close to the bead as possible. Use a rubber, plastic, or rawhide mallet and chain nose pliers to shape the wire. Then, remove any excess wire.
I am so pleased that I could share this tutorial with you today and I hope you’ve been inspired to have a go at making your own jewellery at home. Take a class at The Bead Shop in Manchester for more wonderful ring, bracelet, and necklace tips and ideas. Classes include all equipment and materials needed, like Swarovski crystal beads, glass beads, tools, and more. Best of all, everyone who attends gets a 10 percent discount after each class. The Bead Shop has been in operation since 1993. Their experienced experts will help you choose the best equipment and materials for your beading project. They can even provide a teacher and materials for parties so please visit soon!
This blog post is a guest post advertisement feature. The pink links in this post indicate a sponsored link 🙂


