What do you get for your niece and nephew when you’re the coolest aunt in the world? Why, handmade teddy bears, of course! It’s a project that has been six months in the making and now the bears are finally wrapped up and flying across the sea to reach the little ones in Ireland in time for Christmas. Now, I’m not saying that it took me six months to actually sew the bears – the making part is quite a simple process (thanks to the new teddy bear pattern I used) – it was all the planning that went into the project that took some time and I’ll tell you why.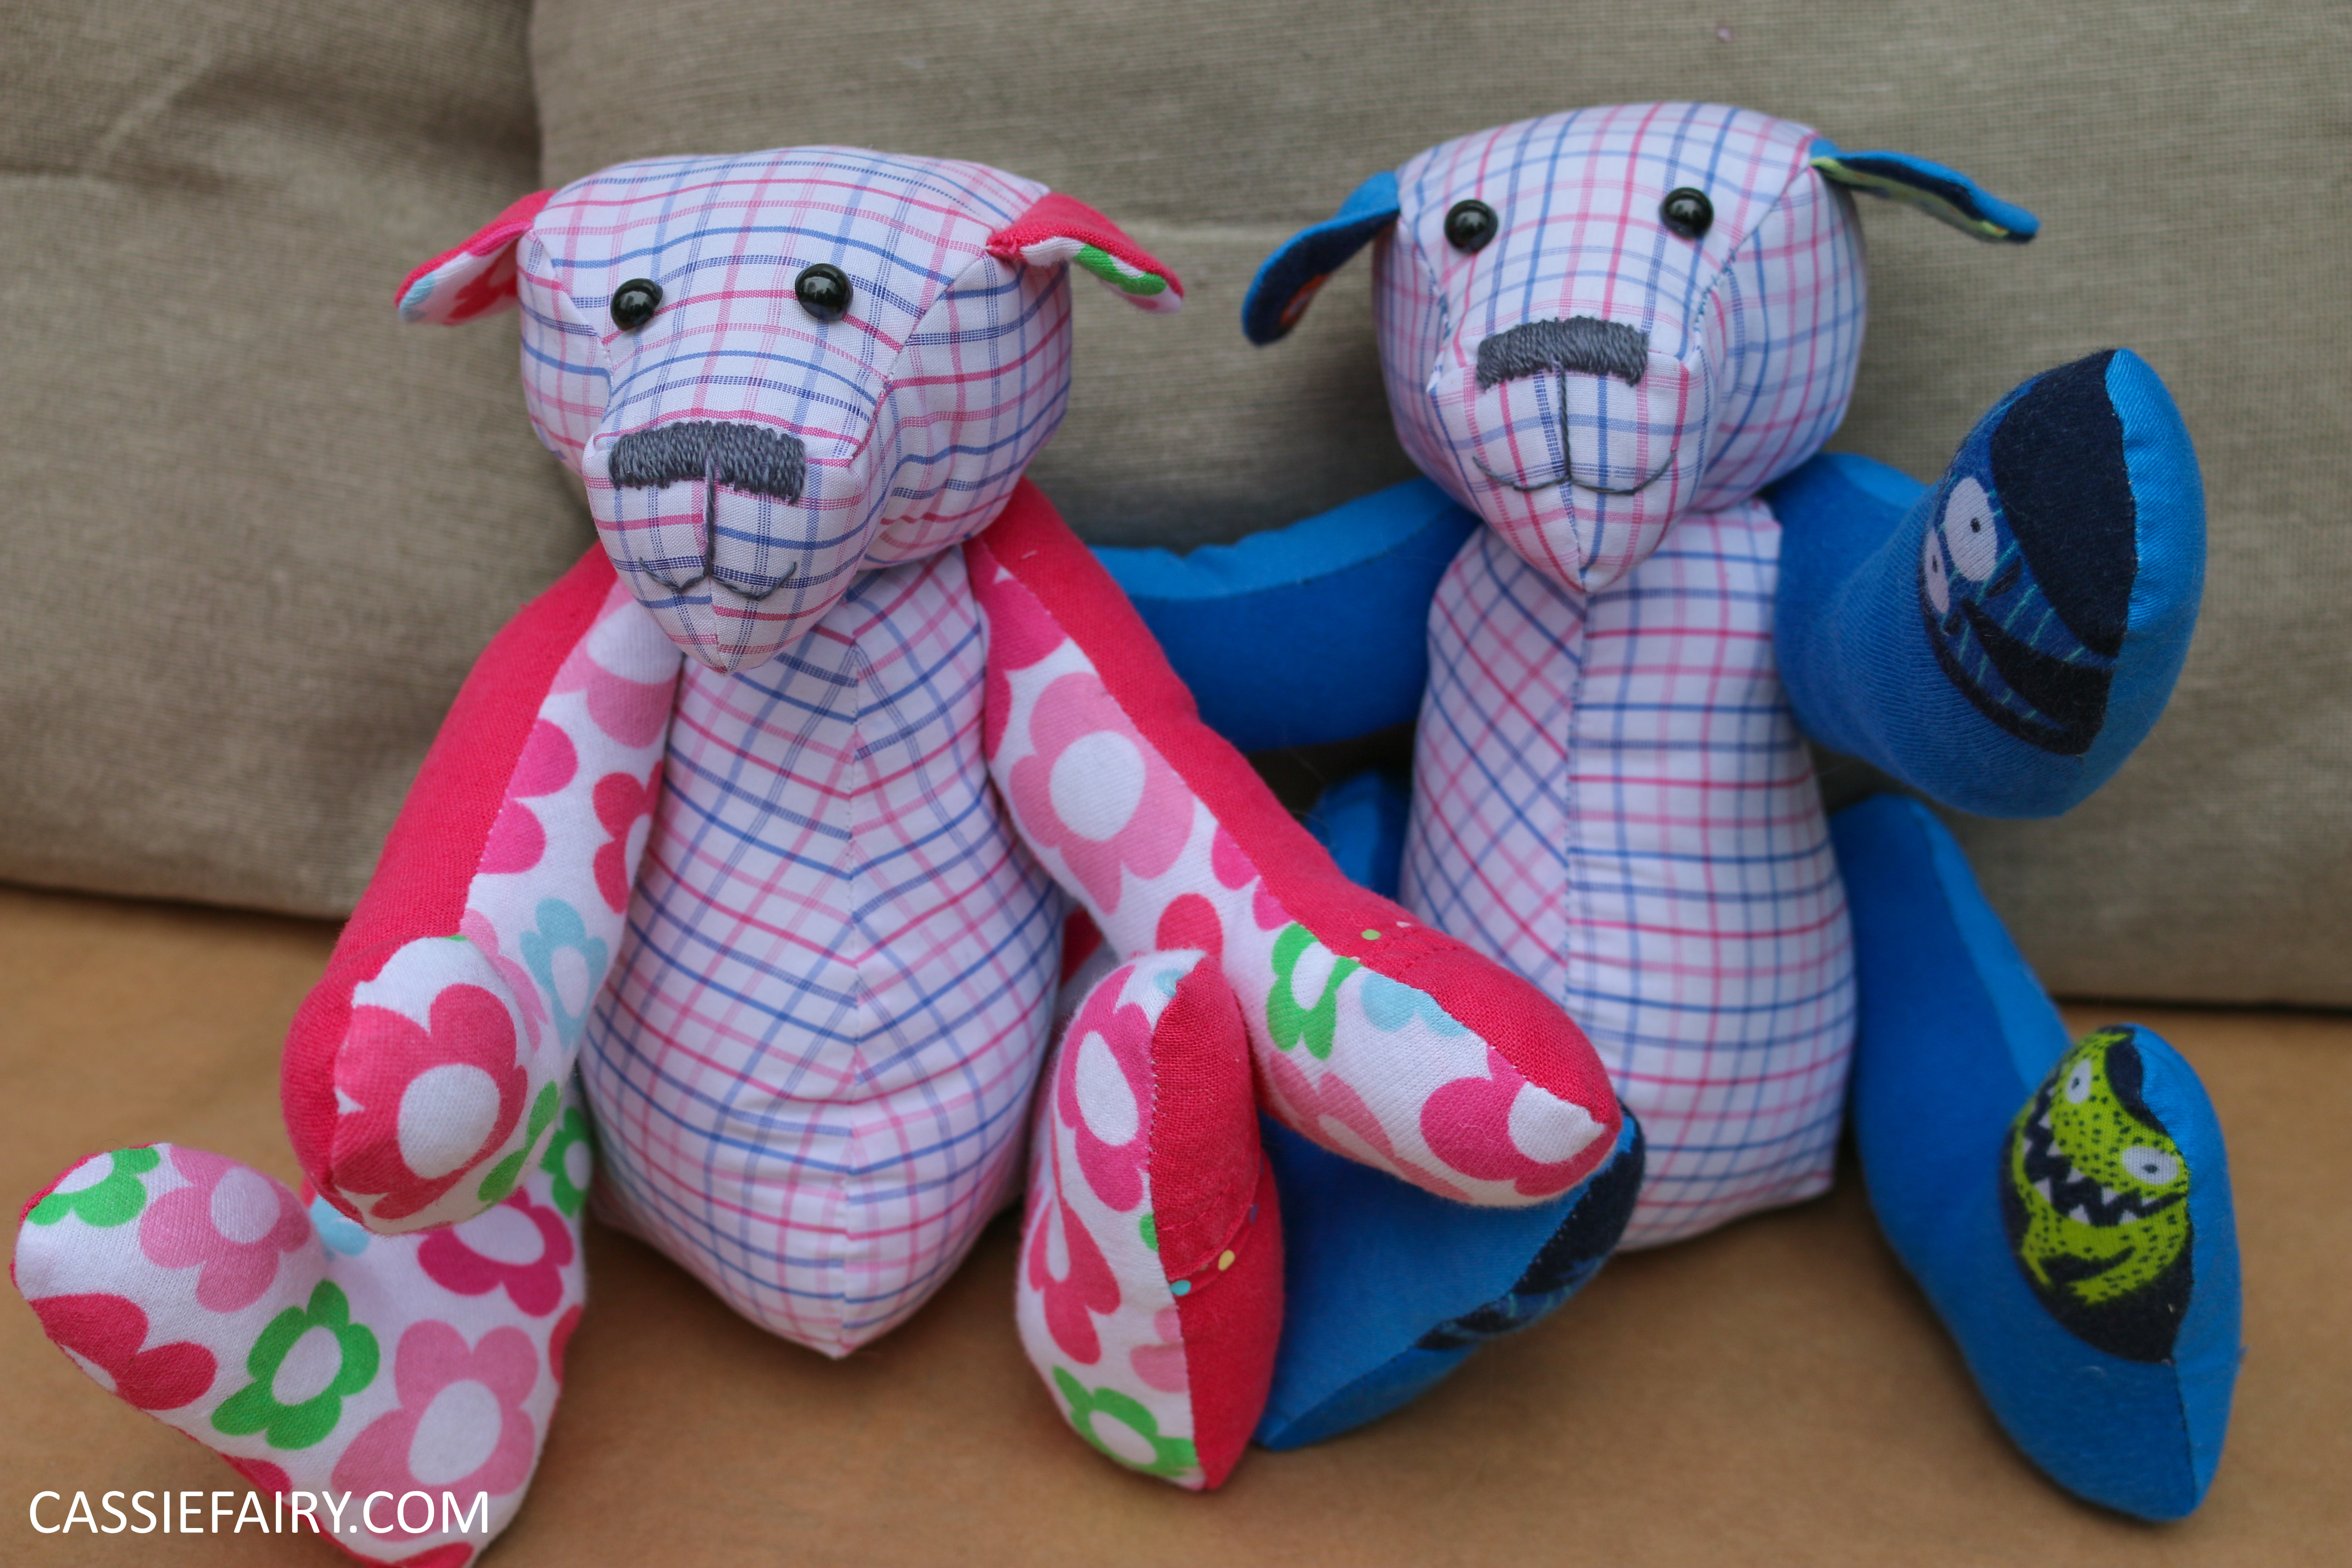
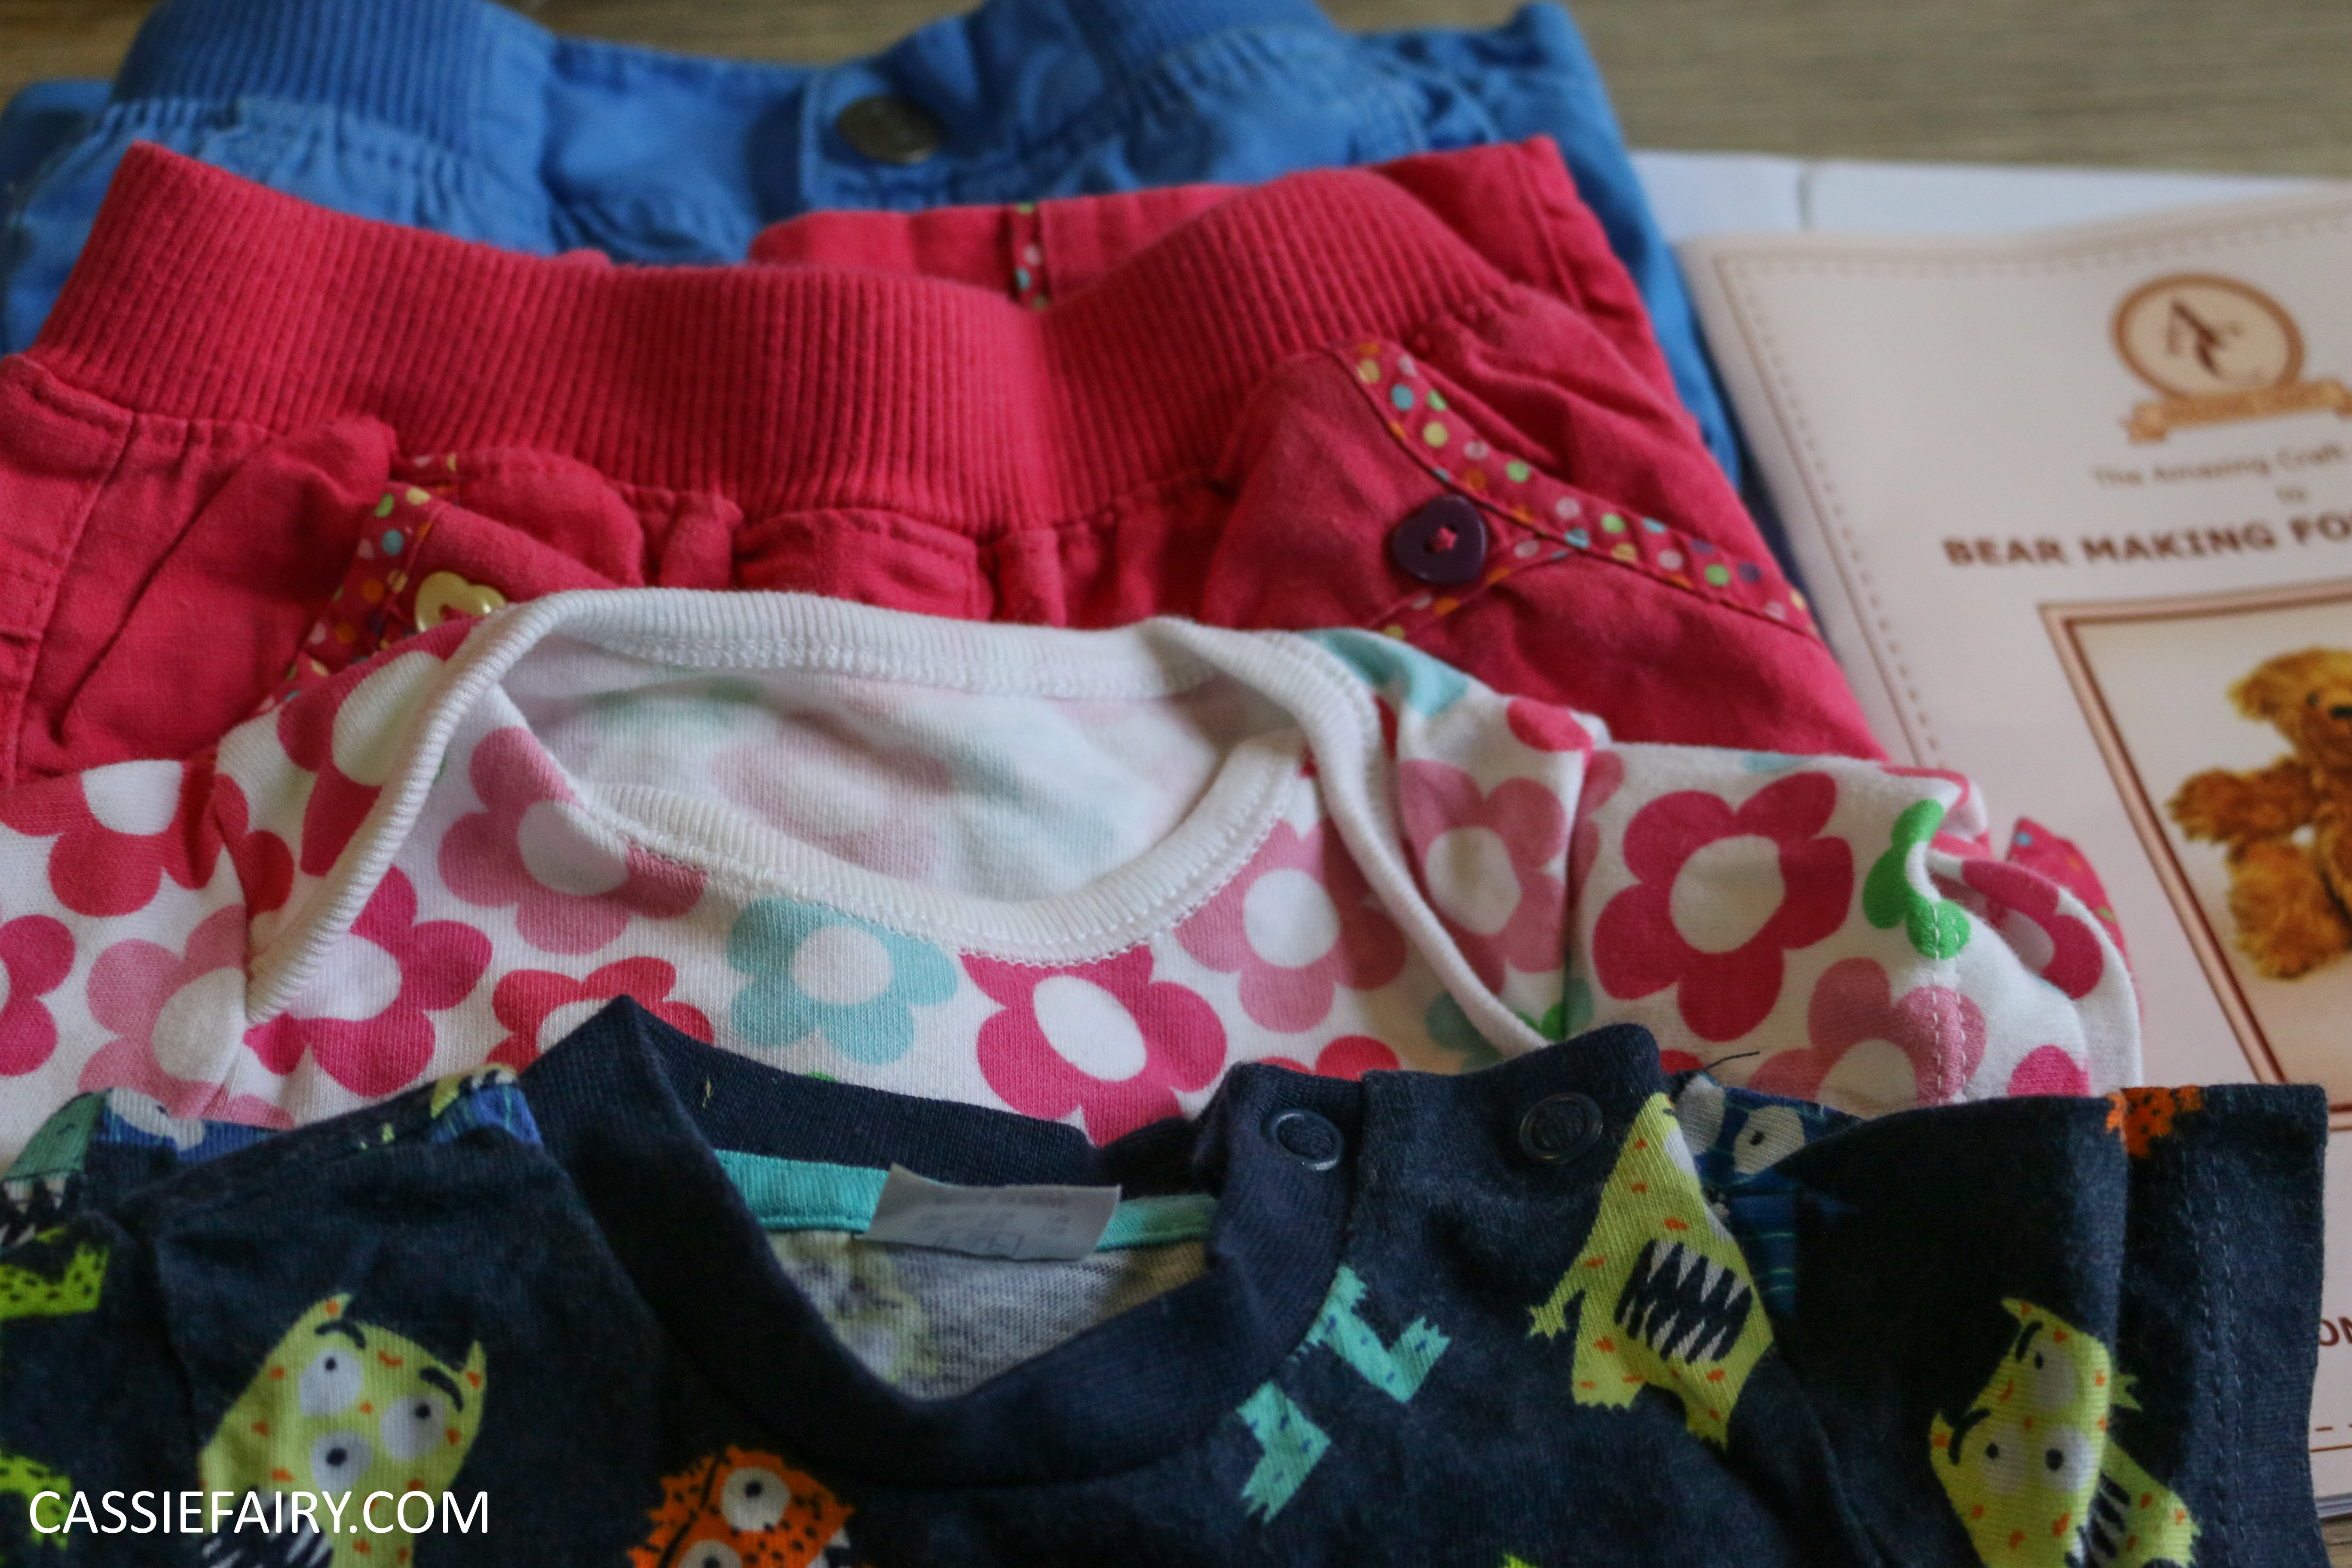
 I wanted to make a keepsake teddy bear for each child, so I wanted them to be personalised in some way. When I first opened up the pattern I could see that it would be easy to make the pattern pieces fit into items of my niece and nephew’s clothing. What better way to make a personalised gift, and to upcycle old clothing at the same time, than to reuse their baby clothes to make them a teddy bear? I asked their parents if they had any of their tiny outfits left, and luckily they did. I asked for non-stretchy items (which are easier to sew) and it wasn’t long before a bag of baby clothes arrived.
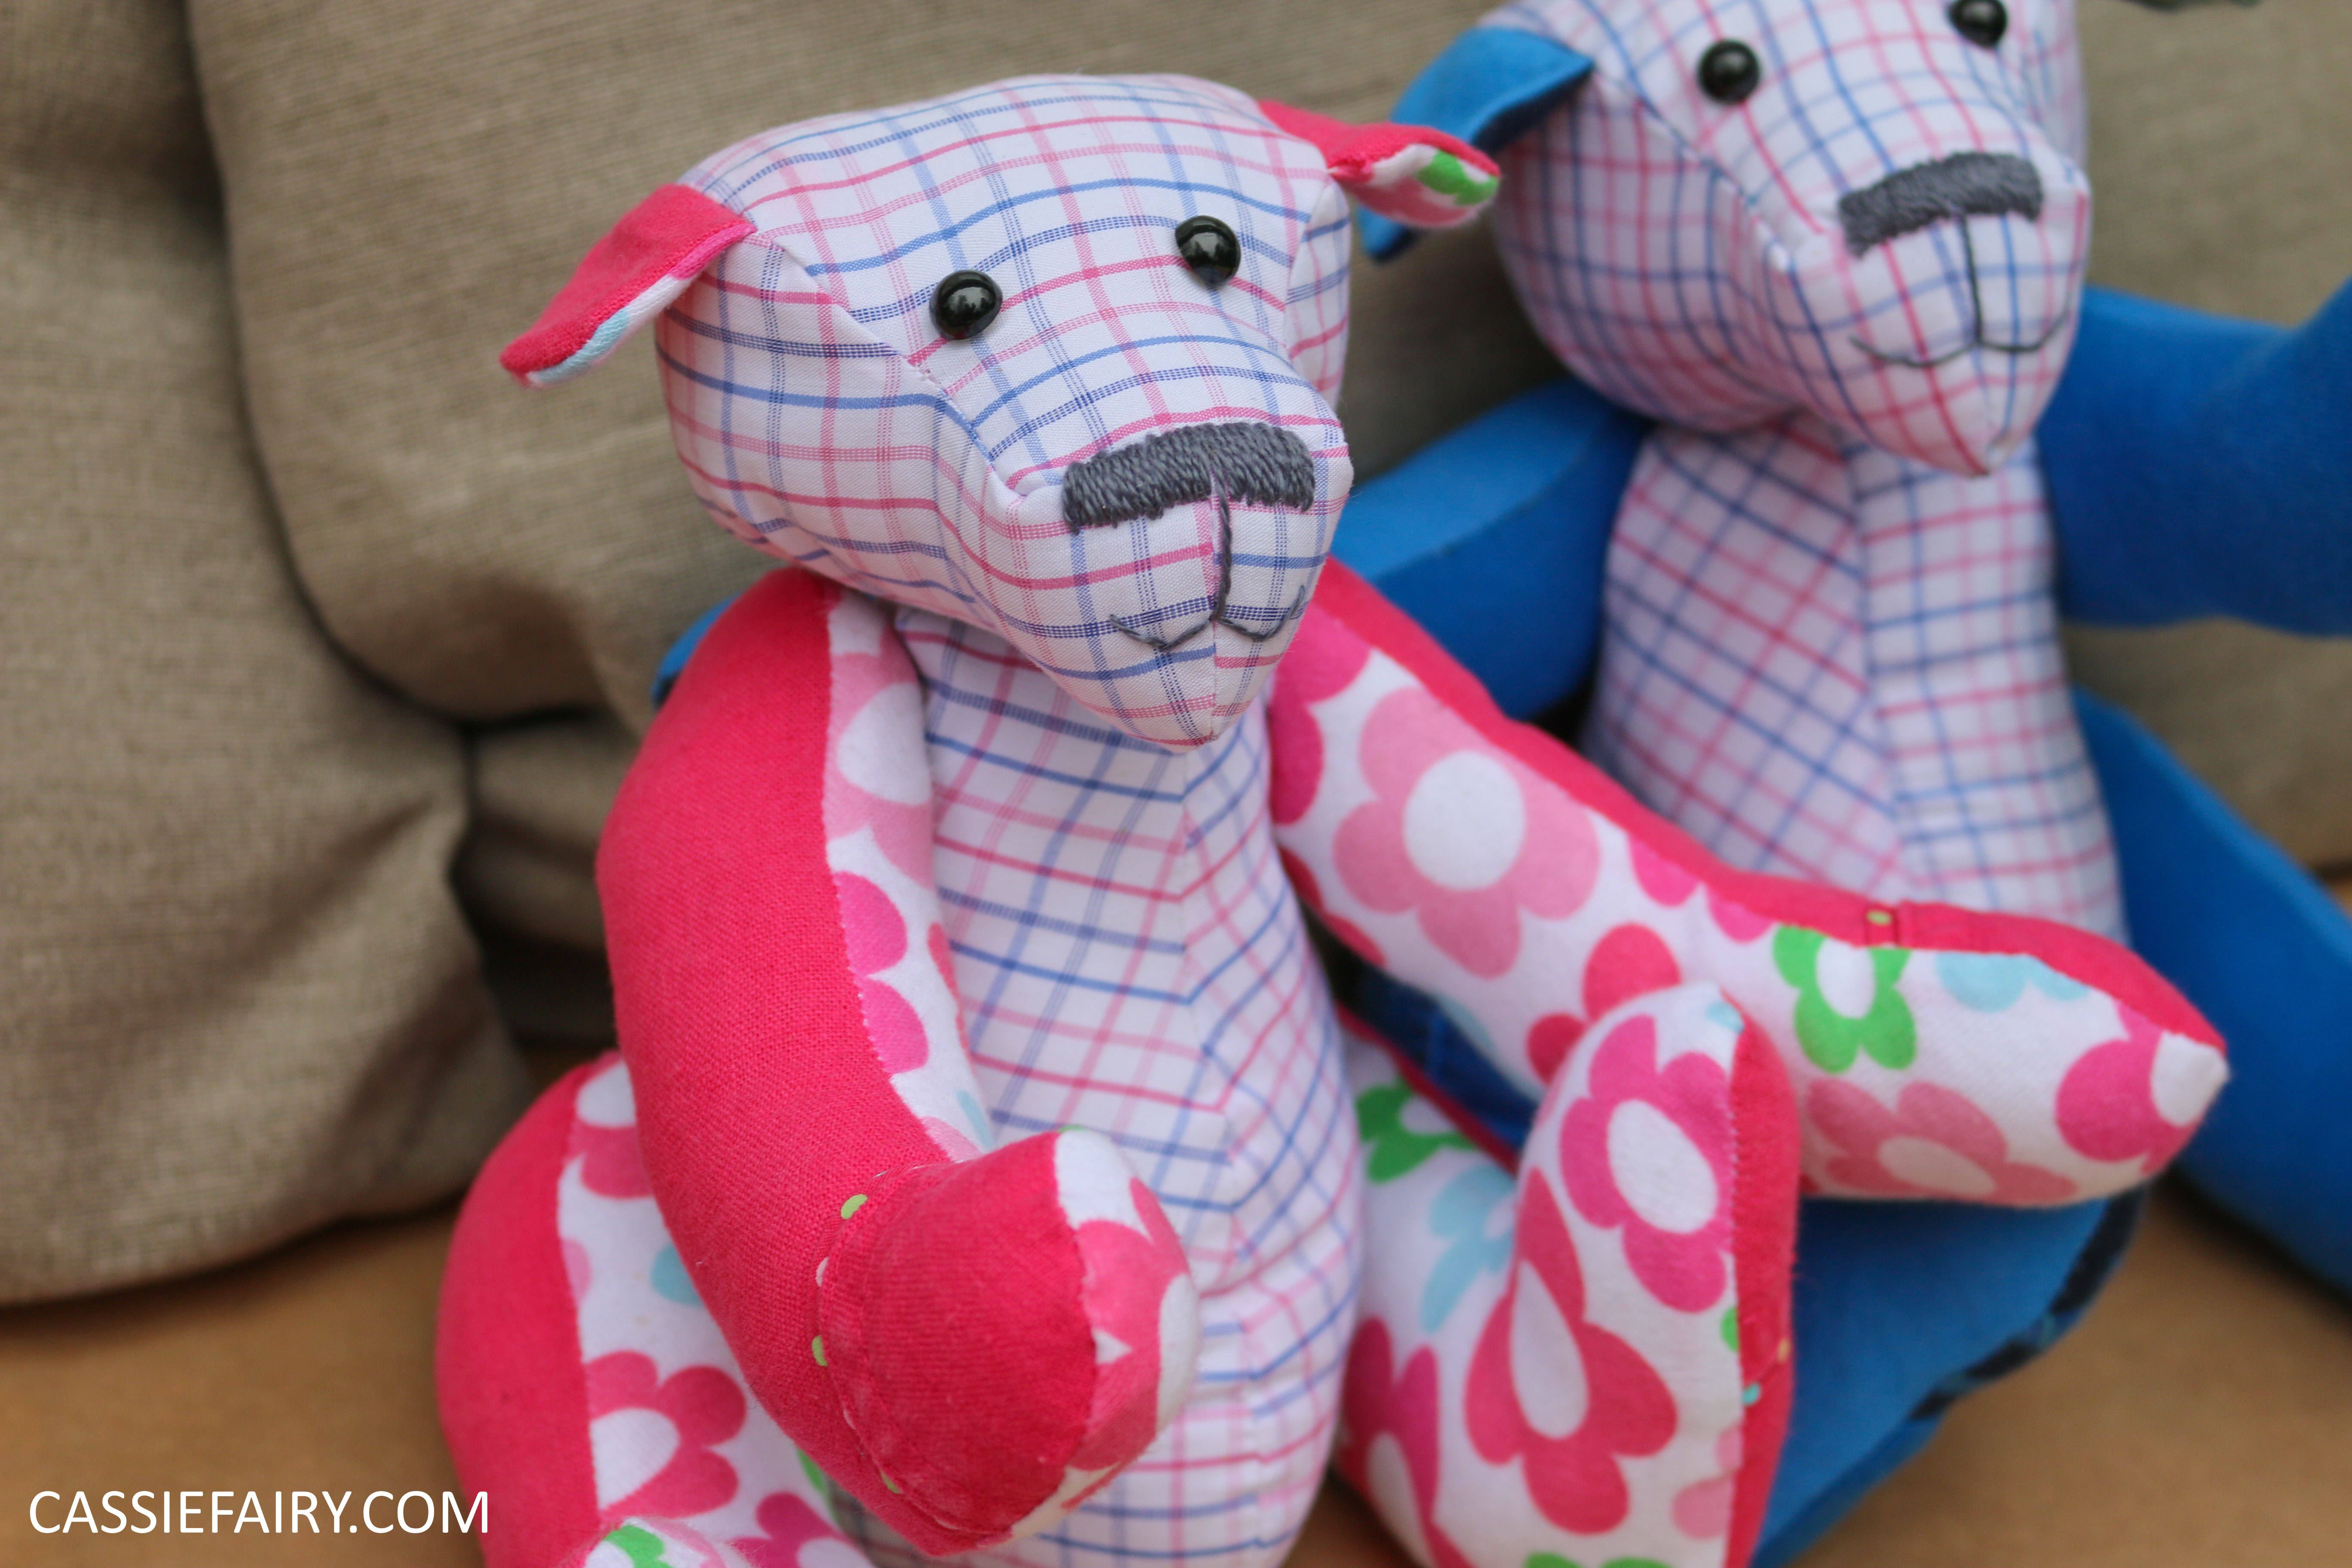
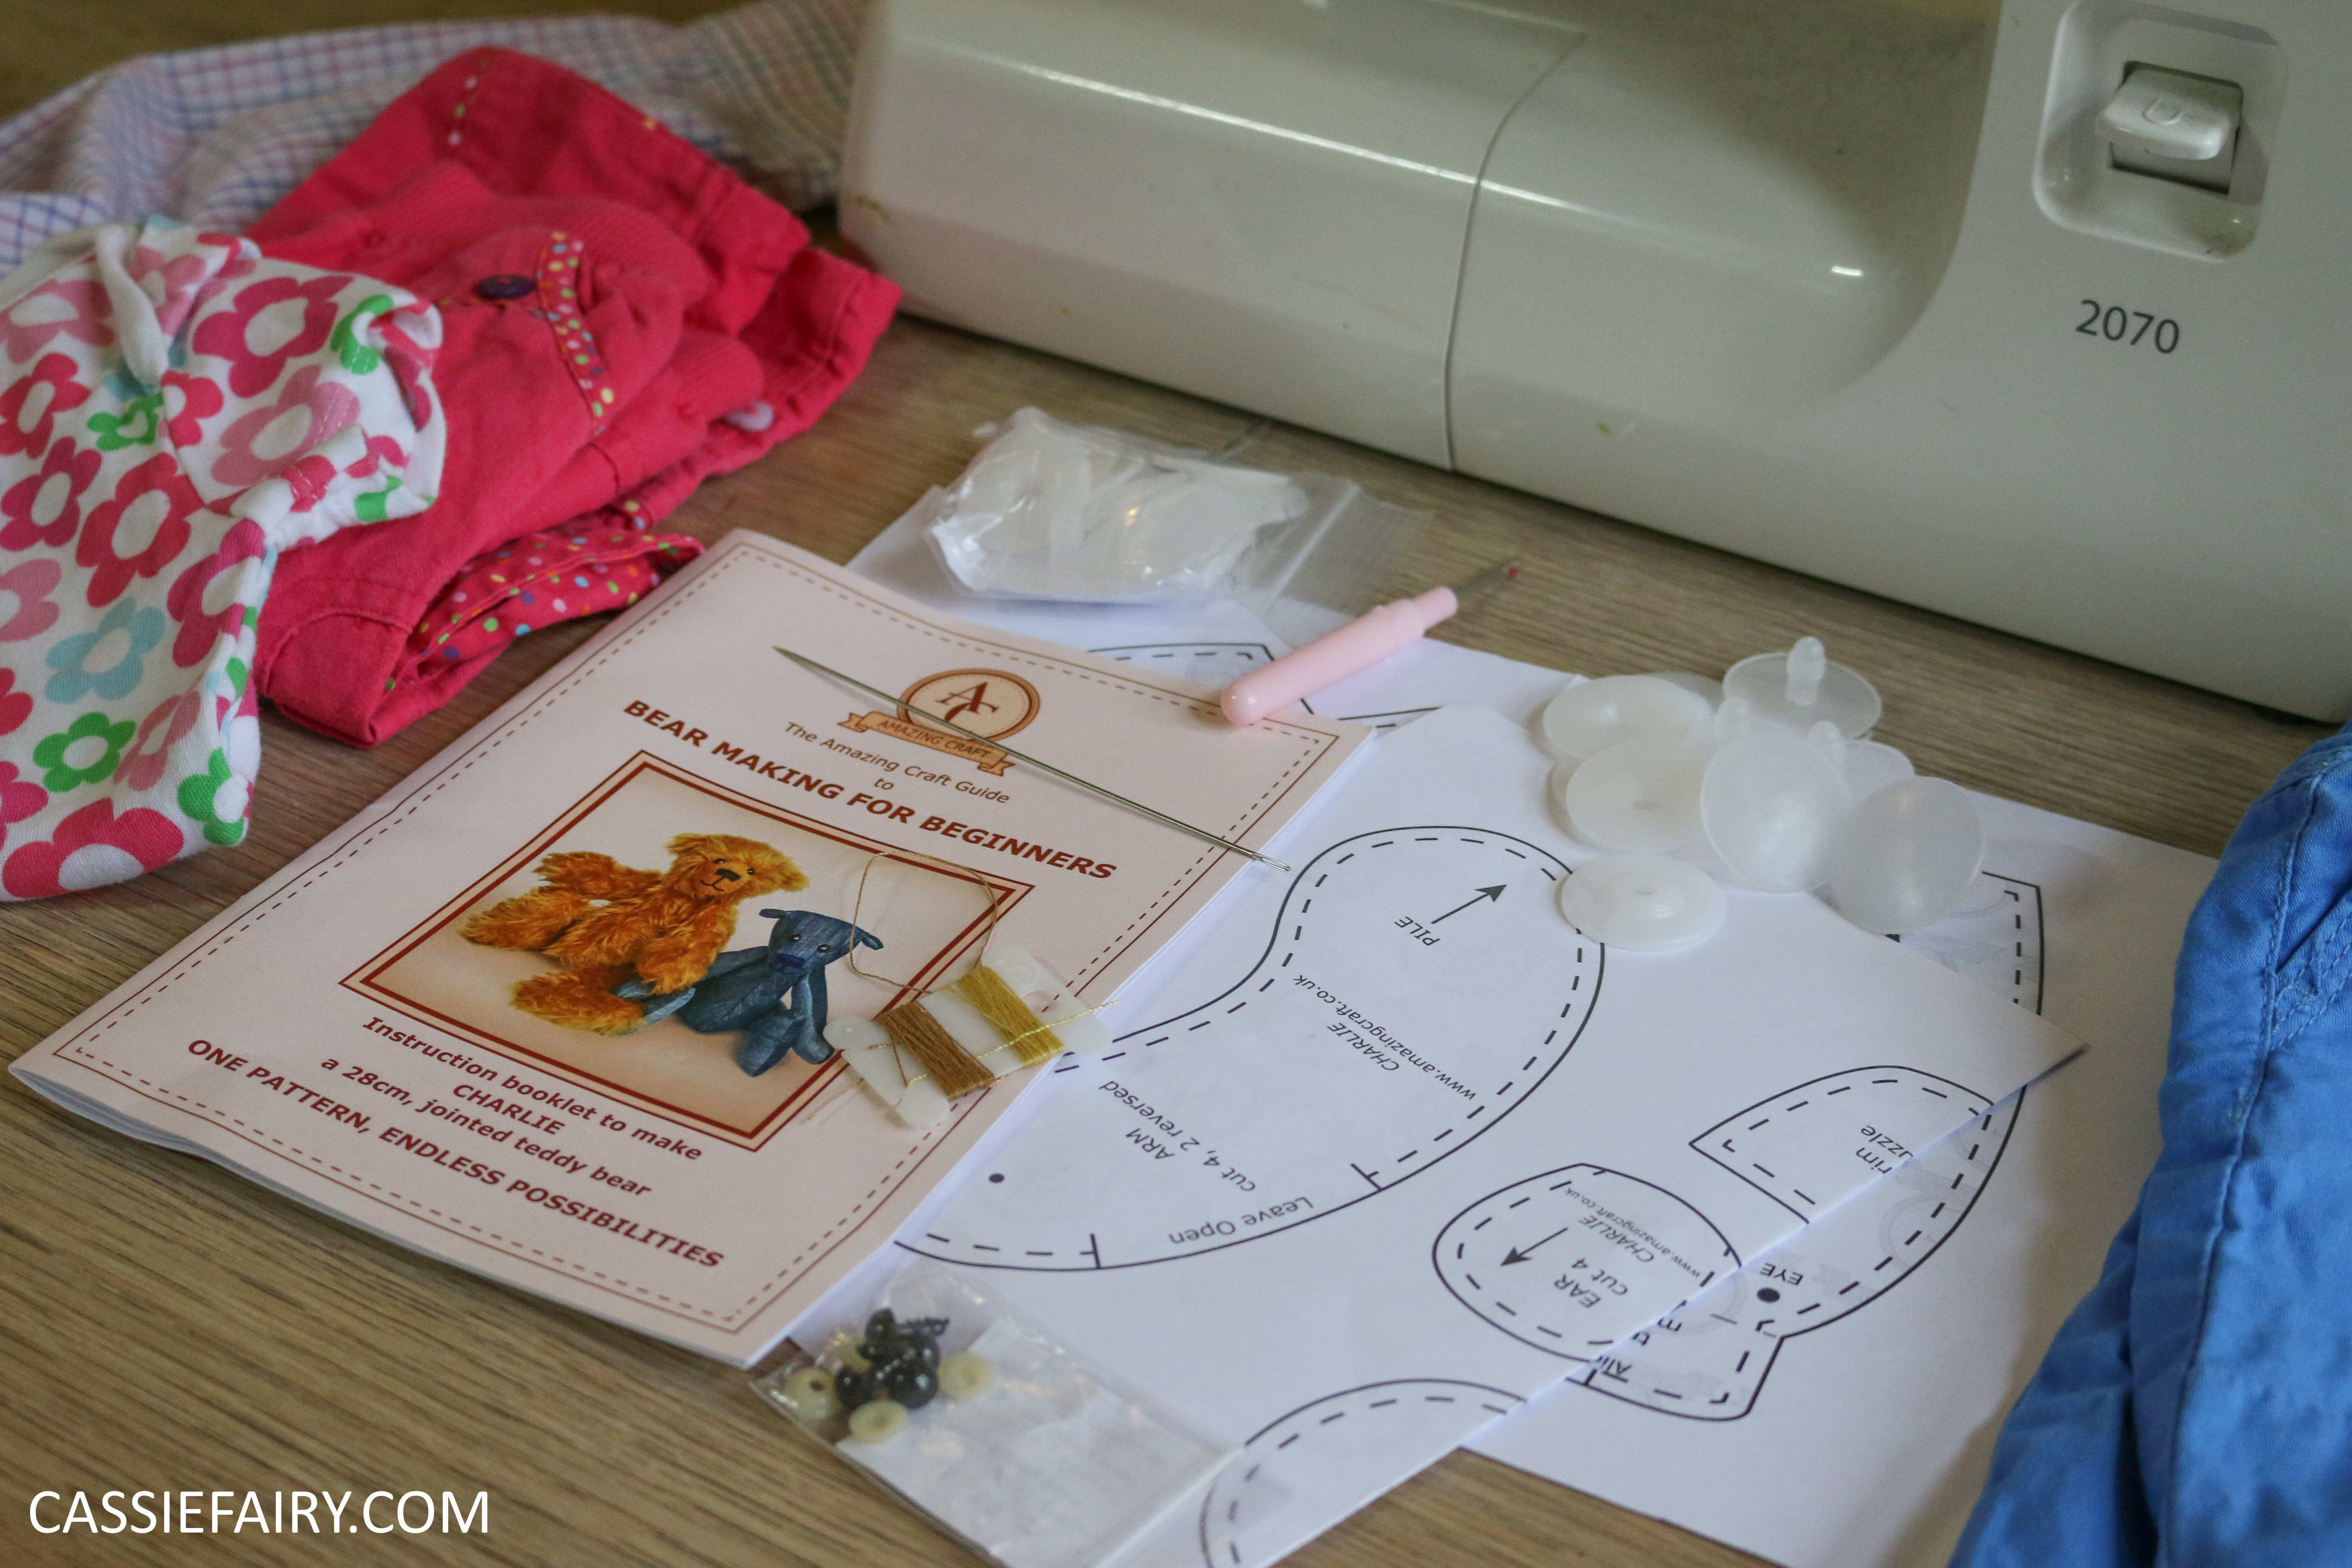
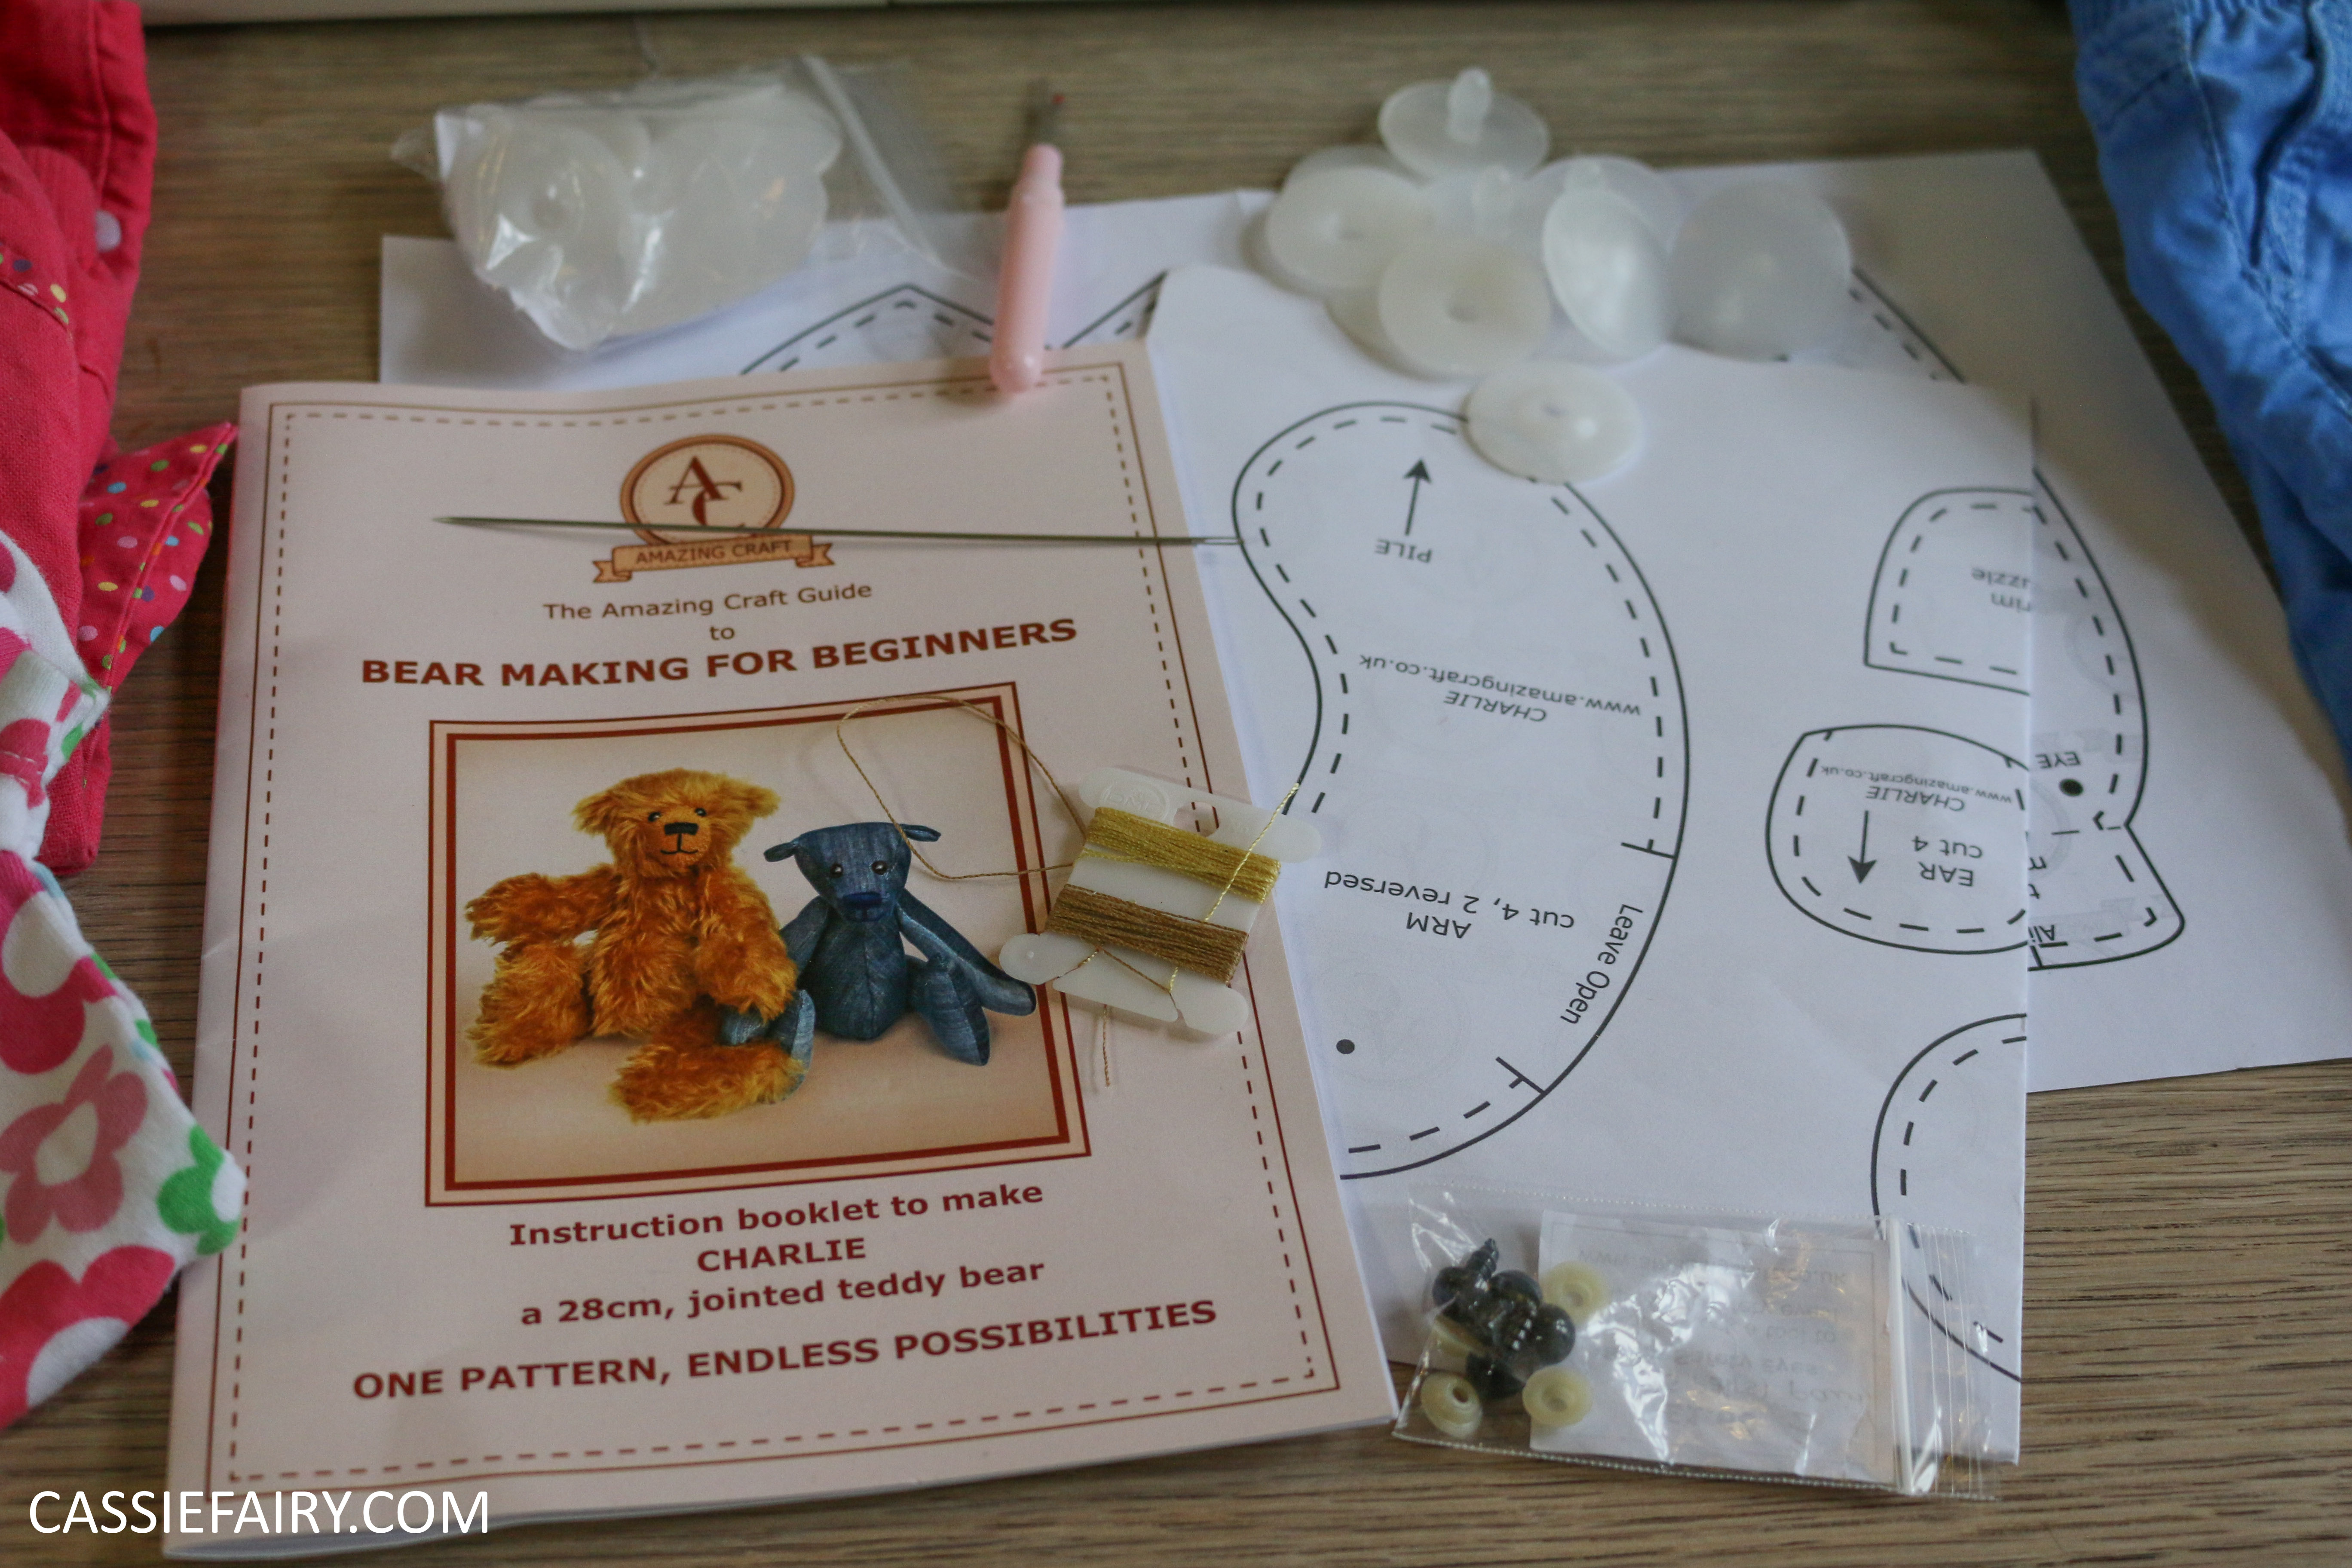
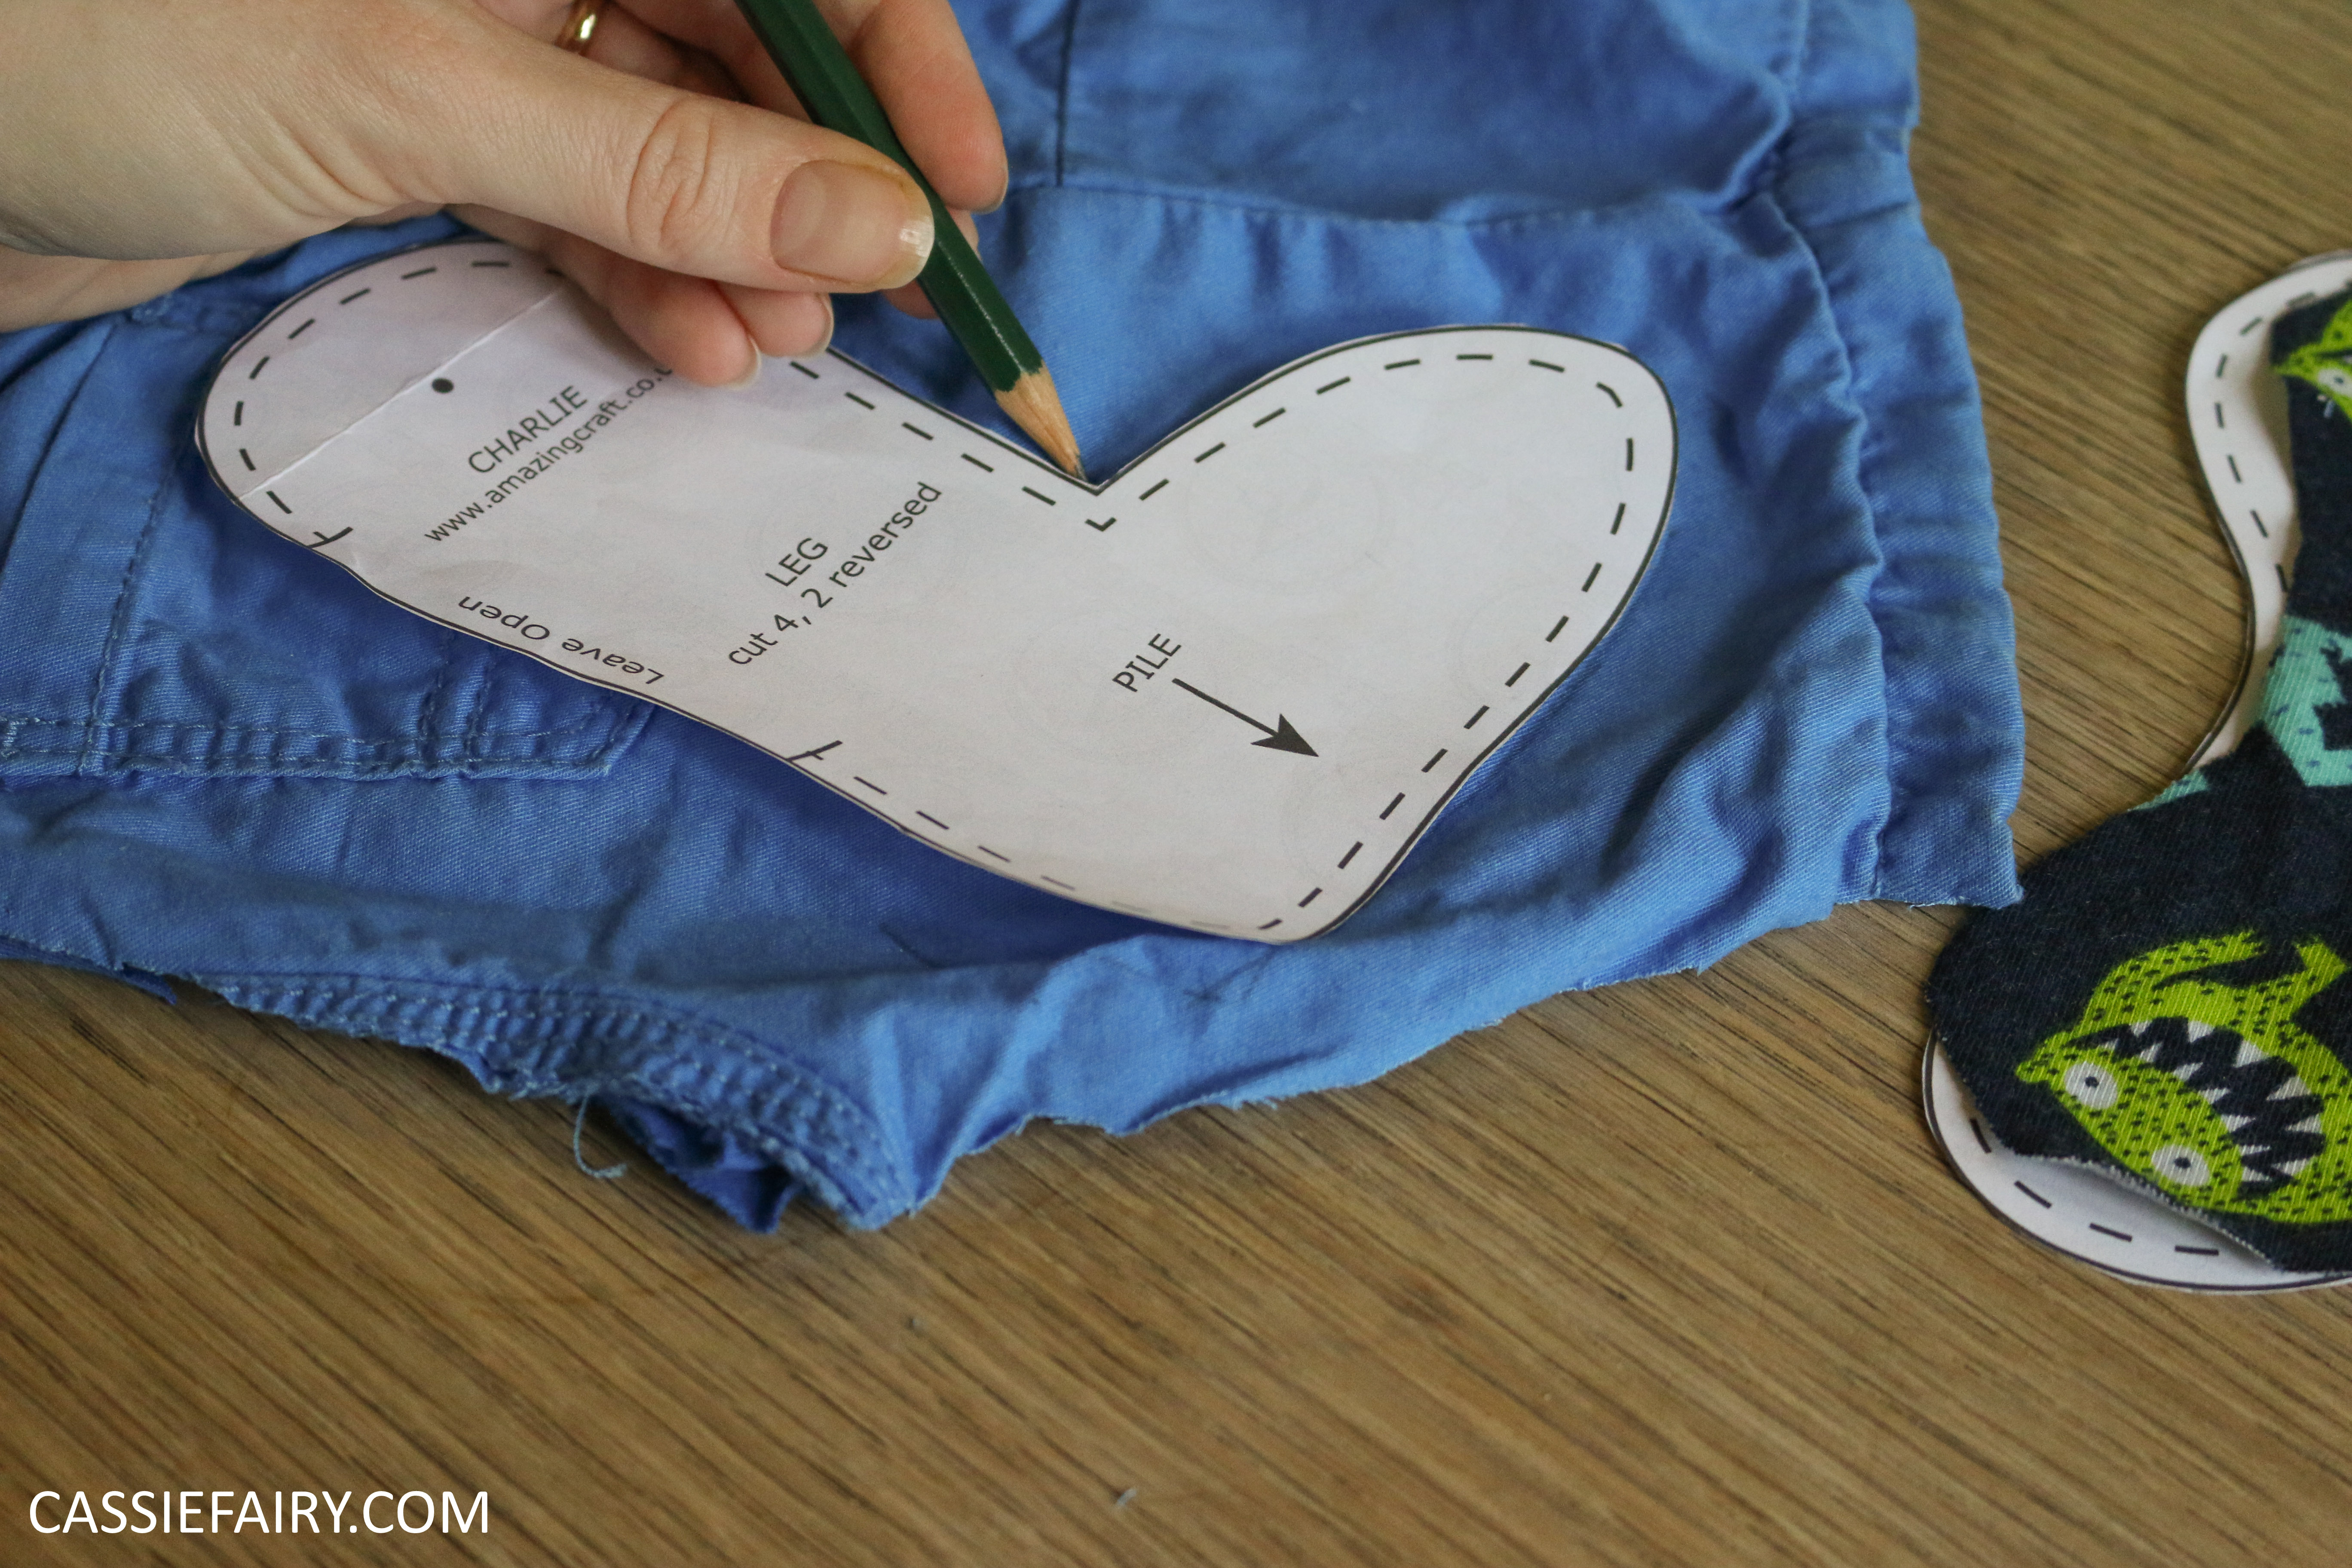
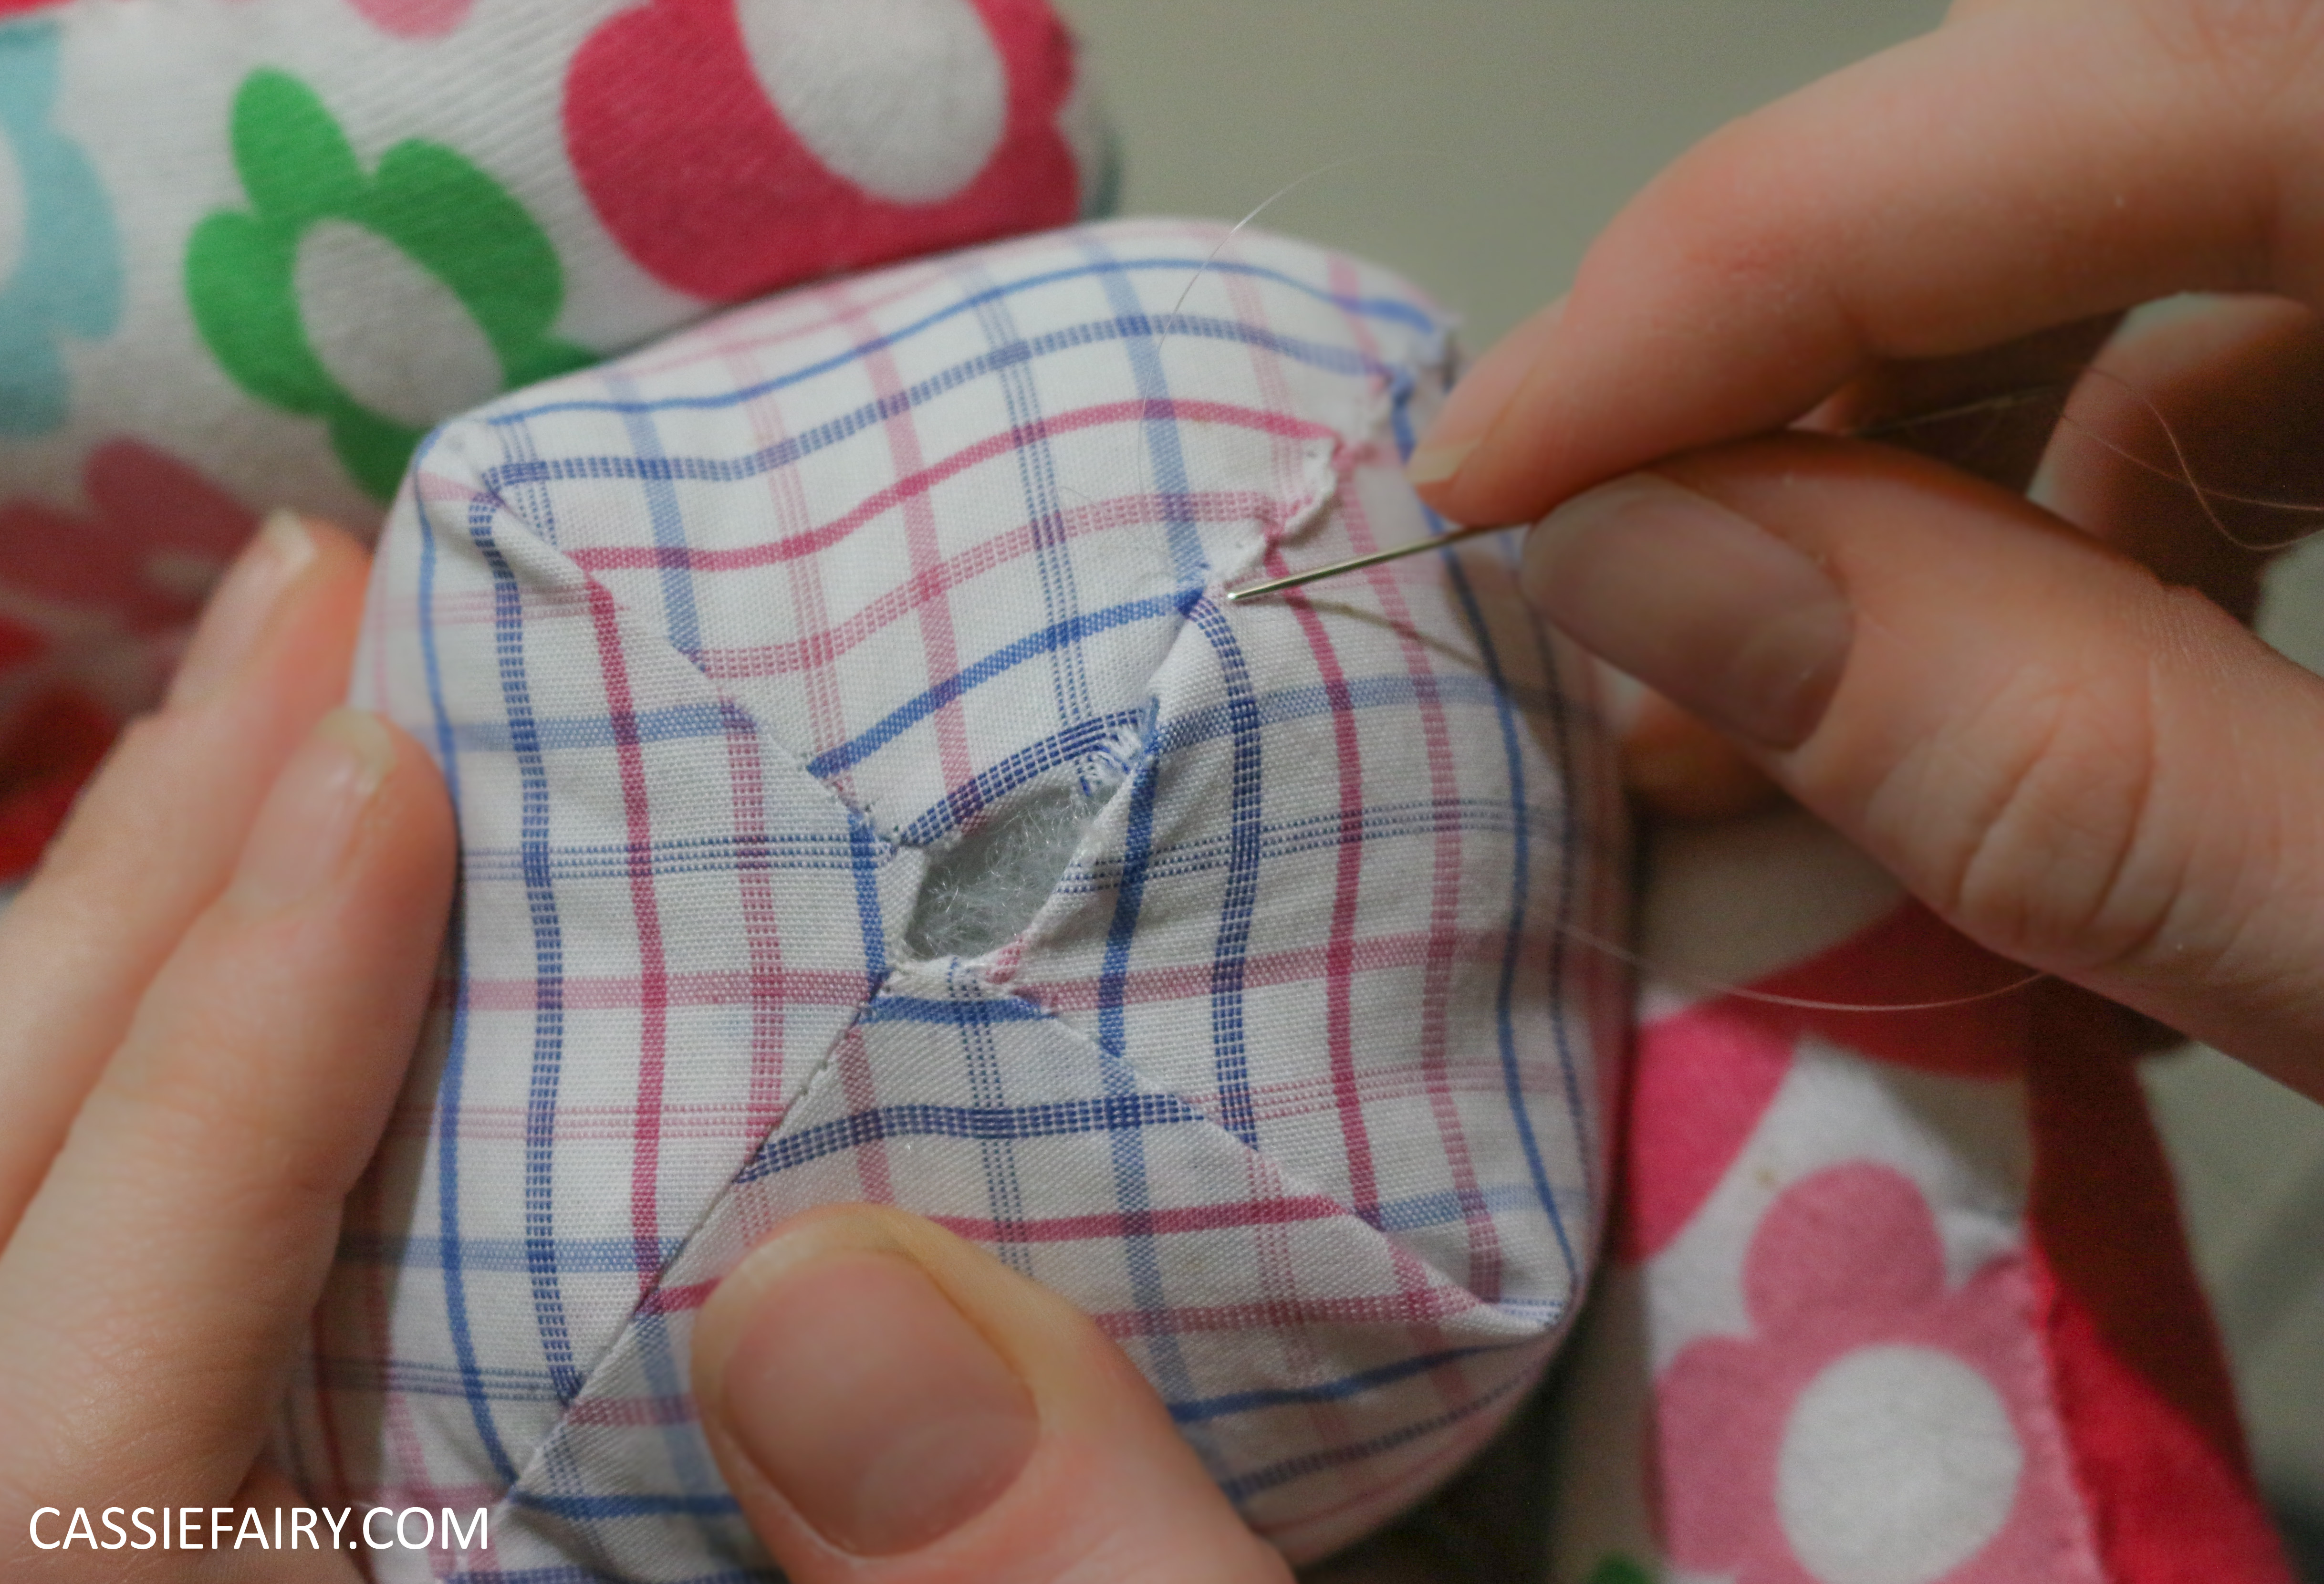
 I got the newly launched Charlie teddy bear pattern from Amazing Craft and studied the instructions from front to back before getting started. There’s only a handful of pattern pieces and the construction seemed so much more straightforward than bear patterns I’ve used in the past. I was eager to get started and see just how the pattern worked. I’m pleased to report that this is the most simple-to-use set of instructions, and having fewer pattern pieces meant much less tacking, pinning and fiddling. I whizzed up the arms and legs in no time at all. The body is the only piece that has any darts in it, and even then there’s only two small darts so it’s really uncomplicated to construct. I guess the pattern does what it says on the cover – it truly is ‘bear making for beginners’ and it couldn’t be easier to follow. It’s available as printed instructions (which I got, at £6.99) or as a digital download to print at home for only £4.99.
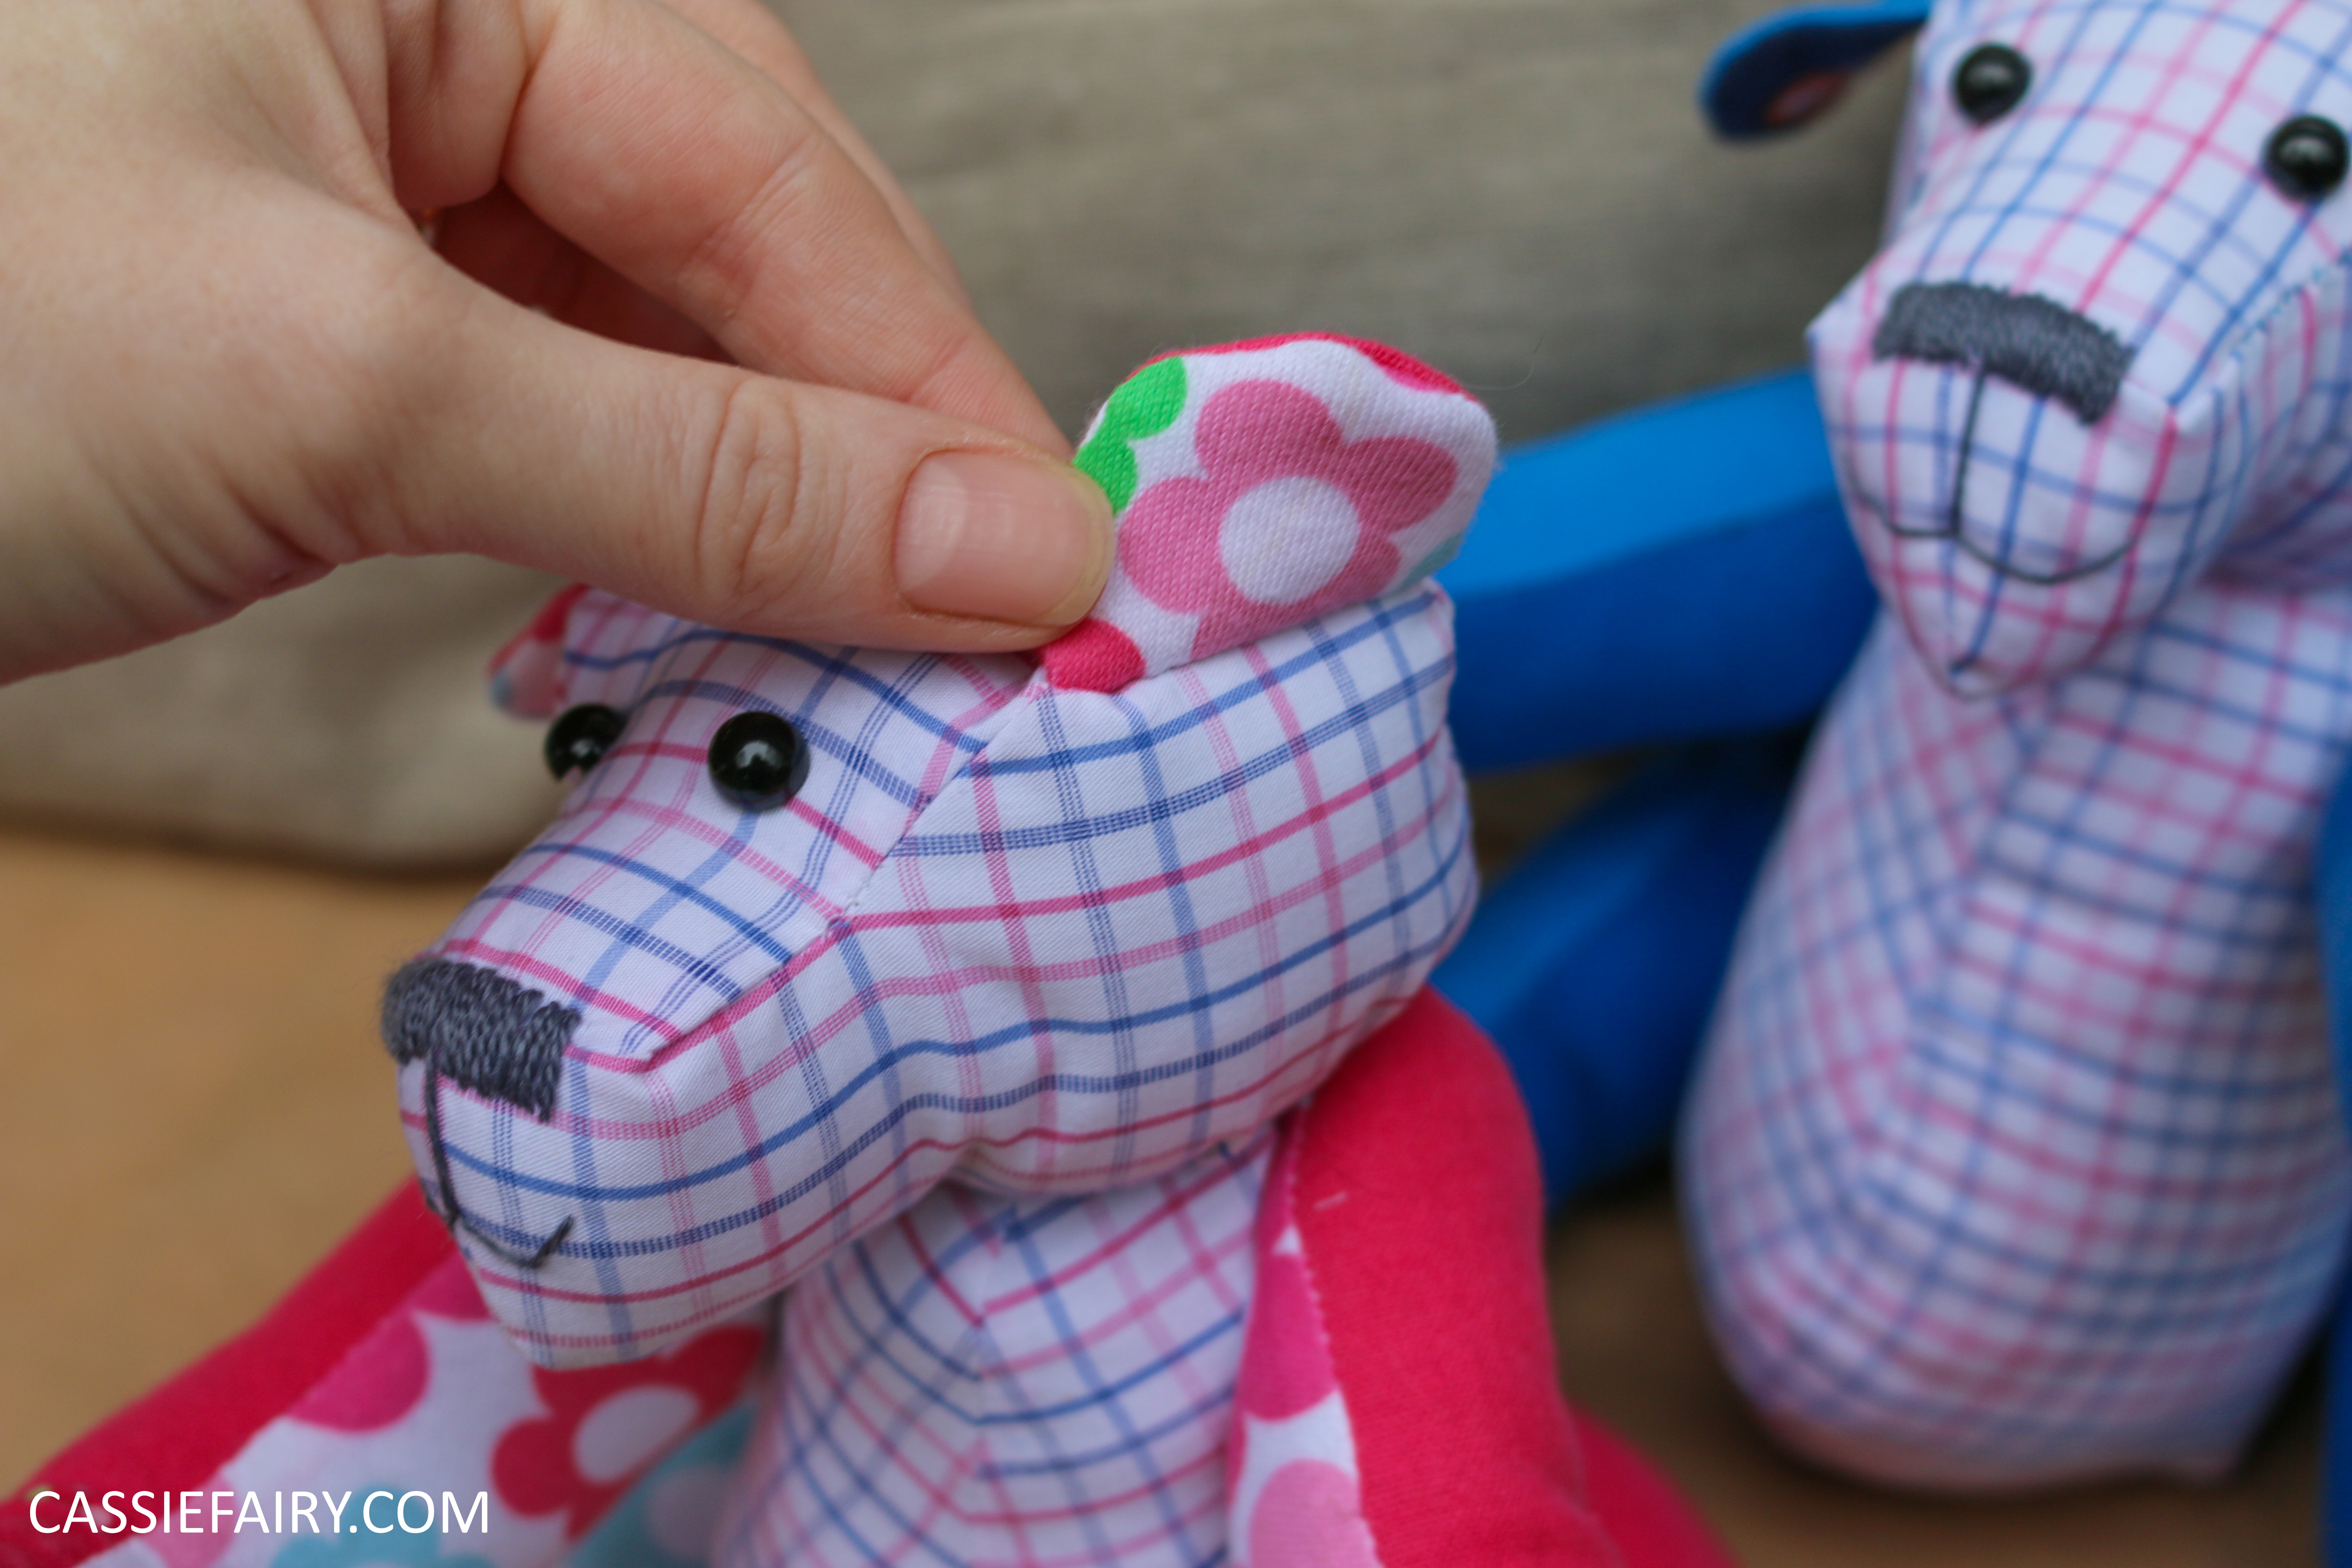
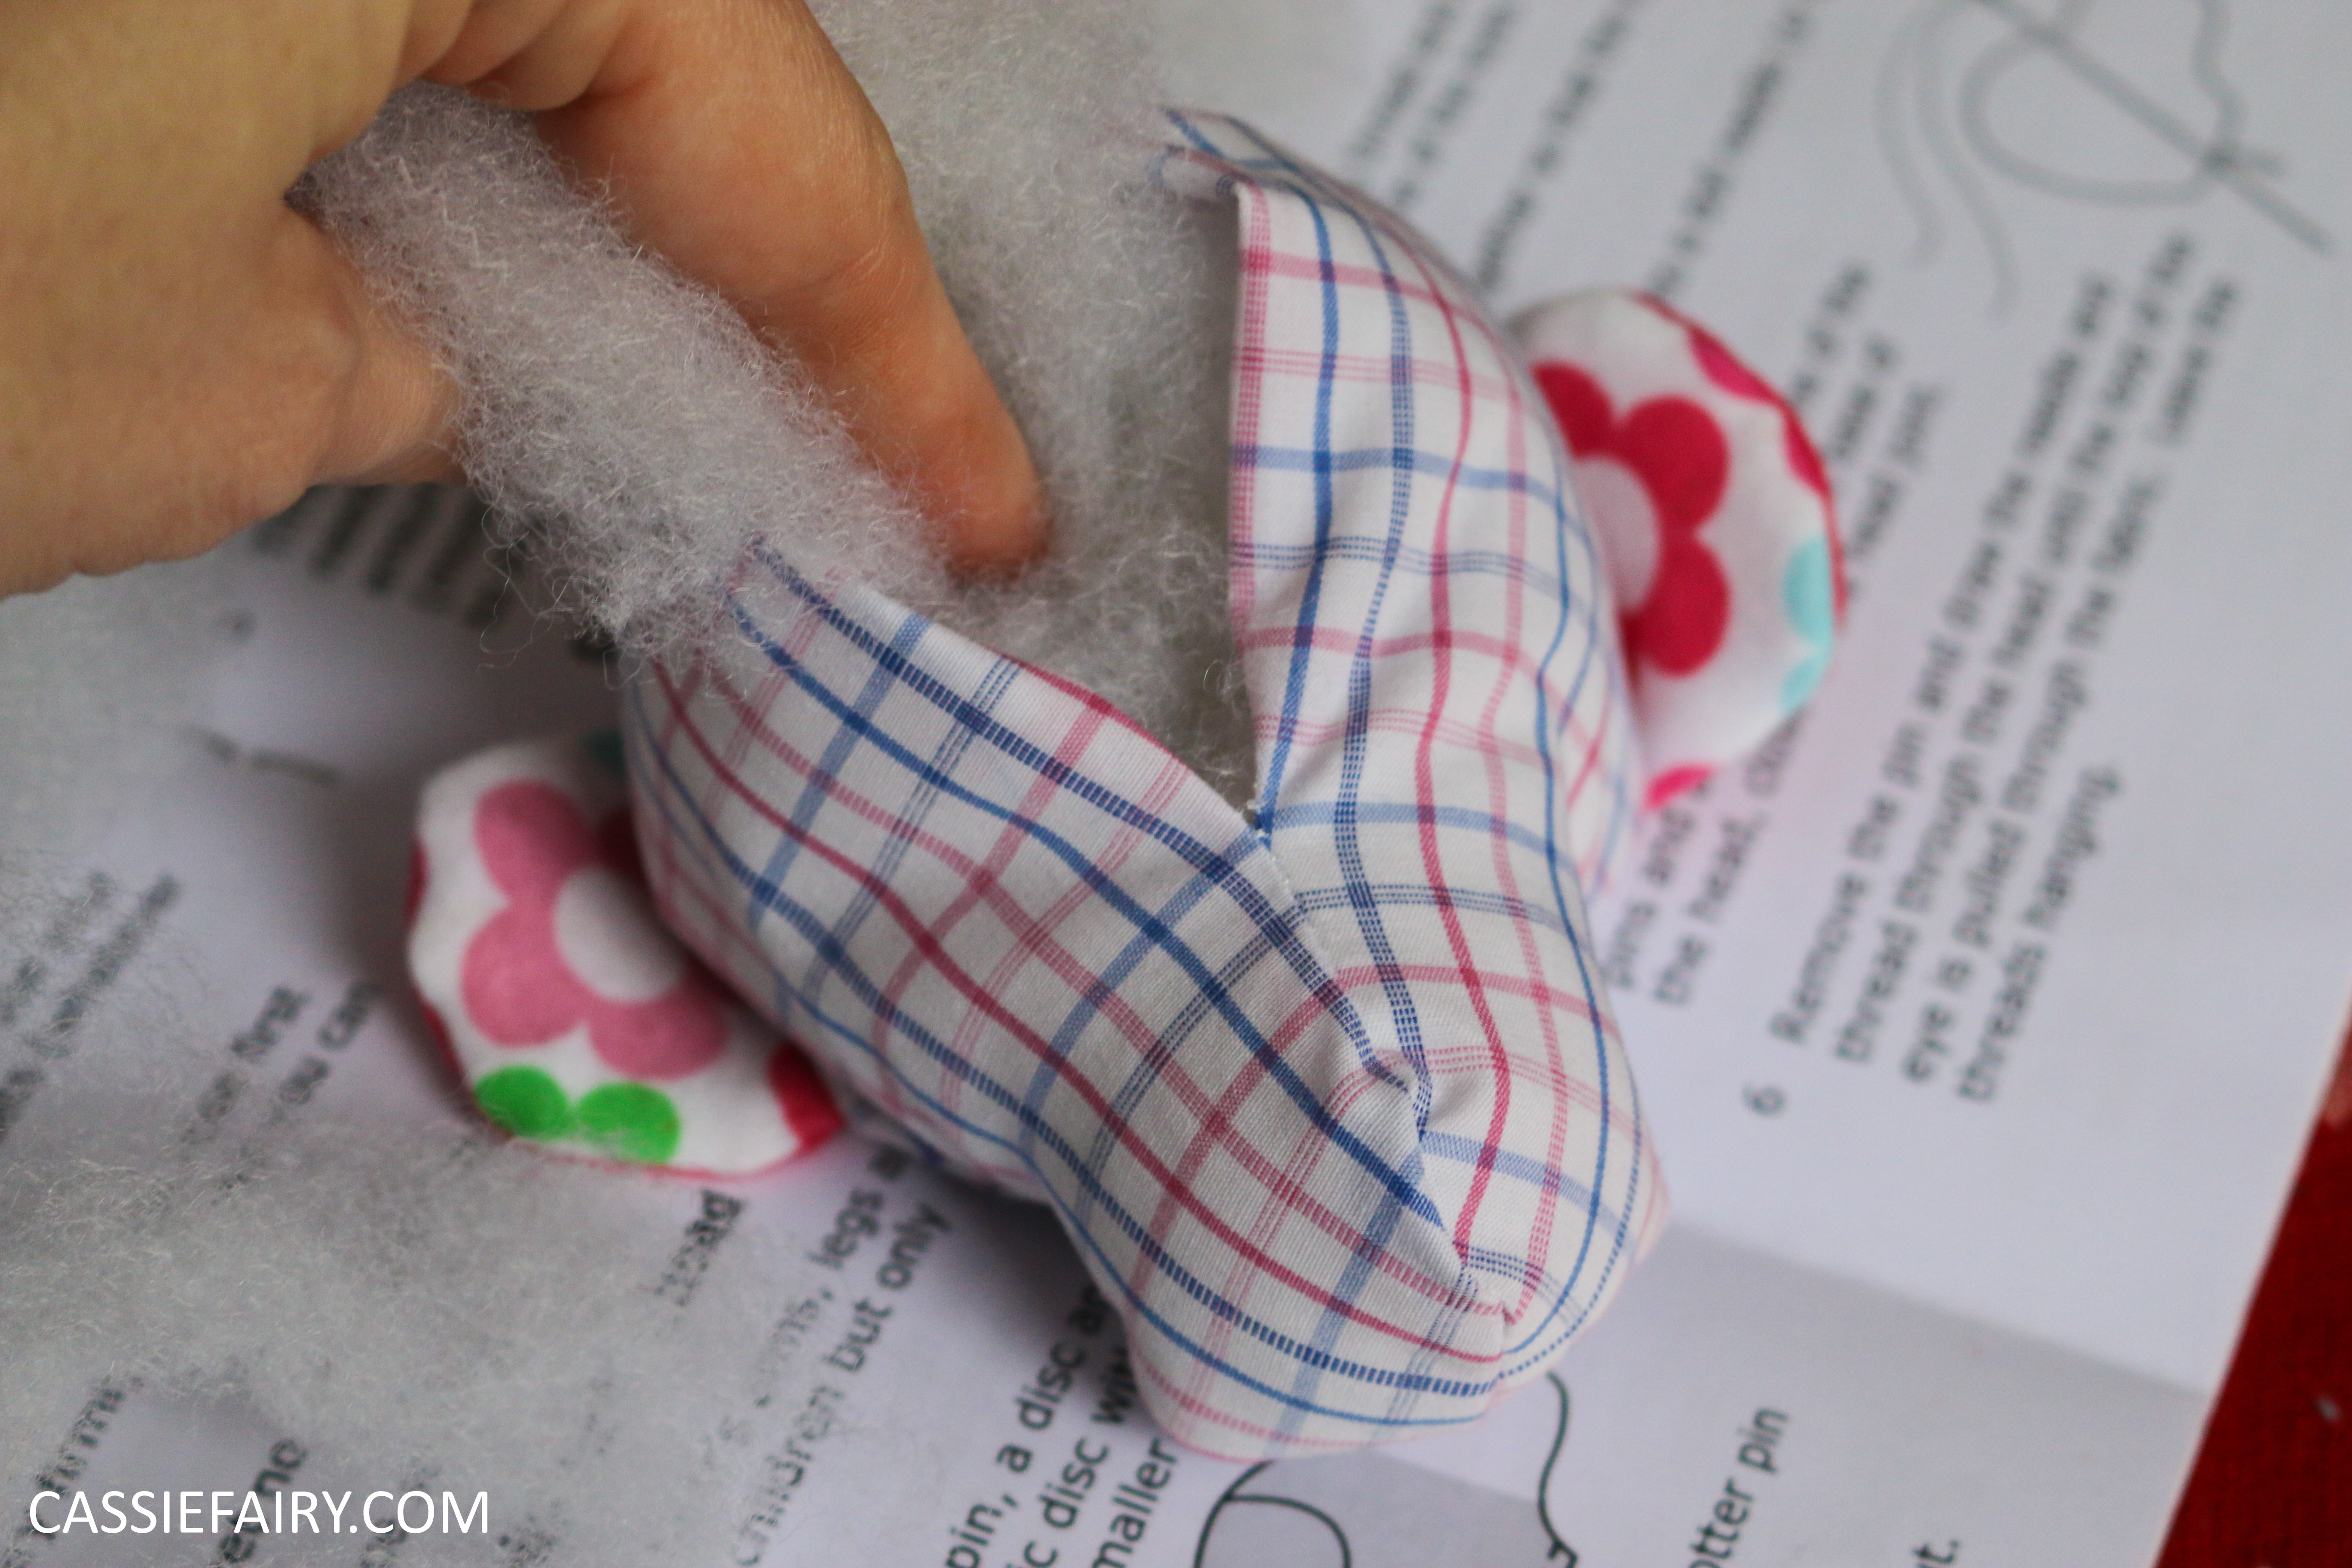
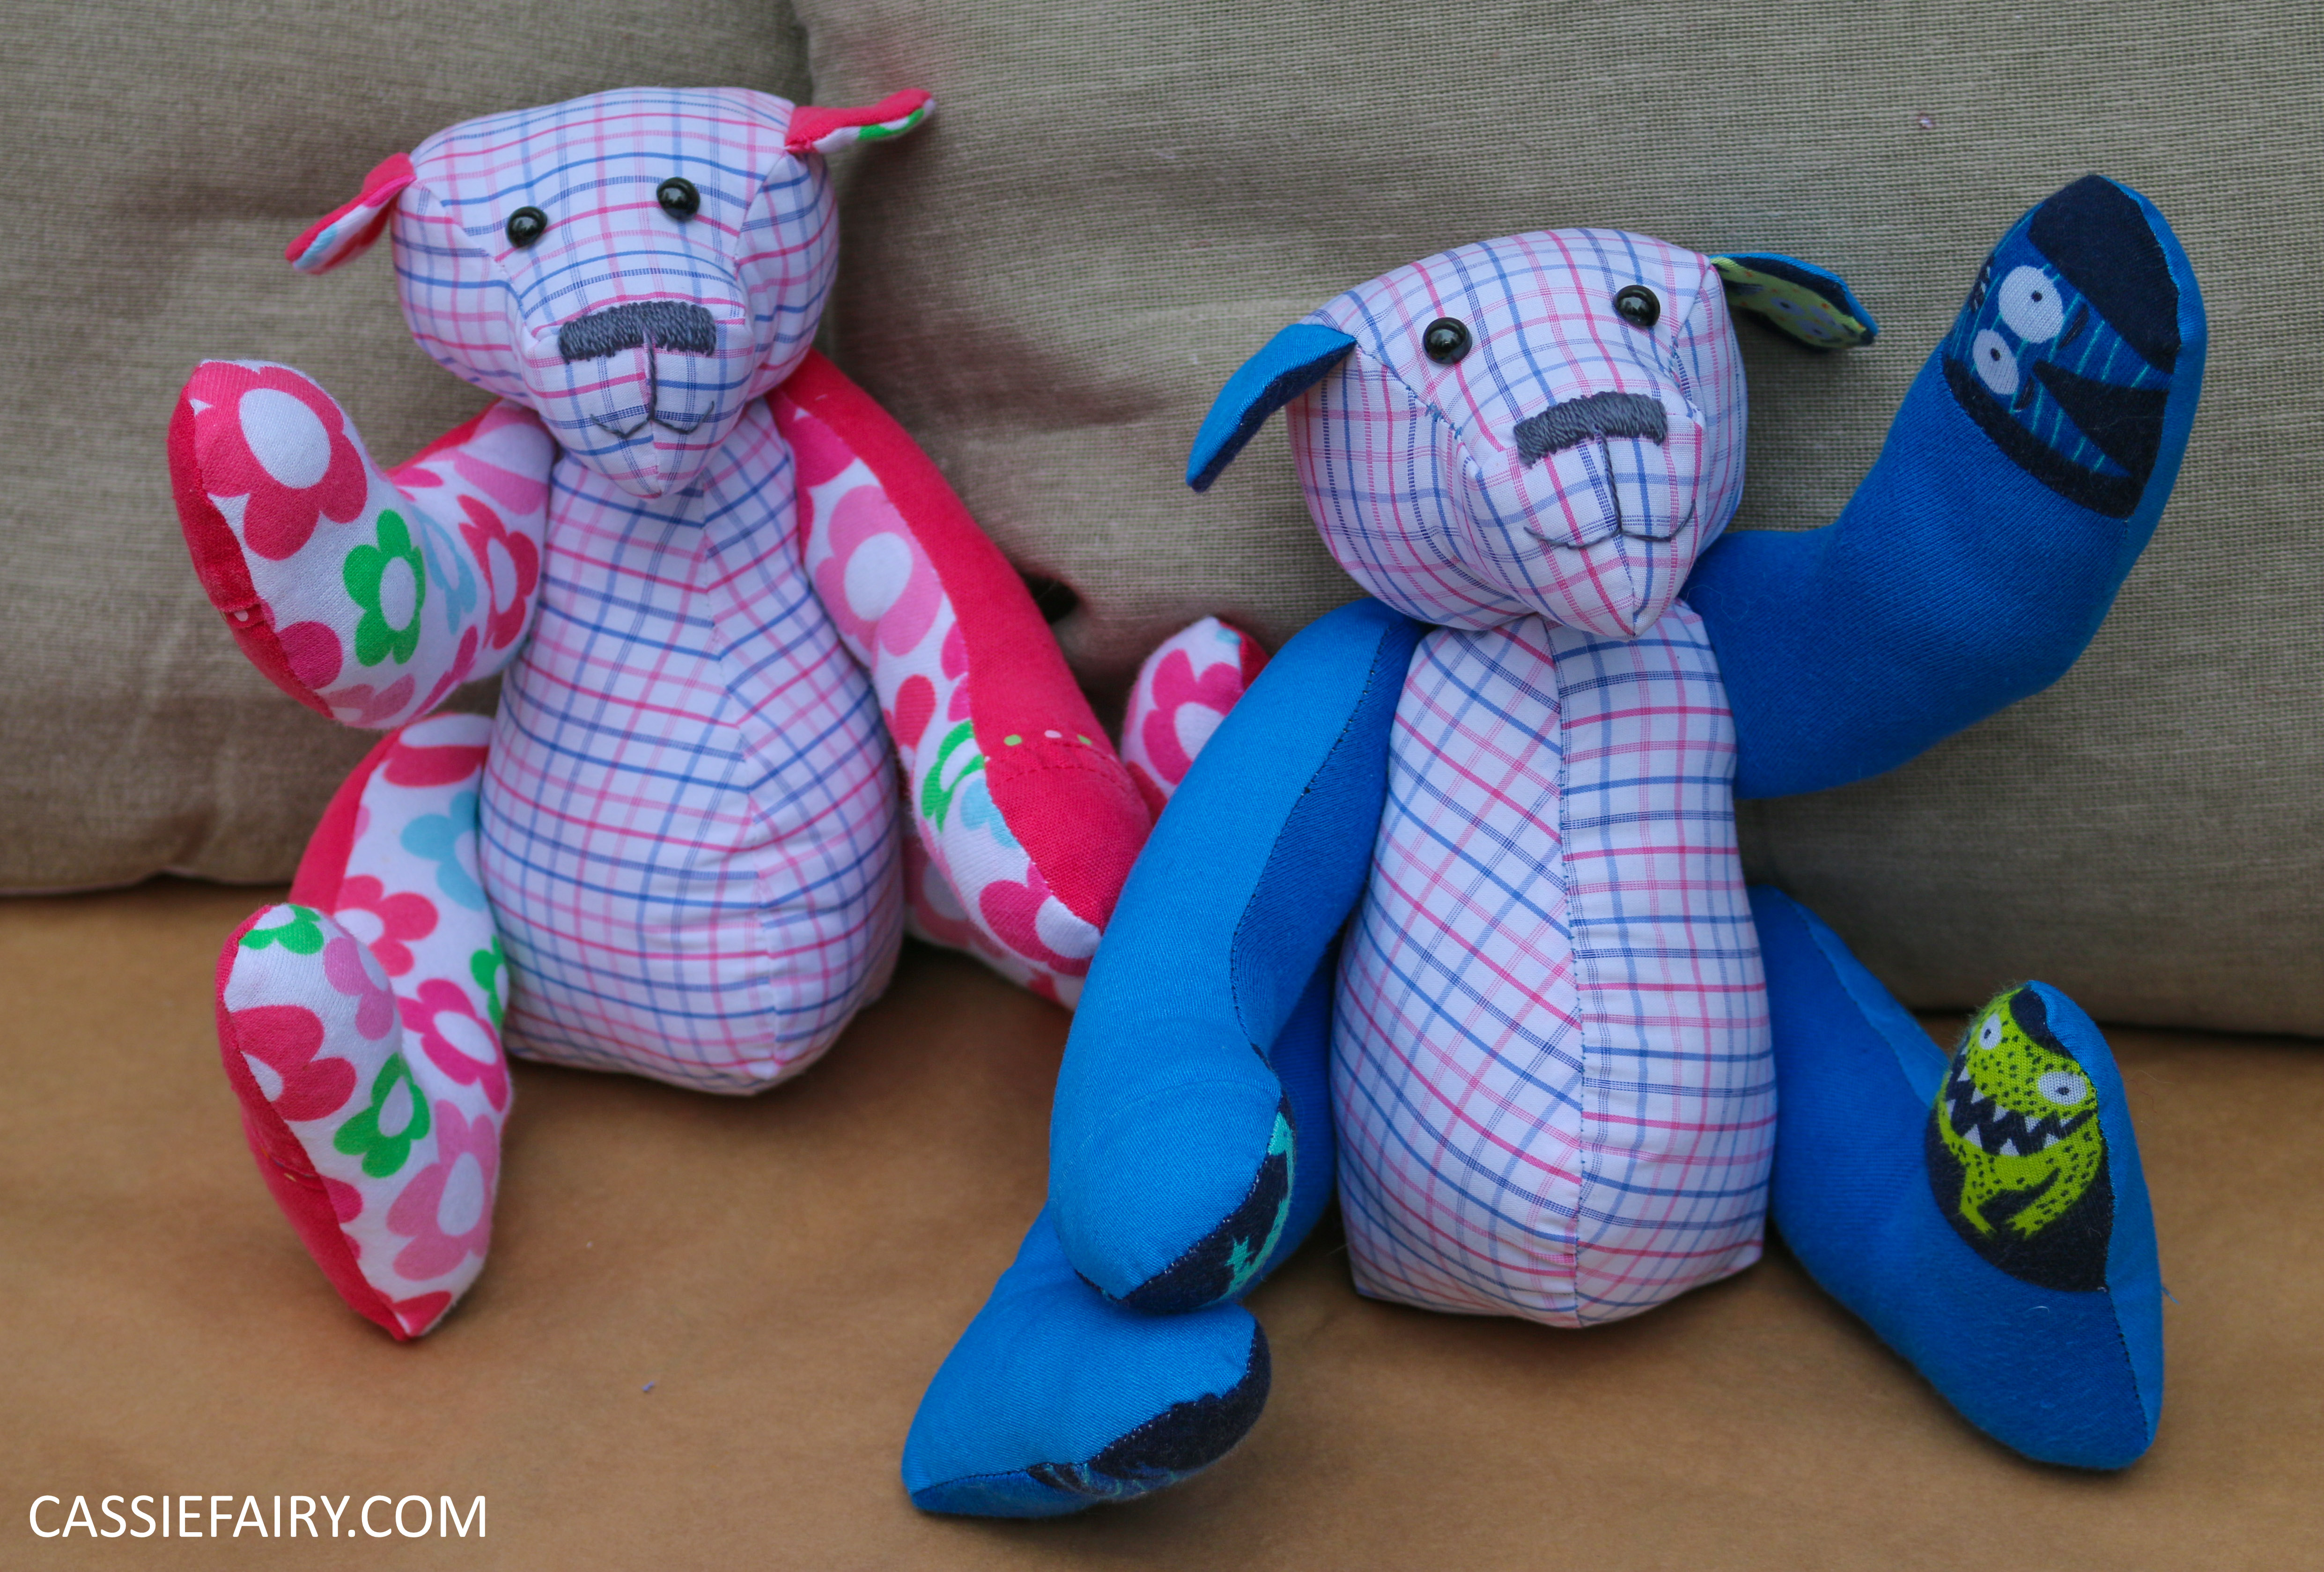
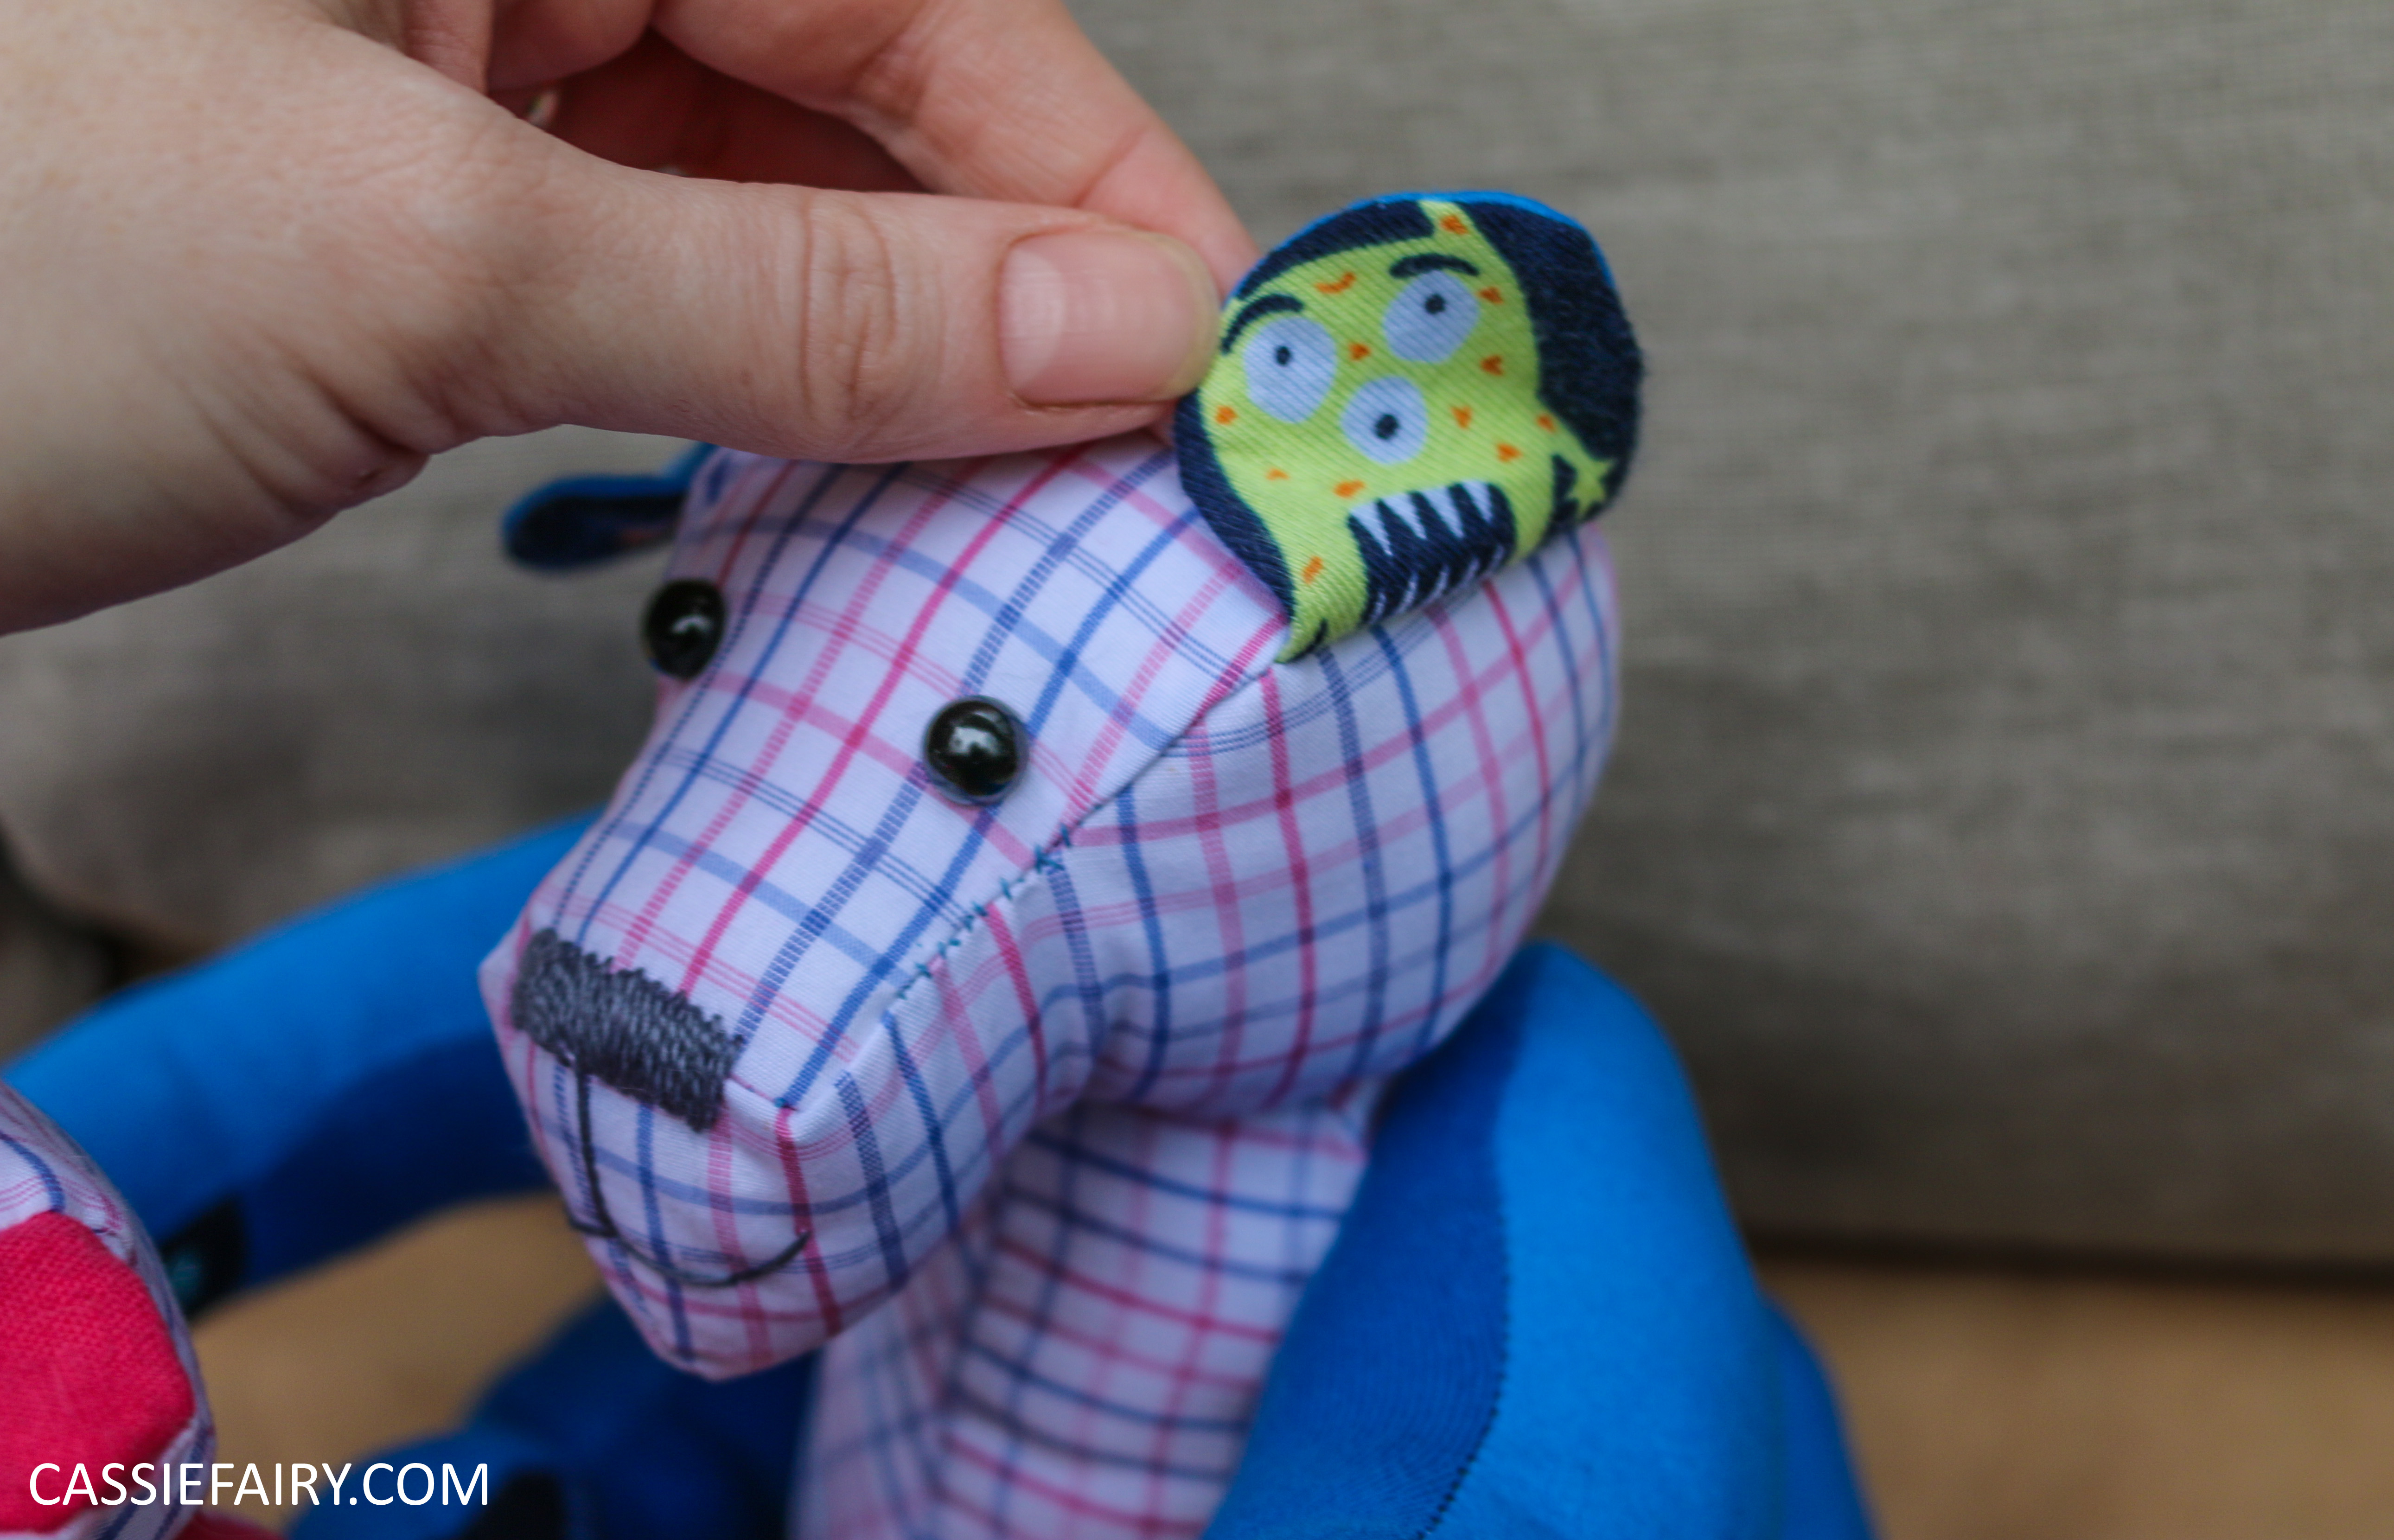
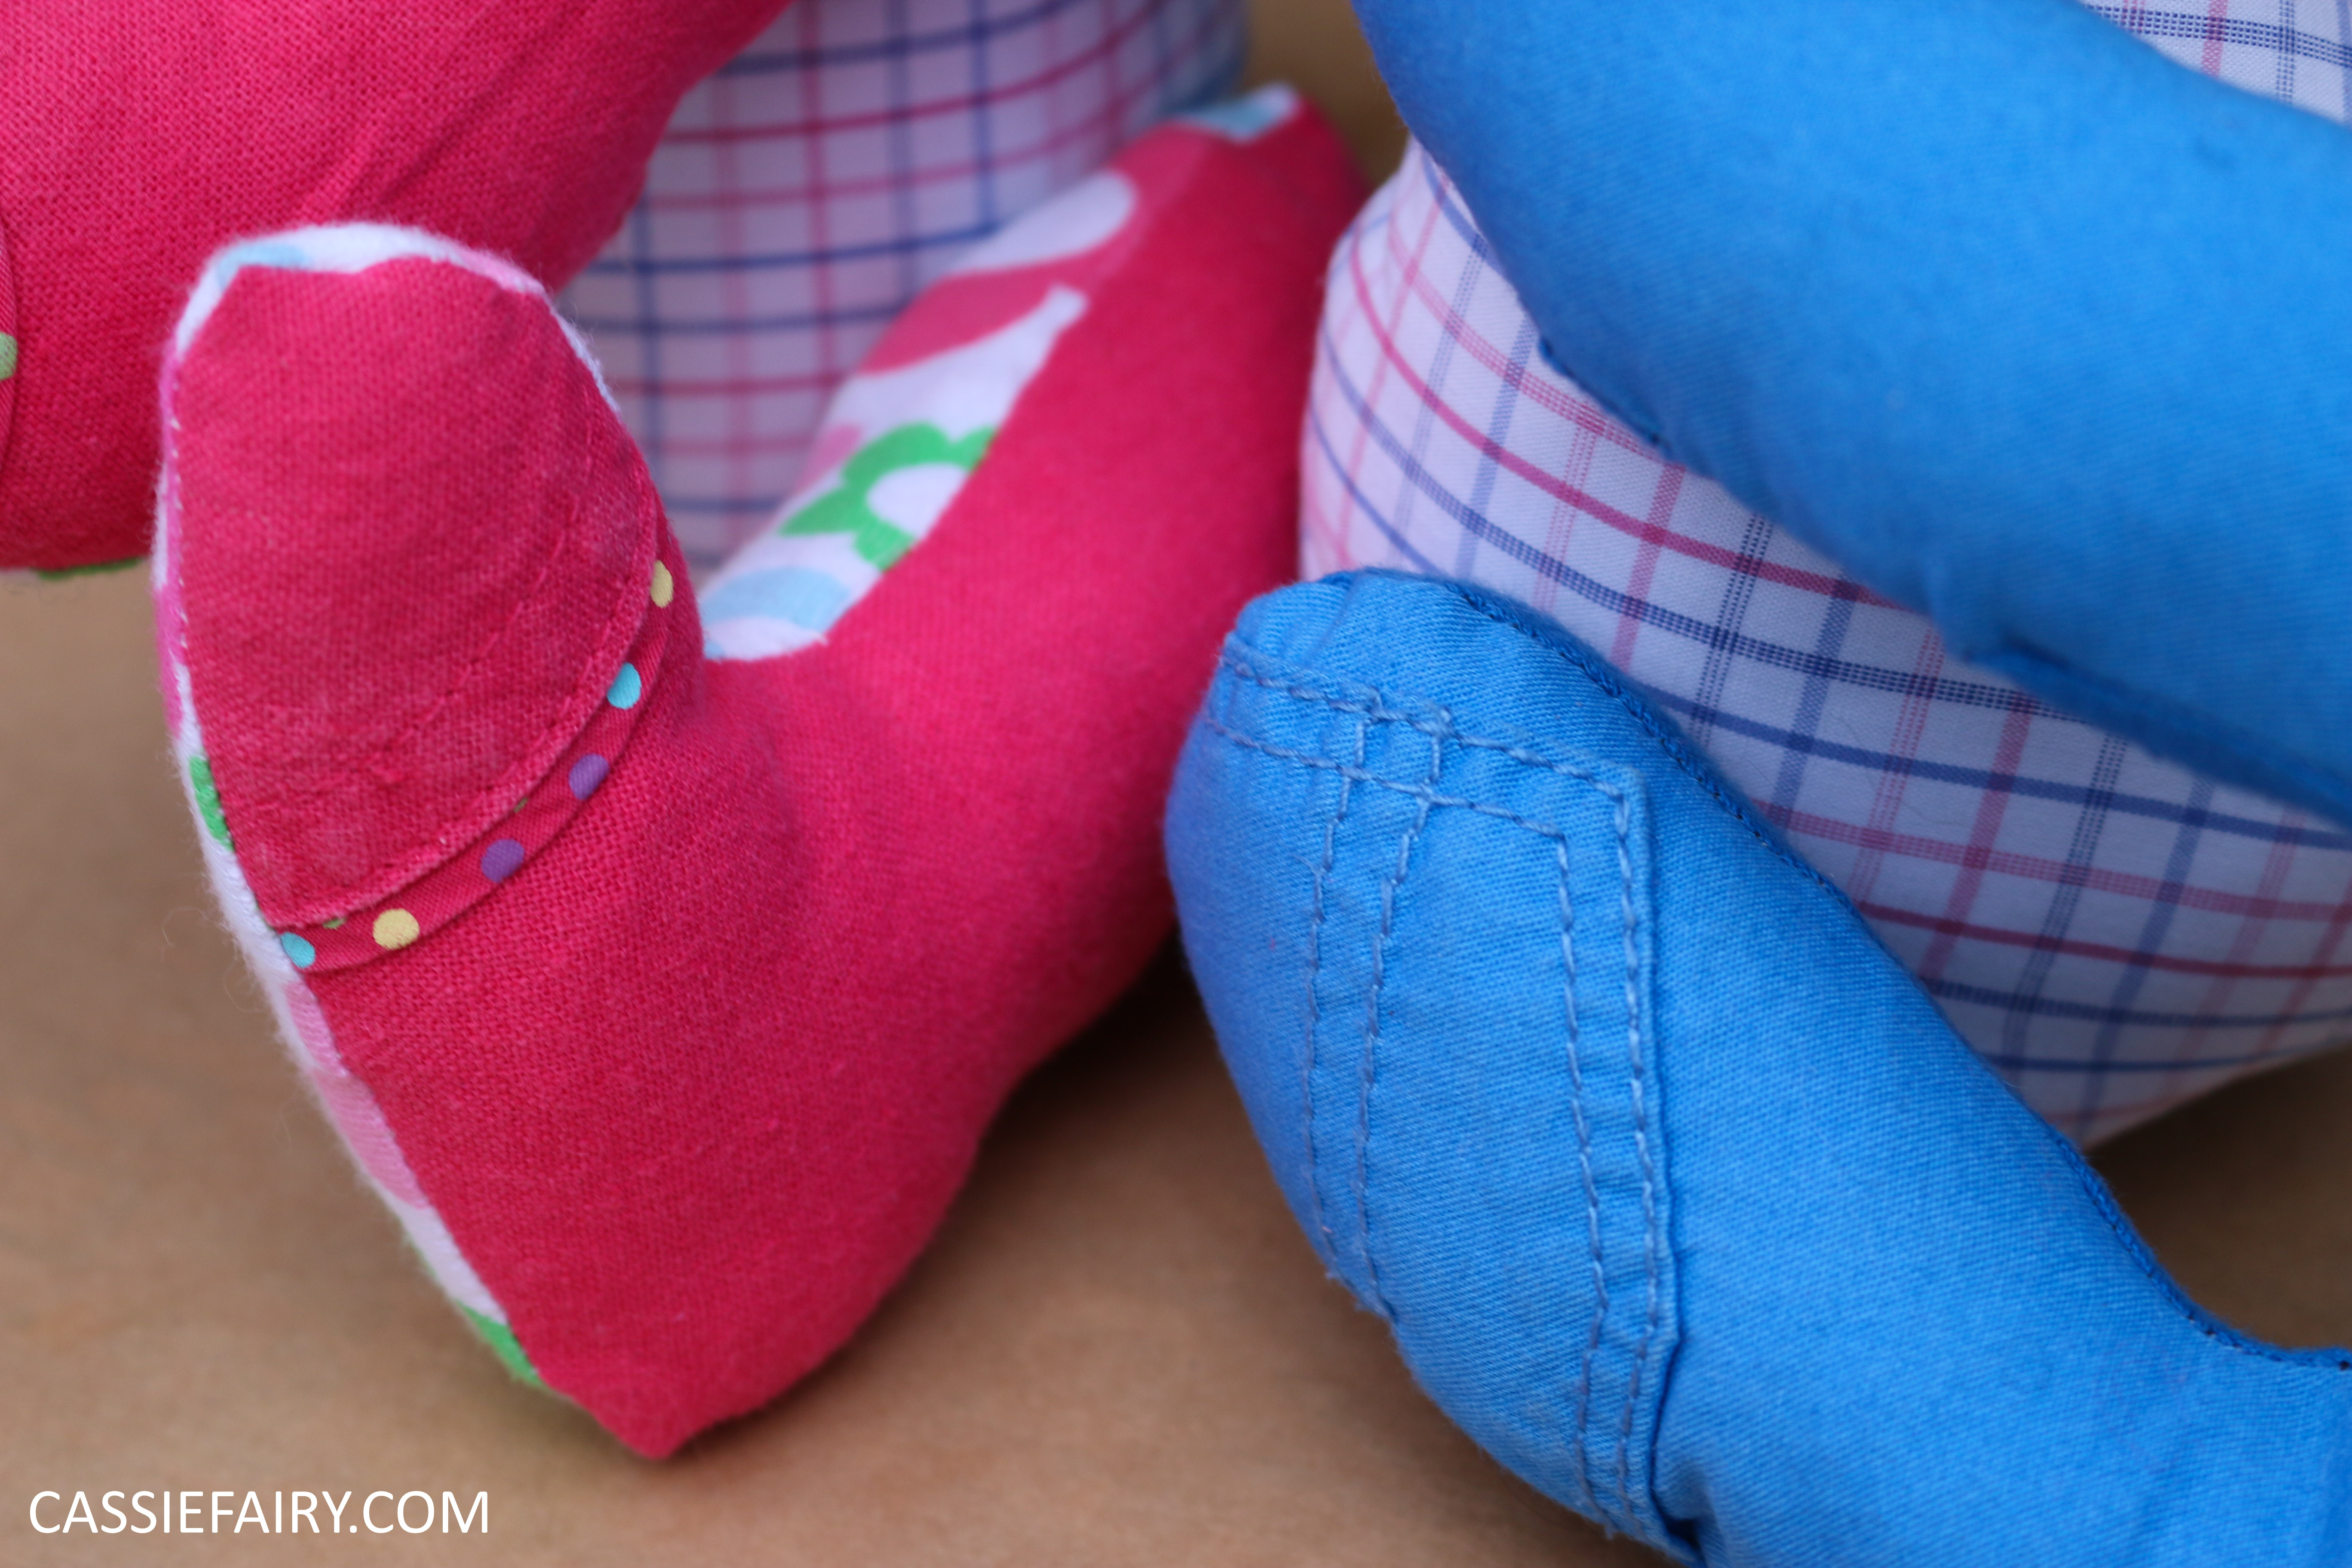 The little trousers were the perfect base to make the arms and legs of the teddies – the linen fabric wasn’t at all stretchy and I could make a feature out of the details on the trousers. I positioned the pattern pieces so that my niece’s bear would have the spotty trim from the trousers around the outside of the paws, and my nephew’s bear has tiny pockets on the legs. I could even reuse the lining of my nephew’s trousers to make a soft inner arm, and I added little monster designs from his tiny t-shirt to make contrasting paws and feet. I used a floral baby-grow to make the insides my of niece’s bear’s arms and even the bears’ ears have a patterned underside.
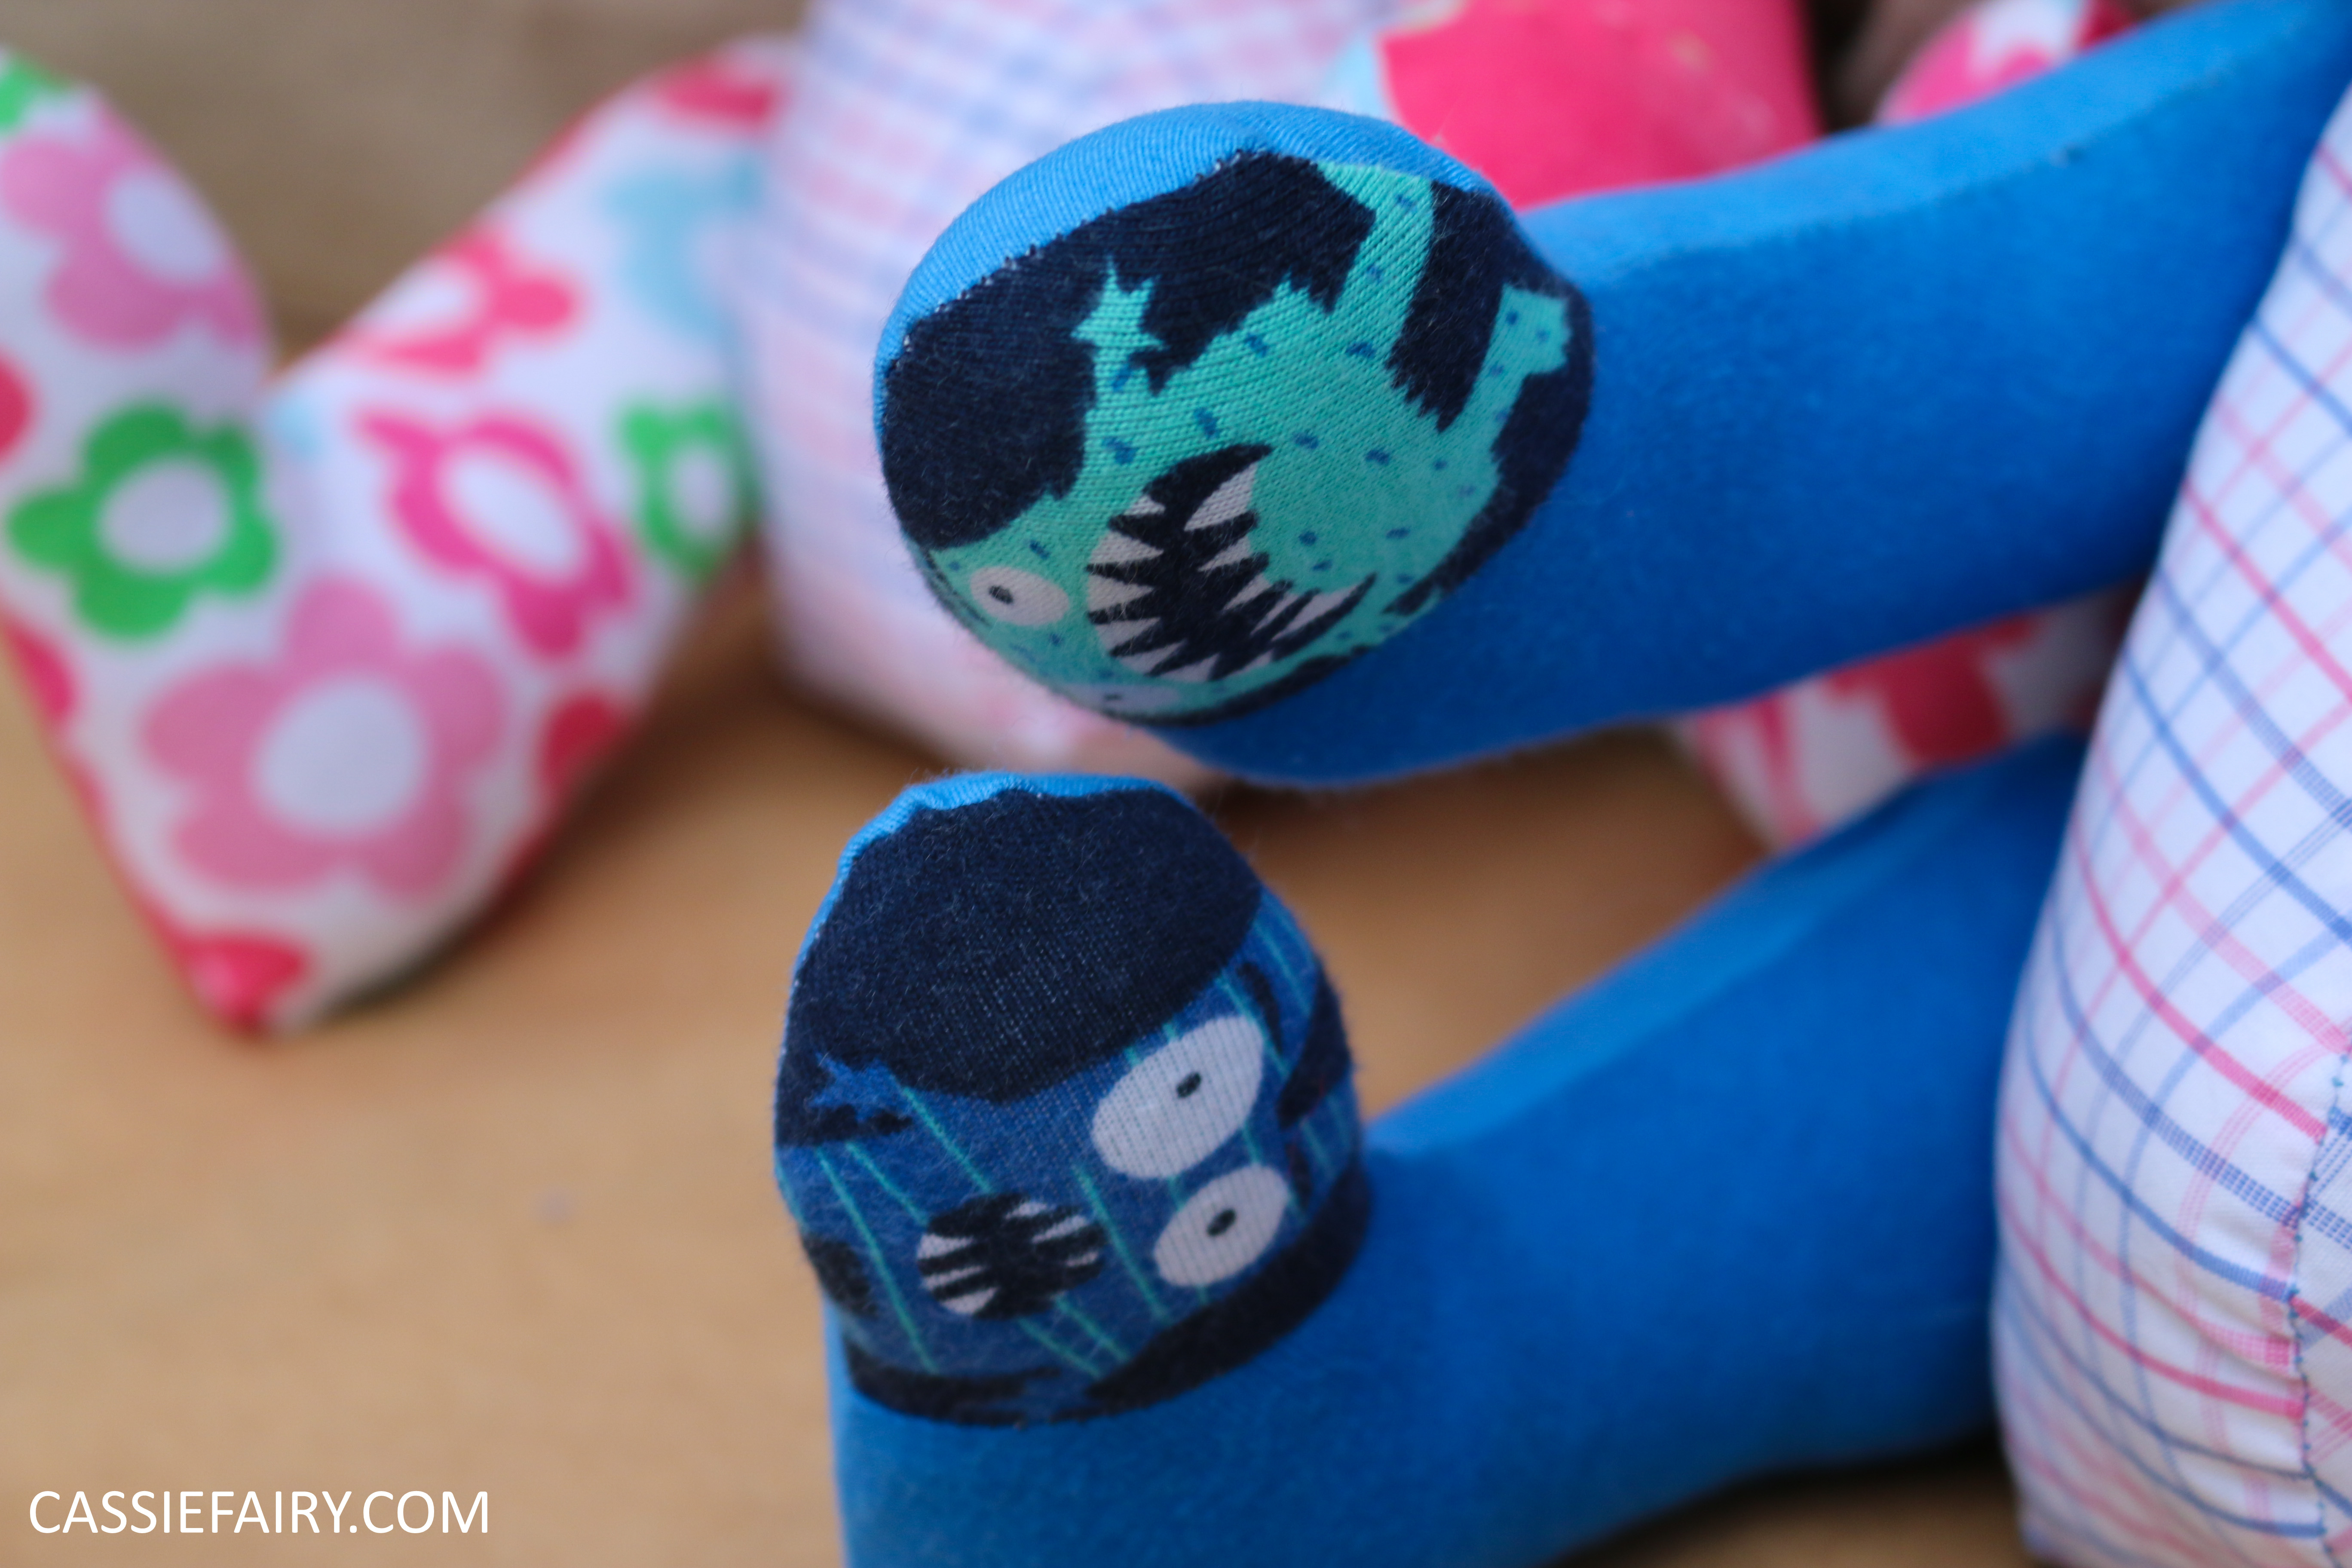
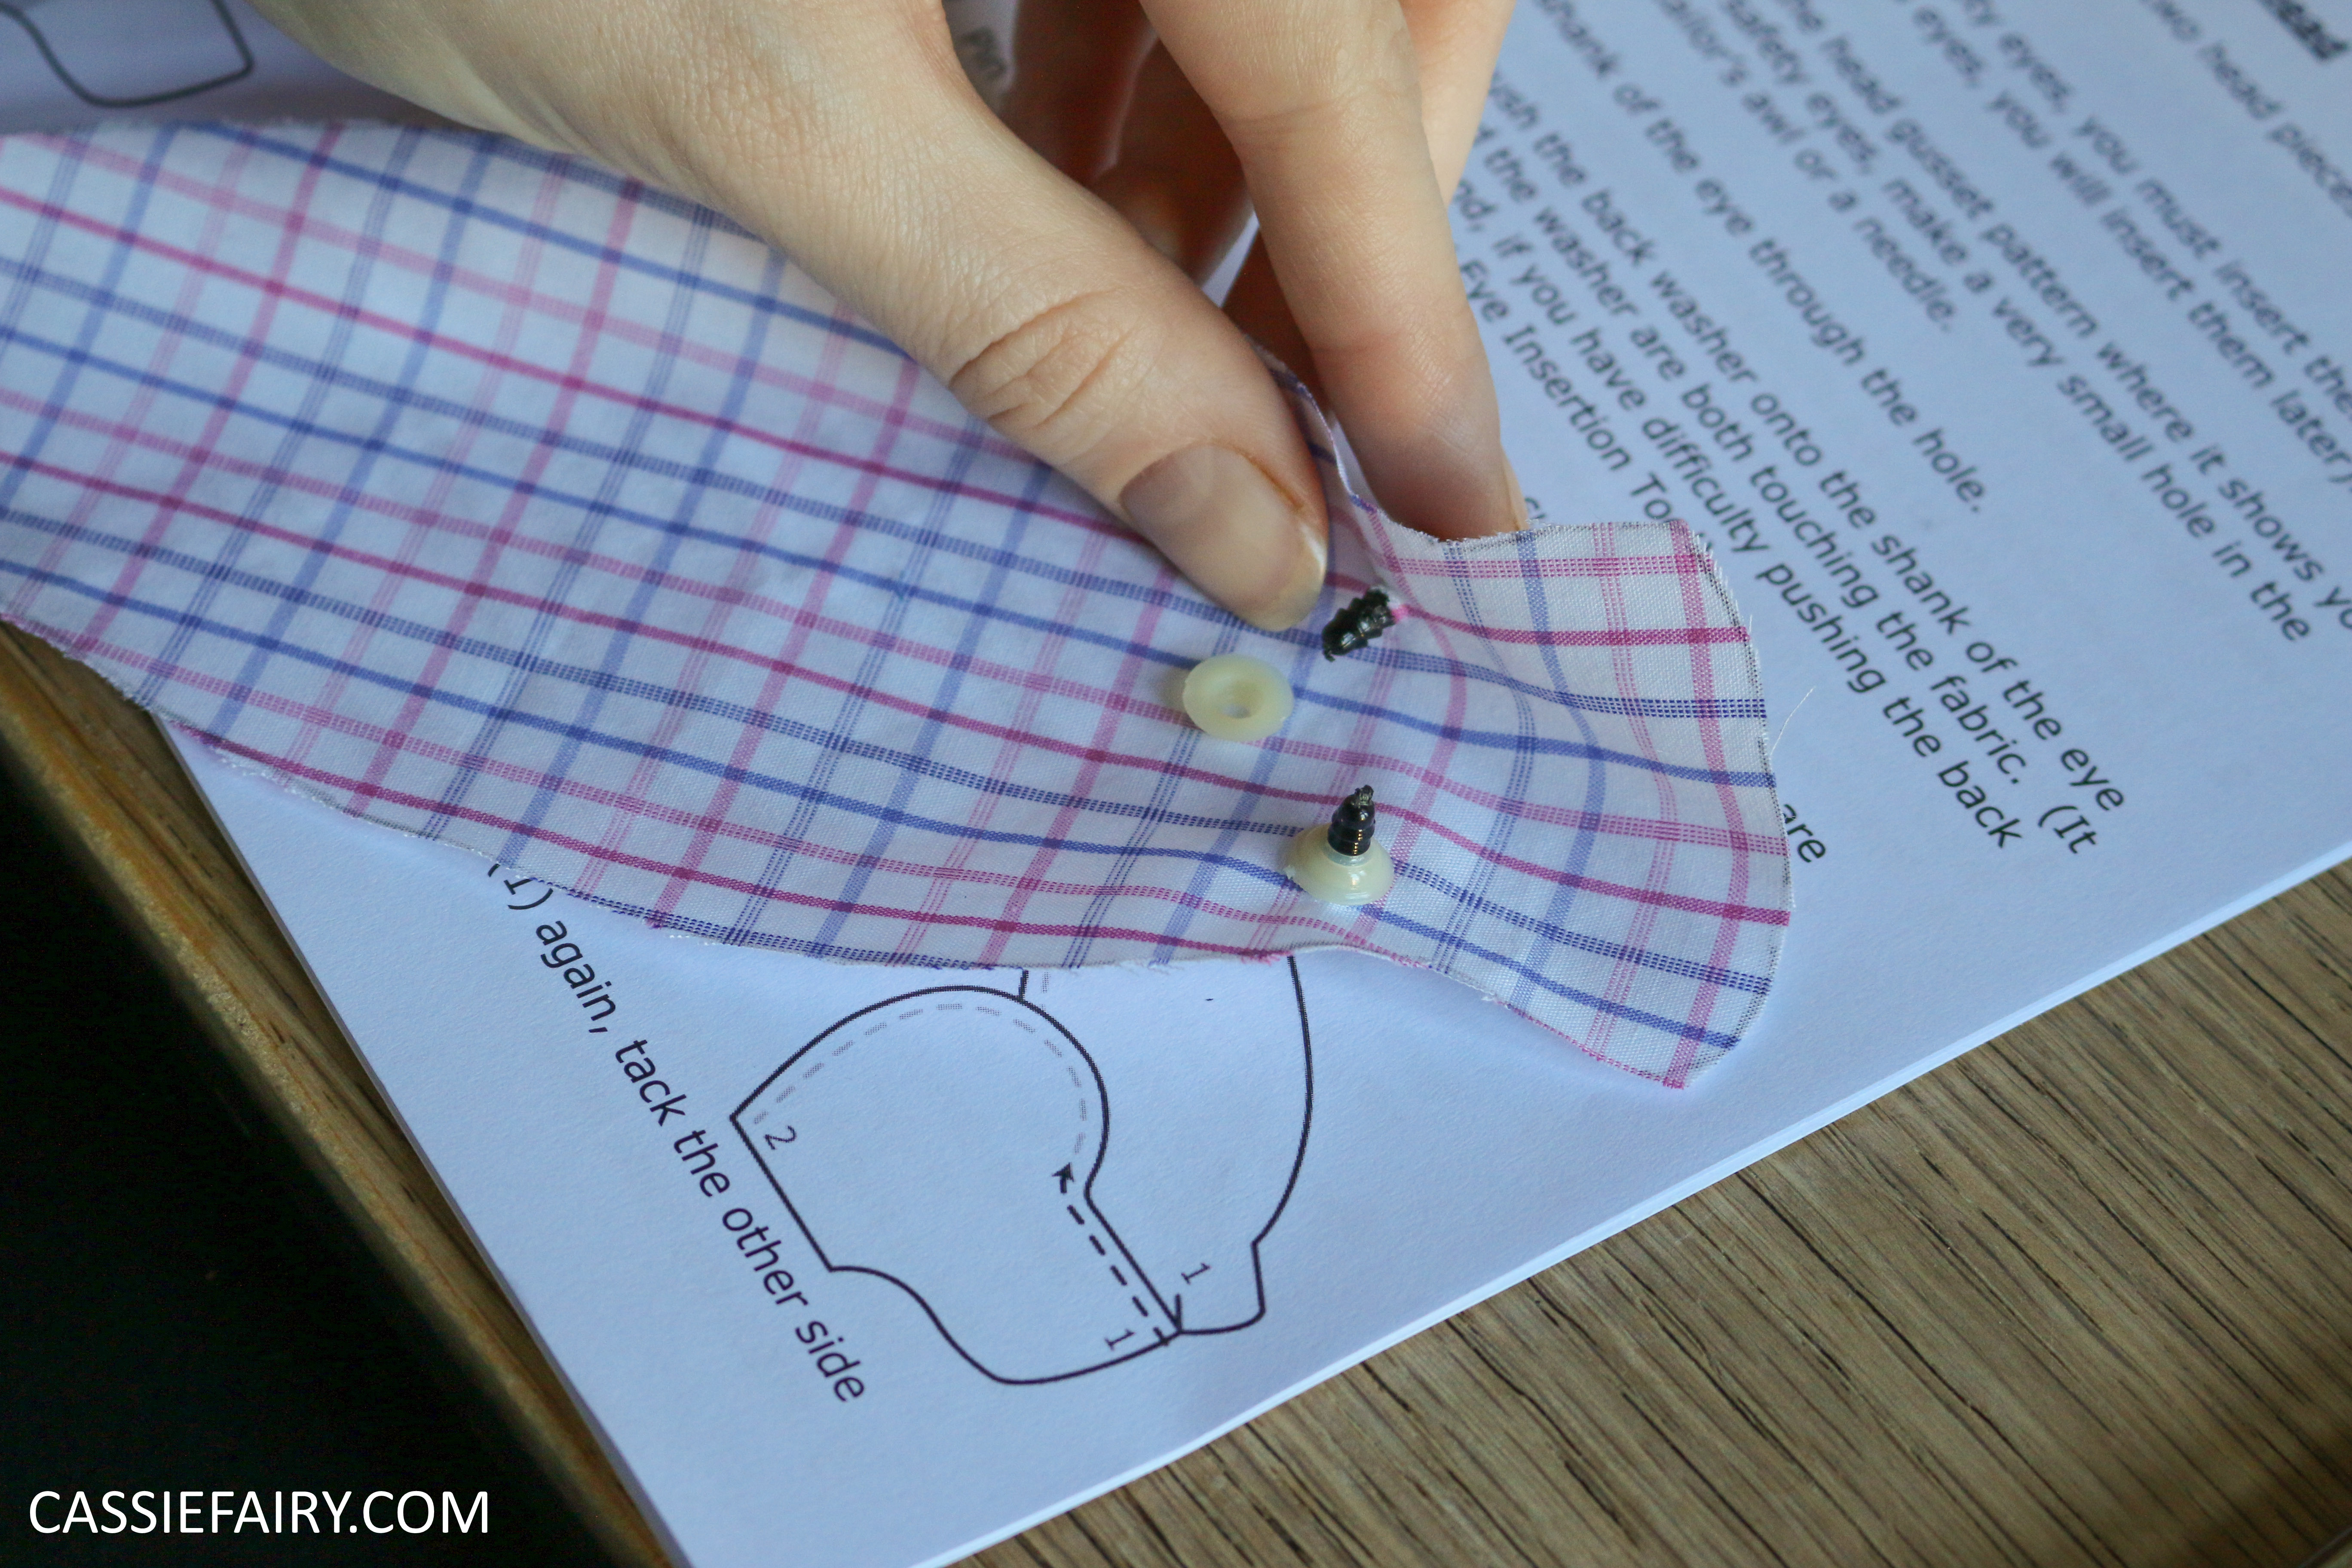
 I wanted the bears to be safe for the little ones to carry around, so I got some safety eyes and plastic safety joints from Amazing Craft. This means that the head, arms and legs are poseable and the eyes can’t be bitten off because they pop together and clamp into place. In fact, I couldn’t even get the joints apart again if I tried! My tip for using these is to get the position of the arms and legs right first time, because you won’t be able to take them off again if they’re in the wrong place, so double-check the position before pushing the joints together. Soaking the joints in hot water for a minute will make them a littler easier to pop together. The plastic joints are also safe to go in the washing machine, which is good news because we all know how mucky kid’s teddies get!
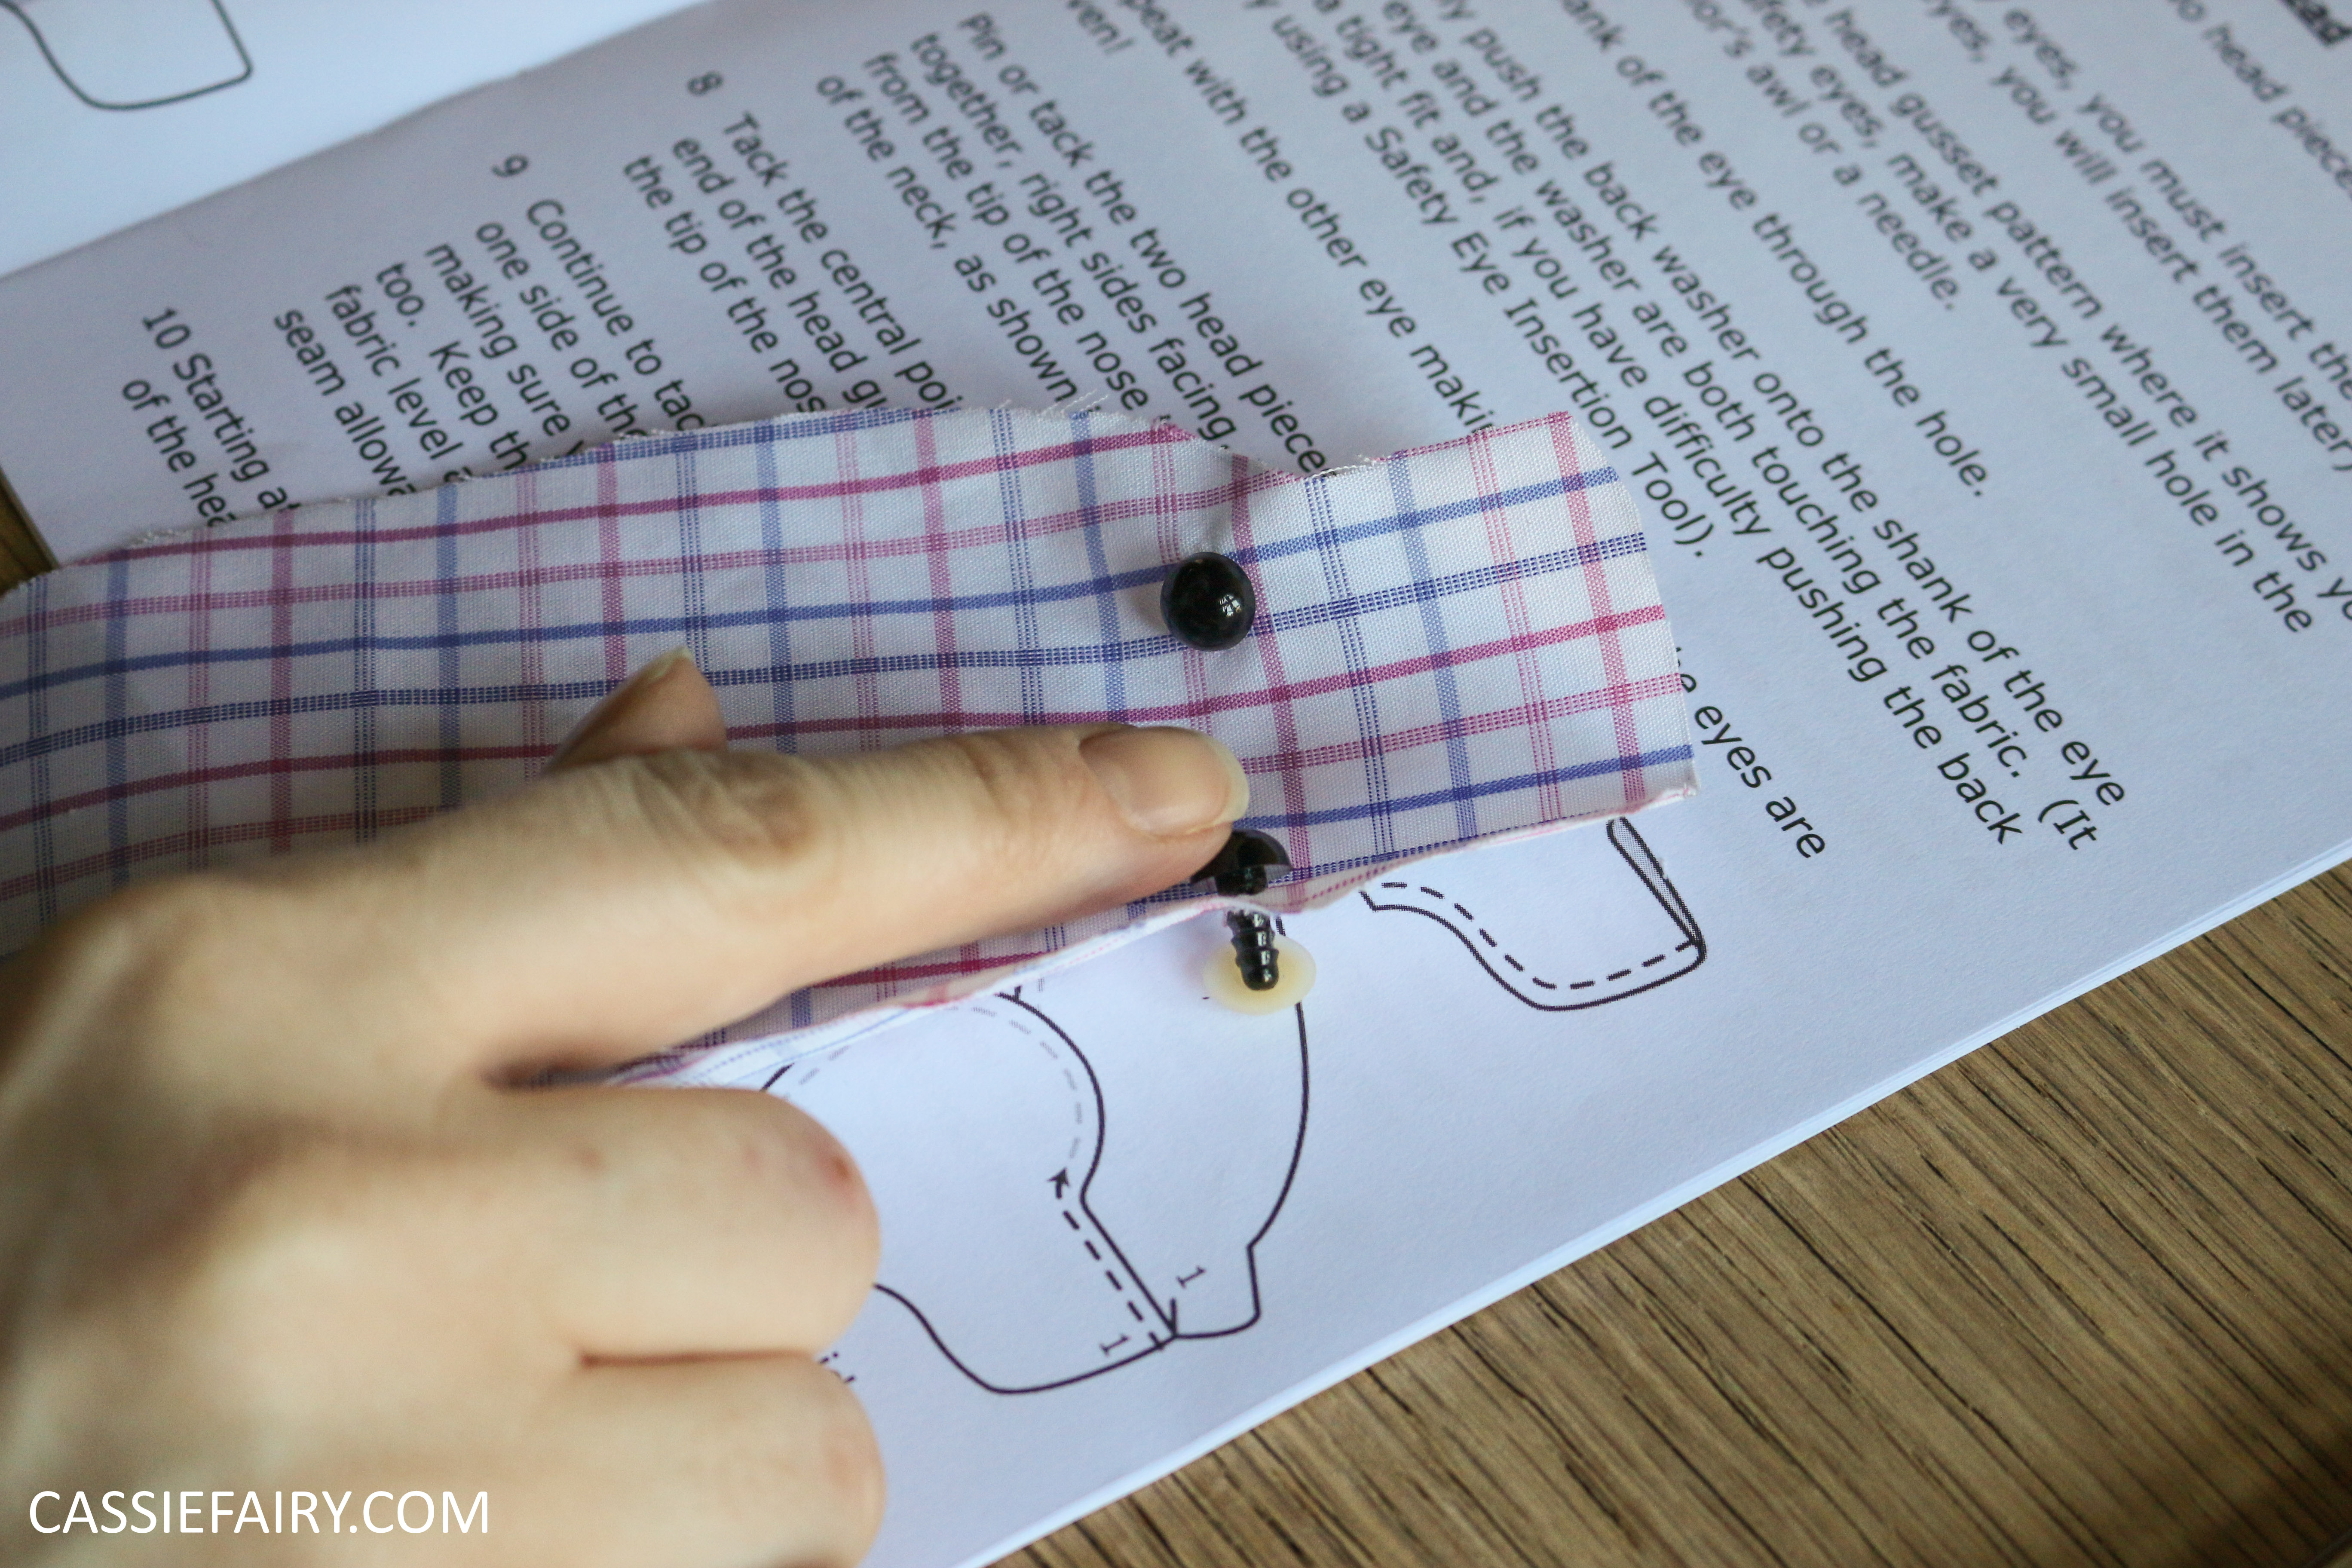
 For the body and head fabric, I picked up a shirt from the charity shop. The pink and blue checked fabric matched the limbs of both bears perfectly. And yes, I did take the kids clothes with me while I was shopping for the fabric so that I could check the colours. Having the bodies and heads made from the same fabric unifies the bears as a pair but they are still very different. I actually only used the sleeves of the shirt to make both bears, so I have plenty more fabric left to make more bears if any more nieces and nephews are added to the family in the future!
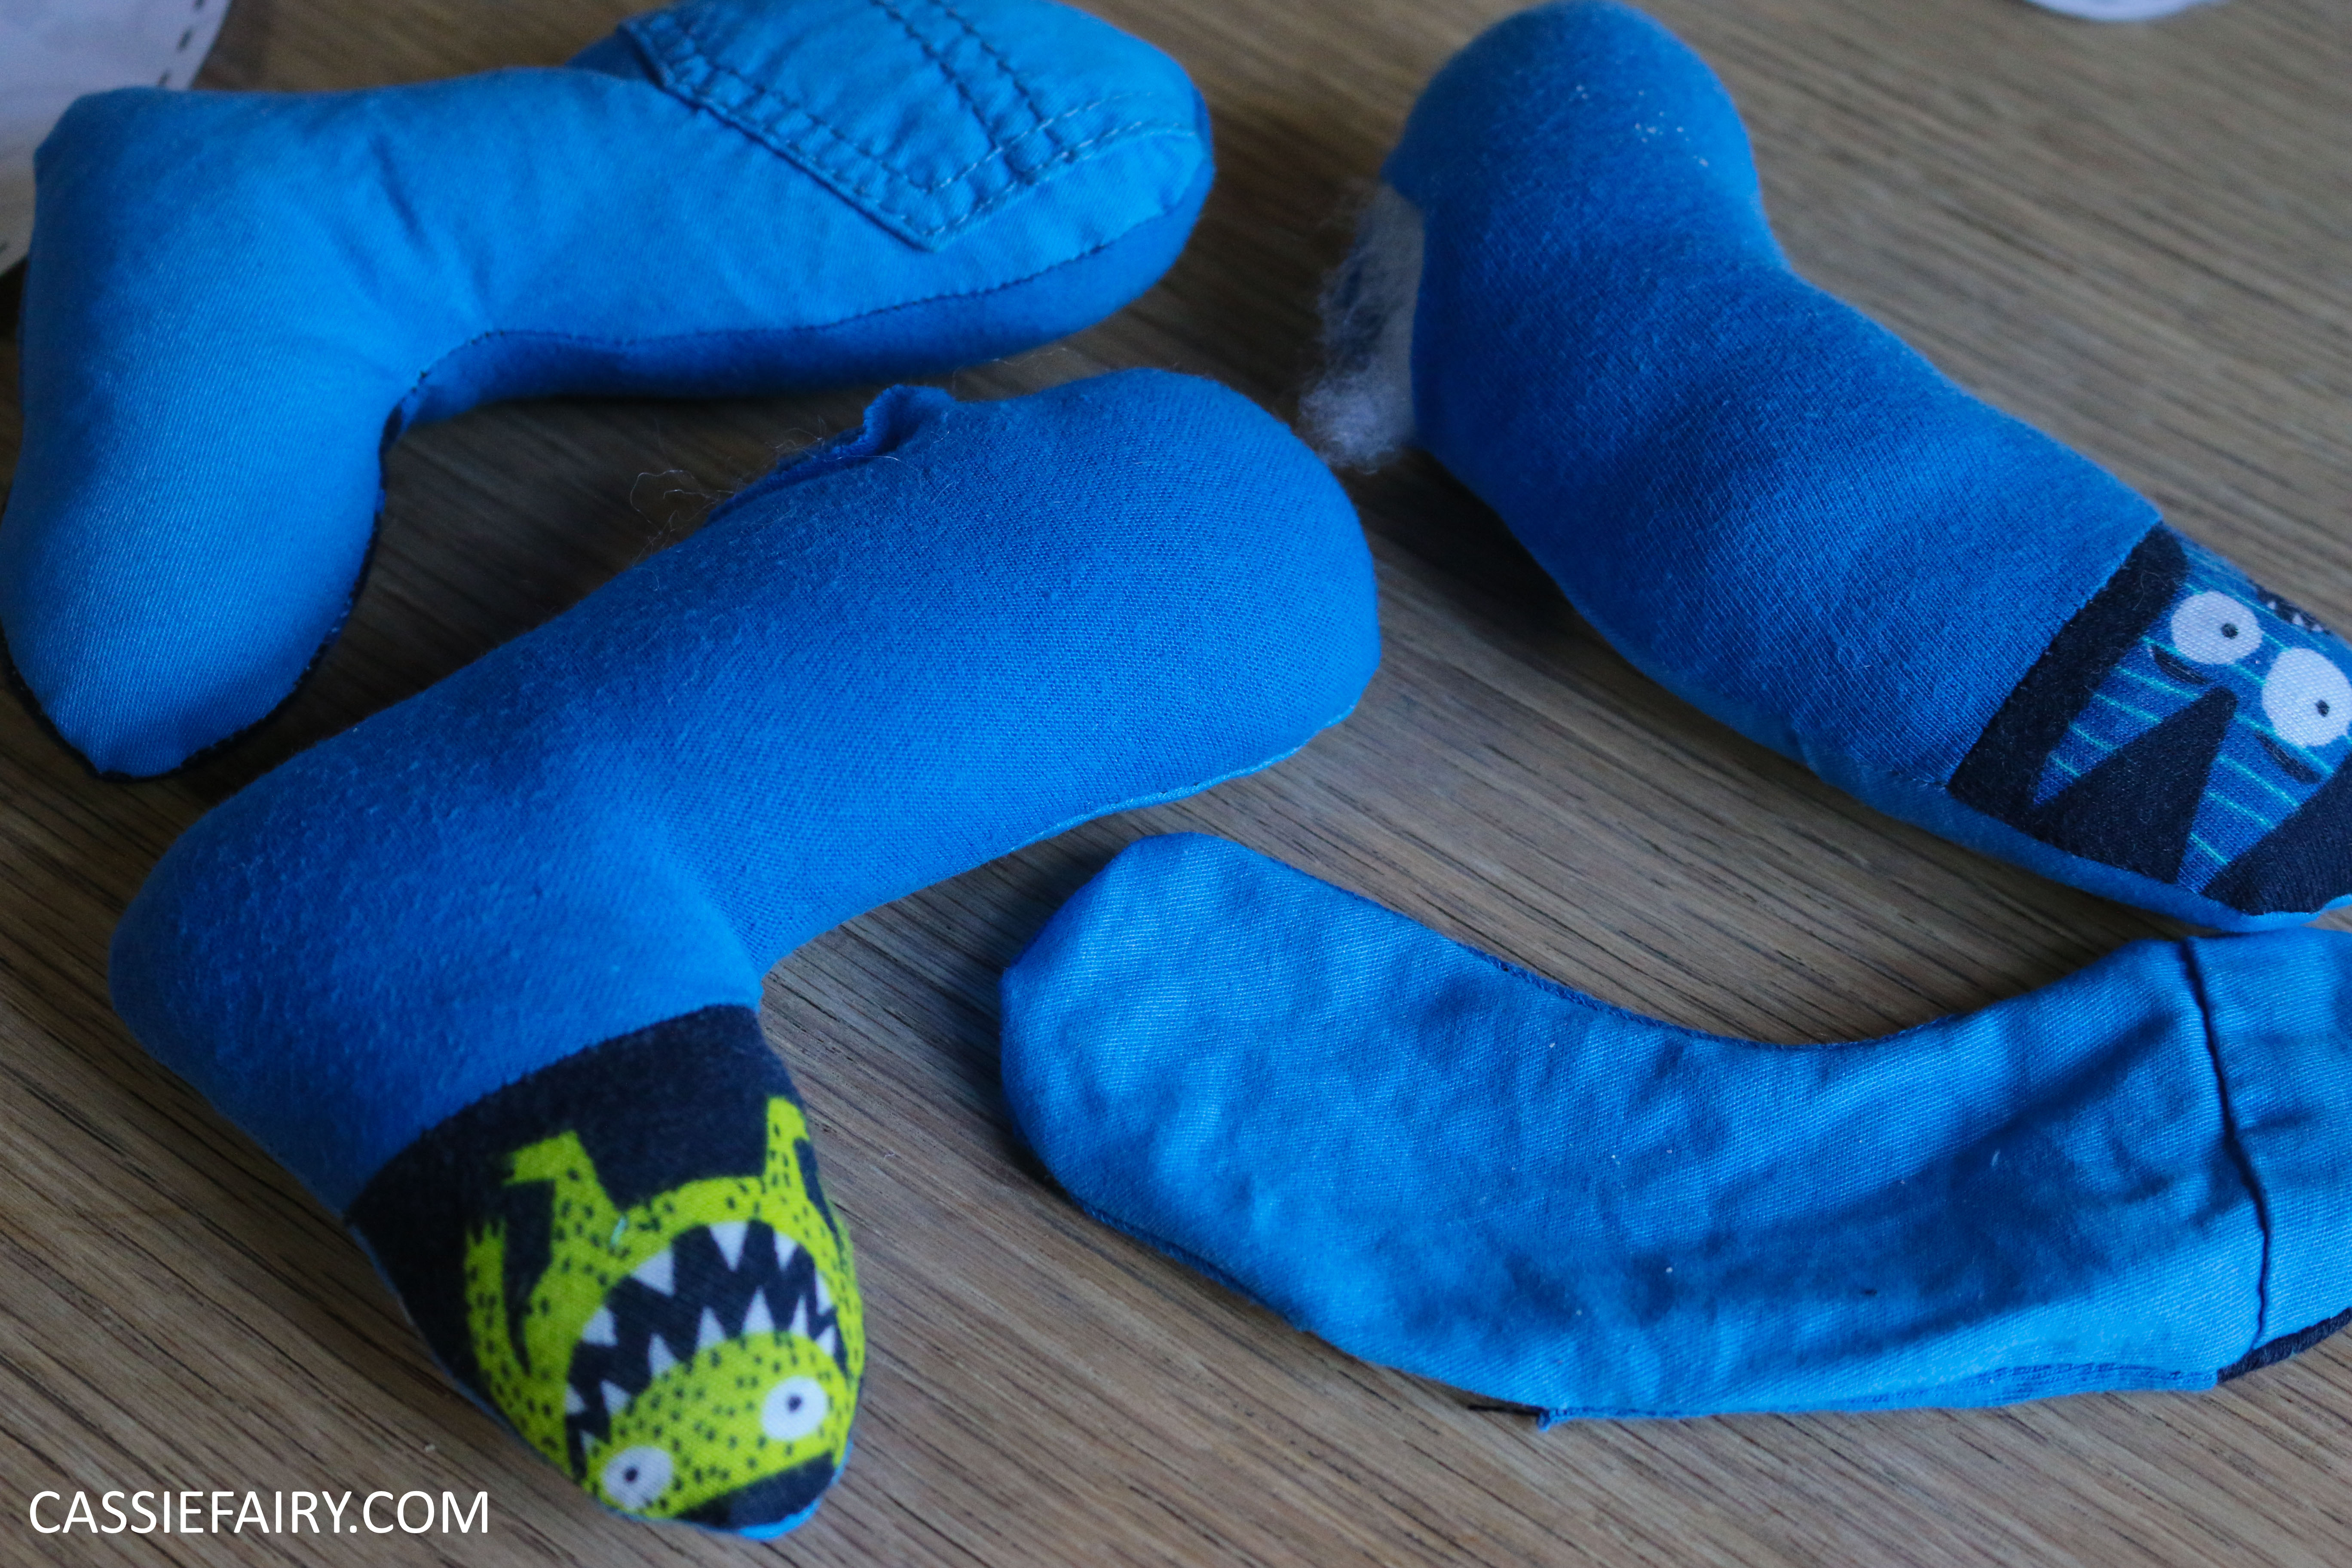
 What do you think of the idea of making teddy bears as a personalised Christmas present? Or for a birthday or even as a christening gift? The actual sewing process didn’t take long and it meant that I got to spend a really enjoyable afternoon away from the laptop or TV screen, so it was really relaxing too. In fact, I kinda want to do it again – this bear-making lark is addictive! I guess that’s because it’s such a satisfying end result; I just had to be careful not to name the bears, otherwise I’d get too attached to them. Be sure to check out this pattern from Amazing Craft if you’re thinking about giving it a go yourself – as long as you follow the instructions in the booklet, you can’t go wrong!