I’m getting a home office! And May will be the month that it happens. Finally, a space I can work in all year round with having to move myself and my laptop in and out of the house. Of course, I love working in my little vintage caravan for most of the year, but when the winter comes, I tend to find myself sit at the kitchen table (or worse, on the sofa) instead going out to the caravan. Honestly, it’s no good for my back, my neck, my legs or my health, so I can’t wait to get a proper office space sorted inside the house.


The bathroom wasn’t the only room to end up being completely stripped out this week. While the tile adhesive was drying I decided to tackle the small bedroom that would eventually become my home office. I powered up my steamer and (after being rather successful with stripping off the woodchip wallpaper in the living room) started to scrape the walls. The only difference this time is that the woodchip wallpaper was beneath another layer of wallpaper. Yes, the last people to decorate hadn’t bothered to take off the woodchip; they’d just papered over the top, creating a lovely dimpled effect on the top paper.


Should I just wallpaper over the top of that? Surely, after a few more layers of wallpaper, the woodchip will be hardly noticeable? Nah, I’m joking of course. I spent a whole day in that room getting hot and steamy, and two sore arms later, I had woodchip-free walls. 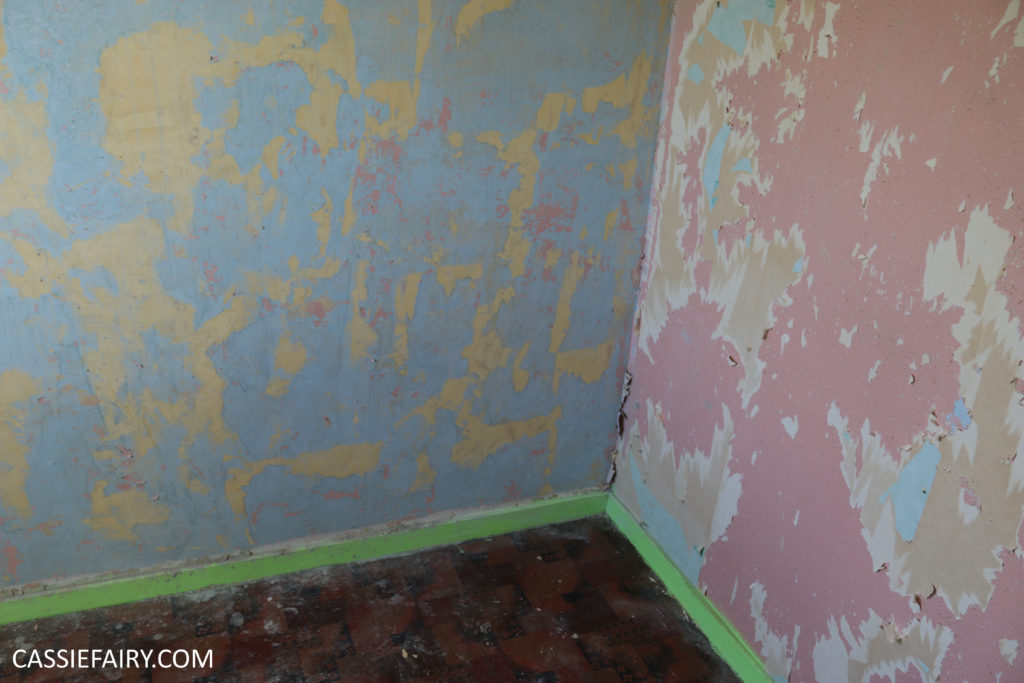 I’ve got lots of decorating to do in the office but I’m already much happier now that the vinyl flooring has gone and the walls are scraped back to plaster. It’s all in the preparation, isn’t it? I’ve picked up some bargain end-of-line rolls of wallpaper for just £1 each so I’m going to paste that up soon. But the desk set-up is the stage I’m really looking forward to, because I’ve already made a decision about what type of desk I want.
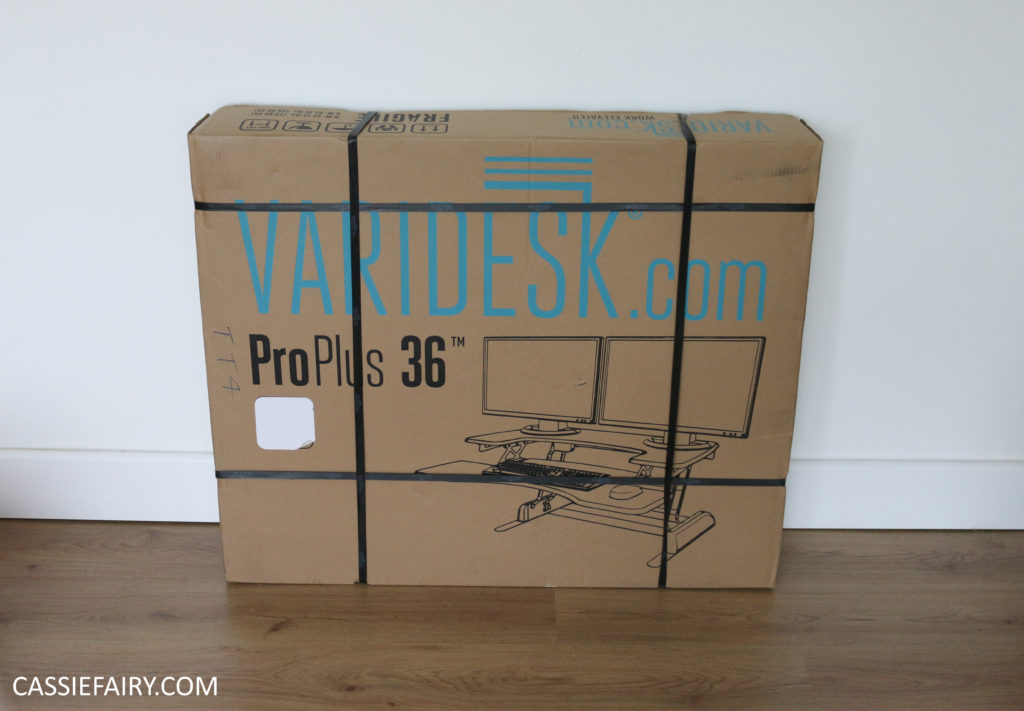
If you read my blog post about the ergonomics of a home office, you’ll know that I’ve already done a lot of research into this. I want my back to stay strong and my body to be as healthy as possible, despite the hours I spend at my desk. So I came to the conclusion that a sit/stand desk was the way to go. I’d been alternating between my DIY desk and a shelf at standing height in my last home, but that wasn’t the ideal solution.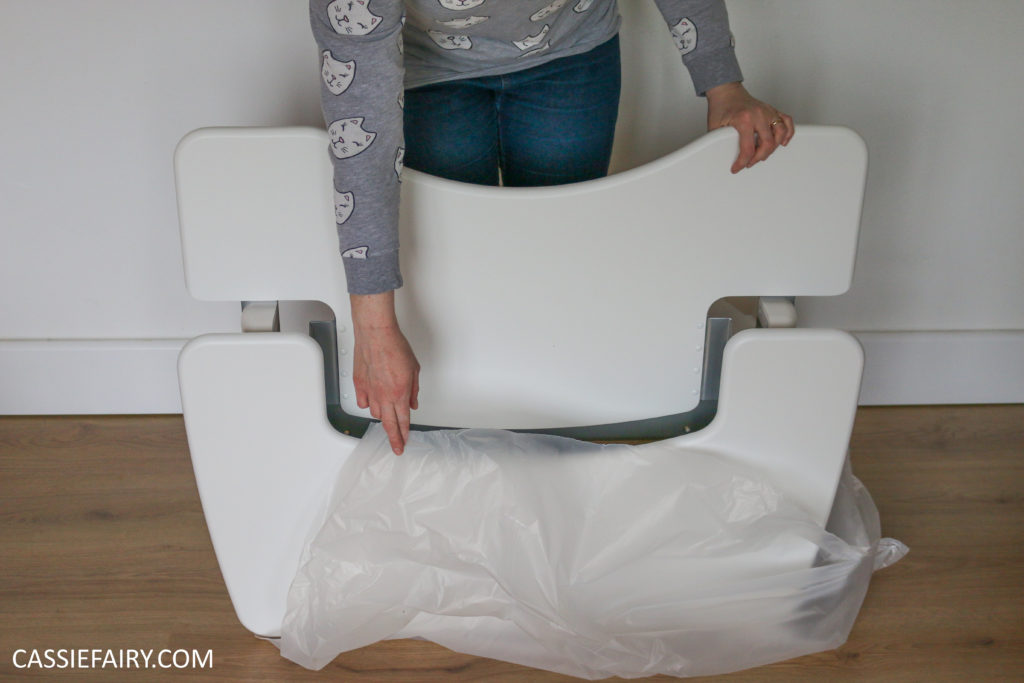 I’d heard of Varidesk a few times over the past year – it always came up in my research – but didn’t have the space for a new piece of office furniture at the time. What I didn’t realise is that the Varidesk sits on top of your existing desk and transforms it into a sit/stand desk. I decided that my treat for doing so well with decorating the office would be the Pro Plus 36 Varidesk. Well, it IS a business expense, after all!
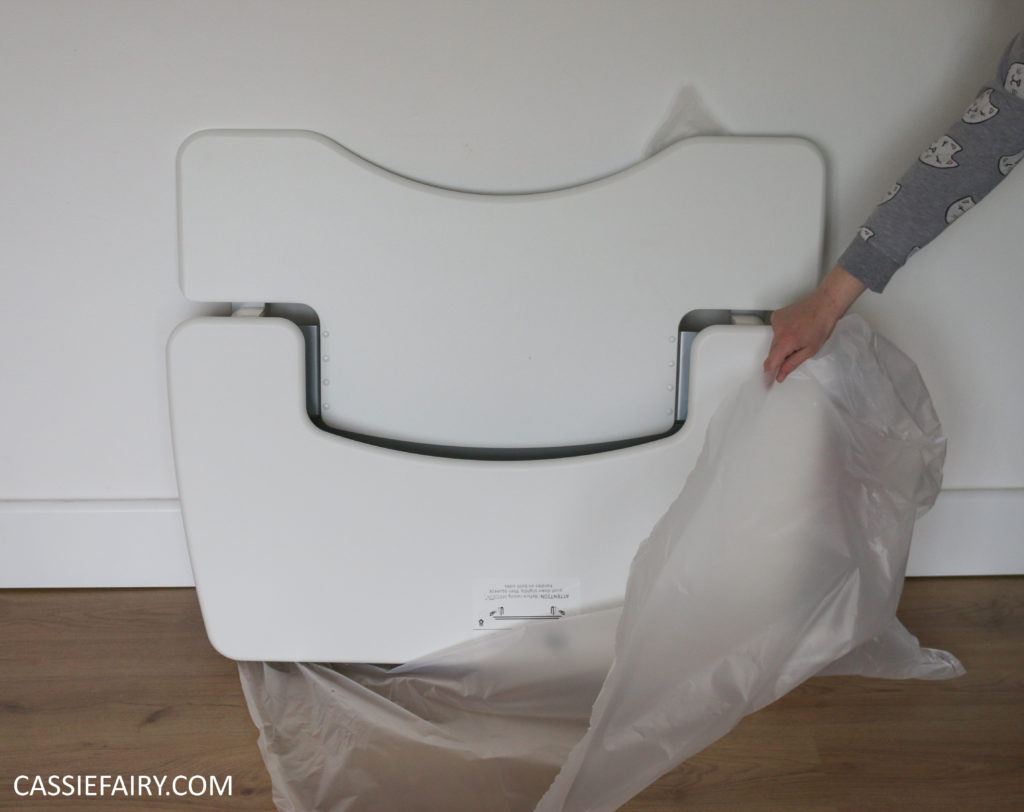
 I chose it in white and waited for the delivery to arrive. Blimey, it’s a heavy box – I’m glad the delivery guy was so helpful in putting it in my hallway because I certainly couldn’t have lifted it. As I unboxed the desk I discovered why; firstly, it’s a very sturdy piece of kit. I guess you don’t want something flimsy when you’re working with (and moving) computers and tech items, so the heaviness of the base was really reassuring. Secondly, it’s SO well packaged with the thickest cardboard that I’m sure a lot of the weight was in the box alone. In fact, when I went to take out the cardboard to be recycled, I could still barely lift it!
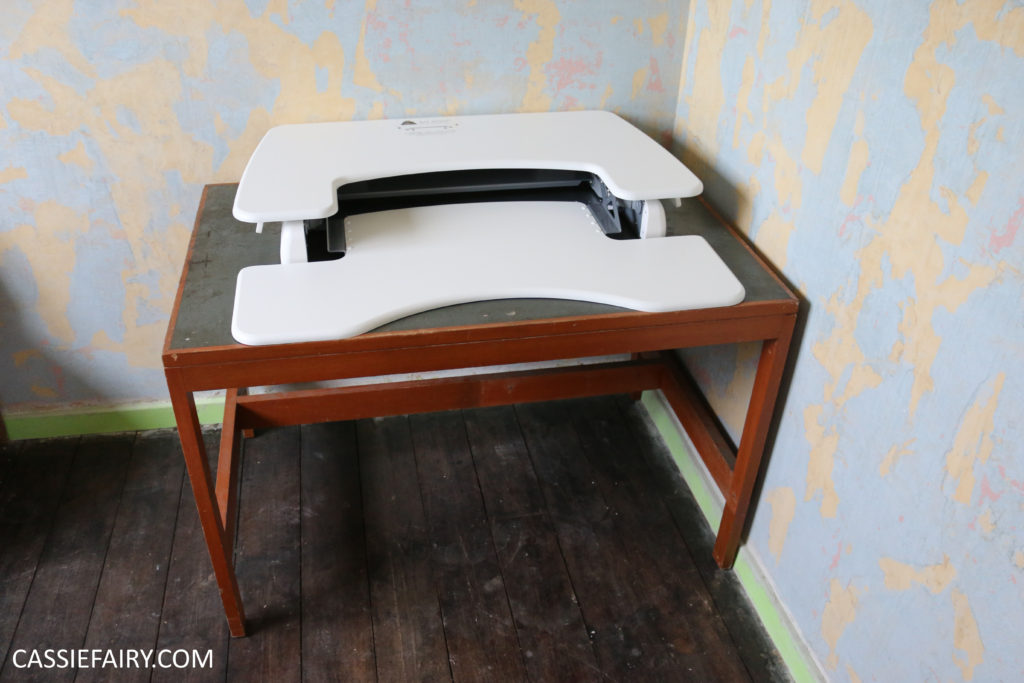
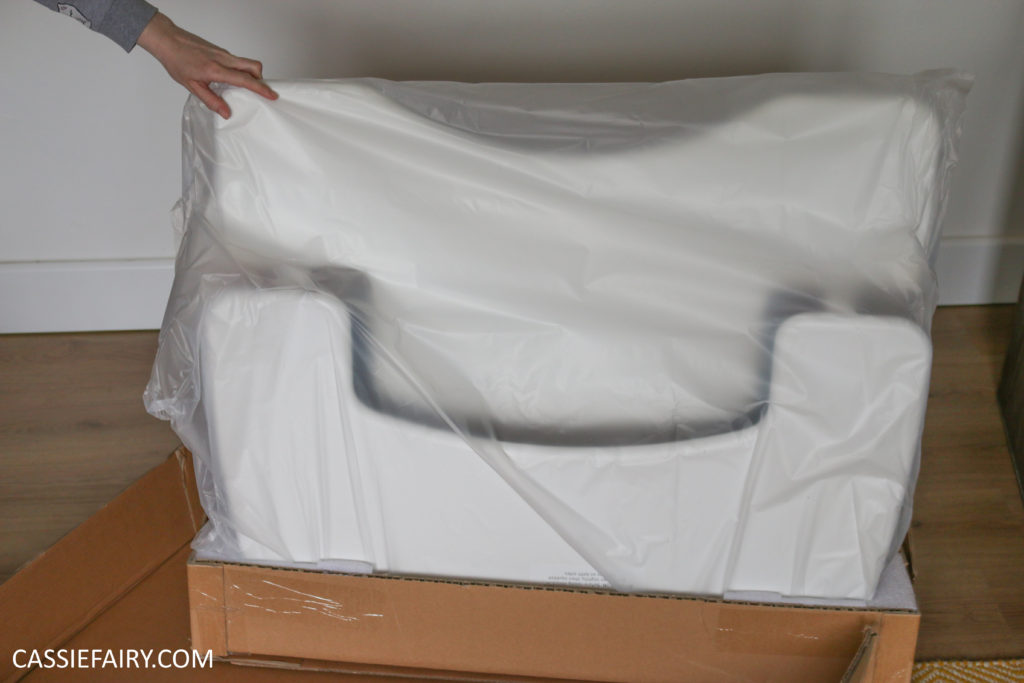
 I thought I’d have a flat-packed assembly job on my hands when I opened the box, but no. The Varidesk came already assembled and just needed a couple of protective pieces removing before I could start using it. I still don’t have my office or desk properly set up but I wanted to try it straight away so we placed it on top of my desktop before I’d even refitted the drawers.
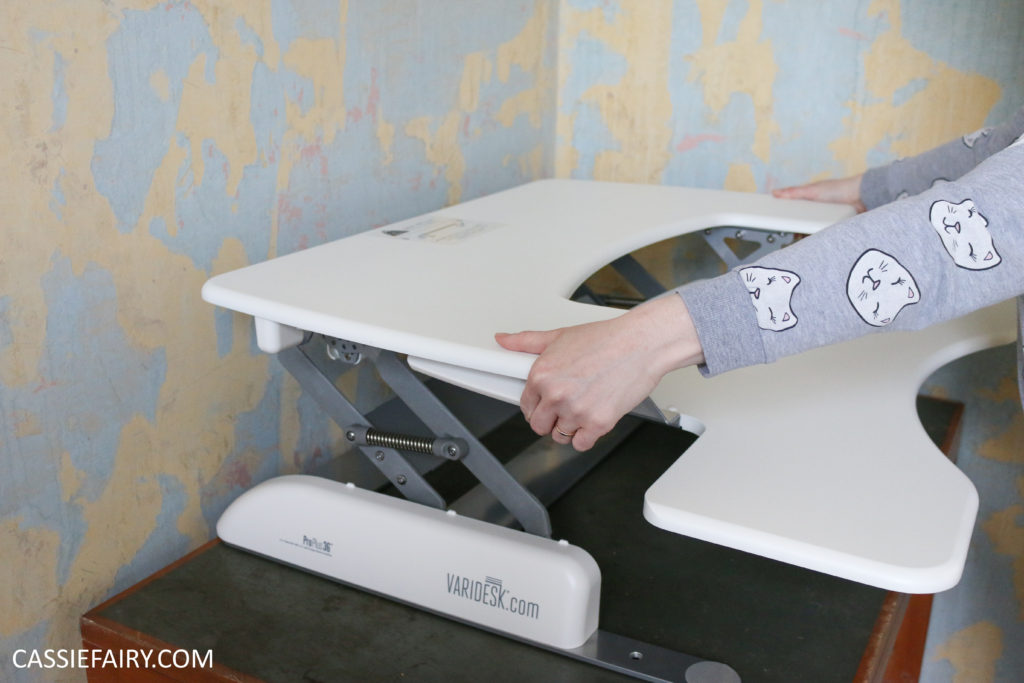
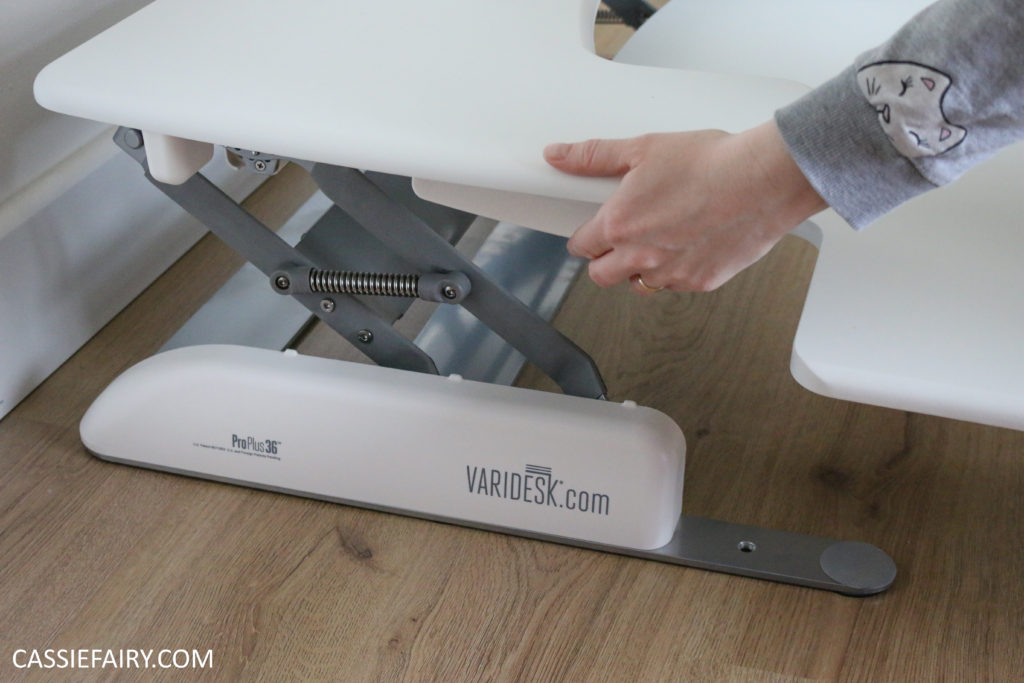
 The mechanism is so easy to use; two handles (one at either side of the desk) are pressed down to engage the springs and lift the Varidesk up to a standing height. I’m glad that both handles have to be squeezed – this means there’s no chance that I can accidentally lean on one handle and ping the desk upwards! The standing height is adjustable – you just stop lifting at whatever height is right for you. It suits both my 6ft husband and my just-over 5ft self perfectly, depending on the height we lift it to.
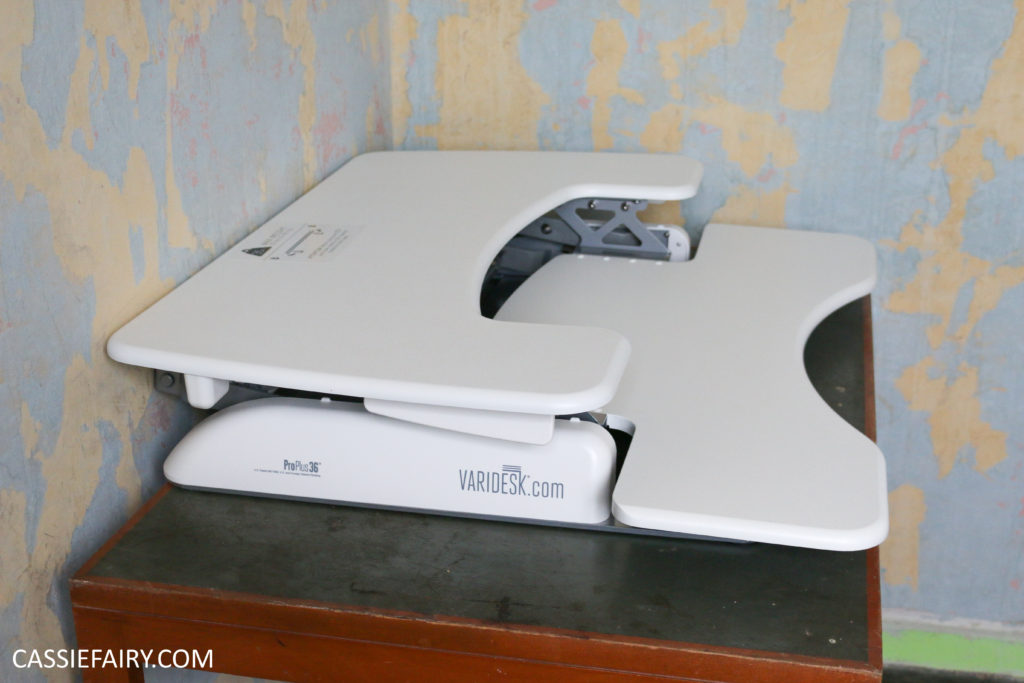
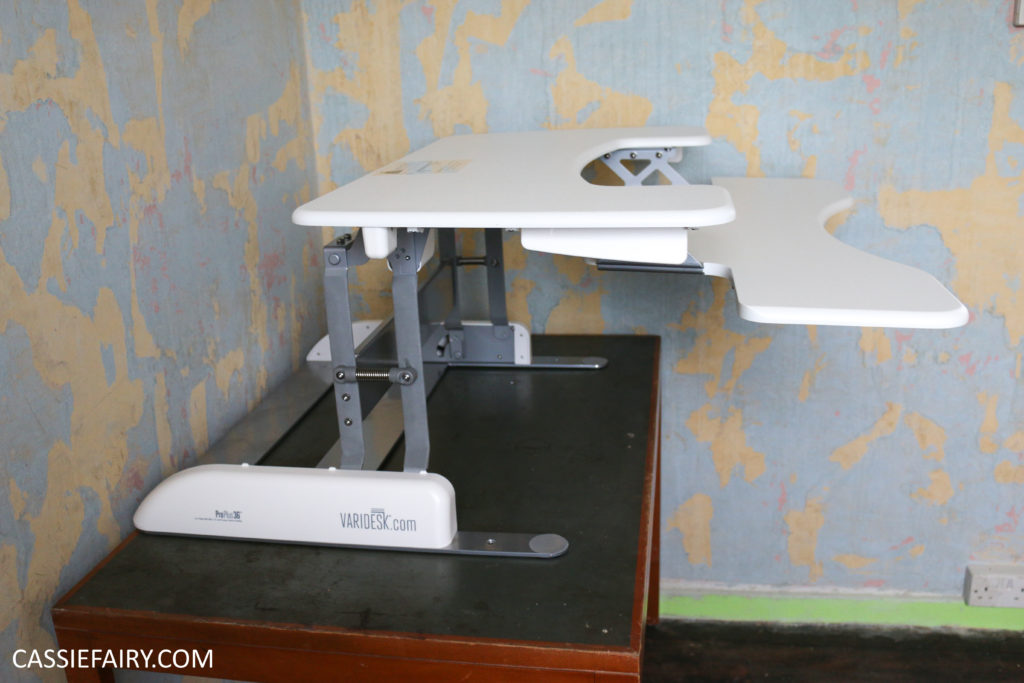
 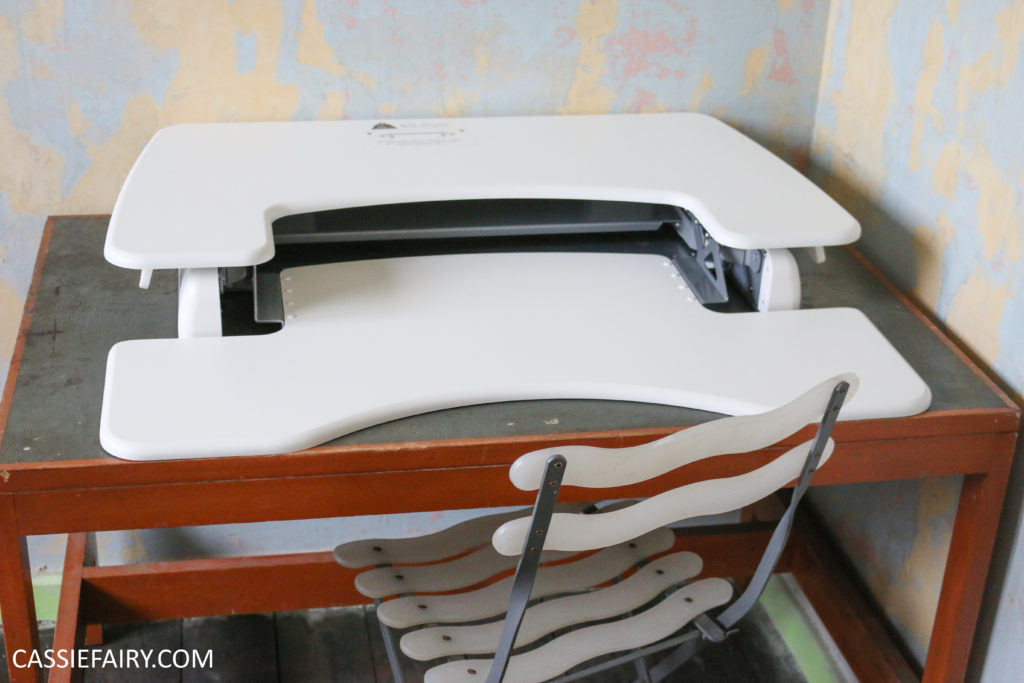 And when I say lift, there’s no effort involved. The springs raise it up smoothly and the only thing you’re controlling is the height at which it stops lifting. There’s actually more effort needed to move the desk back down than there is to lift it up. When it’s folded flat, it lies flush on the surface of the desk. In order to make this ergonmic desk work with my laptop, I’m going to use my Lenovo Yoga on its screen-only setting to create a monitor and position it on the shelf of the Varidesk, so it’s at eye-level. I’m going to combine it with a separate Penclic keyboard and a Nicetouch mouse pad on the base of the desk to create a PC-style set up. Now all I need to do is paint my ‘free to a good home’ desk (and put up that £1 wallpaper) and I’ll be ready to work!
Watch this space for more photos of my office makeover 🙂
Some items in this blog post have been gifted to me and the pink links indicate a gifted product, affiliate link or information source. All thoughts and opinions in this post are based on my own experience and I am not responsible for your experience 🙂


5 responses
Aw thanks Sarah 🙂 Oh I was exactly the same as a student! Yes, I definitely needed an adjustable desk to save my back after all those years! x
I love that this is economical (you’re doing it yourself) AND ergonomic – which is so important! After years of working on my bed as a student I’ve developed some pretty terrible techniques. Great that the desk is adjustable – that’s exactly what I need!
Thanks so much Linda, glad you like it! I can’t wait to get the whole office sorted and have storage space for everything I need 🙂 I have high hopes for the desk, I think I’m going to be so much more comfortable while working 🙂
Will be interested to hear how you like the new desk, as I have thought about getting one myself. My current set up is fine, but I like the idea of standing for a part of the day. Good luck with the room, it will be super cozy in the winter months or on those days you need to stay in the house. Love the blog by the way, always interesting.