All good bank holiday weekends should be spent DIYing, right? The project I had earmarked for the May bank holiday has been long overdue and I can’t believe it’s finally happened! Here’s how I DIYed a wall-to-wall desk for my home office…
It’s been on the cards for a while. Ever since I moved into my home, in fact. And that’s over two years ago now! Sure, I’ve had a desk in my office, but it’s always been a bit of a make-do job. I actually found it ‘free to a good home’ at the side of the road. I planned to paint it and turn the tatty old desk into something I loved, but it never quite happened. So I’ve been working away on a grubby old desk for a couple of years now. Here, I’ll show you:
Actually, that photo was taken after I’d cleared some space to get on with the project and makes the room look quite nice. In reality, it was more like this:

I didn’t have enough storage in my office, which is why I’ve got things piled up all over the place. I tried to keep the desk tidy (I can’t bear to work when the space is a mess) but the area beside the desk was a bit of a dumping ground. Boxes, DIY supplies and even caravan cushions occupied the space when really I needed a bigger surface and more storage.
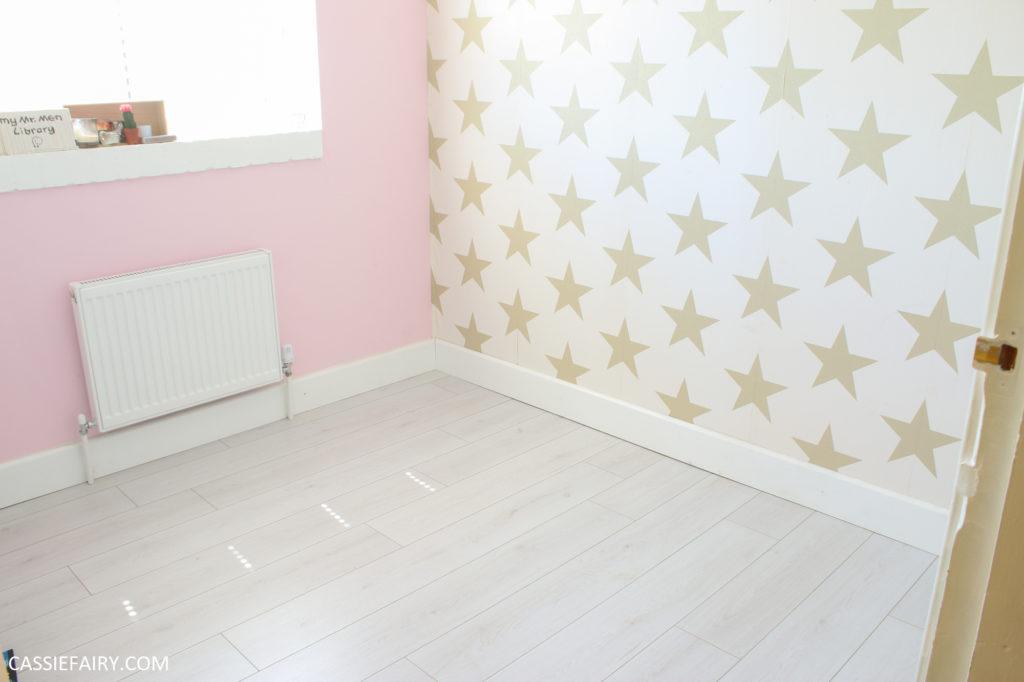
Ahh, that’s better! Do you remember what the room looked like before the star wallpaper? Eww! On Friday last week, I cleared out my office in preparation for the bank holiday weekend. Yes, I was going to DIY myself a desk, no matter what. When TradeSparky heard about my plans to design a wall-to-wall desk for my home office they very kindly offered to send me some Draper tools to help me complete the job. And thank goodness they did!

The plan was to screw supporting batons to the three walls that surrounded the long desktop and add some Ikea legs to the front. However, the walls in our house are ridiculously strong. They’re SO hard to drill into that I’ve avoided putting up pictures and shelves, let alone doing any bigger DIY projects.
Actually, I’m thrilled to have such a sturdy house with no partition walls and plenty of chunky bricks, but it does mean that any project that involves drilling into the walls requires taking a deep breath and having the strength of 5 superheros. Although this time, it wasn’t like that at all. It turns out that I simply didn’t having tools that were up to the job in the past, and now… I do!
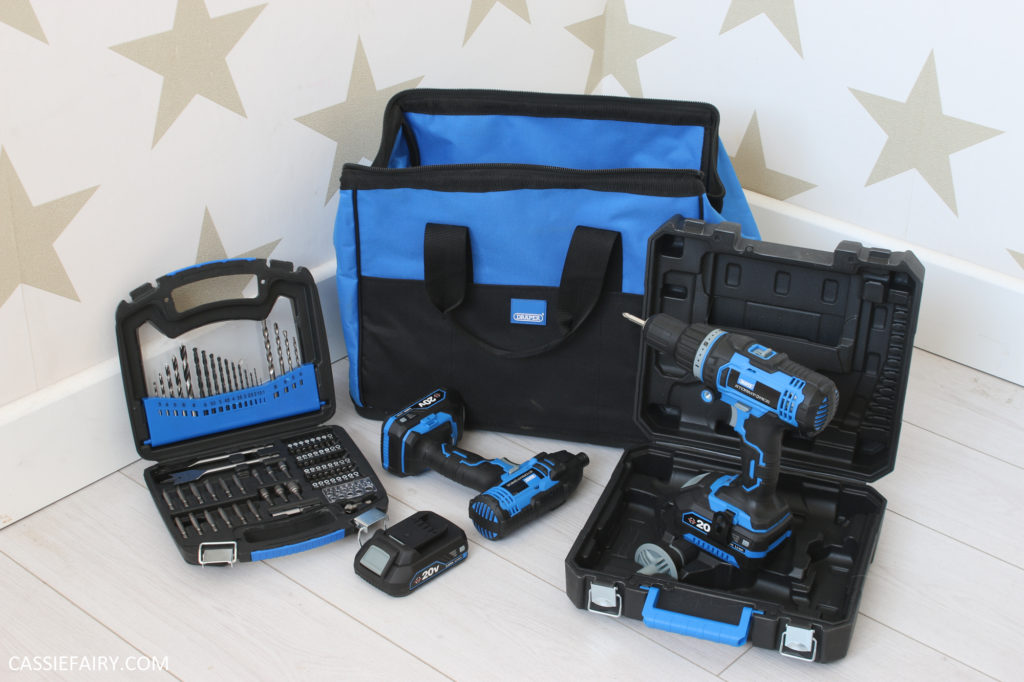
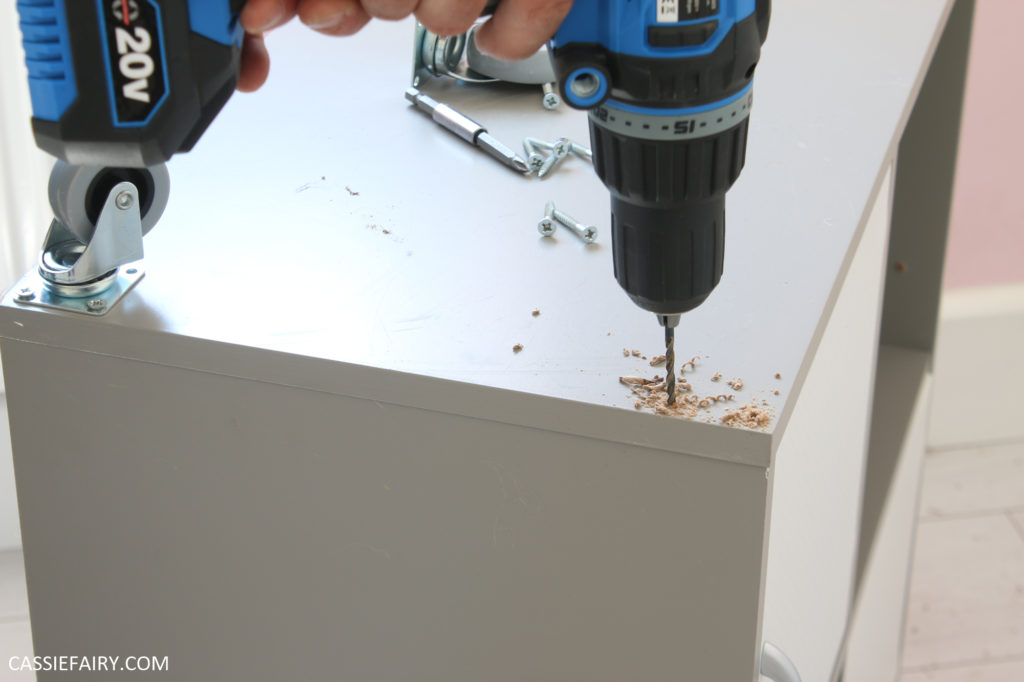
The Draper Impact Tool Kit contains a drill like none I’ve experienced before. It’s a 20v combi drill, which comes with a 4.0Ah battery and two 2.0Ah batteries and charger. Plus, there’s a 20V 1/4″ hex impact driver in the kit, which all comes in a big, sturdy tool bag with plenty of pockets and pouches for storing tools.
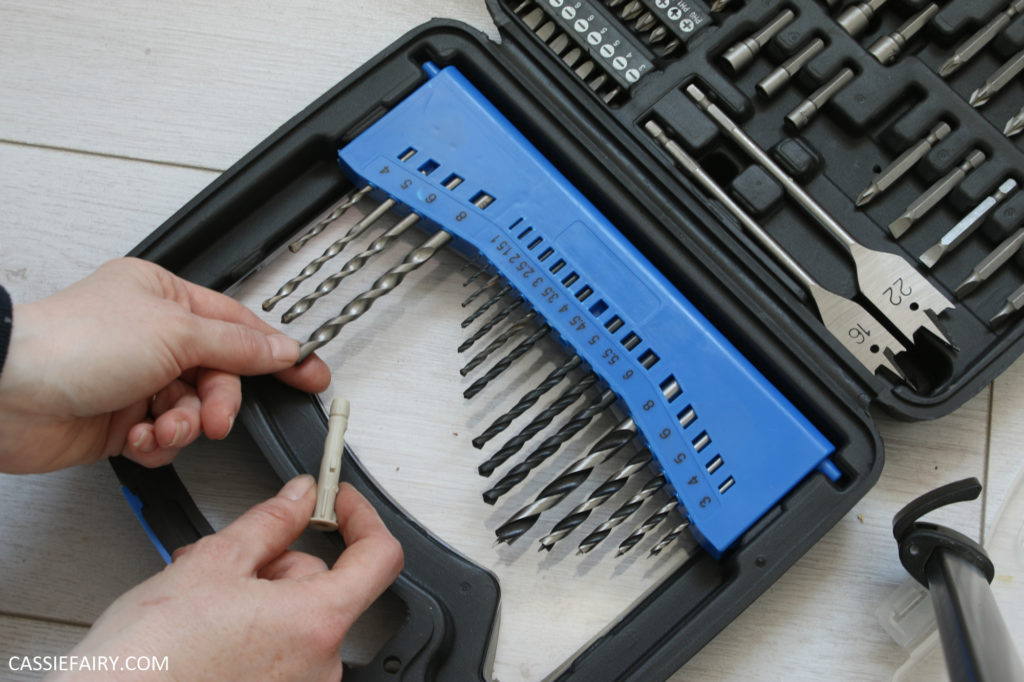
When I first approached the wall with the drill, I was sure I was in for a fight. However, using the masonry bit from the Draper Drill & Accessory Kit, the drill powered into the brickwork with ease. A job that would have previously taken a lot of huffing, puffing, pushing and (possibly) breaking of a couple of drill bits, was over in a matter of seconds. Can you tell I’m impressed?
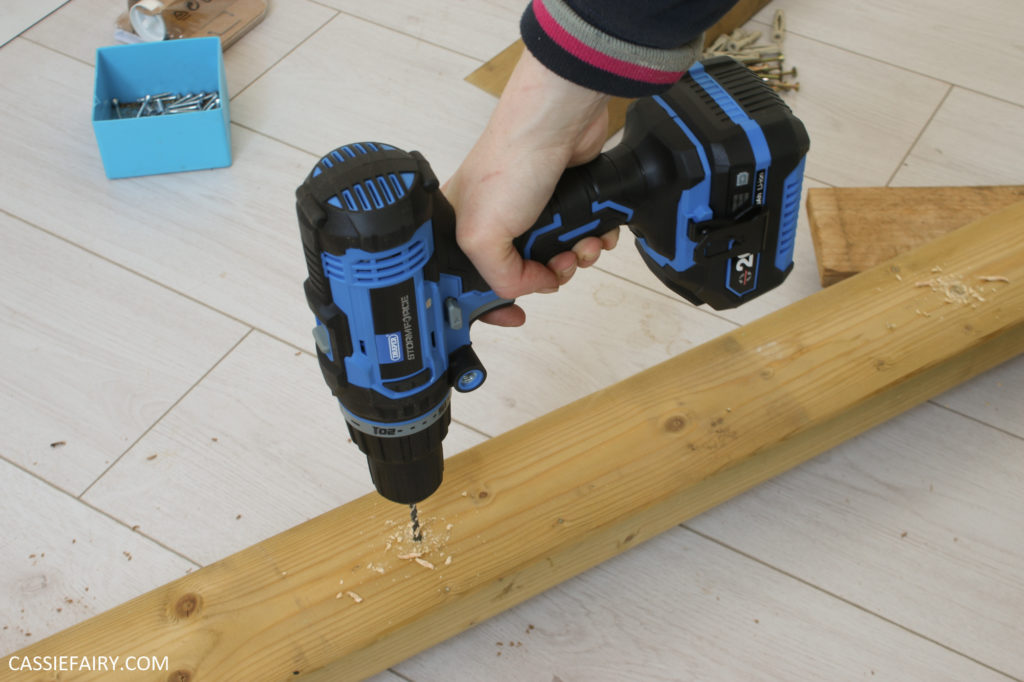
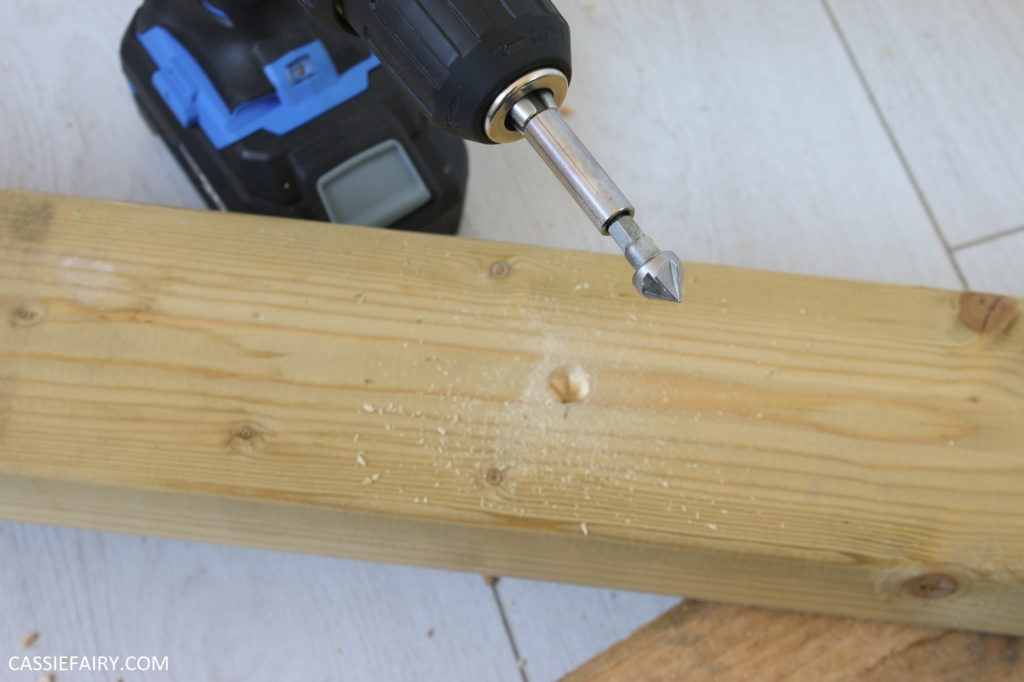
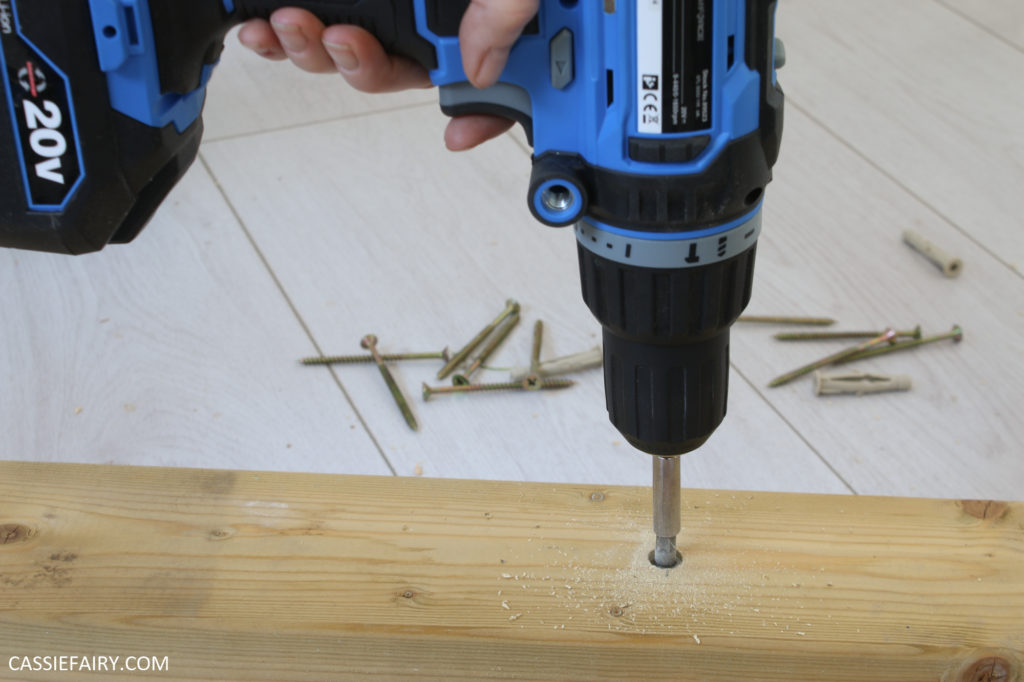
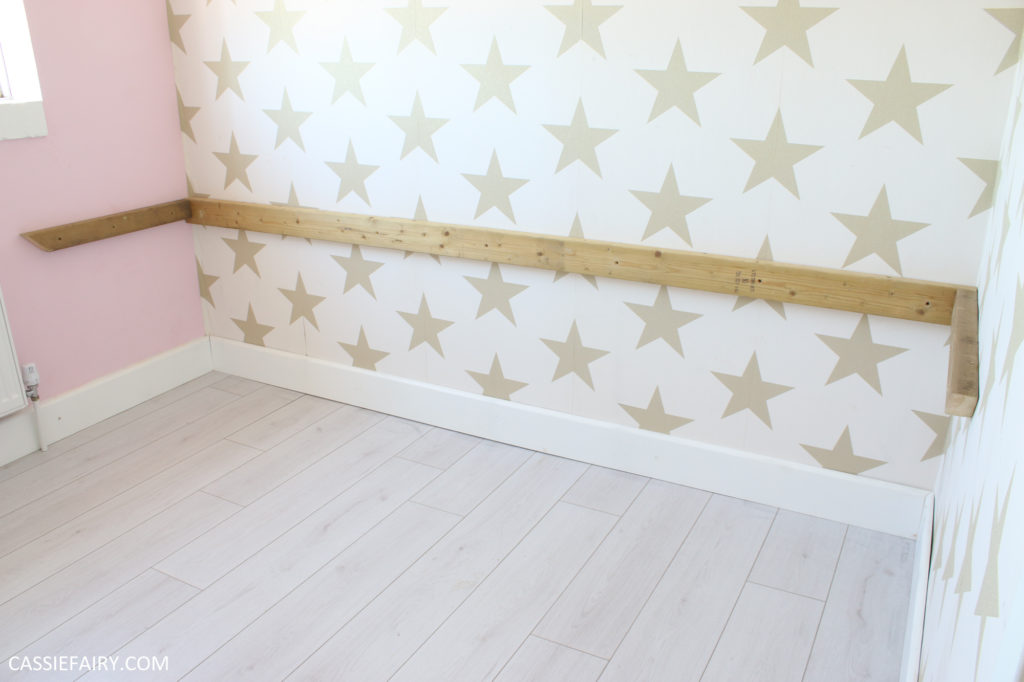
I pilot drilled holes in the wood, used a countersink bit to sink the screws into the surface of the timber and used the screwdriver setting to fix the batons onto the wall with ease. In case you also wanted to make your own wall-to-wall desk, here are the steps I took to create the fitted work surface:
STEP 1
Cut a 3.5 x 2 inch baton to the length of your wall and cut another two side pieces to the depth that you want your desk to be. Pilot drill some holes along the length of the baton and then use a countersink drill bit to make space for the head of the screws to sit inside the baton.
STEP 2
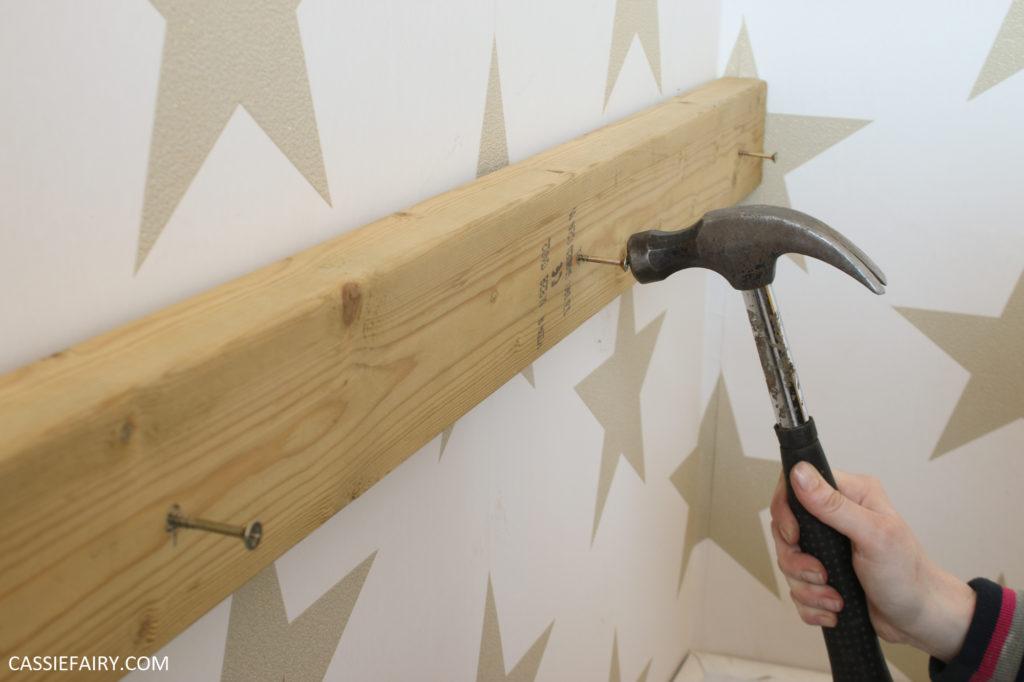
Use the screwdriver to screw in long screws until they are just peeking out the back of the baton. Hold the baton against the wall at the height you want your desk to be and gently knock the screws with a hammer to make an indent in the wall to show you where to drill. All three of the walls I was using to support the desk don’t contain any electrics but if your walls have sockets on them you will have to check the location of wiring before you drill.

STEP 3
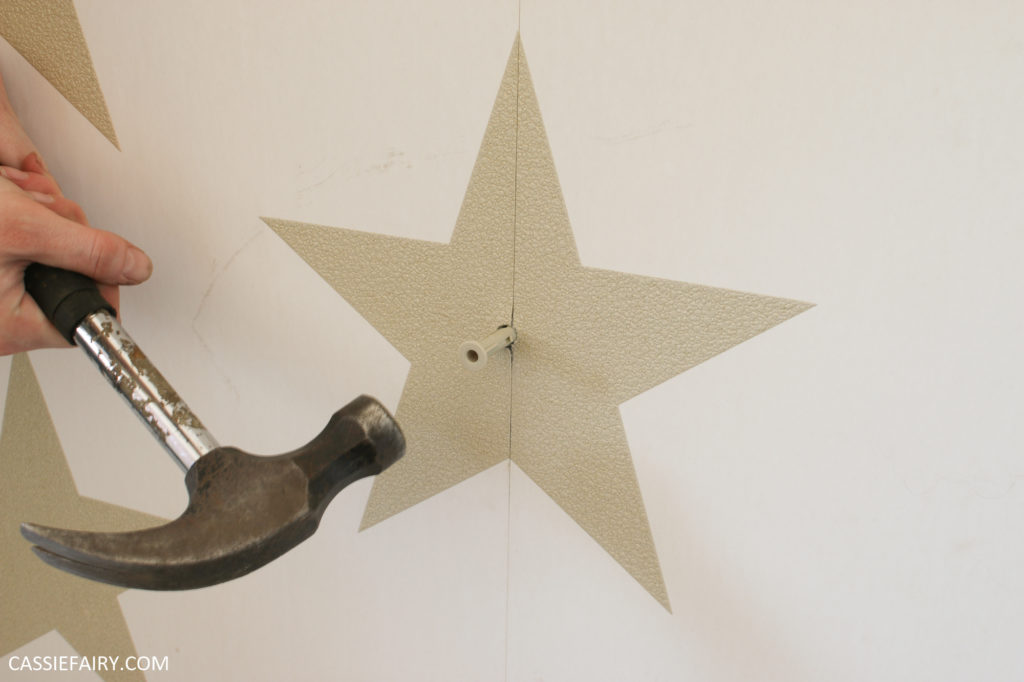
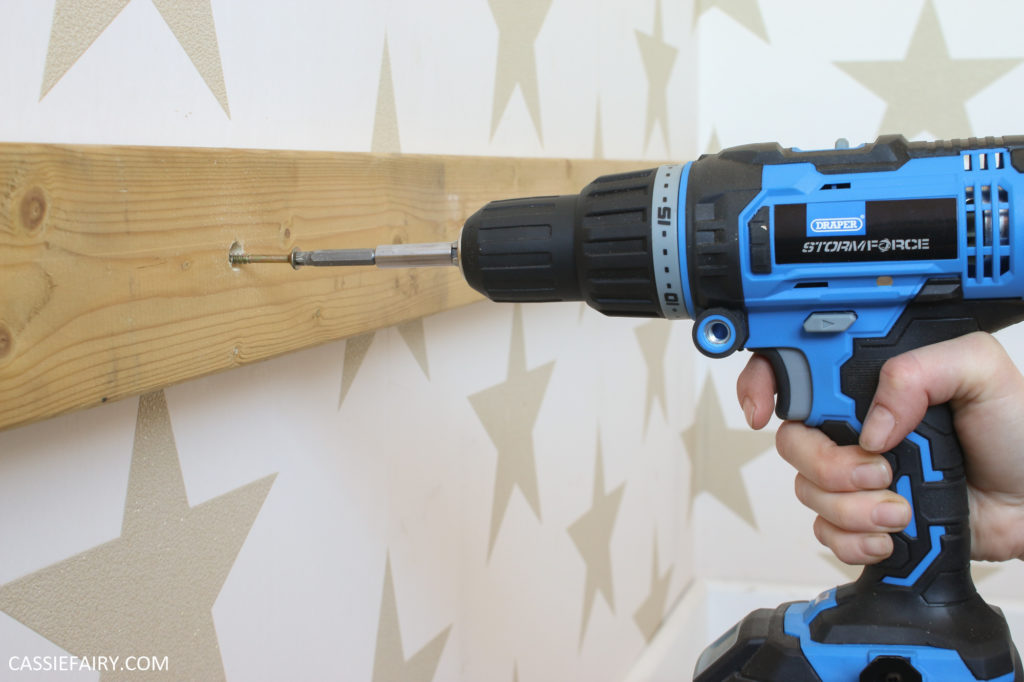
Use a masonry drill bit to drill holes into the walls, taking extra care not to go anywhere near any electrical cables. If in doubt, don’t do it! Hammer wall plugs into the holes and them use the drill with a screwdriver bit to screw the baton onto the wall.
STEP 4
Repeat this with the side batons. Then you’re ready to bring in your worktop and screw it down onto the batons, or add blocks beneath the worktop to fix it securely in place.
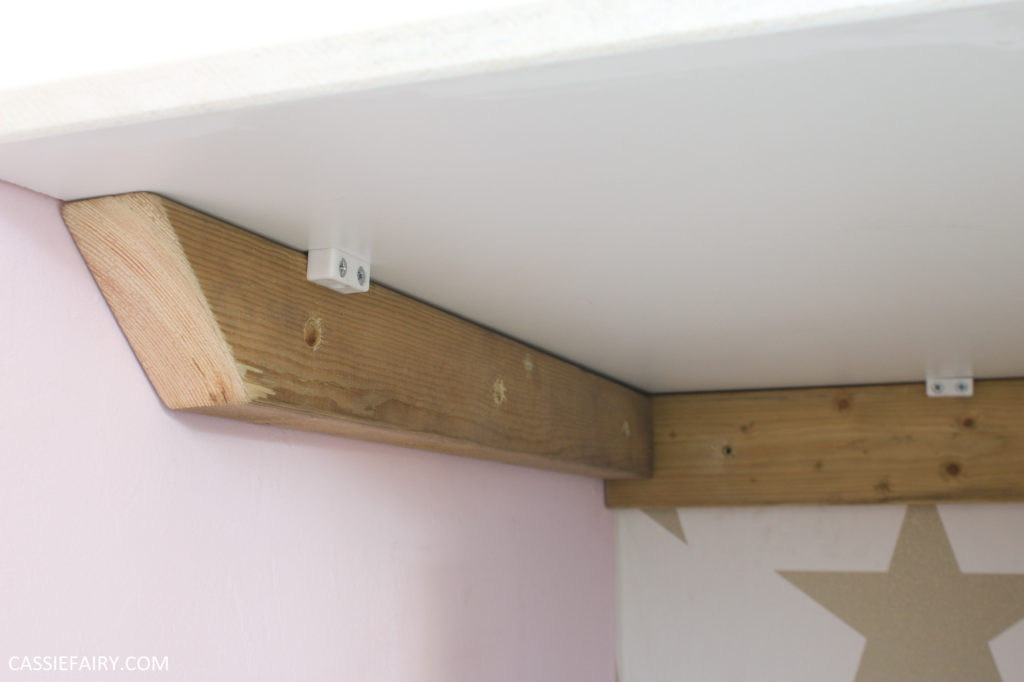
STEP 5
Screw the leg brackets onto the front of the desk for extra support and add the legs. If you’re including any storage furniture to support the desktop, such as drawers or cupboards, now’s the time to add them.
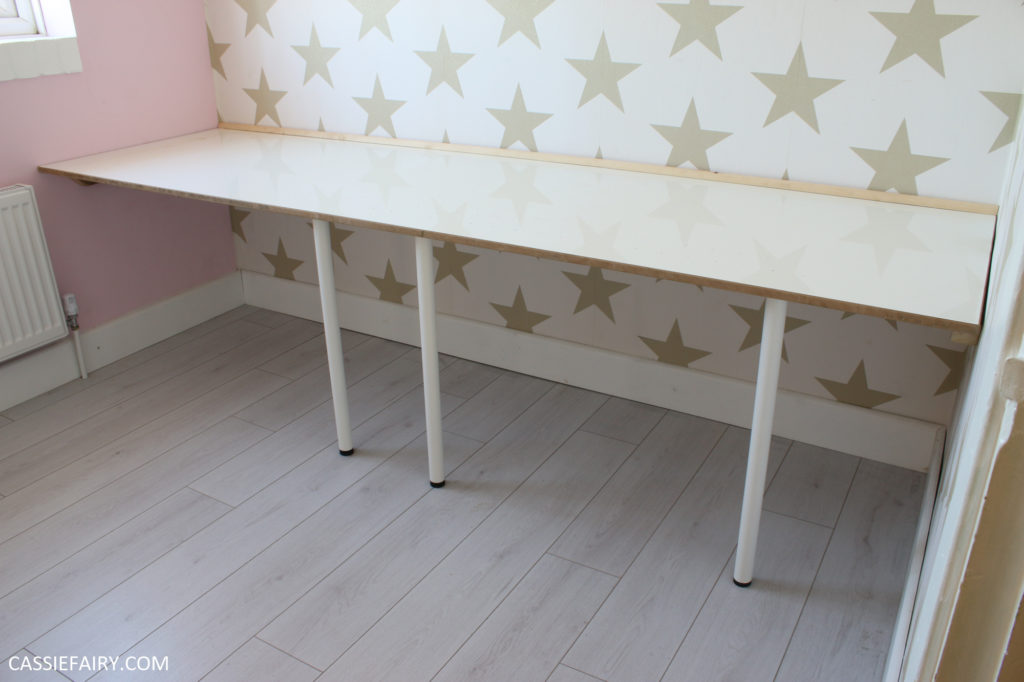
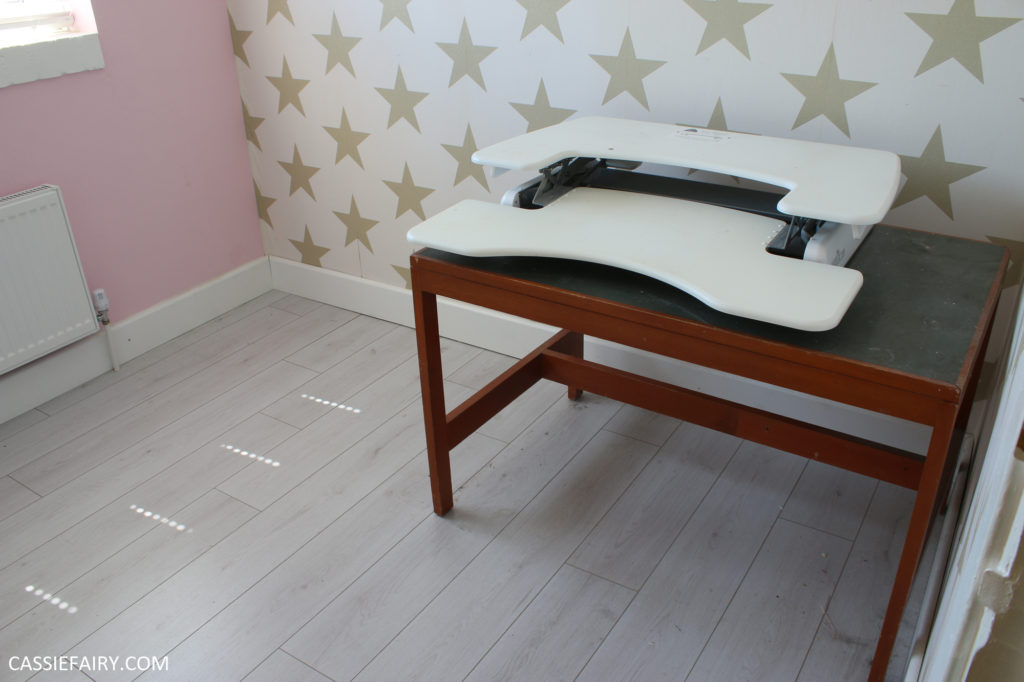
I had a lot of trouble finding a piece of wood long enough to fit the length of the wall, but you could perhaps use a kitchen worktop if you’re okay with a shallow depth for your desk. I needed my desk to be deep enough to hold my sit-stand desktop so I searched high and low for a piece of wood that would work.
Jumbo Ply is the way to get a piece of wood to suit the 3 metre length I needed and, as luck would have it, my local timber yard had an offcut of glossy white-faced wood that was 3 x 3m in size. Huge! My husband and I could barely move it between the two of us and we had to cut it down in the garden otherwise we wouldn’t have been able to get it through the door!
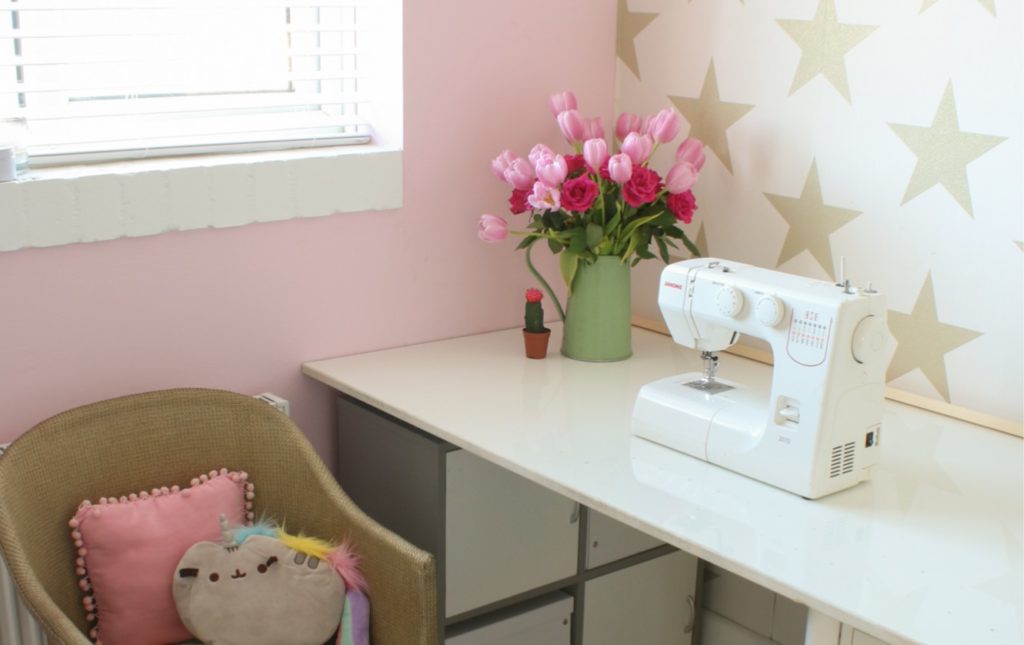
I printed the fabric and upholstered this vintage chair last year.
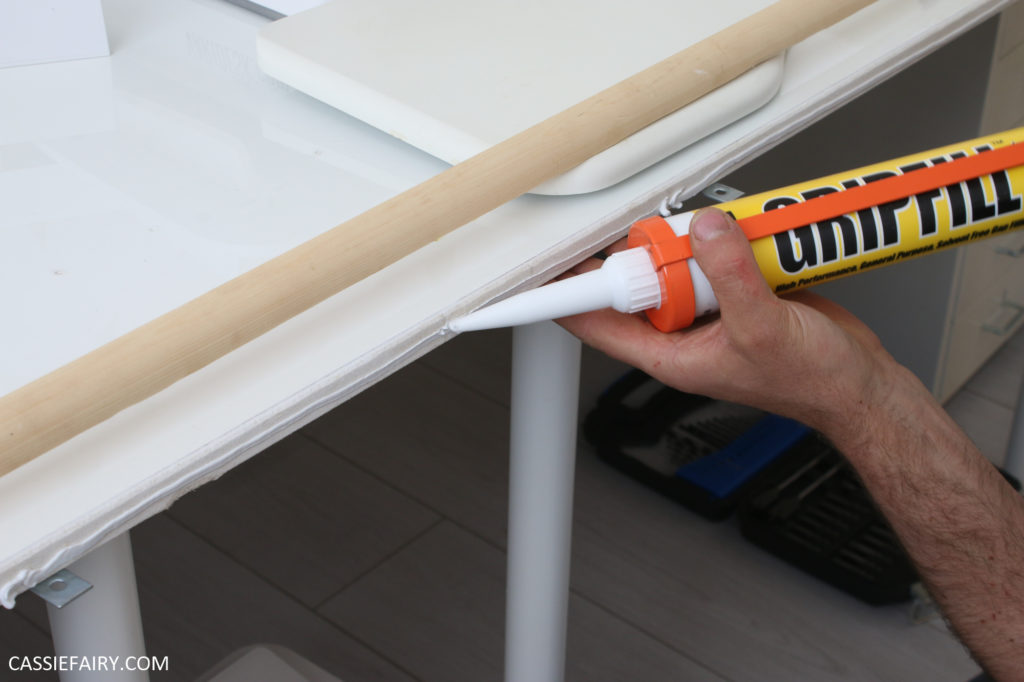
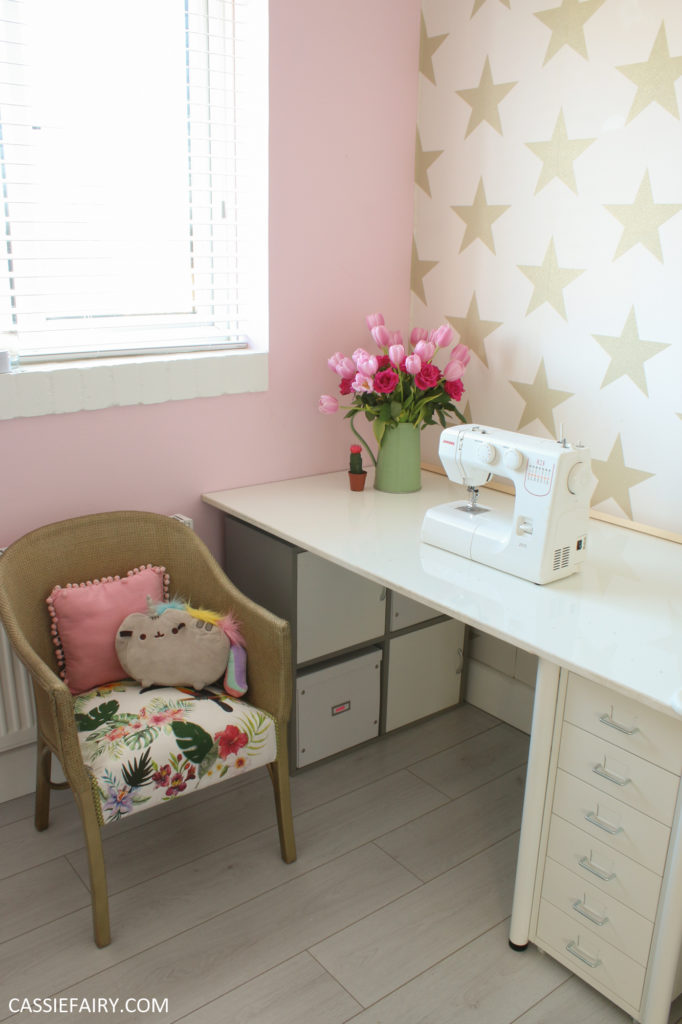
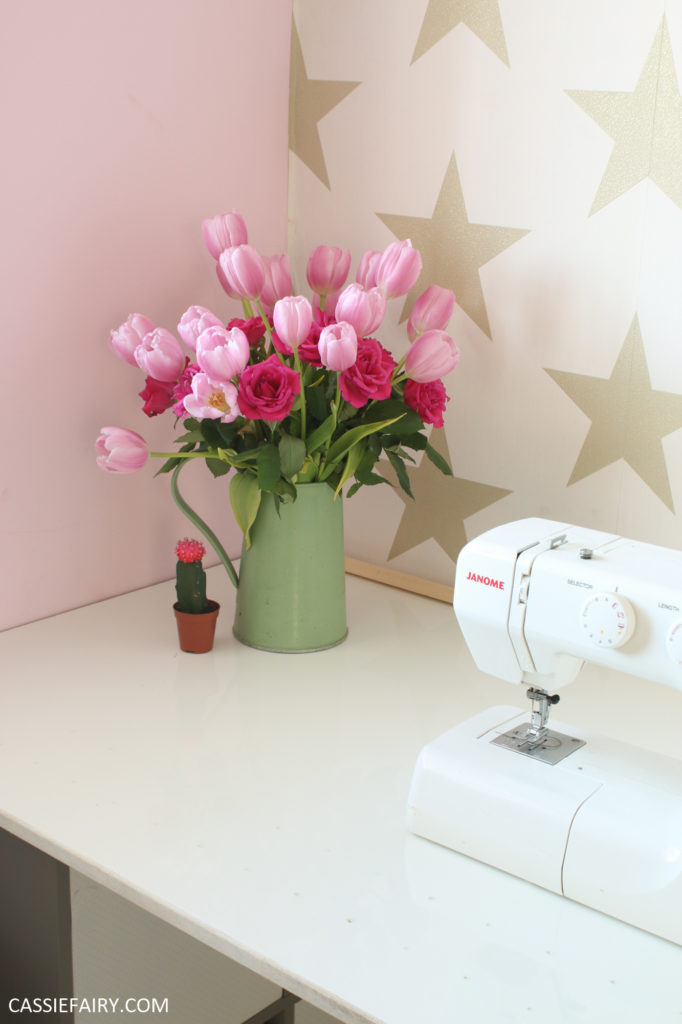
The white surface makes the whole space feel so much bigger and brighter. I’ve been ‘eeeeeeeee-ing’ ever since the worktop went into the room! We just needed to add a piece of trim along the front of the MDF to cover the raw edge. And we’ve added a matching trim along the back to finish it off.
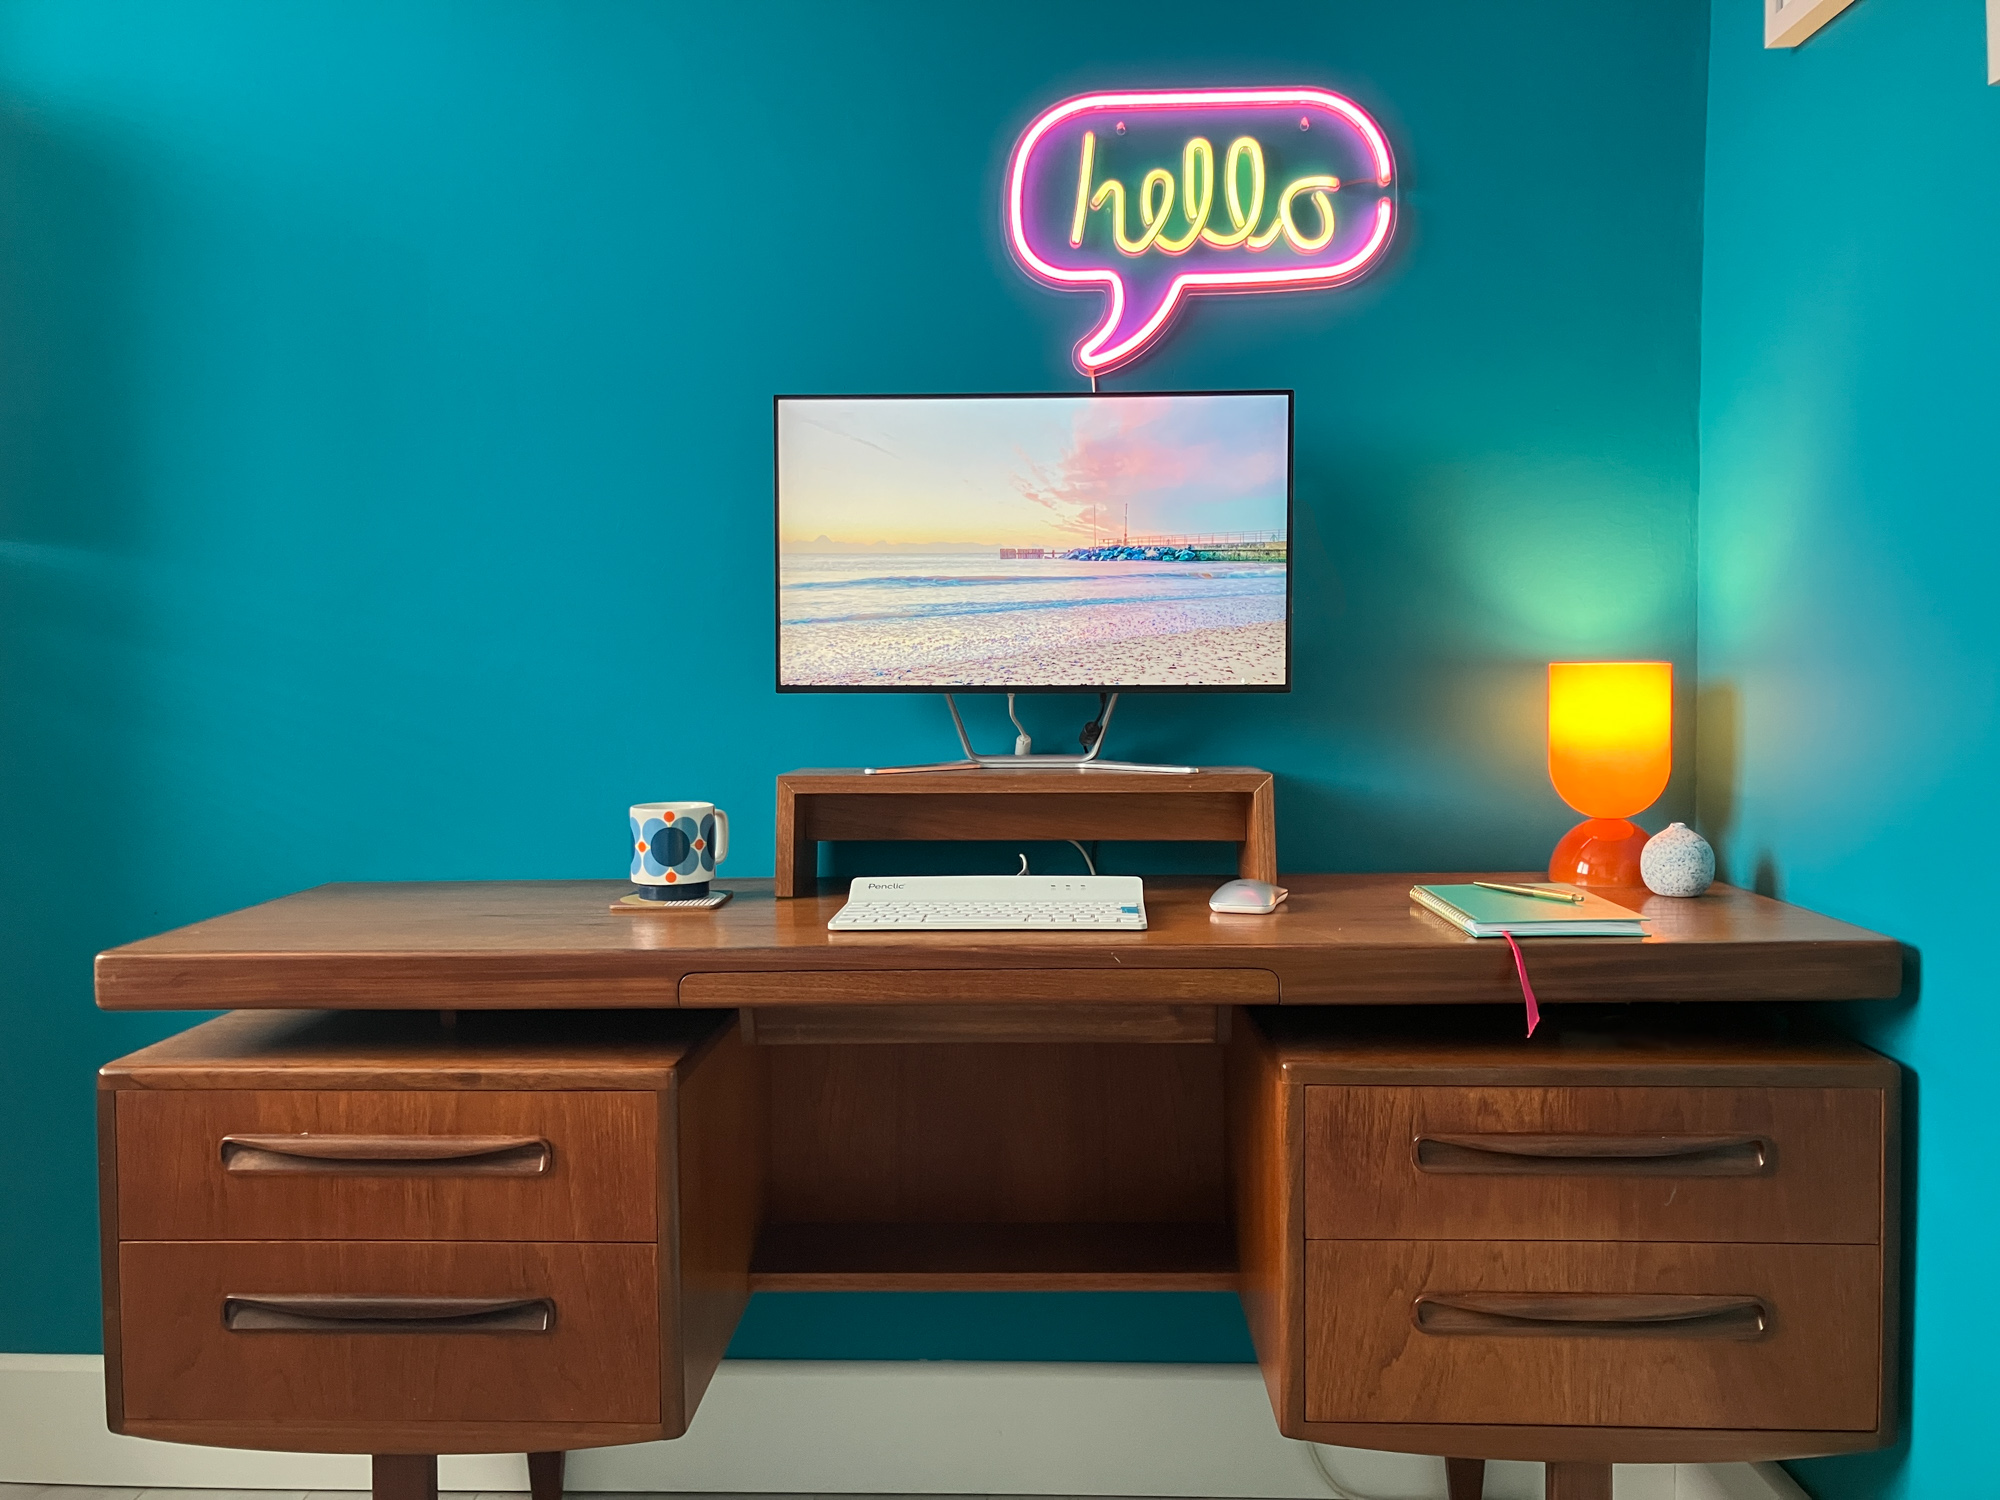
The office isn’t completely finished yet as I want to add some more drawers (my white drawers were from Ikea a couple of years ago and I’d like to get another) and I’ve got some lights and artwork that are finally going to take pride of place on the walls. But I’m already SO happy to have a space to do sewing projects with ease and to spread out my notebooks when I’m working. I’m still shaking my head in disbelief that it’s done! I’ll be sure to show you some more photos of my home office as soon as it’s finished so watch this space!
PIN IT FOR LATER
Some items in this blog post have been gifted to me and the pink links indicate a gifted product, affiliate link or information source. All thoughts and opinions in this post are based on my own experience and I am not responsible for your experience 🙂


2 responses
Thanks so much Lucy, I’m SO delighted with how this DIY turned out! Can’t wait to take some proper photos of the finished room to share 🙂
What a fantastic job you’ve done. The difference is amazing.