I’ve been working on landscaping my garden this year and, although the basics of the design have stayed the same, many of the specific elements and uses for the space have changed. I only had so many square metres to play with and the steep slope needed to be terraced, which left me with a design that created ‘rooms’ within the garden. And since finishing the deck over the weekend, it’s got me thinking about the ways that I want to use the terrace that’s closest to the house.

I’d always planned to be able to eat outdoors and after a lot of number-crunching, I justified the cost of the decking by realising that I was essentially adding an entire ‘room’ to our property. Okay, it doesn’t have a roof, but it leads out seamlessly from the kitchen and I can already tell it’s going to be a great spot for alfresco meals.
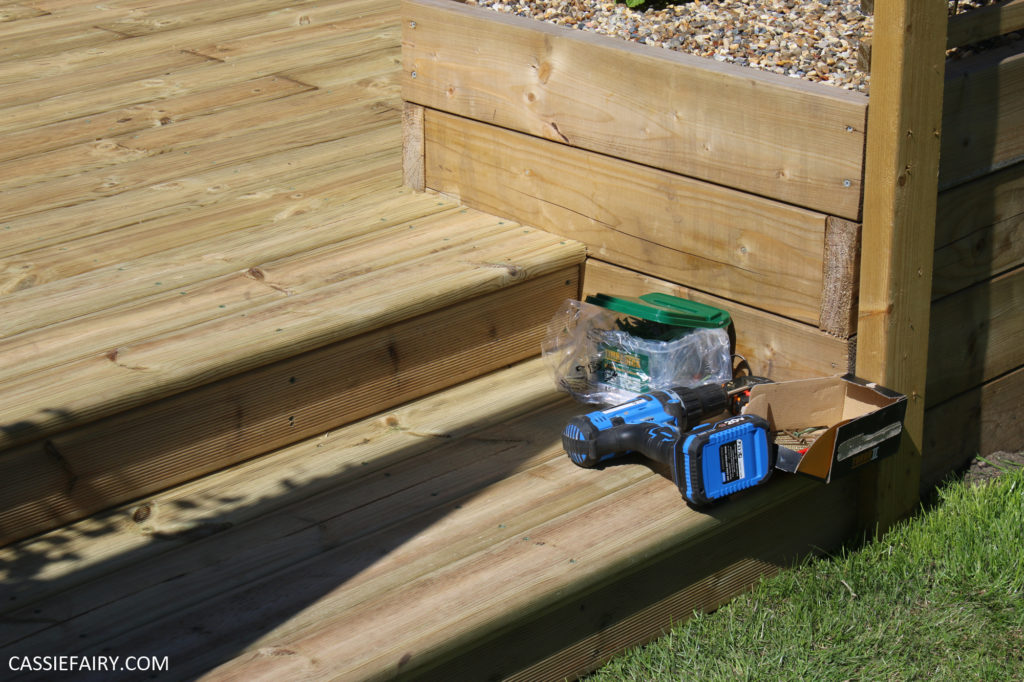
So that decision got me thinking about the things I’ll need to add to the space in order to turn it into another usable ‘room’. I’ve already got a banana parasol that I’m going to move up onto the deck so that it’s protected from the sun (and maybe even the rain too!) but I certainly need to invest in a couple more items that’ll make my deck into an outdoor kitchen/diner.
OUTDOOR TAP AND BASIN
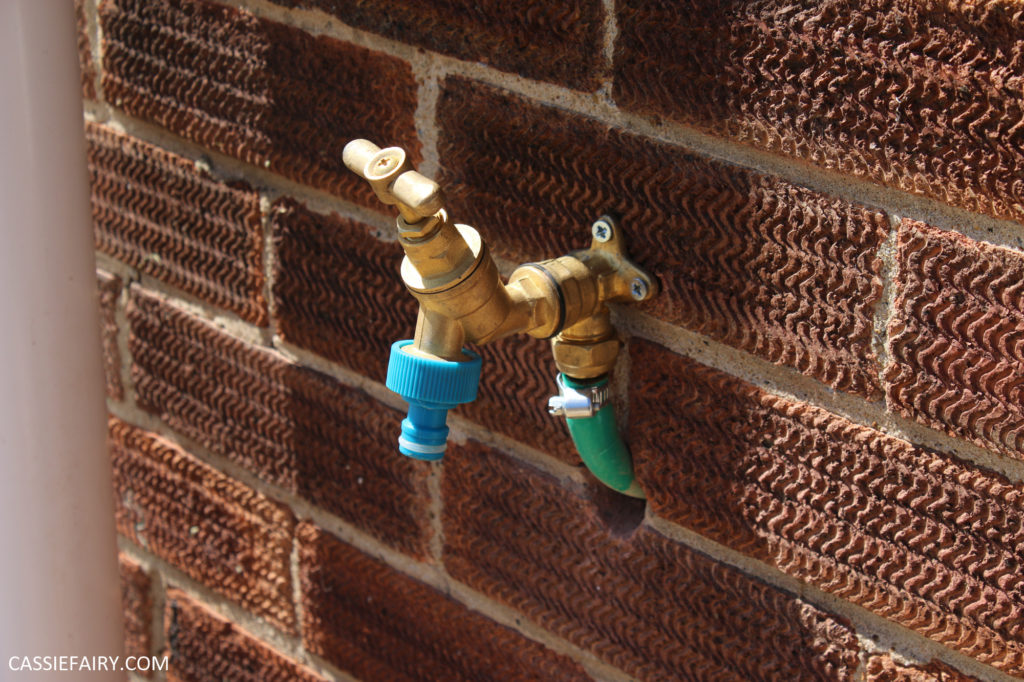
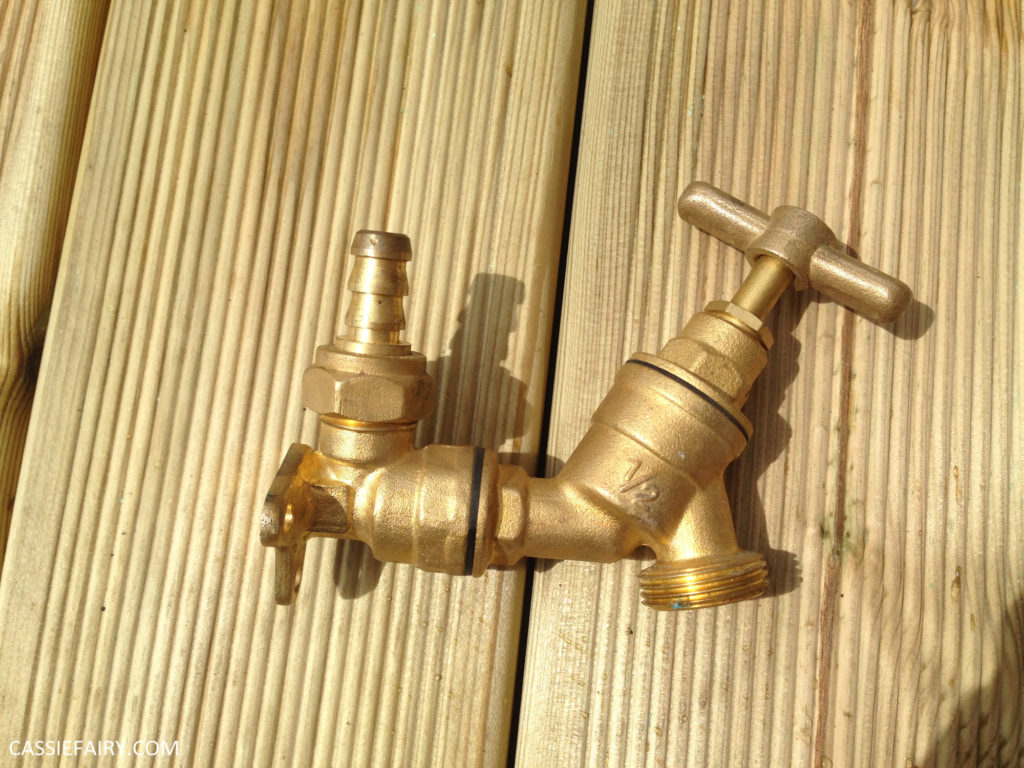
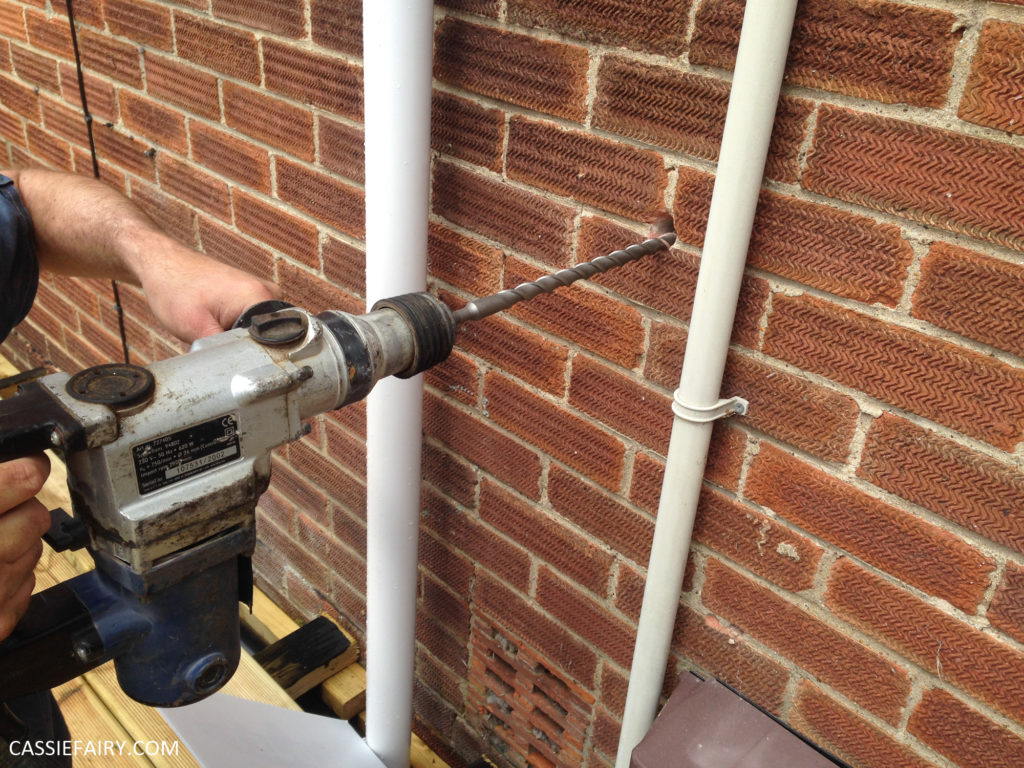
Ever since laying the lawn, we’ve realised that an outdoor tap is essential if we want to keep our plants (and the grass itself!) alive. The main use for the tap is watering and cleaning but, then again, why can’t it be an outdoor sink too? I bought a kit to fit a classic (some would say vintage-style!) outdoor tap on the wall that backs onto the kitchen. And then I realised that we’d need to get through the wall, so my husband bought a giant masonry drill bit!
We’ve just fitted the tap this week so I’ve been looking online for a basin that would be suitable to use outdoors. I didn’t want something that looked like it belonged in a bathroom, and I didn’t want a stainless steel kitchen sink either. I was on the hunt for a chunky, ceramic bowl and I found a few options at Lovasi.
These basins are made by hand using a potter’s wheel and the one below is a white clay with chamotte (baked clay with grinded stones) which creates this beautifully rustic appearance. The conical shape is pretty cool, huh? It doesn’t look too ‘glossy’ for an outdoor basin but it’s certainly a luxurious (almost spa-like) touch to help turn the space into an alfresco kitchen. I suddenly feel like my deck is attached to an Italian villa!
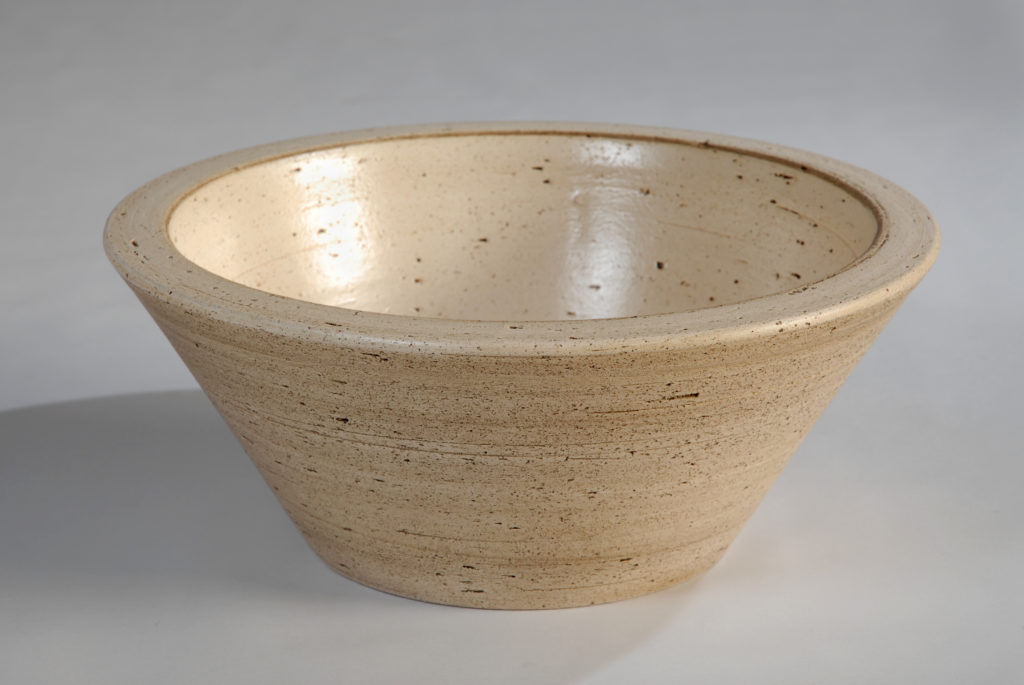
I thought that the classic beige conical basin was ‘the one’ as it the stone-like finish would tie in with my gravelled Mediterranean herb border perfectly BUT, while browsing on the website, another design caught my eye.
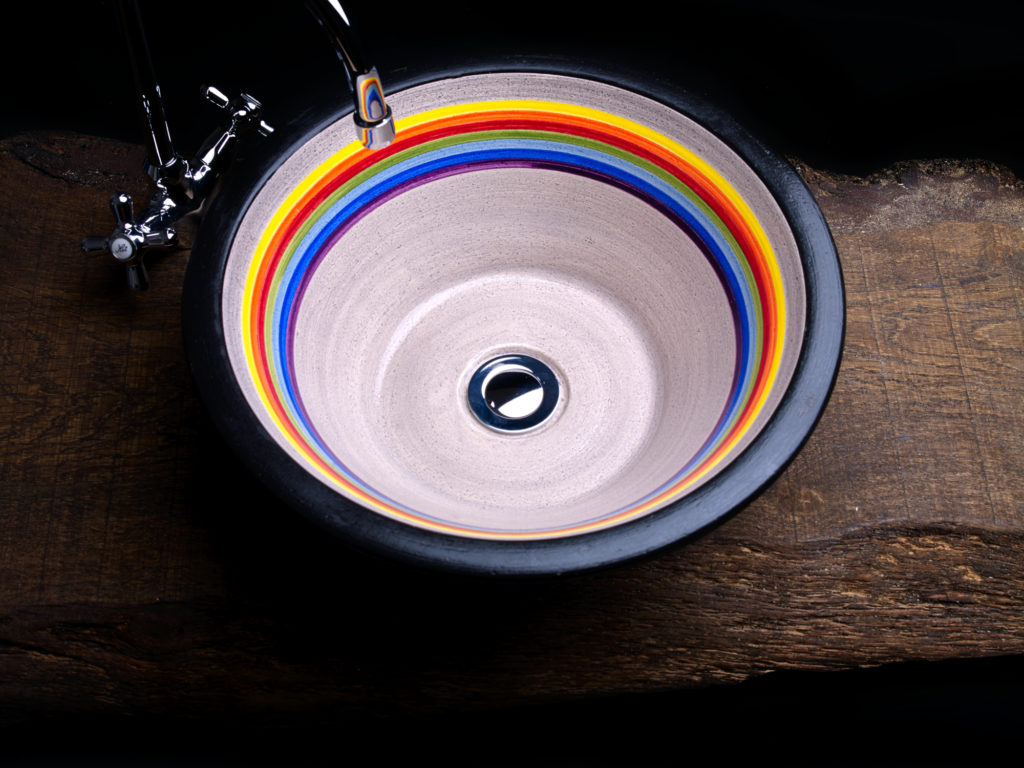
Who could resist this rainbow basin? I mean, if you’re going to have the luxury of an outdoor basin, you might as well choose something fabulous, eh? The only other colour in our garden at the moment is black (I’ve painted both sheds black and will be repainting the outbuilding doors too) so this will tie in perfectly.
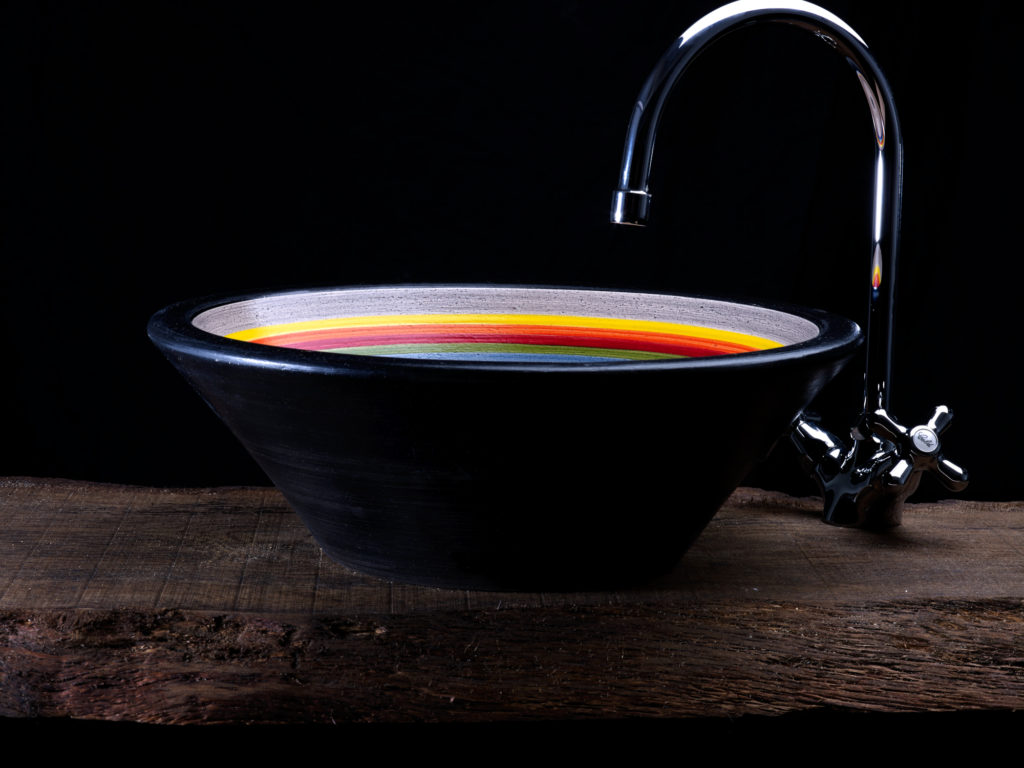
And then there’s the unexpected splash of colour inside the conical basin. I’m hoping that all the flowers that I’ll soon be planting in my garden will provide a similar rainbow of colour on my deck so again it should match perfectly. This wash basin is baked at a high temperature, which guarantees an extremely hard ceramic, and they’re hand painted using ceramic pigments that ensure “unalterable colours” so I’m sure that this basin will look amazing for years to come, whether fitted indoors or outdoors!
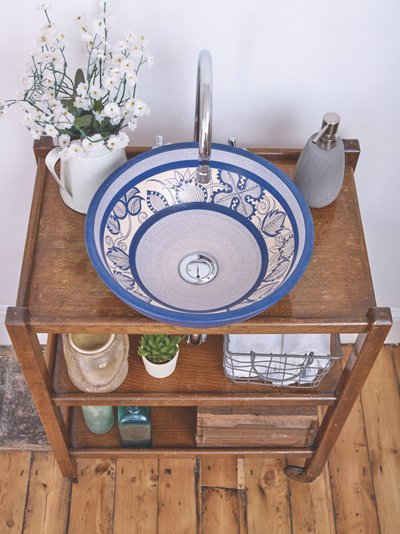
I’m thinking of upcycling a trolley like the one above to hold the basin and plumbing, like an outdoor bar cart. Or maybe I could make a cabinet with a little storage underneath using pallet wood? This would look super rustic in the garden and really allow the basin to be the star of the show. I feel another pallet DIY coming on..!
DINING FURNITURE
If I want to use the space for cooking and dining, I’m going to need a table and chairs. I already have a teak garden bench that’s silvered into a gorgeous grey tone over the years and I’d like to get some more similar furniture to match. However, anything I buy now will take years to fade to the same silvery hue, so I’ve tried to find a patio set that would match straight away.
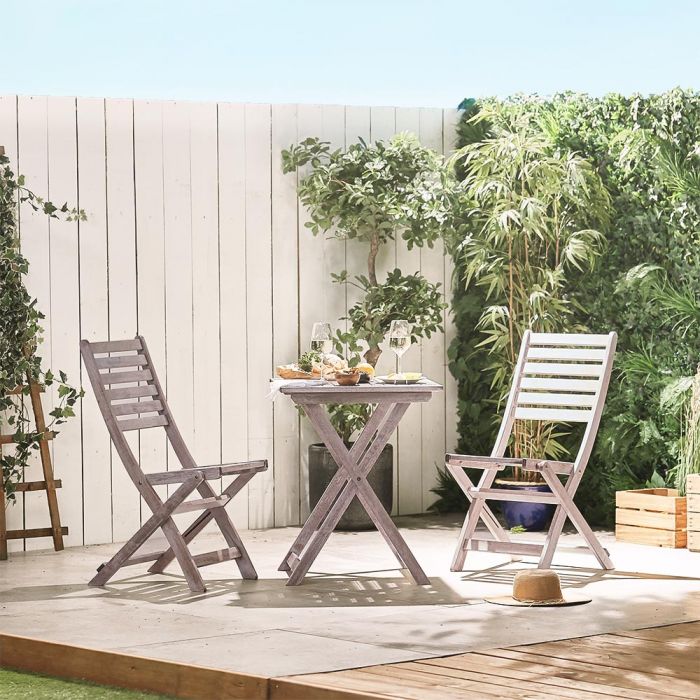
I found this 2-person bistro set at VonHaus that’s exactly the same shade as my faded teak garden bench. I’m planning to use it as a romantic ‘dinner-for-two’ set when it’s just my husband and I eating outside, but when we have guests we can use the two chairs and my existing garden bench around a bigger table. Of course, I’m not going to buy a table – I’ll DIY one – so keep an eye out for a pallet garden table project coming soon to the blog haha!
LIGHTING
I do need some lighting outside so that we can make the most of long summer evening. I love fairy lights and I already have some solar lights on the shed that I might move over to the deck instead. Do I want some festoon lights, Love Island-style? Maybe. Or maybe some motion-sensor flood lights would be more practical to light up the garden safely?
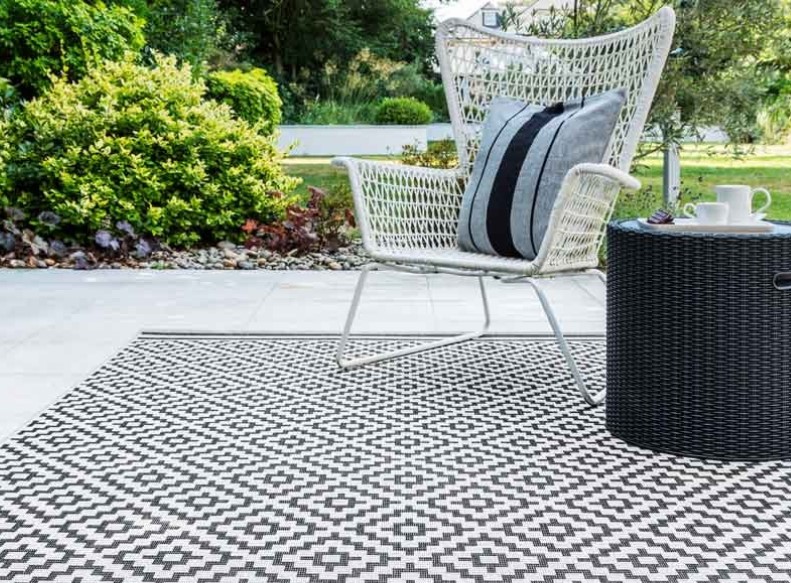
OUTDOOR RUG
I’ve been spending a lot of time looking at gorgeous garden photos on Pinterest so it hasn’t escaped my noticed that outdoor rugs are a ‘thing’ these days. I think it’s a great way to designate a space in the garden or either dining or lounging so I want to include one to divide up the deck space. That would help to split the deck into a cooking area (with the basin, tap, herb planters and maybe a pizza oven!) and a dining space. I like this one from The Rug Retailer:
What else do you think I need to add to my shopping list to turn my deck into an outdoor kitchen and dining room? I really want to make the most of my garden this summer and actually enjoy being outside so I’m hoping to have most of the work finished by the end of the month – I’ll be sure to keep you updated!
Some items in this blog post have been gifted to me and the pink links indicate a gifted product, affiliate link or information source. All thoughts and opinions in this post are based on my own experience and I am not responsible for your experience 🙂


2 responses
I agree Lucy – that’s the one I’m going for! Who can resist a rainbow, eh?! 😀
These are gorgeous basins. Really like the rainbow one.