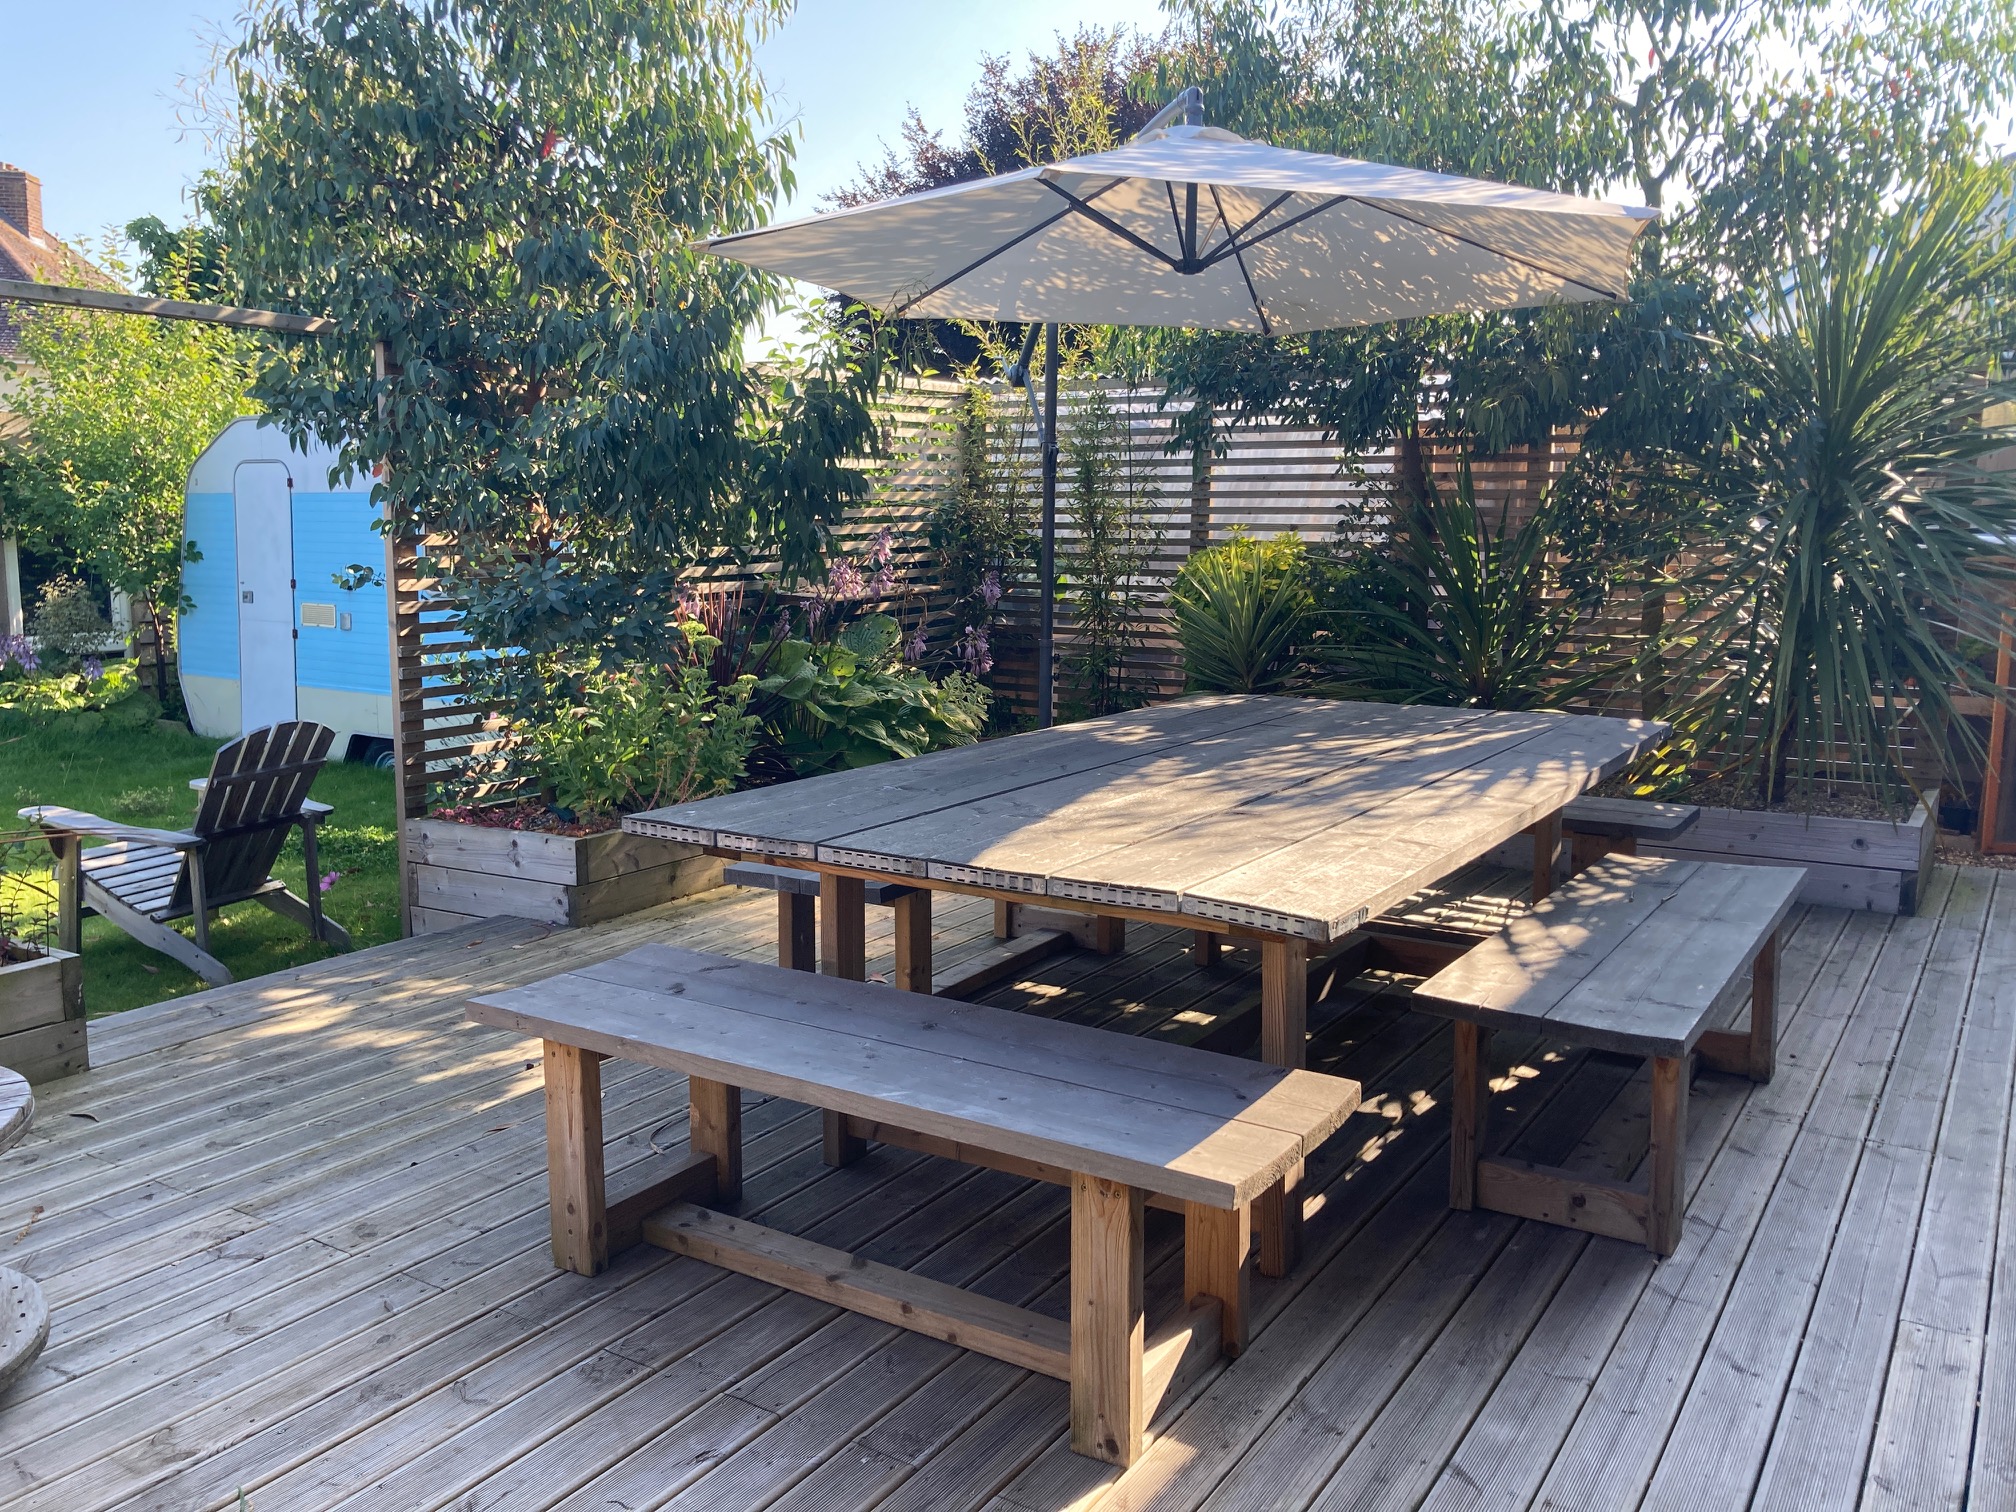
We’ve had a busy week of garden-based DIYing here, which all began when we got hold of some low-cost scaffold boards from the local timber yard. My mind went into overdrive about all the things I could build with the 13ft-long boards but we decided to start small with some rustic garden benches. Here’s how to make them…

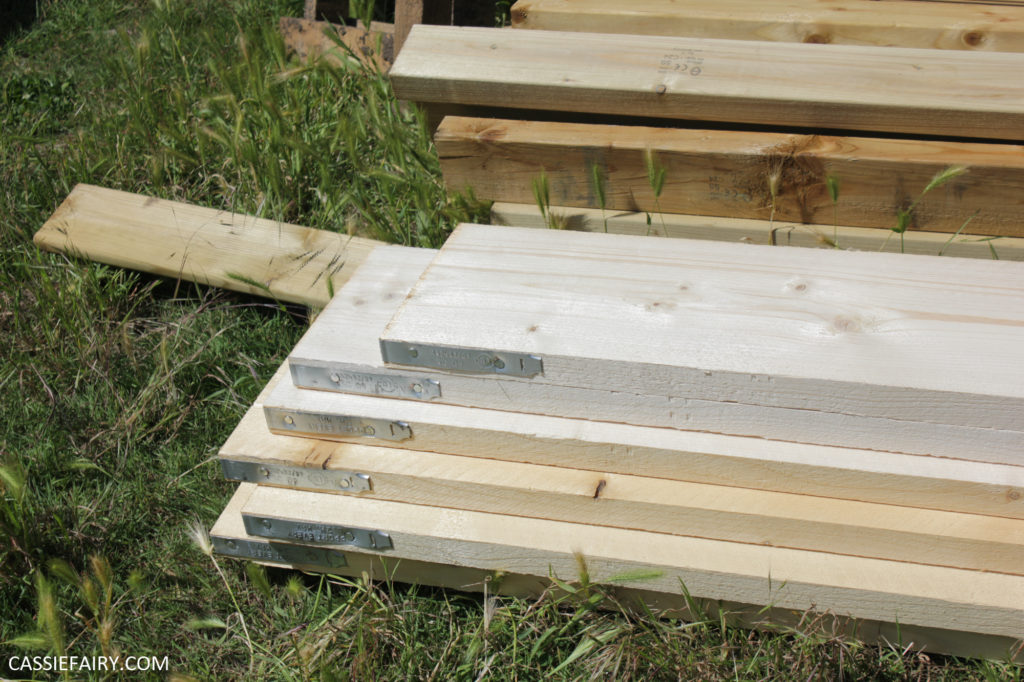
I was inspired by Emma from @Shelovesmacrame, who is such a talented DIYer that she can build practically anything out of pallets and scaffold boards. So when she told me where to source some scaffolding planks locally, I hooked up the trailer and went to bag me some boards.
We’d been discussing my need for a garden table and benches but how I didn’t want to spend £££s on the outdoor furniture I’d seen in garden centres. I had landed on the idea of a scaffold board table after admiring the HUGE ones at Urban Jungle last year during @SeeSuffolk‘s blogger meet-up and Emma encouraged me to go for it.
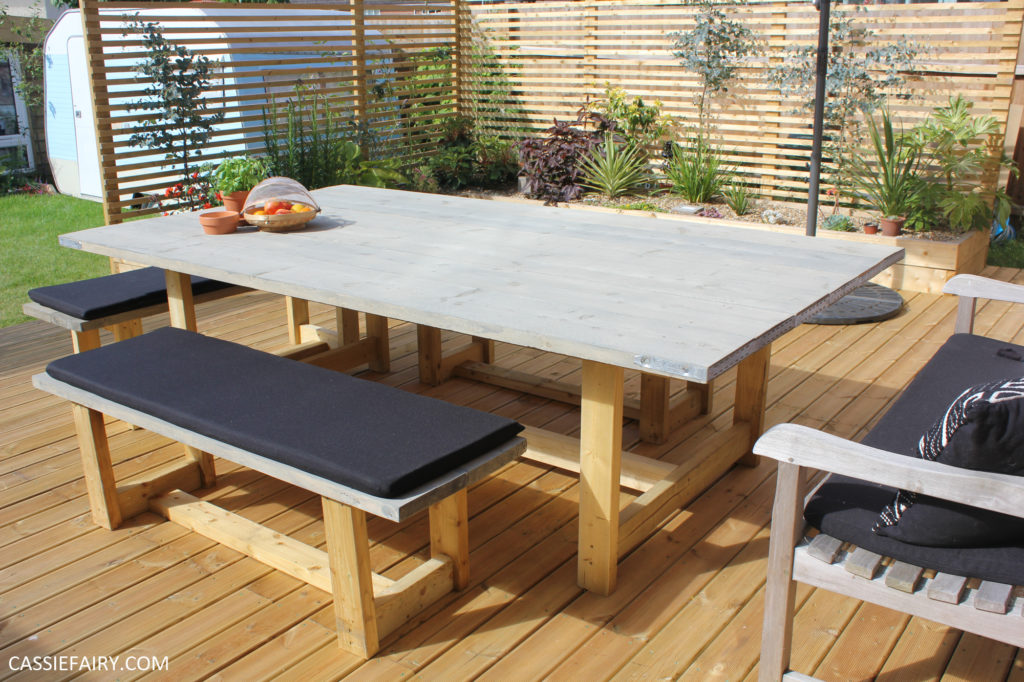
I’ll be sharing the details of the big scaffold board dining table project on my blog soon (it’s a whopper!) but for today I thought I’d share our first attempt at building with scaffold planks. We used offcuts of scaffold boards to make three chunky (and very sturdy) garden benches and here’s how we did it:
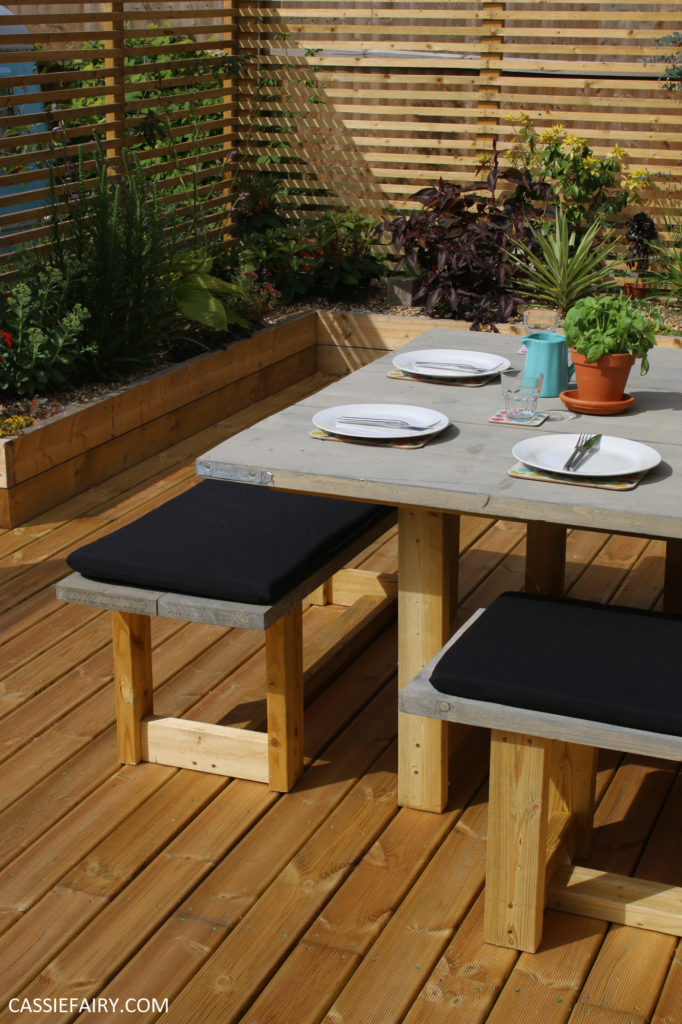
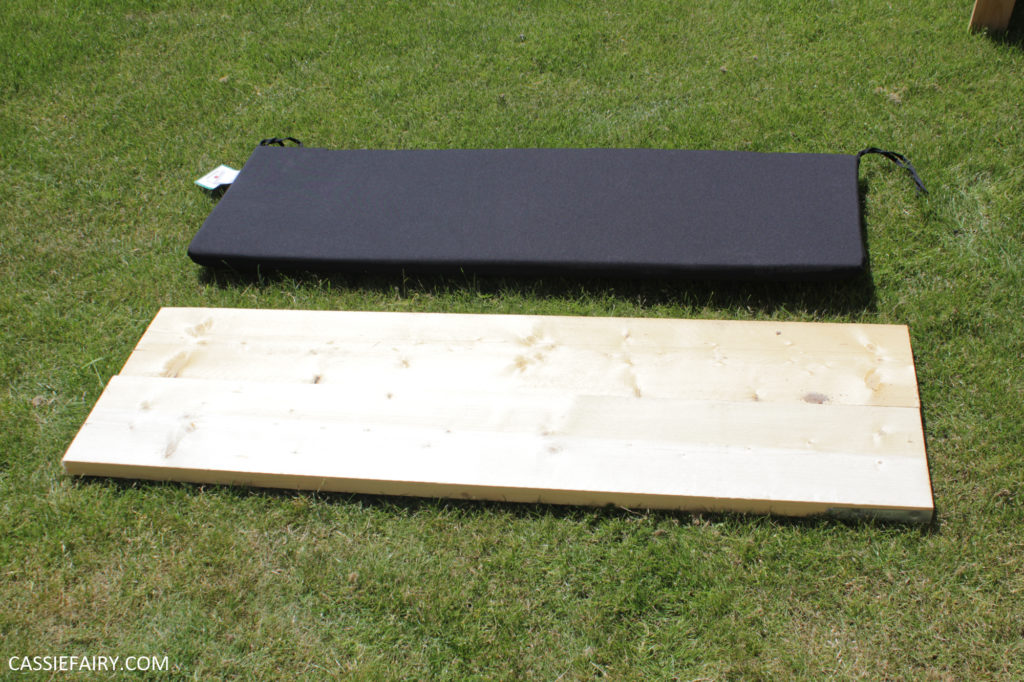
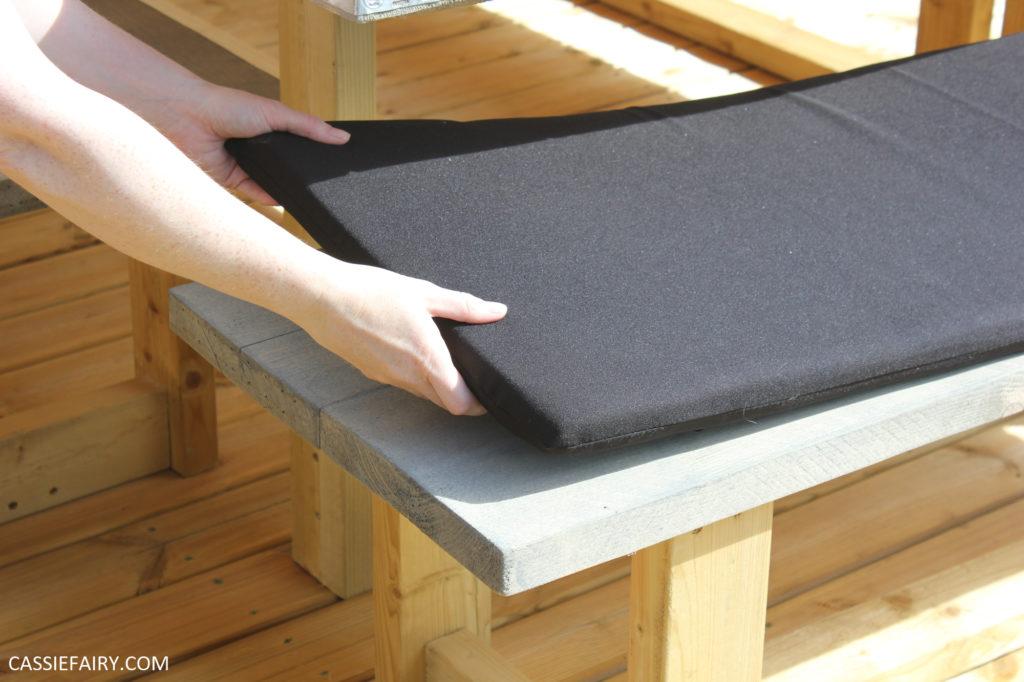
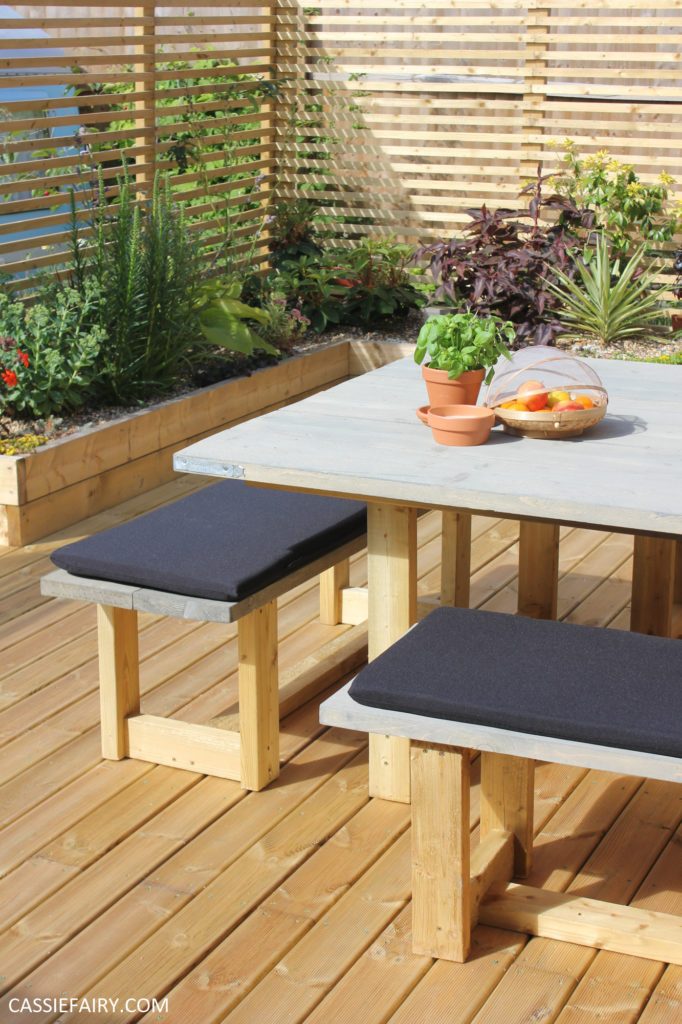
I began by cutting all the boards down to the right length. I wanted the benches to fit under the table and to also be the right size for some classy black garden bench cushions that I’d got from Wayfair. So we cut the planks down to 5ft length and, luckily, the width of the bench cushion was exactly two scaffold-planks wide!
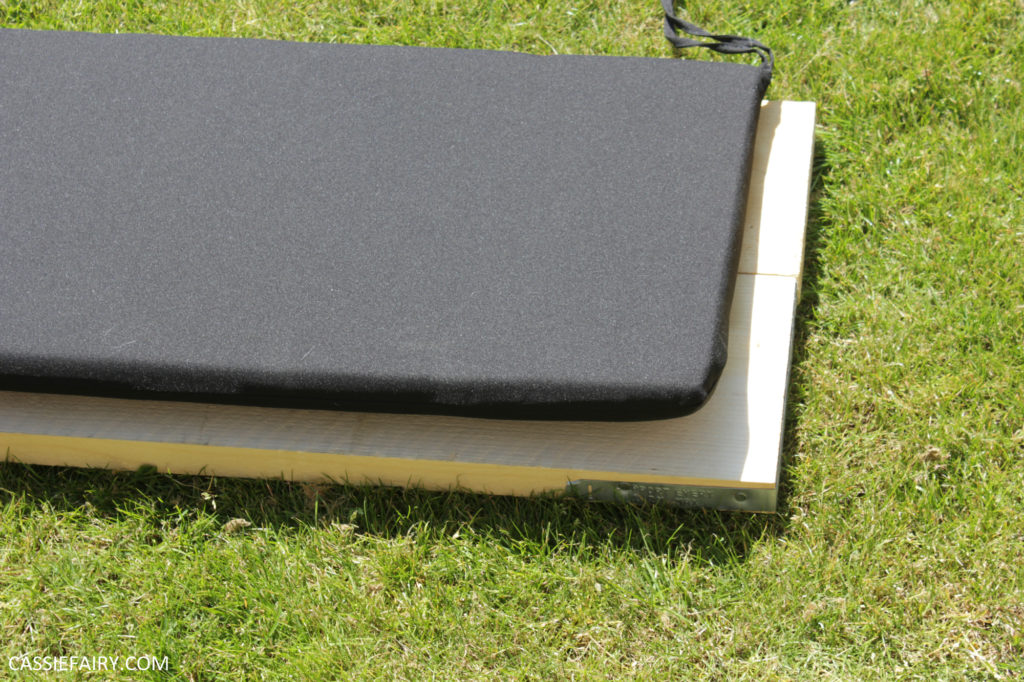
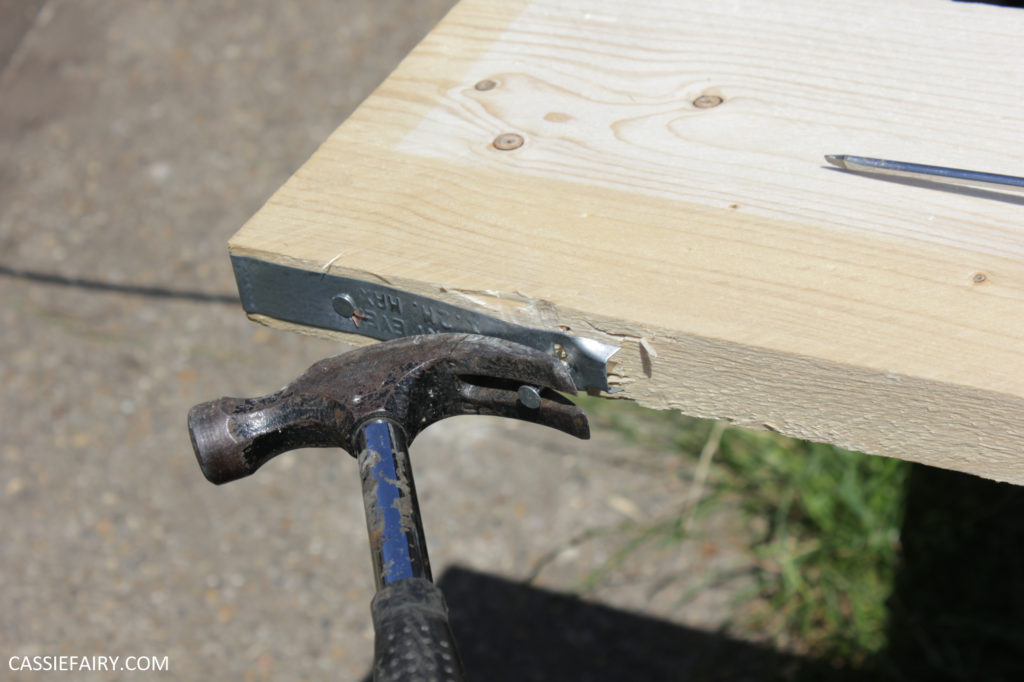
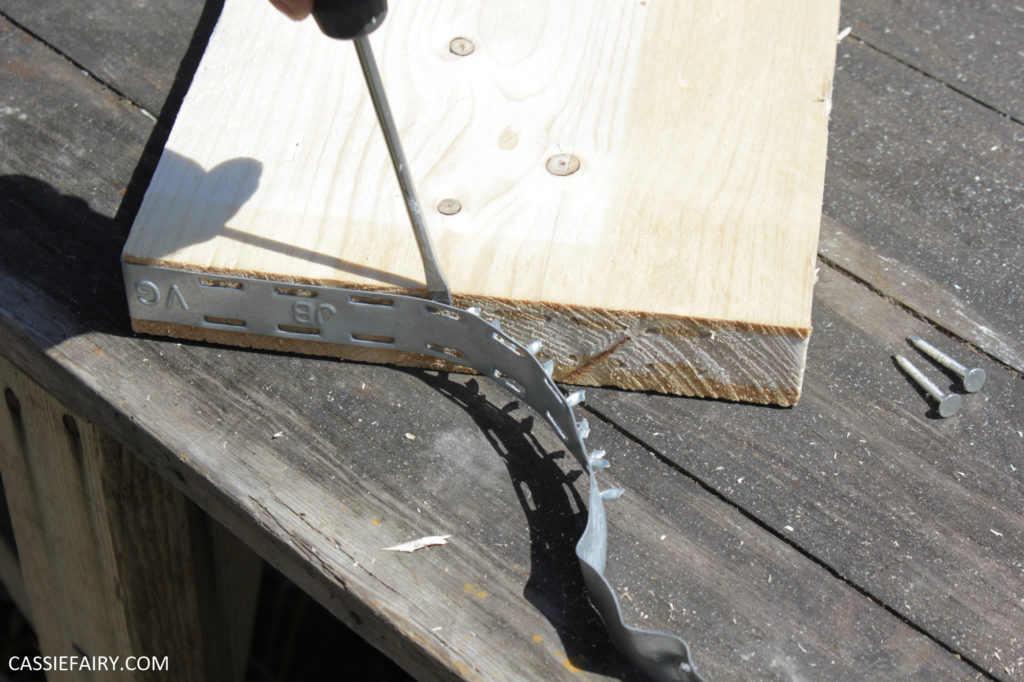
I then prised off the metal ends from the scaffold board offcuts. I wanted to re-use the metal trims on the table but didn’t want the garden benches to look quite so industrial. If you’re going to do the same, please be VERY careful as the metal trim has LOTS of spikes on the back and is rather ‘twangy’ when you try to get it off. Don’t get hurt.
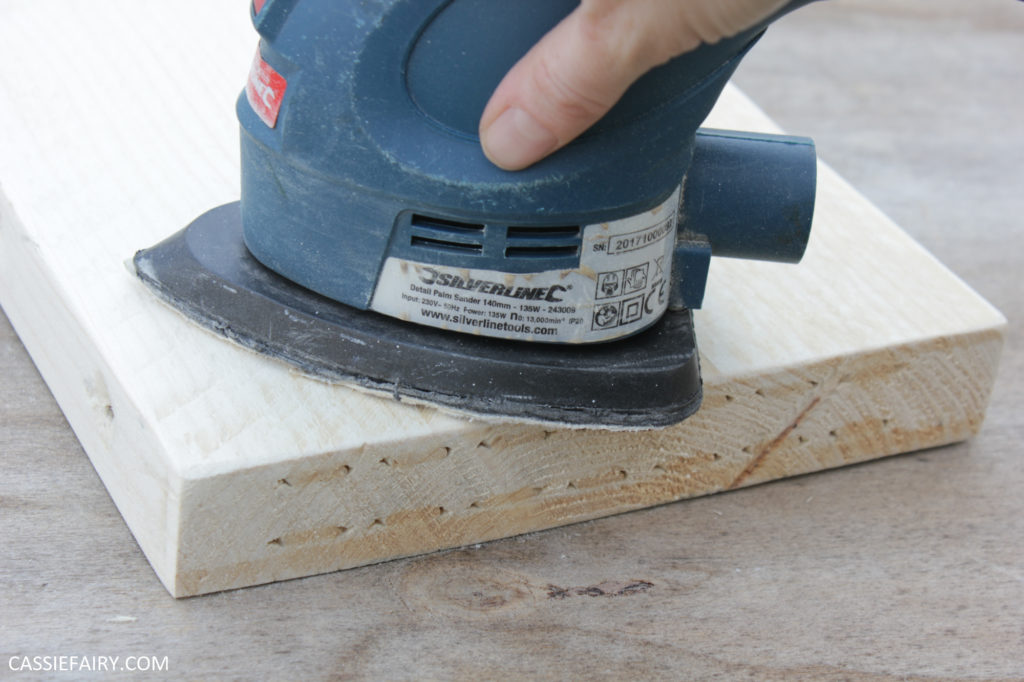
I sanded down the scaffold boards thoroughly because there’s no way that I want to catch my dress (or skin, for that matter!) on a splinter of wood sticking out of the bench. It was a lovely sunny afternoon so it wasn’t too much of a hardship to be sanding down planks in my garden until they were super-smooth.
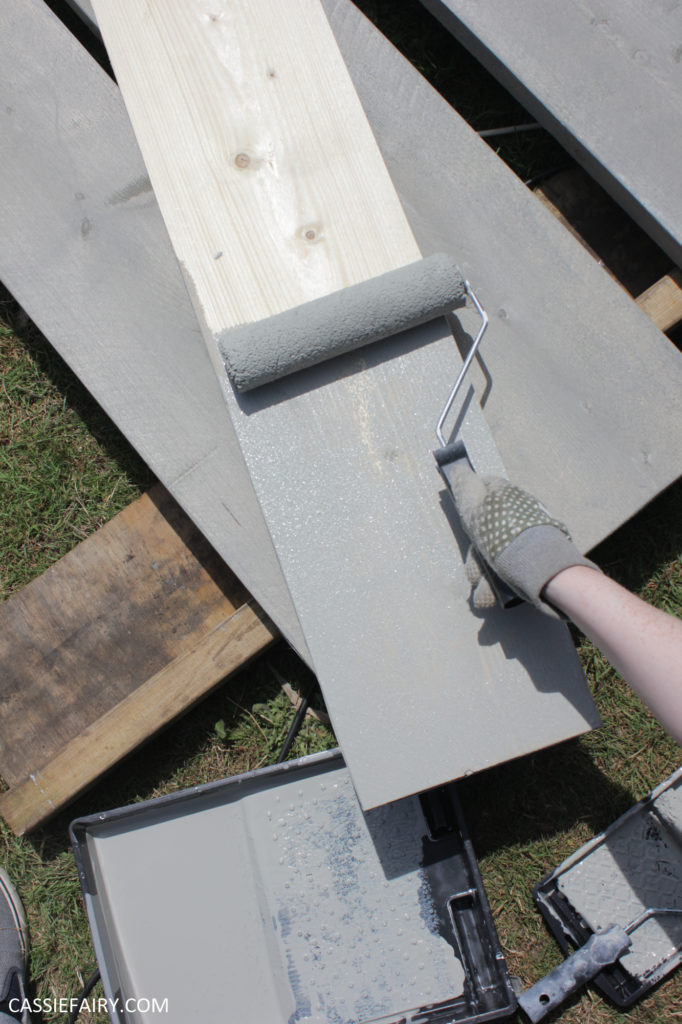
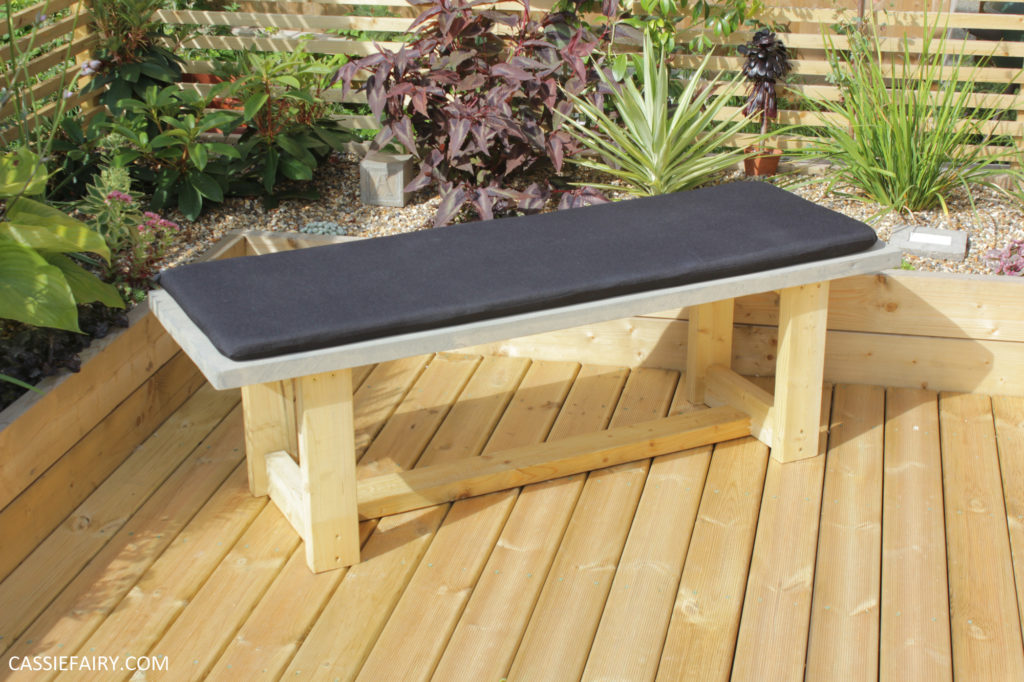
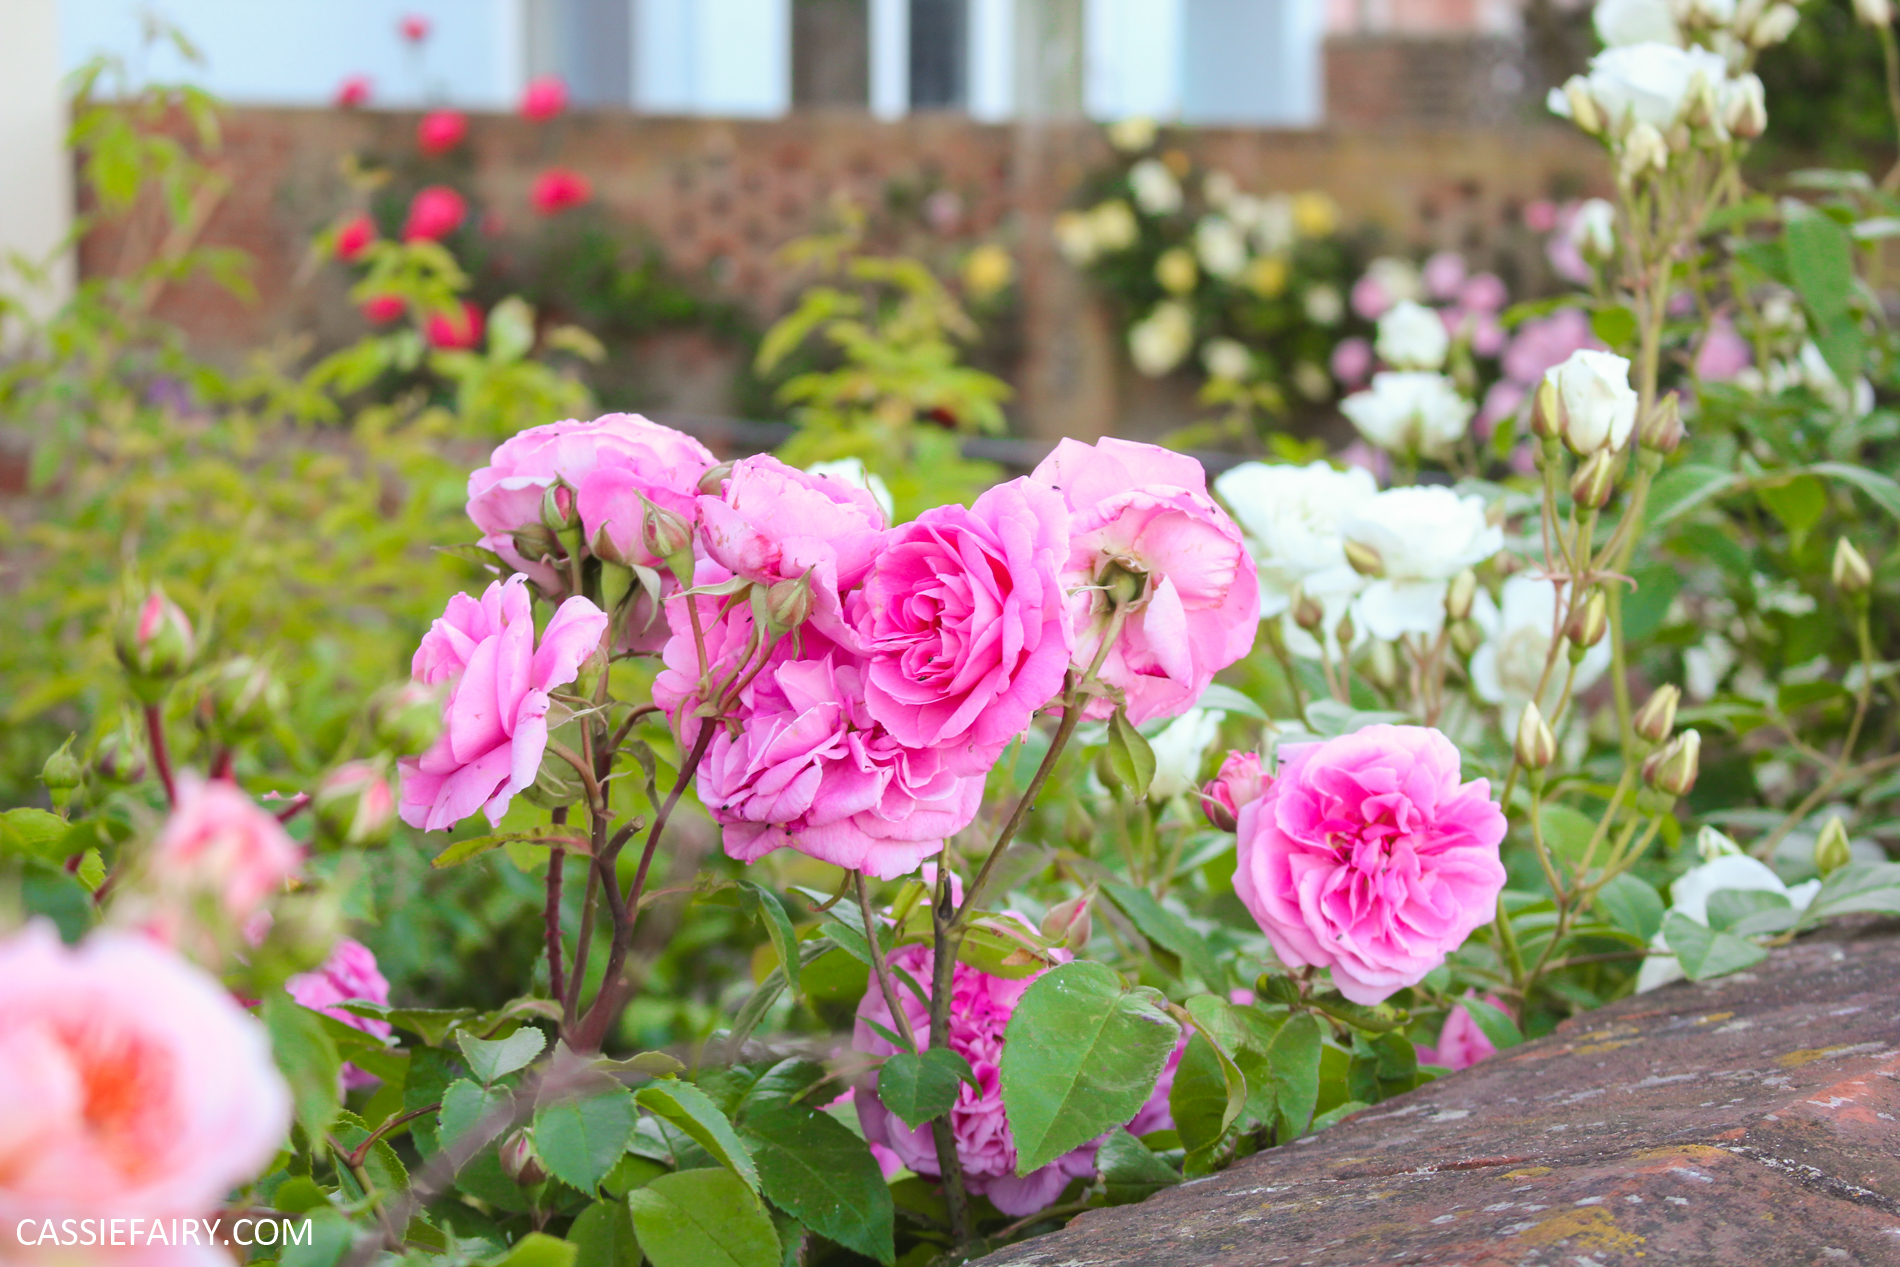
We already have one garden bench – it’s a teak bench that I got last year – and it has already silvered into a gorgeous grey tone. I could of course wait a year or two for the scaffold boards to age and become silvery too, but I don’t have the patience for that I want everything to match right now! So it was time for a thin coat of garden paint. I chose a slate grey outdoor paint from B&M, it was £9.99 for a huge tub that I only needed about a quarter of for this project.
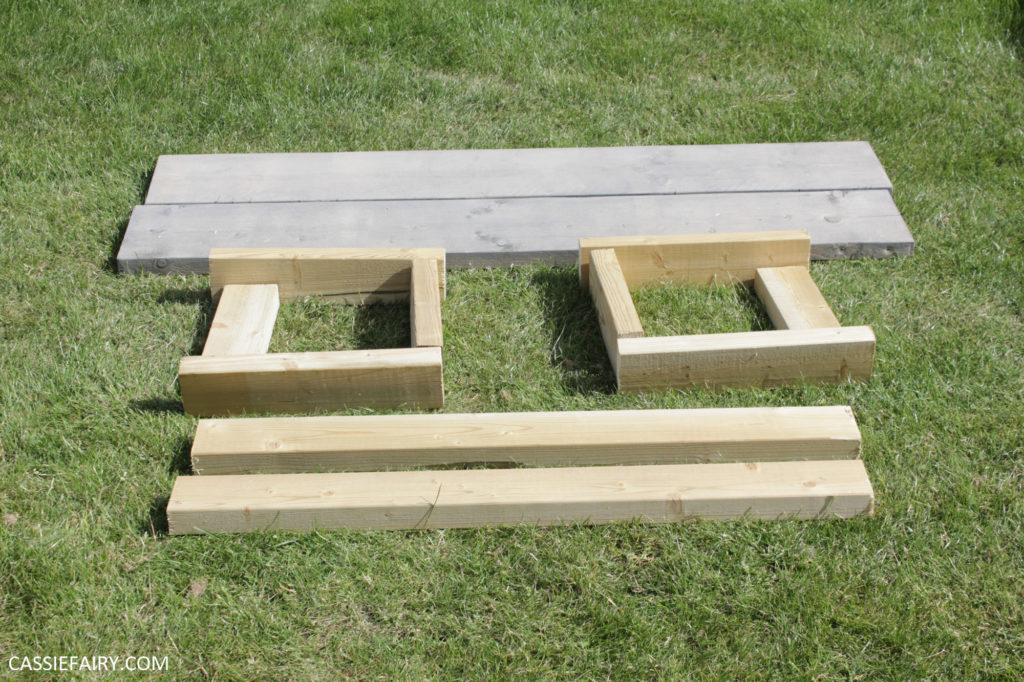
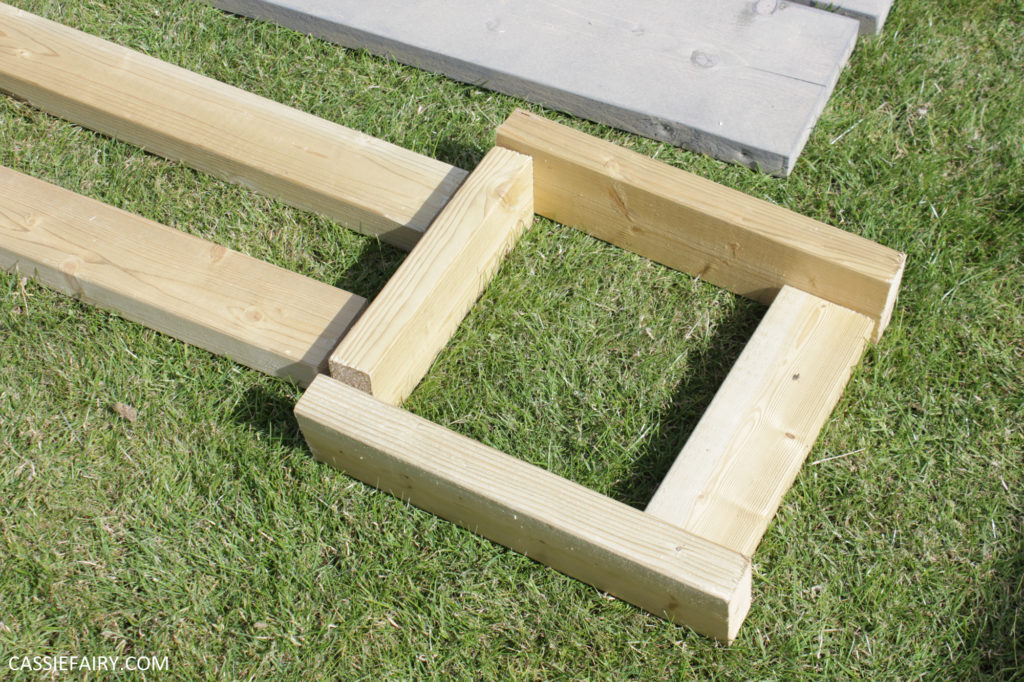
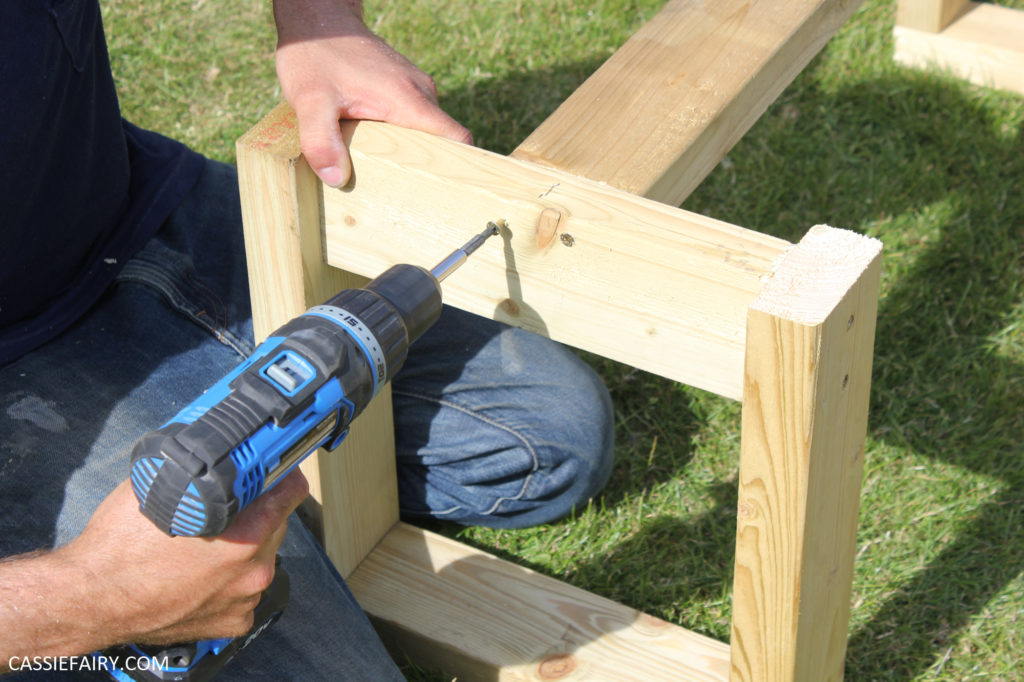
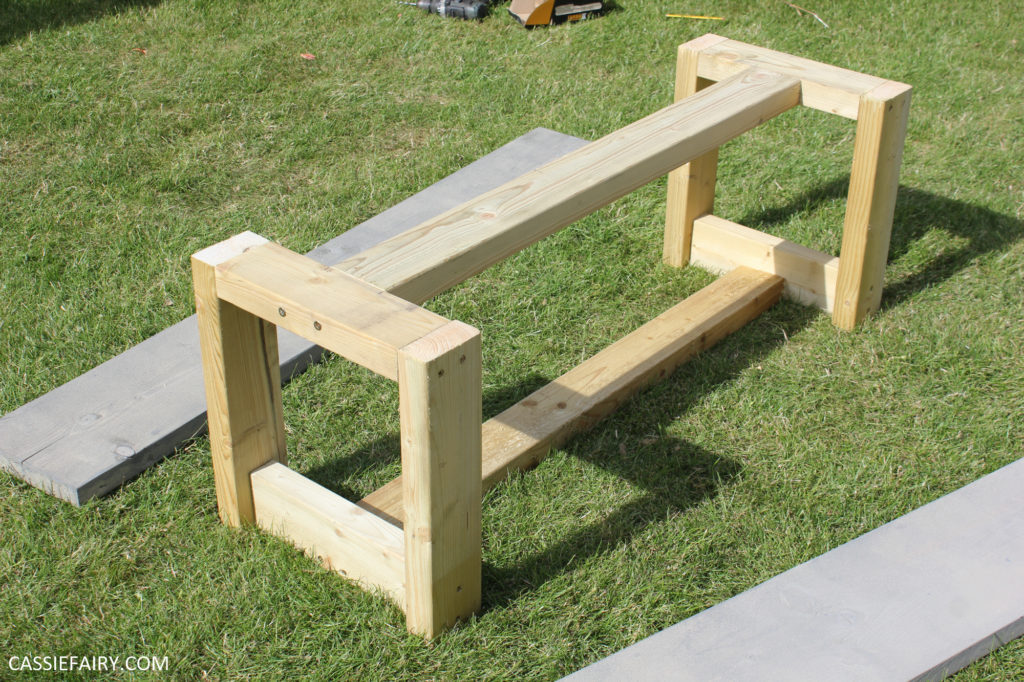
We used pressure-treated timber to make two ‘rectangles to form the ends of the benches and then added two central beams to support the ends. After screwing the base together with very long self-drilling screws that we had leftover from our shed build, we used decking screws to attach the scaffold planks to the top.

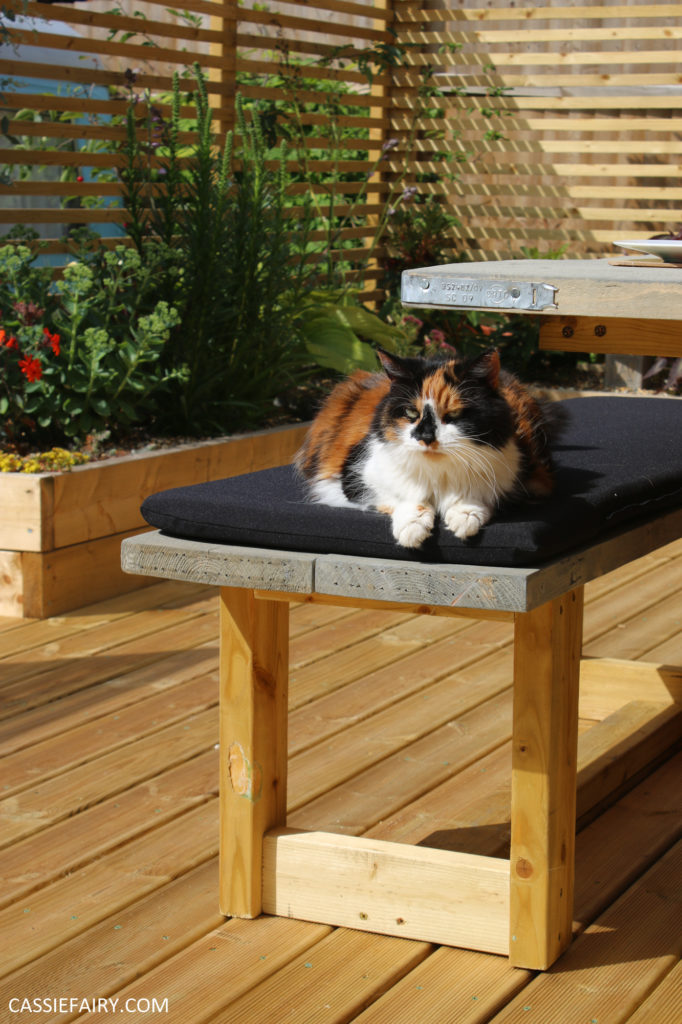
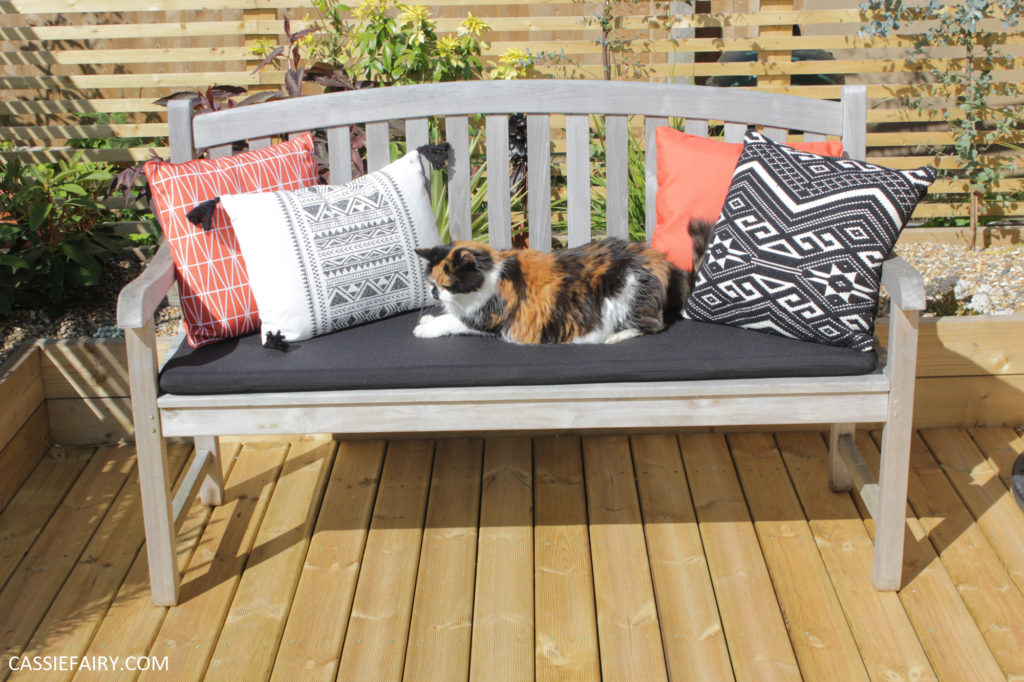
And here’s the finished bench seat – what do you think? We made another two, and I’m actually considering making one more bench and buying another cushion pad for it. In fact, I’ve just made up my mind – I’m going to go and order another bench cushion pad right now.

When I ordered the first three bench cushions, I also took a look at the other outdoor cushions on the Wayfair website and I decided to get a couple more. I already had a black woven cushion indoors that didn’t really have a place of its own, so I popped that on the bench seat, along with a new tasselled cushion which is a little whiter and provides contrast.
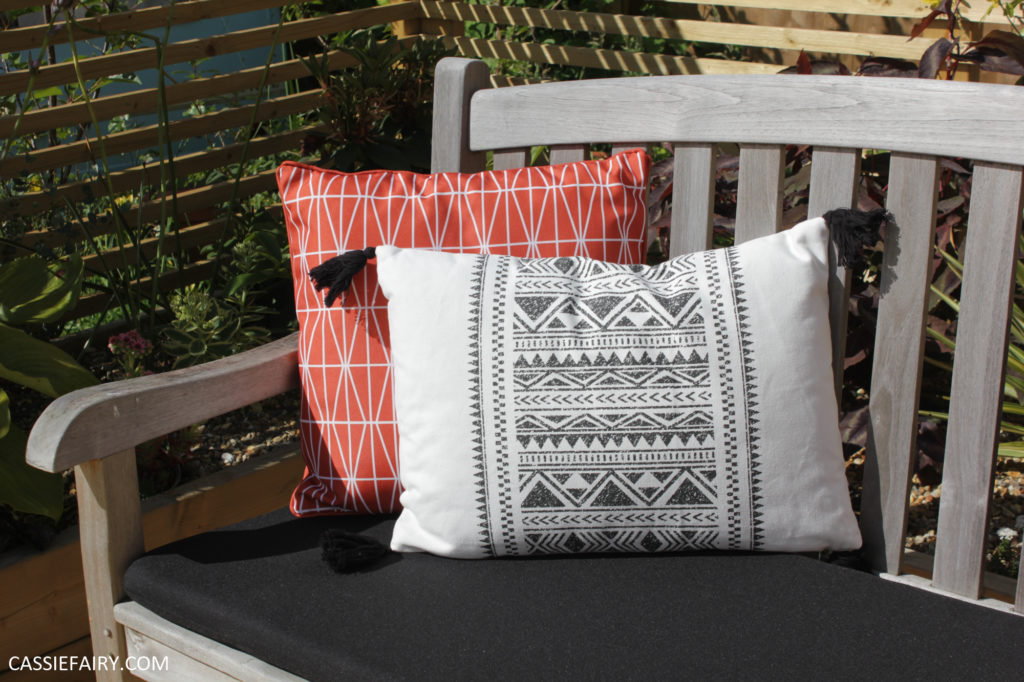
I planned to stick to monochrome tones on the patio, with the black wood of the shed and doors, and the silvery grey tones of the bench, but we’d just bought some bargain terracotta pots from Wilco (the one on the table is just 60p!) and I couldn’t resist adding a further splash of orange with a pair of patterned outdoor cushions.
I think I’m done for cushions now, but I’m definitely getting that extra cushion pad and building another bench seat. They’re so handy for moving around the garden and will provide plenty of seating around the scaffold board table. Watch this space for the DIY project to build a scaffolding table for yourself and let me know what you think of these benches in the comments below 🙂
Some items in this blog post have been gifted to me and the pink links indicate a gifted product, affiliate link or information source. All thoughts and opinions in this post are based on my own experience and I am not responsible for your experience 🙂


8 responses
Hi, Sorry I don’t know what CLS is! We used standard scaffolding boards to build the benches – we just cut one length in half and made a bench from these two pieces. Hope this helps 🙂
Hi, is that CLS you used for the benches? If so how many lengths for each bench please ?
Hi Vicky, thanks for getting in touch. There isn’t a specific cutting list for this project as the sizes will differ depending on the length of scaffold boards you’re able to get – we used a 13ft scaffold board and cut it in half so that it was the right length to fit our DIY table! The scaffold boards are available in a range of lengths so you can choose whichever size you want the finished bench to be – hope this helps! 🙂
My grandson chose your bench for us to make for his Mom. I am new at this and can’t find the cut list. Could you please post it for me. Thank you so much Vicky
Hi Yanina, that’s great news – I hope your upcycled scaffold table project goes well 🙂 Just to let you know that our scaffold board table has been outside all year (including all winter, it’s too heavy to move!) and it’s only warped a little bit. Not enough that it causes a problem – we can still eat at the table without plates and pots tipping over! Hope this helps.
Amazing! Well done! You make it look so easy. We are going to replace our outside table top, which has warped & split, by using scaffold planks. I thought just using cuprinol on an indoor dining table would make it last outside but no such luck. Thanks for the fab makes!
Thanks so much Sarah Lou 🙂
This looks great. I like the re-use of the metal trim on the table-top. I’ve done something similar, although because my benches were a different shape, I’ve had to get custom made cushions, I saved money by ordering foam cut to size from F.C. Hancox and then just adding my own cover using some material I had left over from another project.