
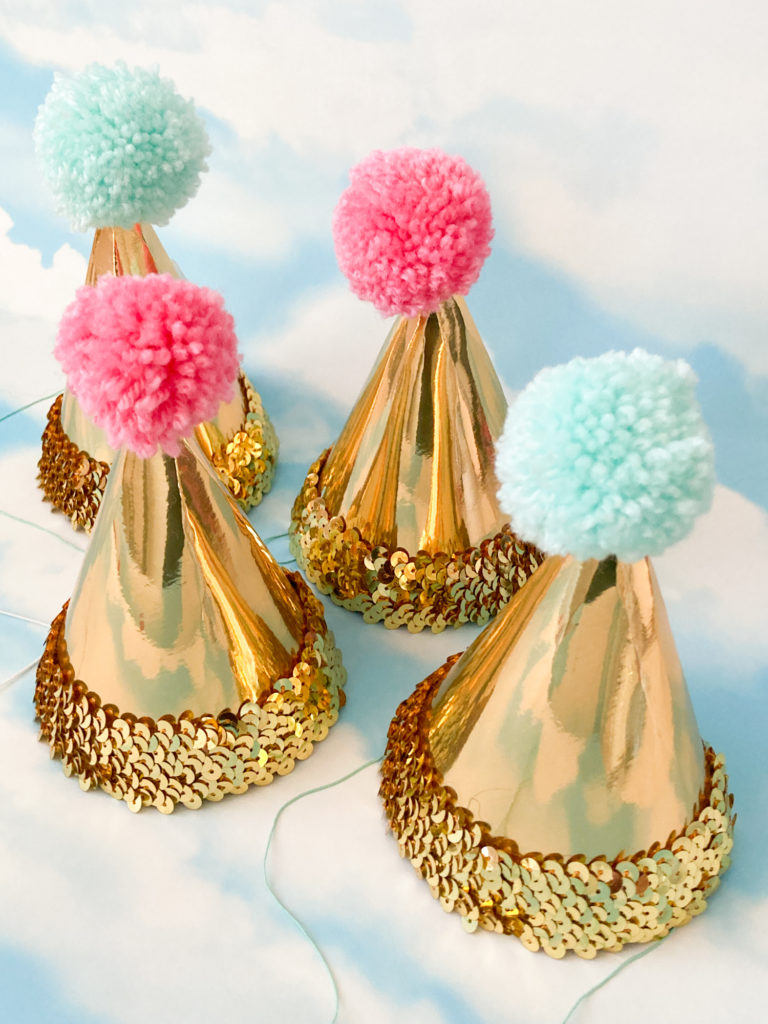
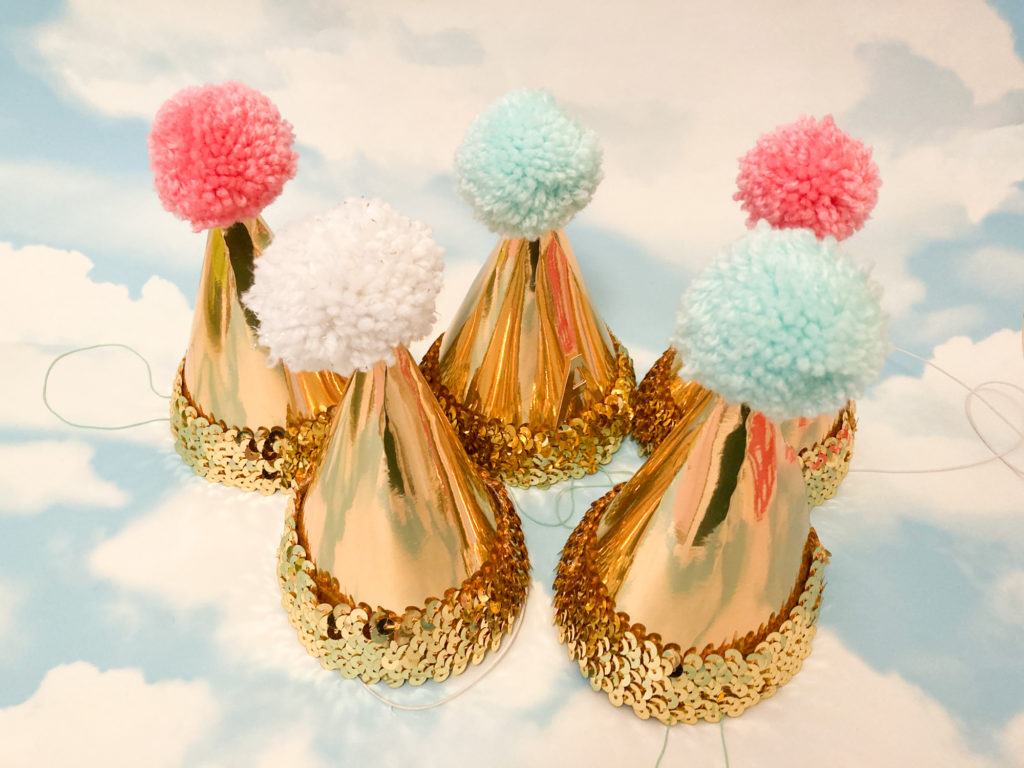
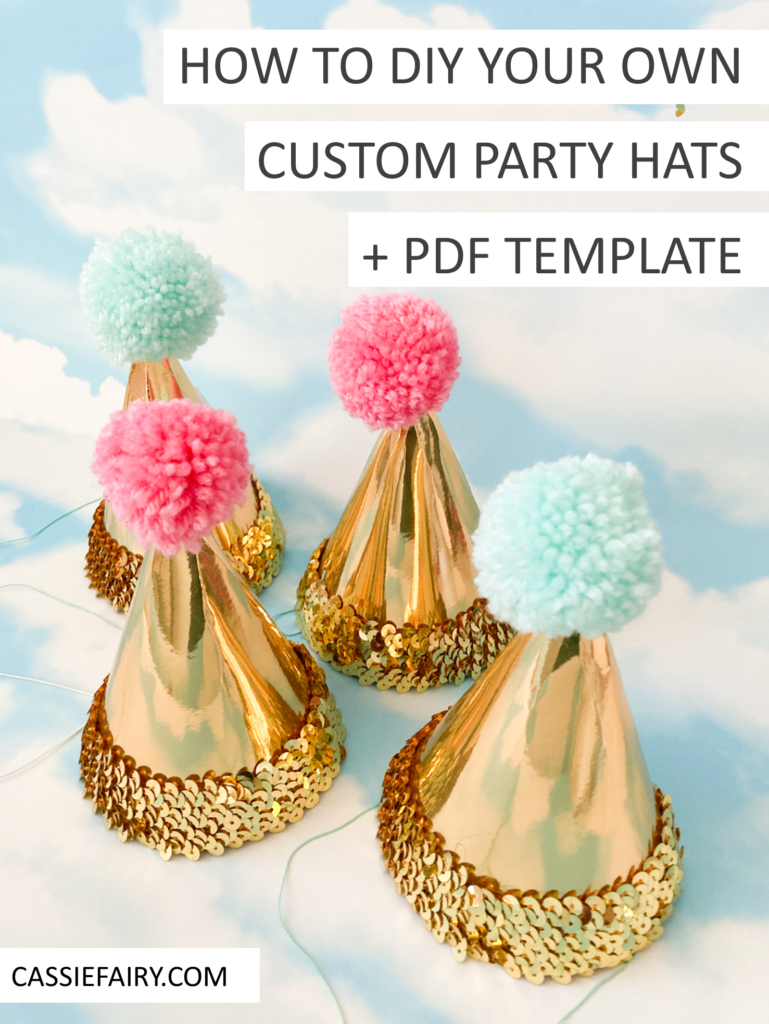
Whether it’s a Christmas party, New Year’s Eve or a birthday celebration, nothing gets the party started quicker than donning a glitzy party hat! I’ve made mine in gold card with colourful pompoms and a matching sequinned band, but you could choose any colour or patterned card to make the hat suit your celebration.
How about a red cardboard hat with fluffy trims to create mini Santa hats for Christmas? Or a rainbow polka dot patterned card for a kids birthday party? Once you’ve got the party hat template, the possibilities are endless – and you can make two hats from one A4 sheet of card. Here’s the PDF template for you to download:
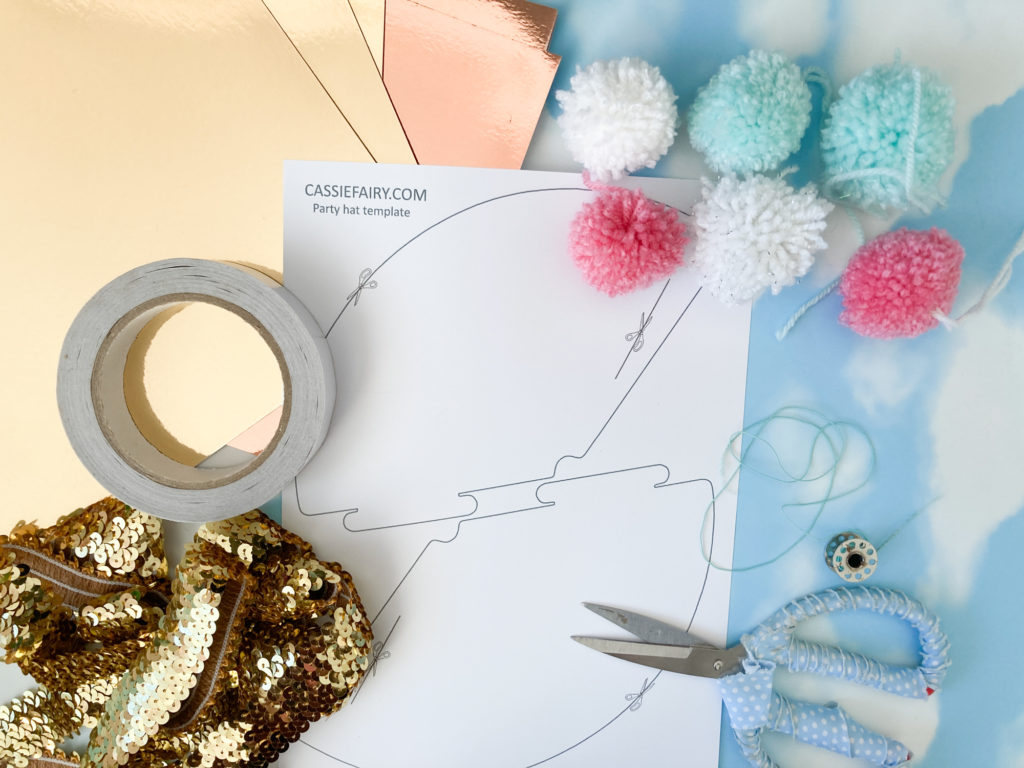
You will need
- Party hat template
- Coloured, metallic or patterned card
- Scissors
- Elastic thread
- Double-sided sticky tape
- Sequinned trim, ribbon or fluffy trim
- Pom-poms
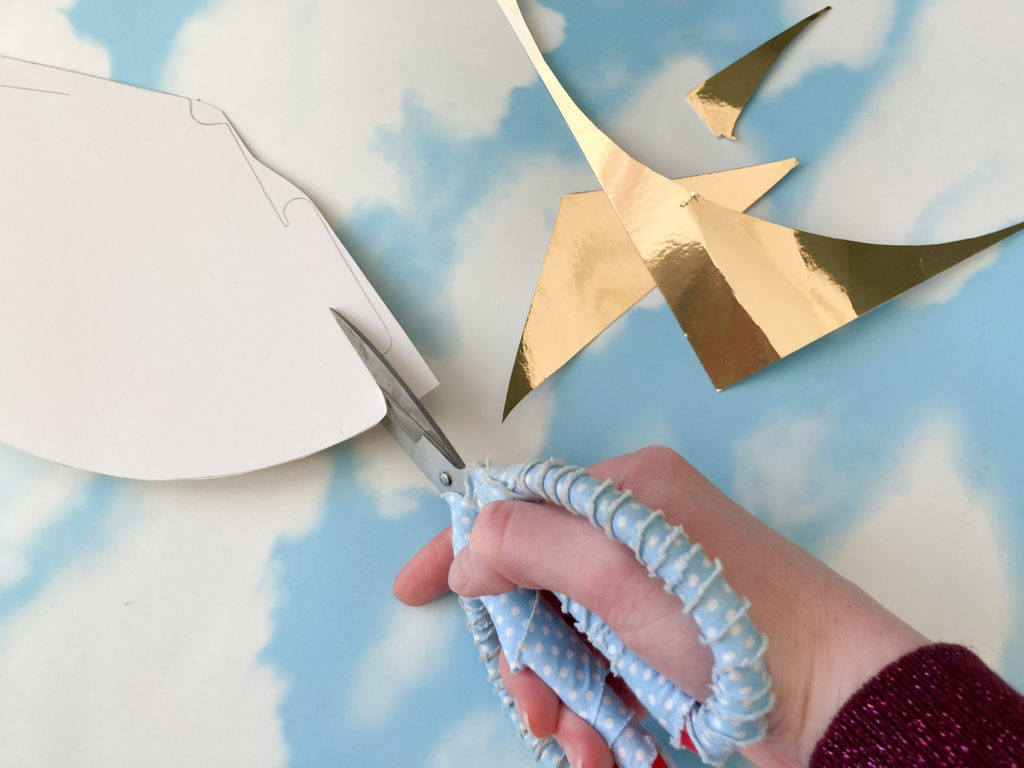
Step 1
Print out the template onto plain paper and cut it out. Position the templates onto the back of your patterned, metallic or coloured card and draw around the shape. If you’ve got quite thin card, you may be able to put it through your printer and print the template directly onto the back of the card.
Step 2
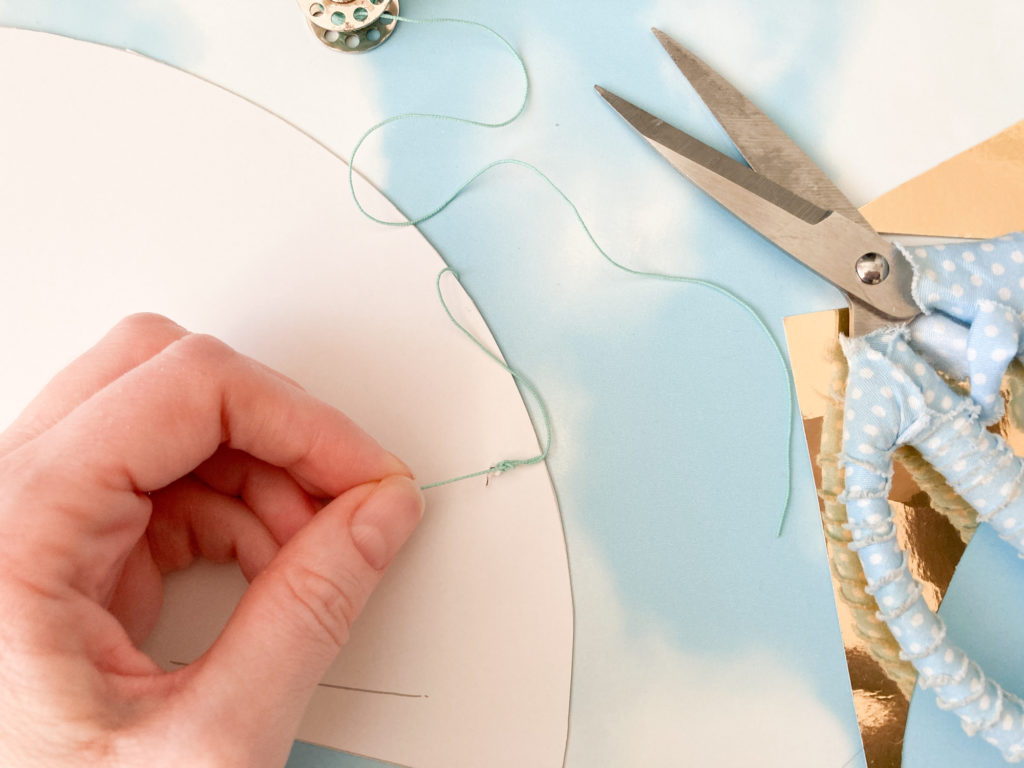
Cut around the template and make a slice along the line to create a slot for the tab. You can also add a hole in each side at this point, ready for the elastic strap.
Step 3
Roll up the party hat into a cone and pop the tab into the slot. You can use some tape on the inside of the hat to secure this in position if needed.

Step 4
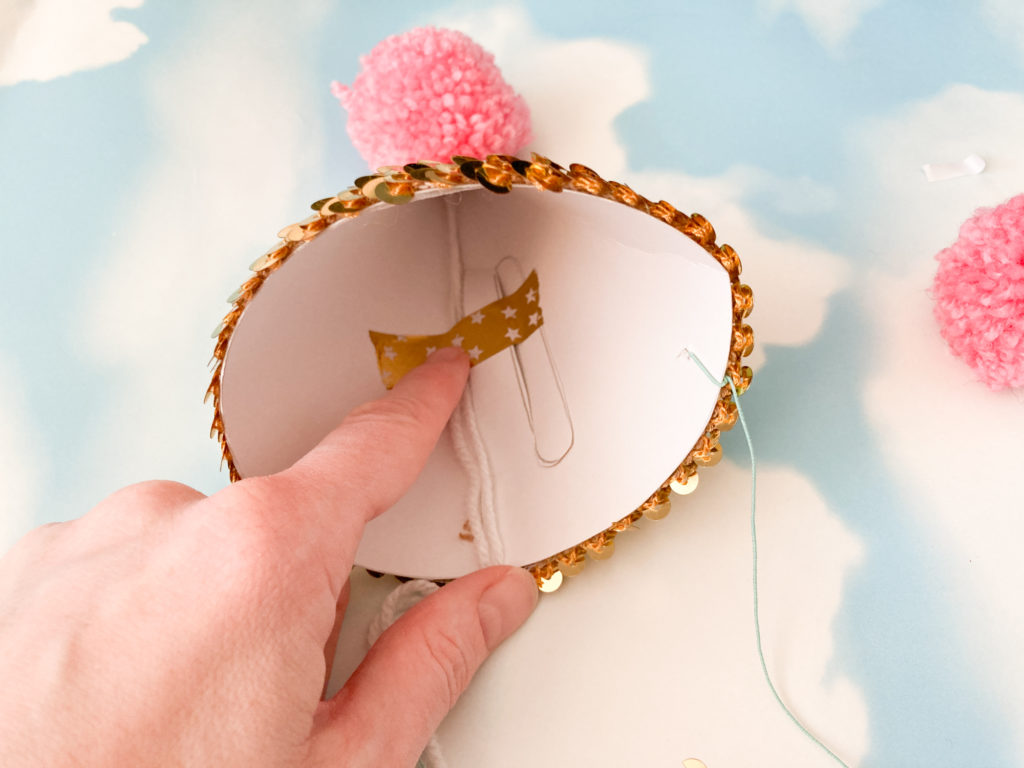
Cut a length of elastic thread to fit under your chin and thread this through the holes in the sides of the party hat. Tie the elastic in position and you can tuck any loose ends underneath the trims in the next step.
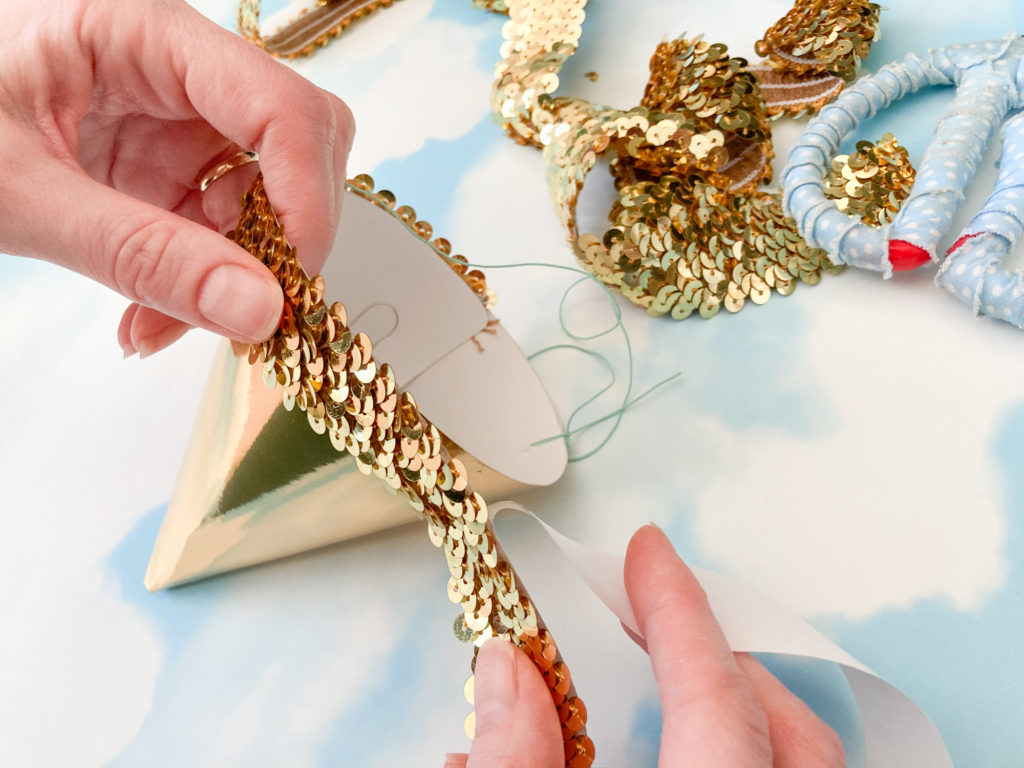
Step 5
Cut approx 30cm of sequinned trim, or any other ribbon or trim you like. Add double-sided sticky tape to the back of the trim. I used a slightly stretchy sequinned trim so it was a little easier to make it fit around the curved shape of the hat.
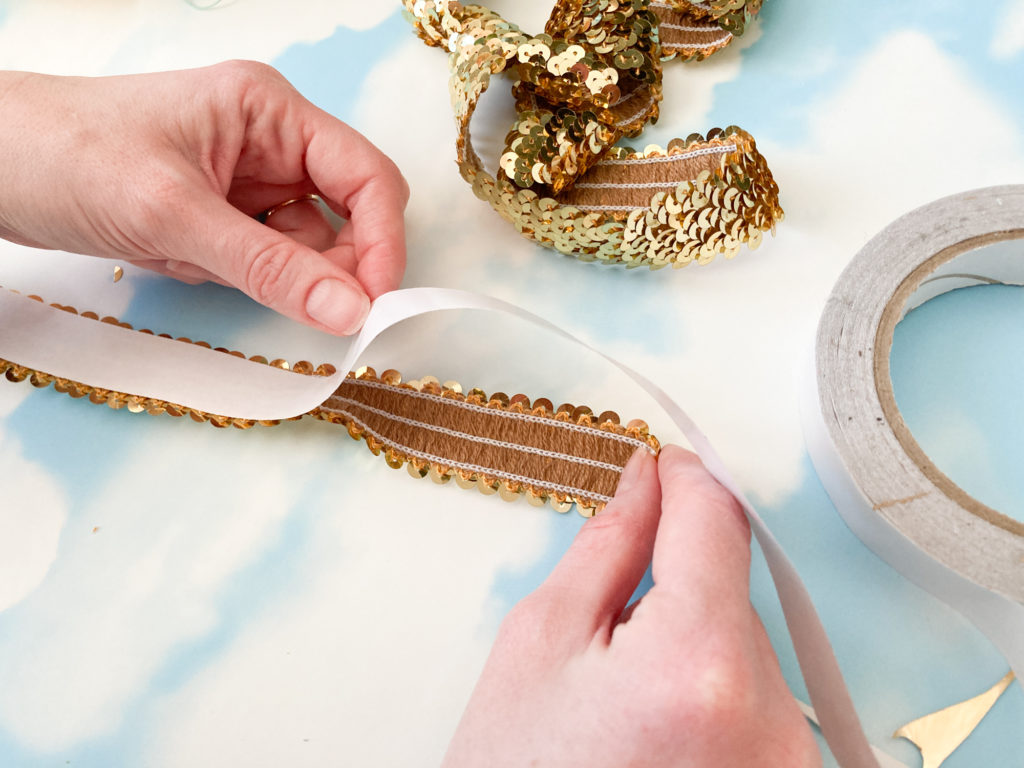
Step 6
Peel away the backing and stick the first part of the trim beneath the flap at the back where the edges of the hat cross over. Continue peeling off the backing and sticking down the trim around the hat until the ends meet at the back.
Step 7
Finish the hat with a pom-pom. You can either glue this to the top of the hat or, if you’ve made the pom-pom yourself, you can thread the loose ends of the centre tie down the hole in the top of the hat and secure the ends with tape inside the hat.
Now wear your party hat with pride to every celebration! You can make multiple hats for all your guests and even customise them with the guest’s initial or favourite colours.
I hope you have a fun party – whatever you’ve got planned! Let me know if you have a go at making these custom DIY party hats in the comments below and I’d love to see what colours and styles you create so please tag me in your project photos on Instagram @Cassiefairy – I can’t wait to see your party hats!
Pin it for later


One Response
Suggestion.
Do an update column (like Purl Soho does frequently), but use various shades of green paper, white, + to make Christmas Trees to decorate various surfaces 🙂