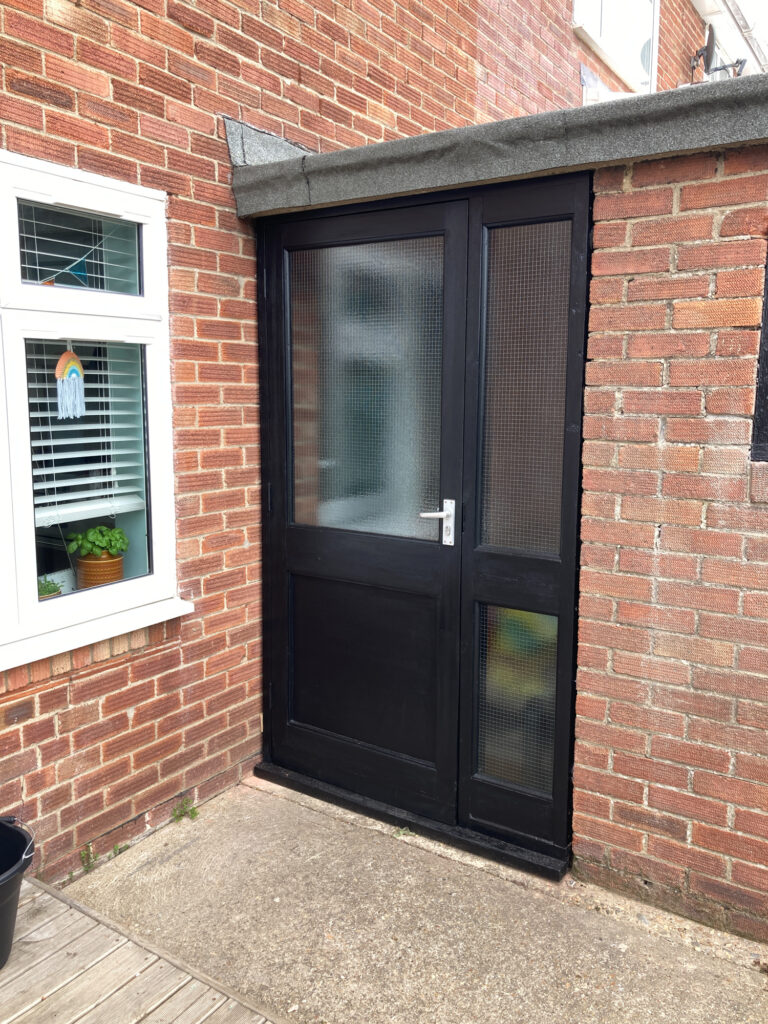
My porch makeover has been in progress for a while and today I’m sharing the second phase of the DIY project. Check out the ‘before’ photos in my first porch makeover blog post, where we upcycled an ancient door frame to enclose the open porch.
Enclosing the open porch has created a kind-of entryway from the garden before you come into the kitchen. This, therefore, lends itself perfectly to being a mud room or boot room, with storage for wellies, coats and other outdoor items. So, in this space, I’m considering different shelving and cabinet options to make the most of every inch of space across the back wall of the porch.

I’ve previously used heavy-duty garage shelving in the brick outbuilding, which has proven to be an excellent storage option. It’s sturdy enough to take the weight of heavy boxes and tools but it doesn’t look excessively bulky or block the light, which is important when you’re adding storage to a small utility space, shed or tool store.
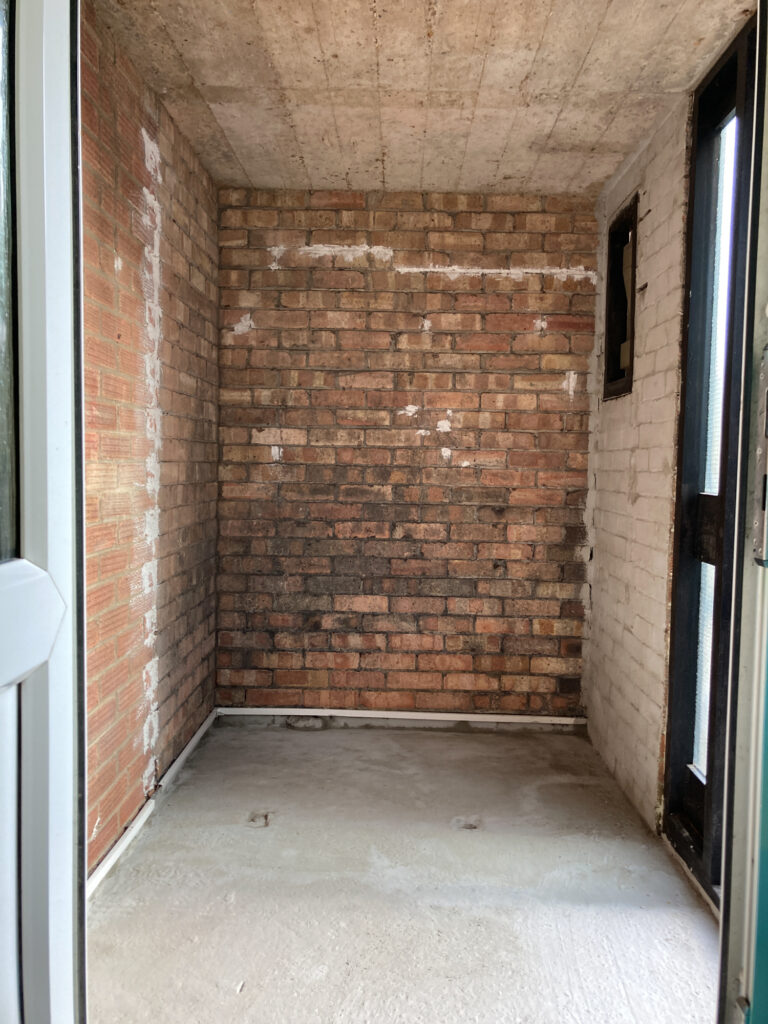
I liked the idea of keeping the exposed brickwork but painting over it with a minty aqua colour to match the kitchen, which adjoins the porch. So, the first thing to do was prepare the brick walls and the ceiling for painting.
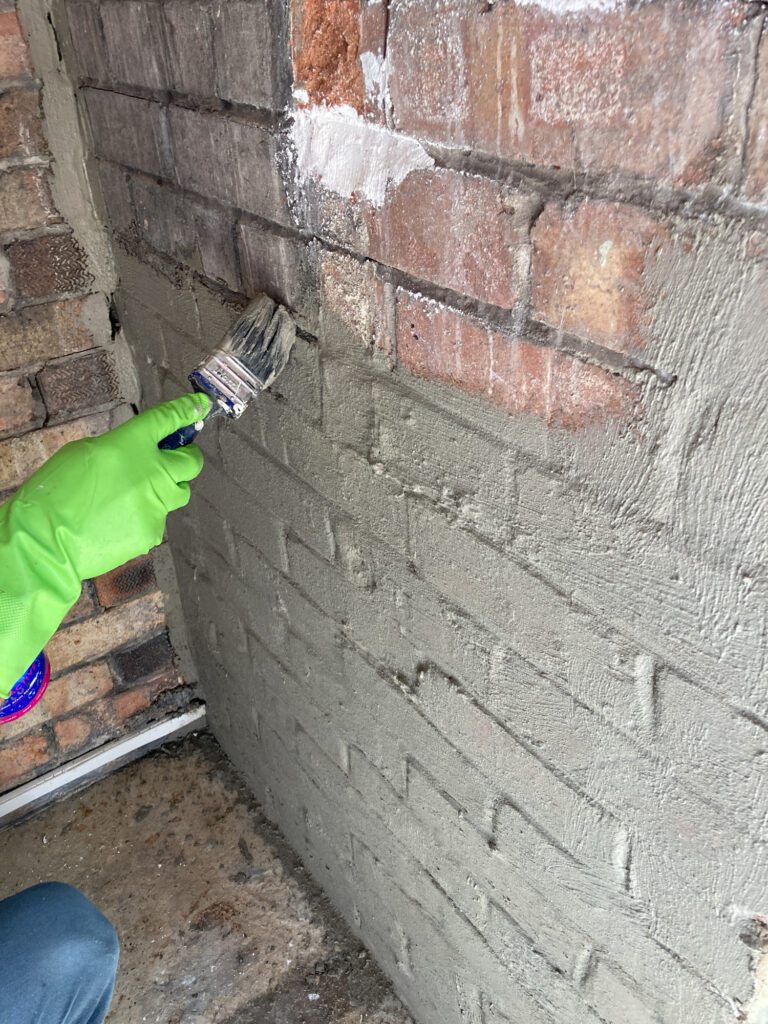
I used an old wire brush to gently scrub away any flaking bits of mortar and then used a broom to get rid of any dust and cobwebs. Inevitably, there were a few old holes and cracks in the mortar so we used filler to patch up any uneven areas.
Then came the moisture-proofing. We painted on a coat of a concrete-like substance that prevents dampness from penetrating the exterior wall. This was also used on the concrete floor to prevent the damp from rising up.
Despite knocking out part of the wall, luckily the floor wasn’t damaged and the foundations of the outbuilding were solid. I’d considered that we might need a residential foundation repair before incorporating this exterior space into the home but thankfully everything in good condition and the moisture-proofing was all it needed.
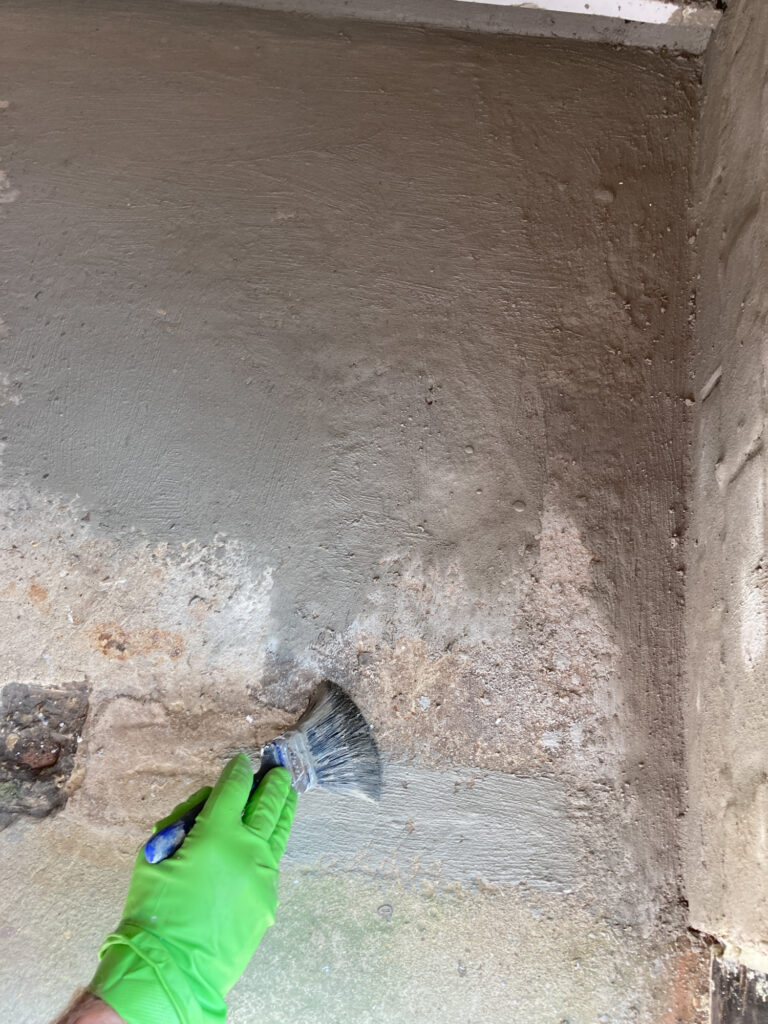
If you want to see the painting process, I’ve shared a video on Instagram (below). We used a masonry decorating kit by Harris Brushes, which made it easy to brush the paint into the mortar grooves. I then used the fluffy masonry roller to paint a couple of coats of onto the brickwork until it was completely covered.
How to save money on paint
My top tip for painting onto brick and getting a solid colour is to use an undercoat of white paint. It doesn’t have to be anything special, just a basic cheap white emulsion will do nicely. Roller it onto the walls and allow it to dry completely before doing a second and third coat using the colour of your choice.
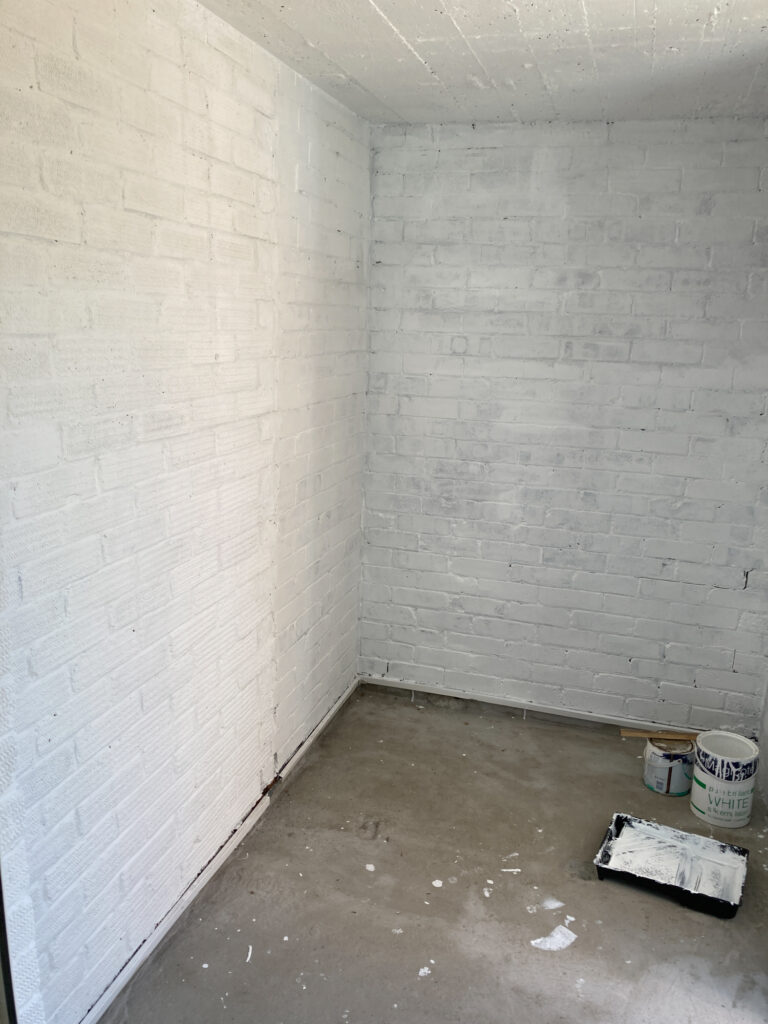
If you’re using a darker colour for the top coat, you can use a darker undercoat using a cheapie grey colour. Doing the first coat with a cheaper paint means you’re not wasting your (possibly more expensive) top coat paint on an undercoat to cover the redness of the bricks. The basic paint will cover this up nicely and then you’ll have a blank canvas to add the colour on top.
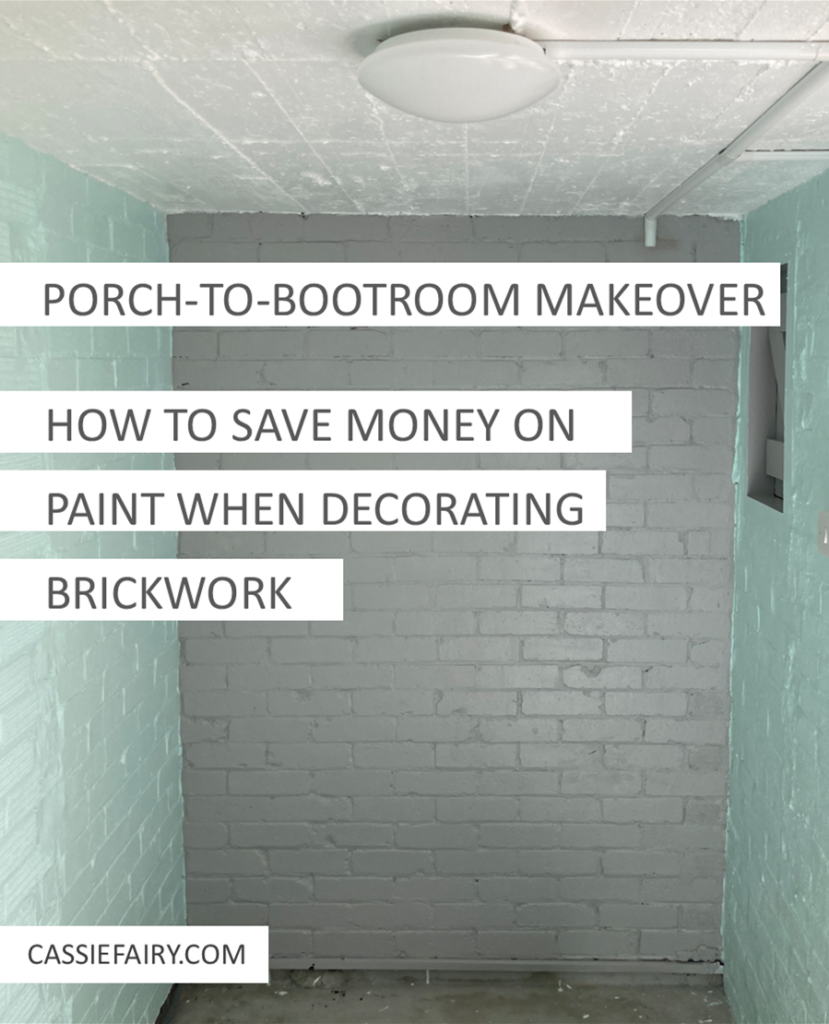
When I started running low on the aqua kitchen paint, I decided to paint the back wall of the porch with leftover grey paint. This wall will be entirely hidden behind the storage units so it didn’t need to be the same colour as the side walls. That’s another tip for saving money on paint – if the wall is hidden, does it really need to be the same colour?
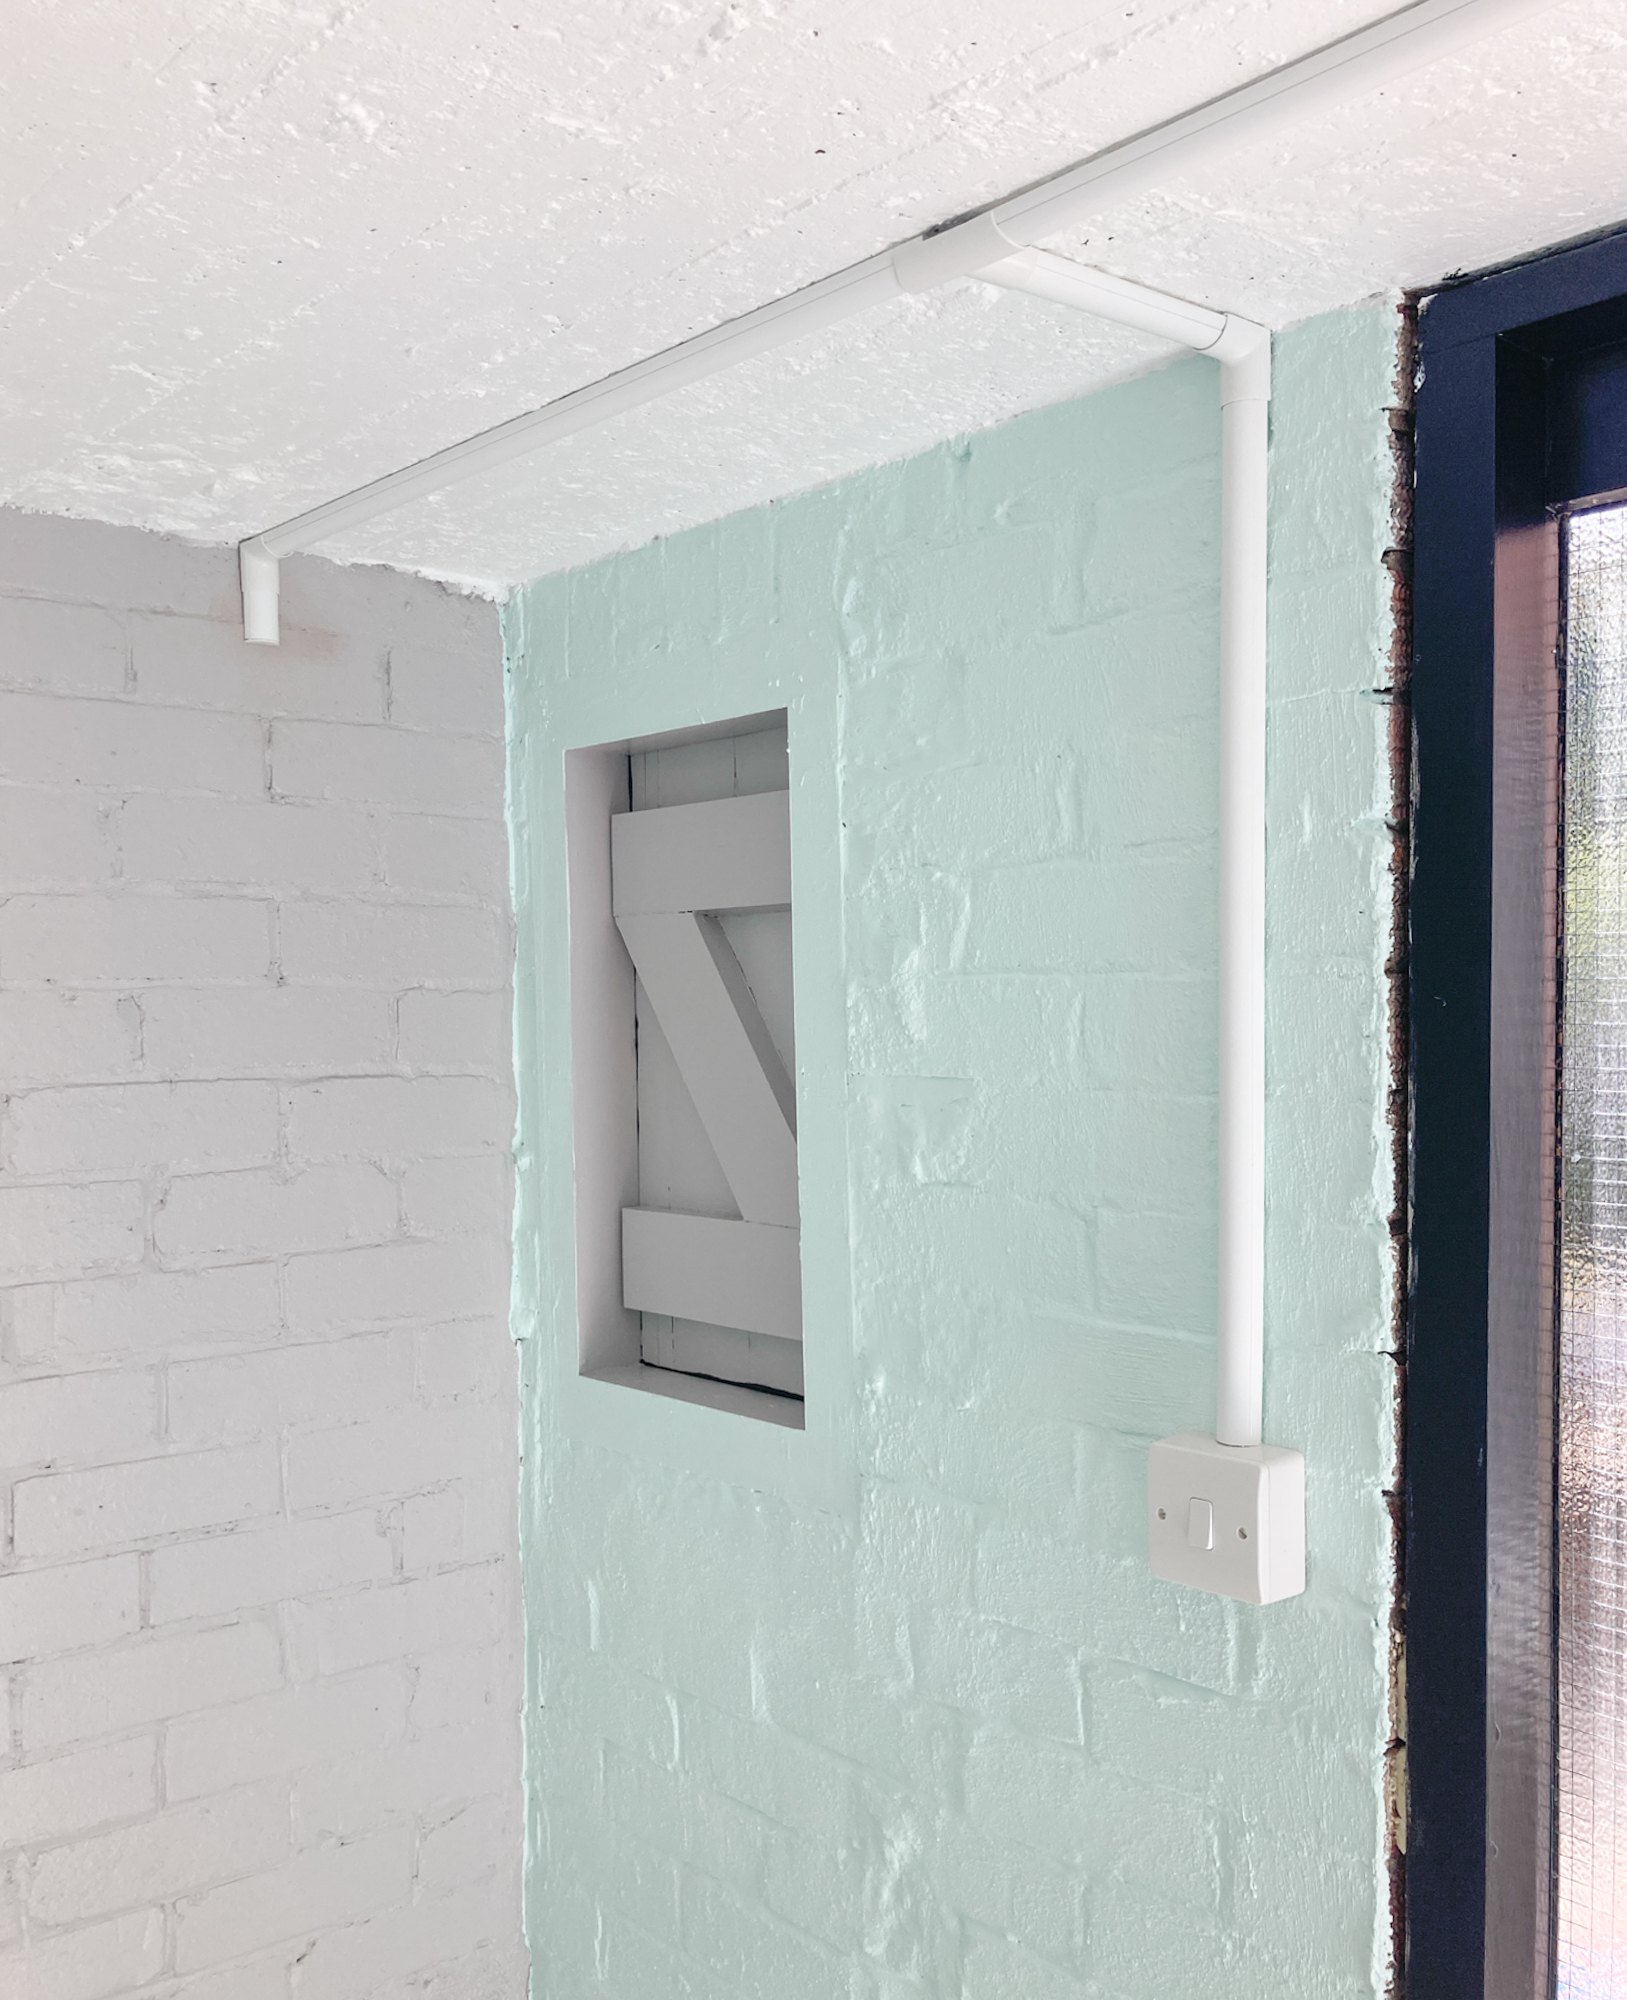
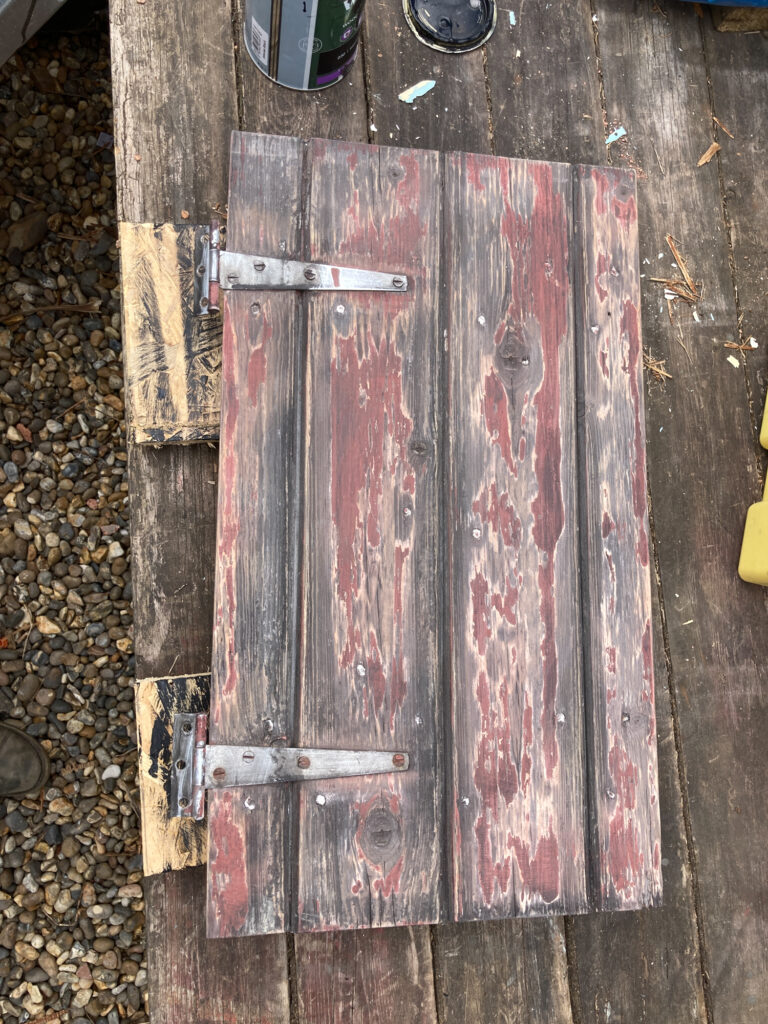
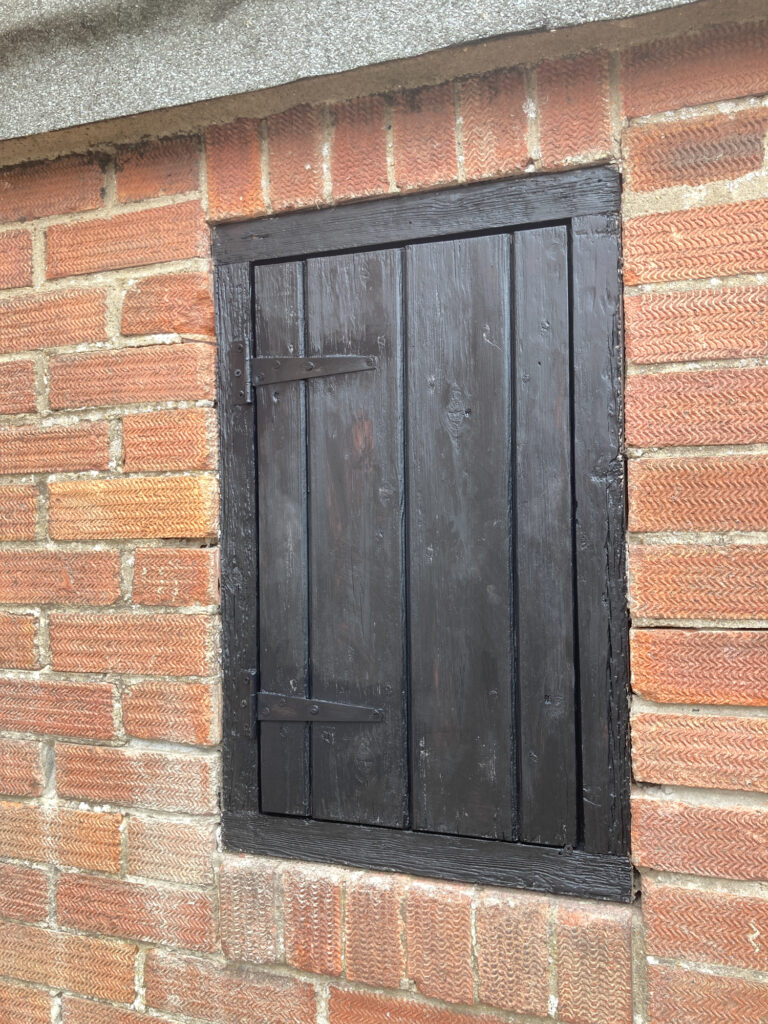
There’s a small side door/window in the porch but this would also be covered by the cabinets so we decided to seal up the door completely. But not before I gave it a makeover with a lot of sanding, some black exterior paint to match the door and a coat of grey paint on the inside.
The next phase will be doing the flooring and fitting useful storage across the back wall. Be sure to check back soon for more updates on my porch makeover project! And please share your own experiences of incorporating outdoor spaces into your home, I’d love to hear your advice in the comments below. 🙂
Pin it for later
This article is a sponsored collaboration. The pink links in the content indicate a sponsored link or information source. The blog post reflects my own experience and the sponsor hasn’t had any control over my content 🙂