When space is tight and you don’t have room for a dressing table in your bedroom, how about turning an alcove or cupboard into a built-in vanity space? Here’s how my finished fitted DIY dressing table project turned out… You may remember my previous blog post on the DIY steps I took to add shelves, electrics and an illuminated mirror to the built-in cupboard. If you have already seen the step-by-step project have a read of my blog post on how to turn an alcove into a fitted dressing table. Plus, you can check out the horrid ‘before’ photos too!
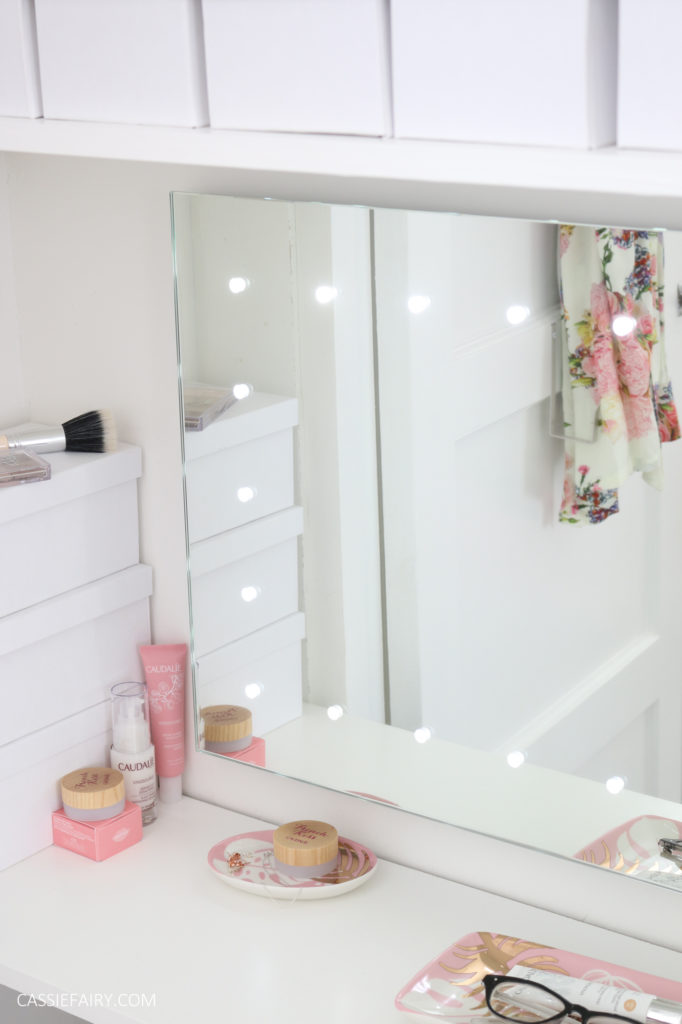 After doing all the heavy DIY work, the next step was to add storage, seating, hooks and accessories. I picked out a selection of sturdy white cardboard boxes from the IKEA Tjena range. I chose small ‘cassette’ boxes for storing makeup, moisturisers and my first aid kit, and 4 large storage boxes for shoes, handbags, hair styling tools etc.
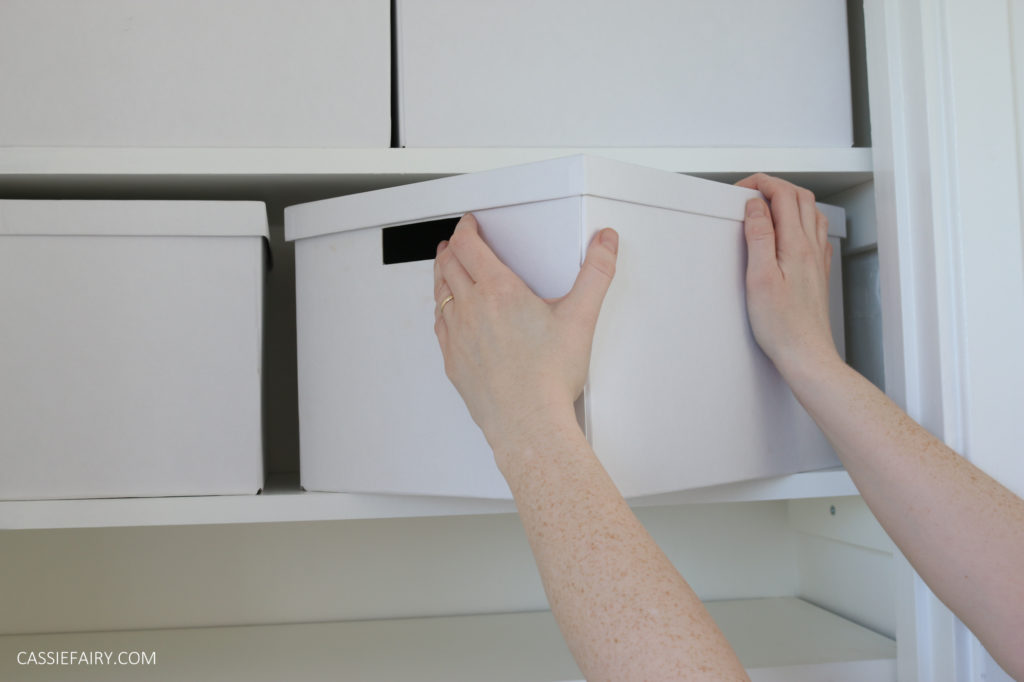
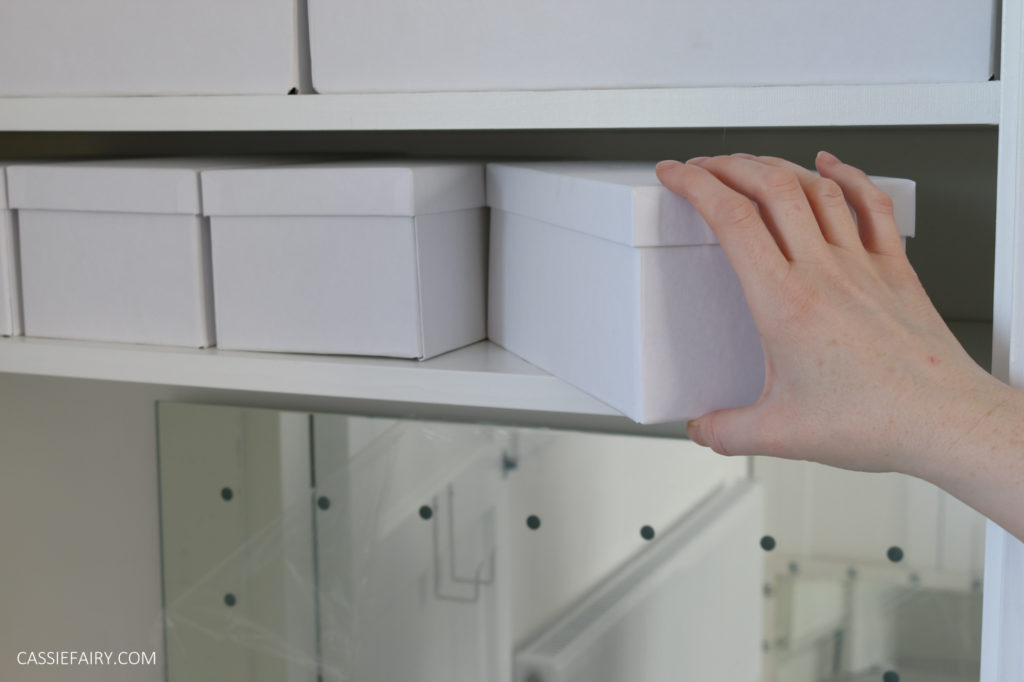 I had planned ahead and installed the shelves at the right height to accommodate these boxes by checking the measurements in the catalogue. I knew I’d be able to fit in four large boxes on the upper shelves and these would hold the items that I don’t use all the time, such as clutch bags, heels and seasonal accessories. The smaller boxes would be useful for things I use everyday so I picked up a few extra to stack at the side of the mirror.
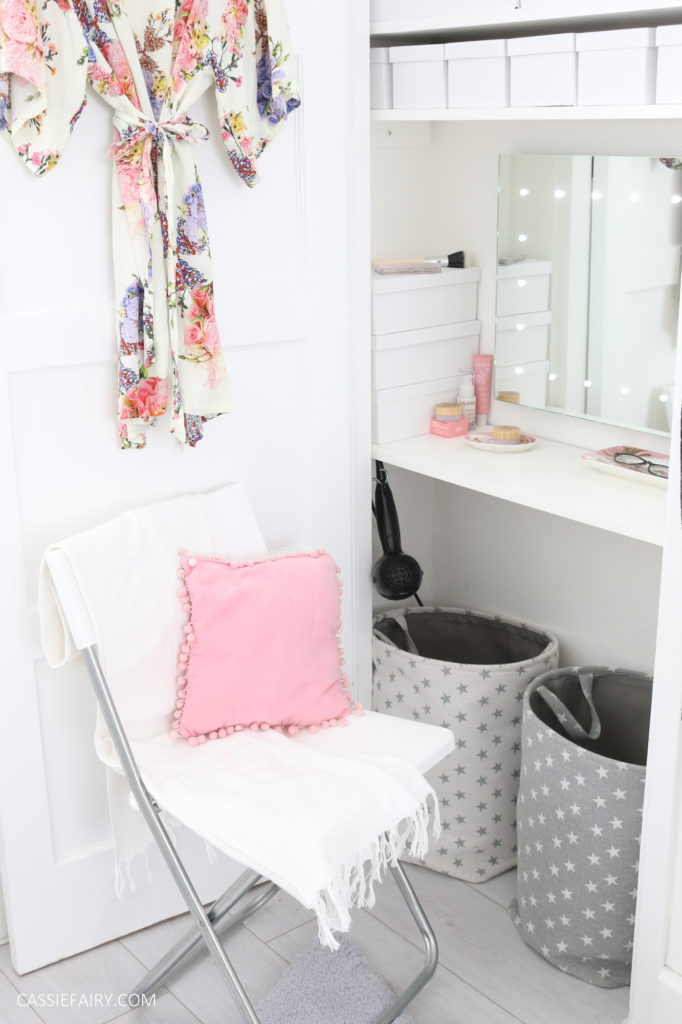
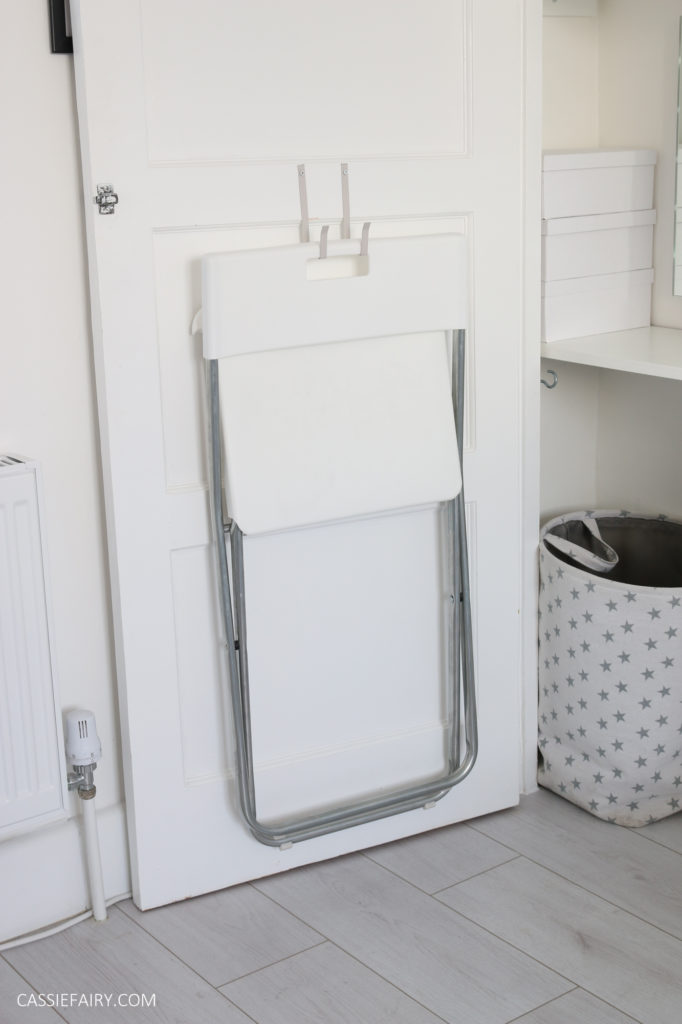 I needed a chair to be able to sit at my ‘dressing table’ so I attached a couple of large hooks to the inside of the cupboard door and hung a folding IKEA chair on the hooks. Now I can just unhook the chair and sit down to do my make-up in the reflection of my illuminated mirror. Oh, and I popped another small double hook at the top of the door to give me space to hang a dressing gown, or the following day’s outfit.
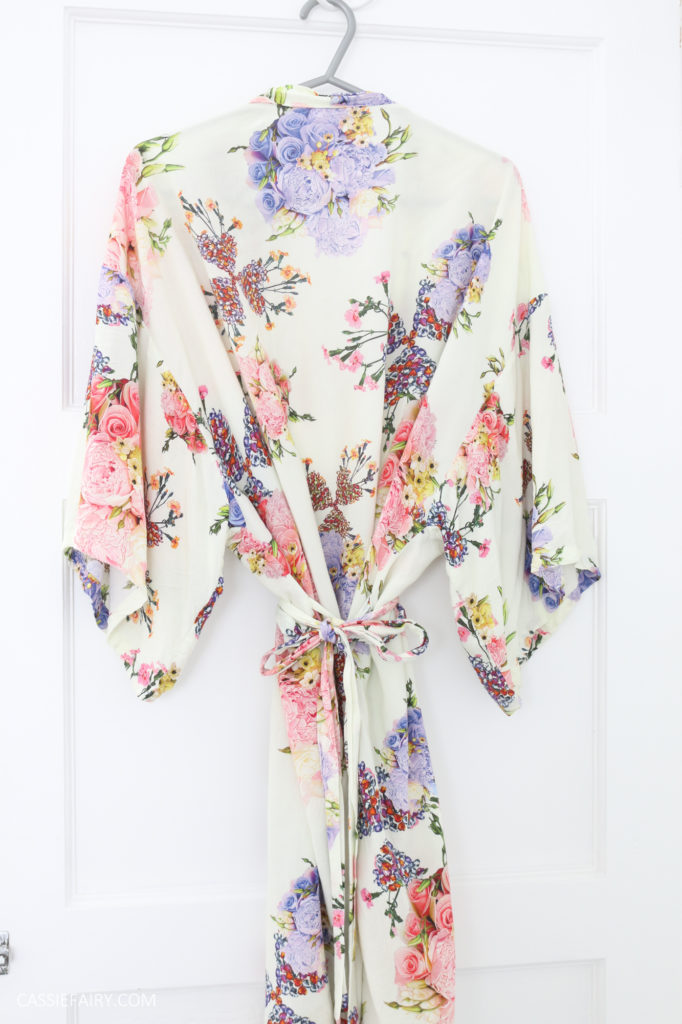 You might have also spotted that I’ve added a hook beneath the surface to hang my hair dryer. I feel like I’m at the hairdressers when I sit at my dressing table and blow dry my hair now. Especially with the illuminated mirror – it feels like a really luxurious place to sit and pamper myself.
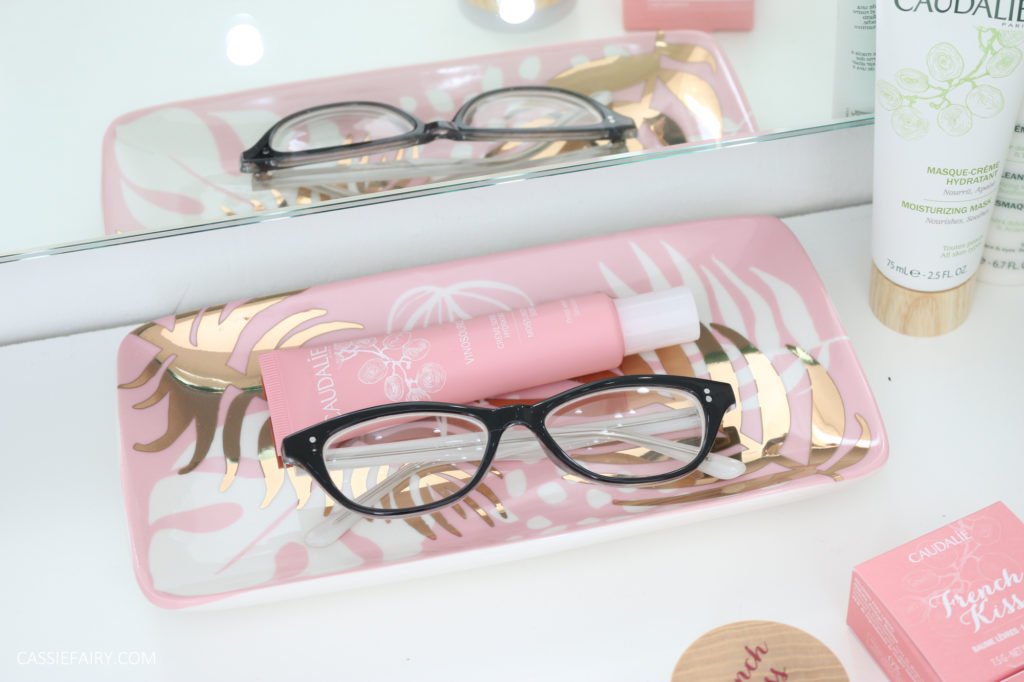
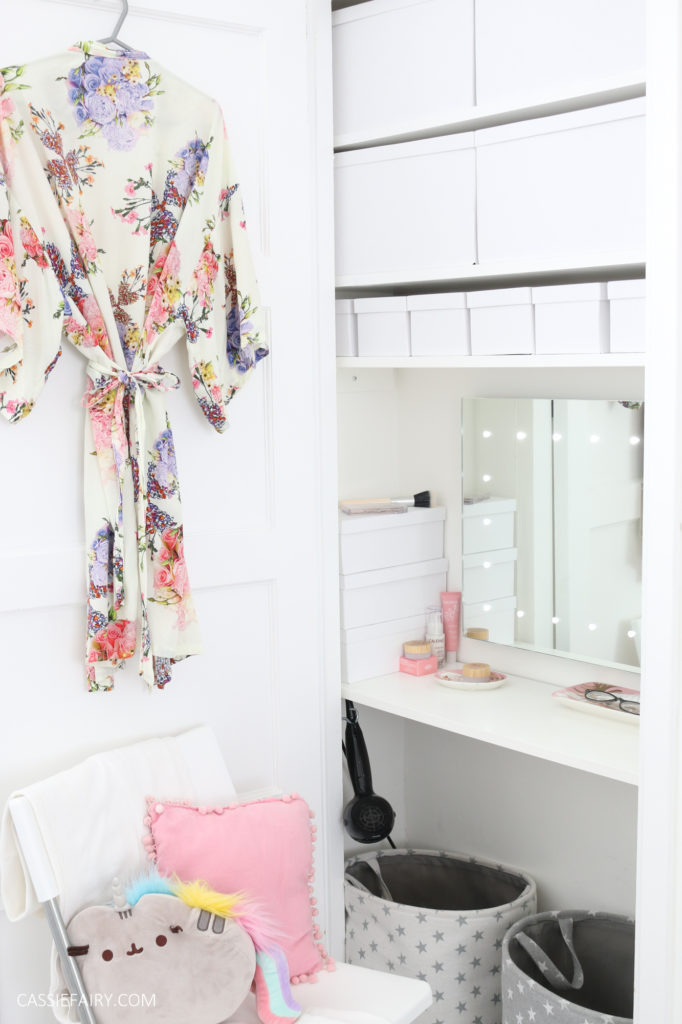 I didn’t want the space to feel sterile – it was all looking very white after I added the boxes – so I decided to add a pop of colour with some pink accessories. I got these patterned trinket trays from DotComGiftShop (soon to be rebranded as RexLondon). How cute is the tropical leaf pattern with rose gold touches? They’re perfect for keeping the surface of my dressing table tidy – I can just throw my jewellery or glasses into the trays at the end of the day without making a mess.
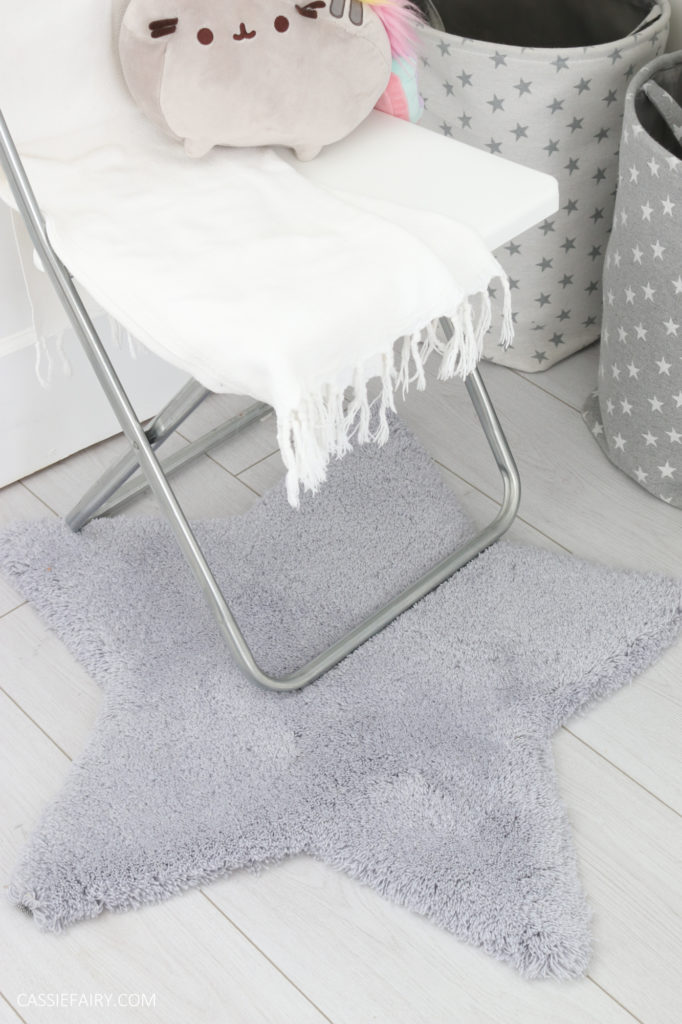 I softened up the space with some soft furnishings too. When I saw this star rug in the children’s range at TheRugSeller, I was hooked. Well, you know how much I love stars. Throwing this down beneath my chair has made me feel even more like a Hollywood star, getting ready for a big awards ceremony! The rug is made from natural wool so it really is a rather luxurious addition to the space.
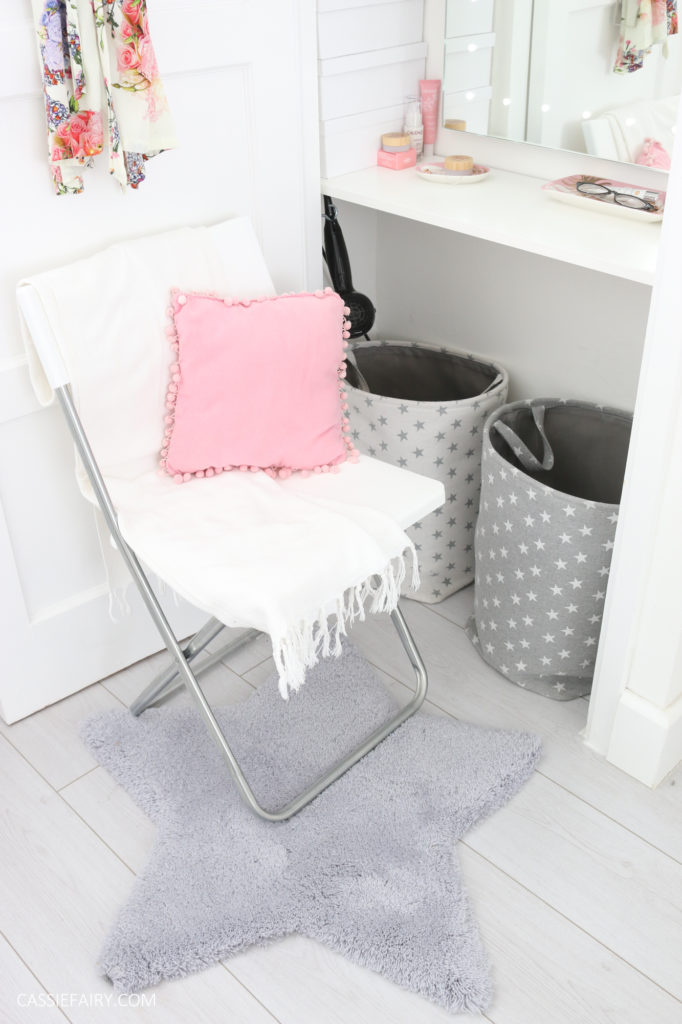 As you can imagine, it wasn’t long before my cats decided that the star was ‘their spot’ so it gets a lot of use. Interestingly enough, it doesn’t seem to trap cat fur inside the pile, which is a big improvement on the other rugs I have in the bedroom. In fact, it still looks as good as new, even after my cats have claimed it as their own. It’s by kids rug brand BellyButton and all of their rugs have a soft, thick pile to make it suitable for little hands and feet.
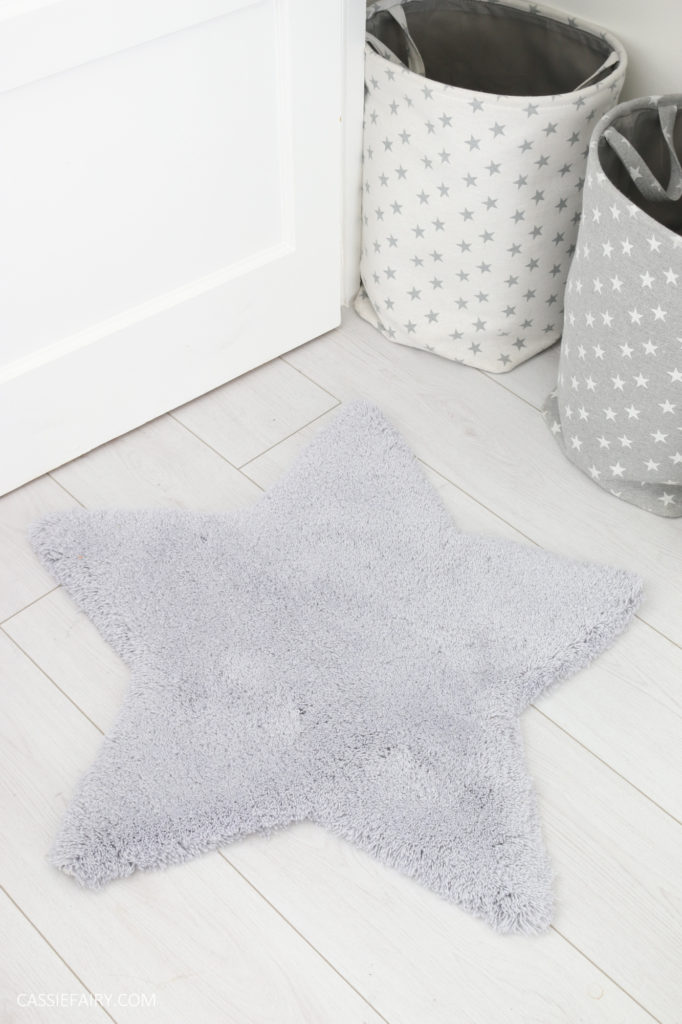 When I’ve put my chair away on the hooks and have closed the door on my dressing table, it’s still a lovely addition to the bedroom and makes that corner of the room look extra cosy, thanks to the thick fluffy pile. If you can’t already guess, I love monochrome colours in my bedroom – it’s mostly white, with a big monochrome mural on one wall – so the grey colour fits in seamlessly. I’m now considering getting a pink star for my office, what do you think?
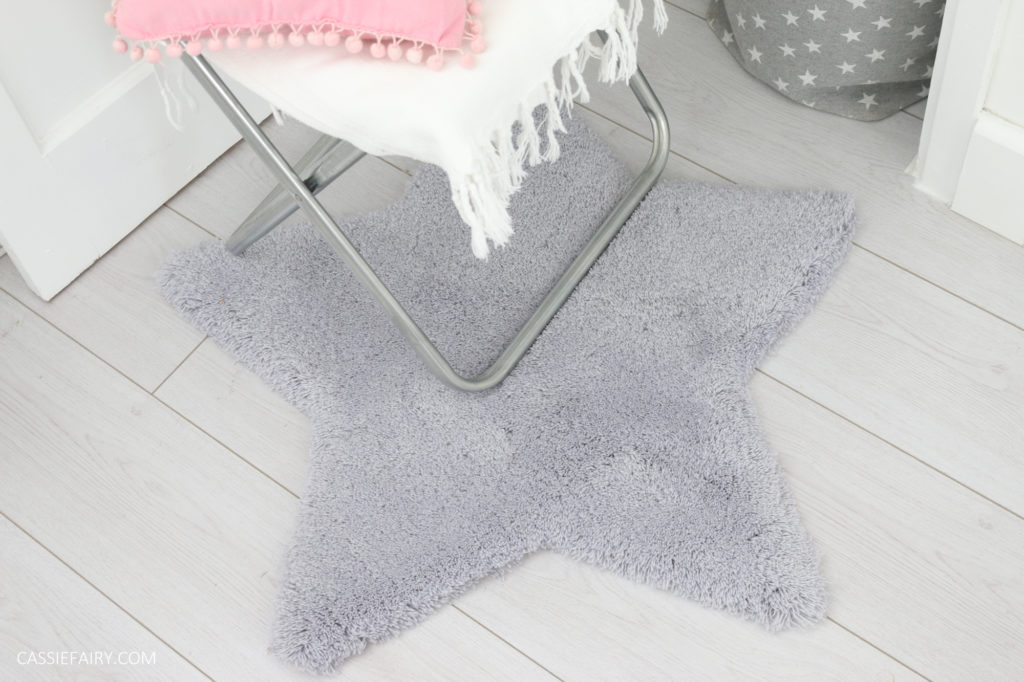 I added a pink pom-pom cushion that I’ve had for years and a white blanket that I picked up in a charity shop for 75p to make the plastic chair a more comfortable place to sit. Well, who knows how long I might be sitting at my dressing table if I need to preen myself for a night out, haha!
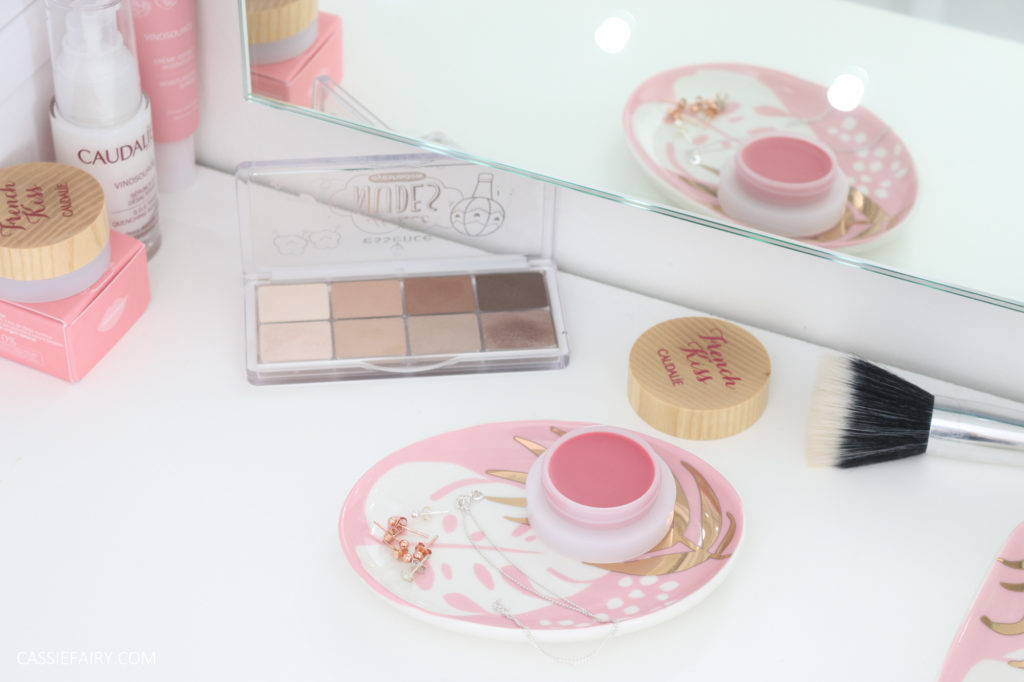 Speaking of which, I’ve just discovered a new product from Caudalie that I really love – their French Kiss range. I’m not a big lipstick wearer – in fact, I just cleared out a lot of makeup that I haven’t used for ages. I didn’t see the point in filling my new storage boxes with products I don’t use, so my unused lipsticks, eye shadow palettes and nail polishes have all been donated to my friends. But I do like Caudalie’s tinted lip balms; they provide just enough colour and gloss to look like you’re wearing something on your lips, while moisturising and protecting your lips. Bonus!
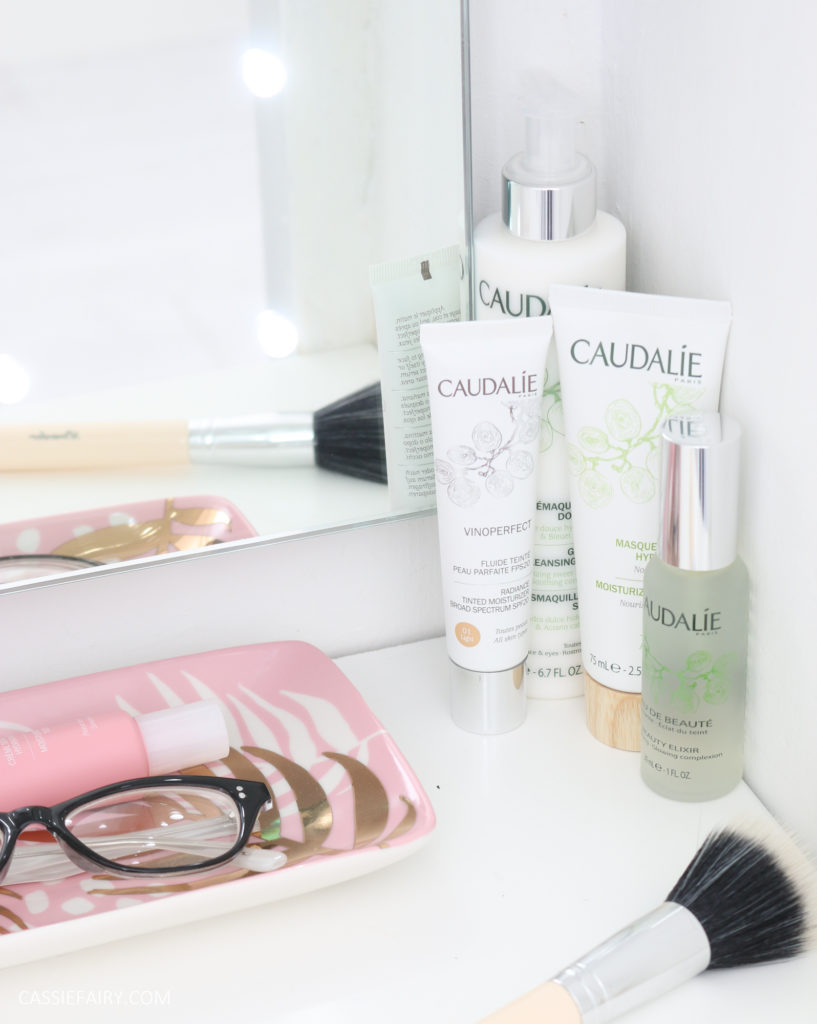 You may have spotted quite a few Caudalie products on my dressing table. It’s one of the few cruelty-free, paraben-free brands I use regularly, as their skincare products are so gentle and natural. Even with my sensitive skin, I’ve never had any problems with breakouts or irritation with this range. I love their Vinosource grape moisturiser for everyday use (I’ve been using it for years – such a fresh, light product) and I’m currently trying out their cleansers and masks too.
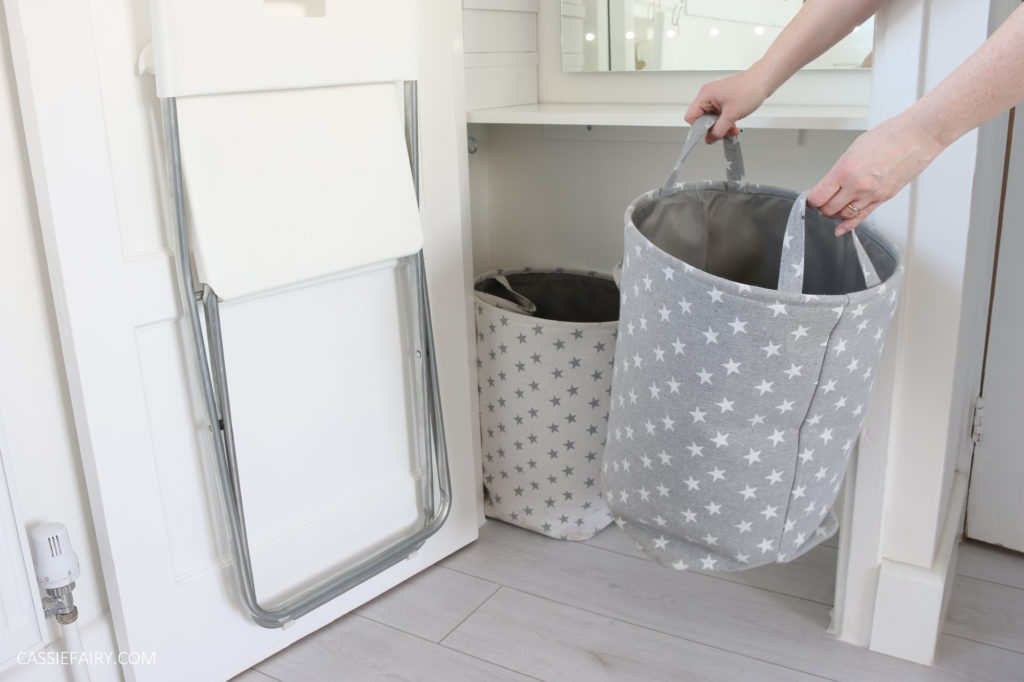 And lastly – but rather importantly – I added some laundry baskets. I got these star patterned fabric hampers from B&M and they fit into the space perfectly to keep my washing tidy.
 So what do you think of my finished fitted alcove dressing table? Will you be creating something similar yourself? Do you have a space cupboard or alcove that could be repurposed? If so, be sure to have a read of my DIY alcove dressing table post about how I added shelves and fittings before you get started. Let me know if you have a go by leaving me a comment below or tagging me in your Instagram photos @cassiefairy.
PIN THIS PROJECT FOR LATER..!
Some items in this blog post have been gifted to me and the pink links indicate a gifted product, affiliate link or information source. All thoughts and opinions in this post are based on my own experience and I am not responsible for your experience 🙂


2 responses
gtb
Incredible! This blog looks exactly like my old one!
It’s on a completely different subject but
it has pretty much the same page layout and design. Superb choice
of colors!