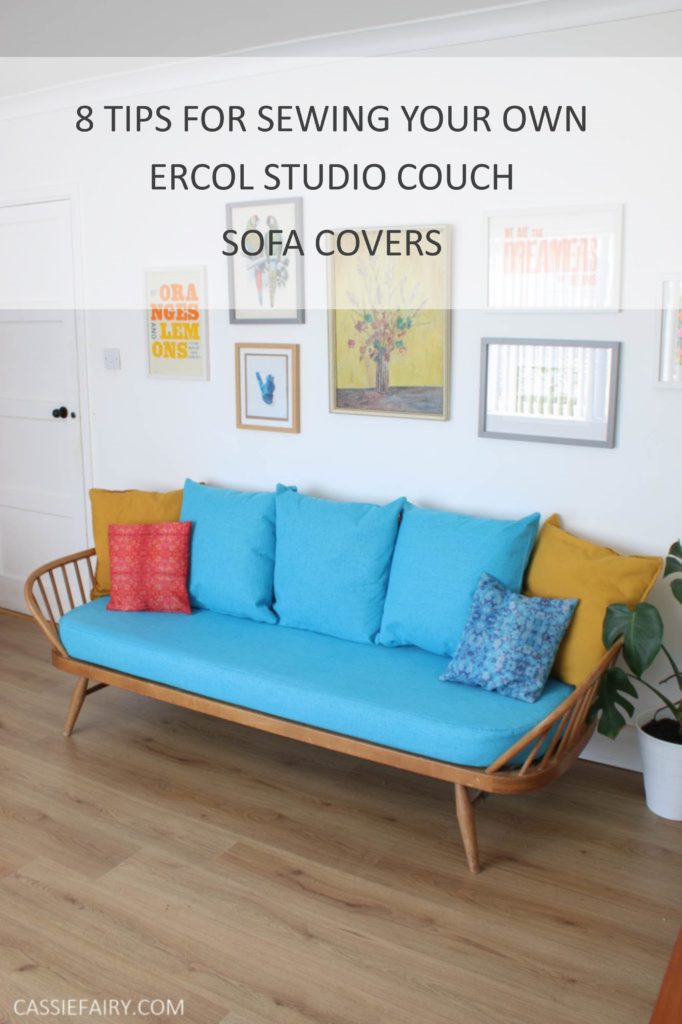
If you’ve read my recent blog post about re-covering my Ercol studio couches you’ll know that I went into this project feeling rather confident. I figured that it was just a couple of 3D cushion covers so how hard could it be? Here’s how I got on when I attempted sofa upholstery for the first time…
“How hard can it be?” It turns out that it is simultaneously harder than I had imagined think but easier than you’d think. It was simple and straightforward, yet confusing and tough. Nonetheless, I am so pleased that my mind tricked me into thinking that this was a project that I was capable of because I might never have started otherwise!
I had read a book on upholstery that my friend lent to me last year and there was only one section that related to sewing new covers for foam cushions. All the rest was about stapling, stuffing and tacking so it didn’t apply to my Ercol studio couches, which have non-attached foam bases. This made the project easier (because I didn’t have to wrestle with the entire piece of furniture) and more difficult (because I had to sew precisely to get the right shape, rather than pull and staple the fabric).
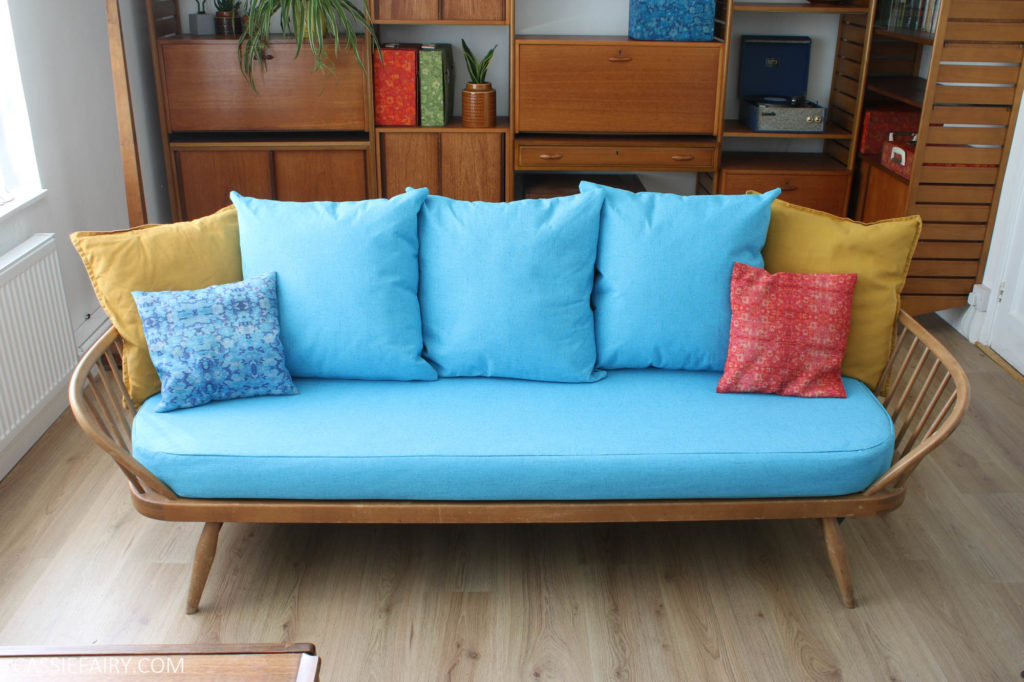
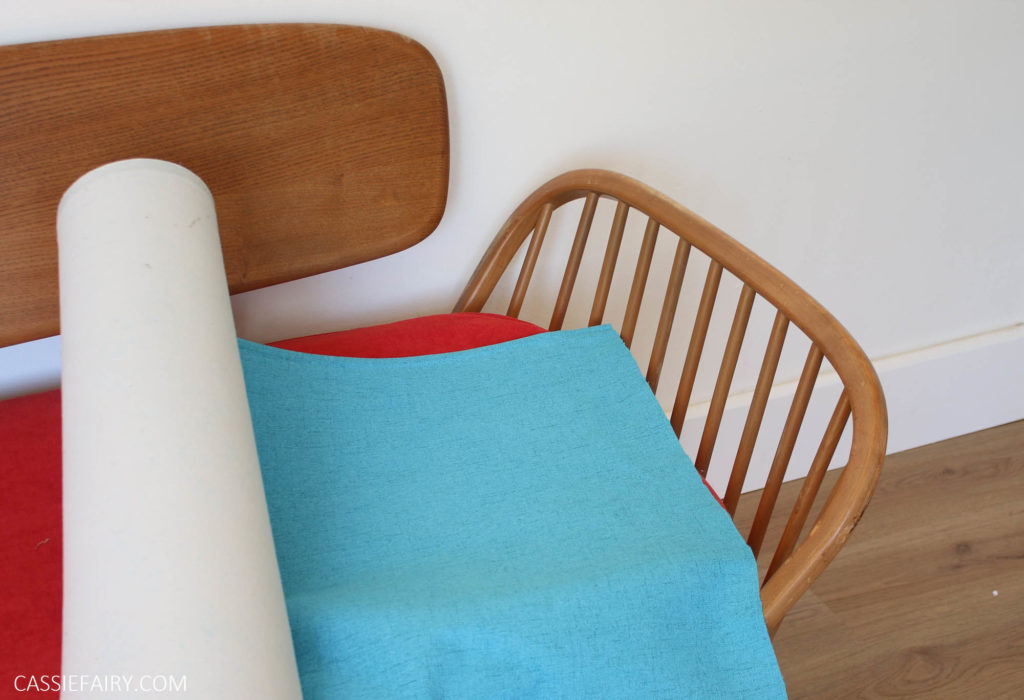
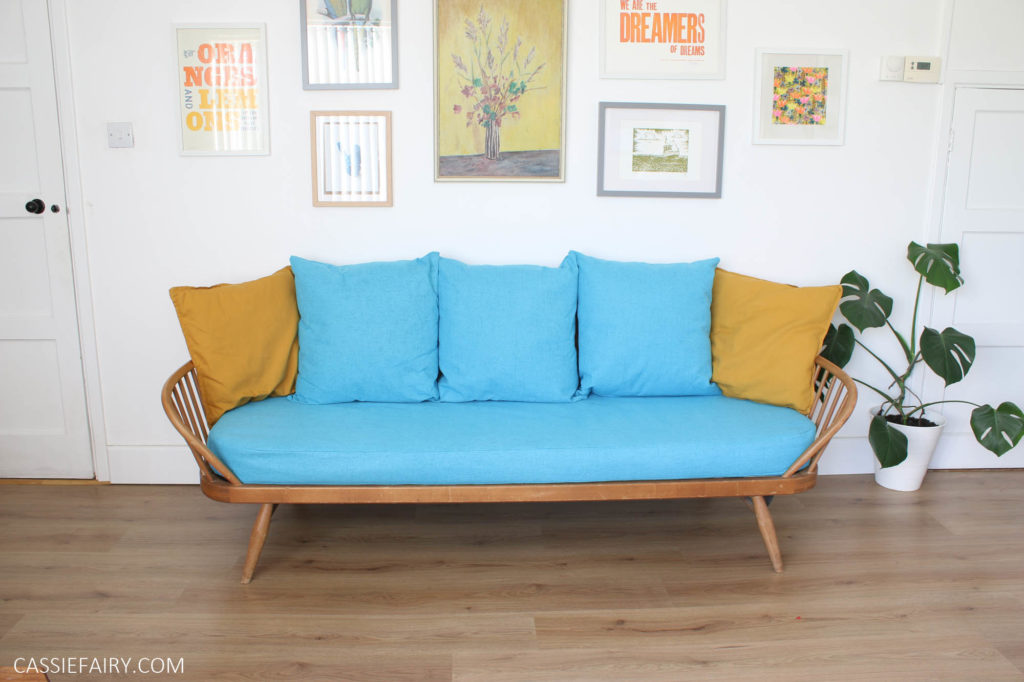
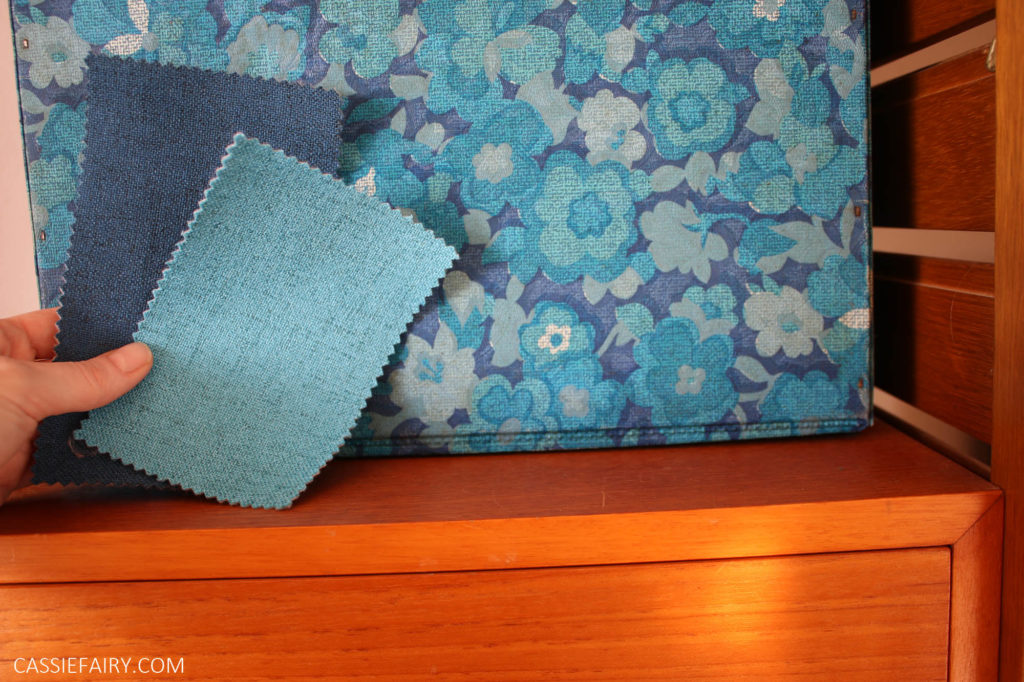
I learnt a lot from that chapter in the upholstery book and it made me feel confident that I could give it a go. So I began my search for the perfect upholstery fabric and decided on this beautiful sunny-day sky blue woven fabric from Yorkshire Fabric Shop. It’s called Ibiza 60 if you want to get the exact same fabric for yourself – but they also sell fabric in hundreds of colours, prints and textures so I’m sure you’ll find something suitable using their Fabric Finder.
TIP 1 – USE FLAME RETARDANT FABRIC
I asked for the fabric to be given a flame resistant treatment to make it suitable for using on a sofa and the roll of fabric was delivered to me within a week or two. The flame retardant treatment gave the reverse of the fabric a slightly sticky feel – but more on that later..! I spent about a day just looking at the fabric and being intimidated by how big the project seemed to be, and then I pulled my socks up and got to work.
TIP 2 – USE THE FLOOR
If you’re thinking of attempting a similar project, you’re going to need a lot of space to measure out the fabric and make your templates so my tip is to use the floor. It’s the biggest ‘table’ I’ve got! I pushed the sofas aside in the living room (vacuumed thoroughly!) and rolled out the fabric to use the floor space as my cutting table. Just be very careful not to damage your floor while you’re measuring and cutting.
TIP 3 – CREATE A TEMPLATE
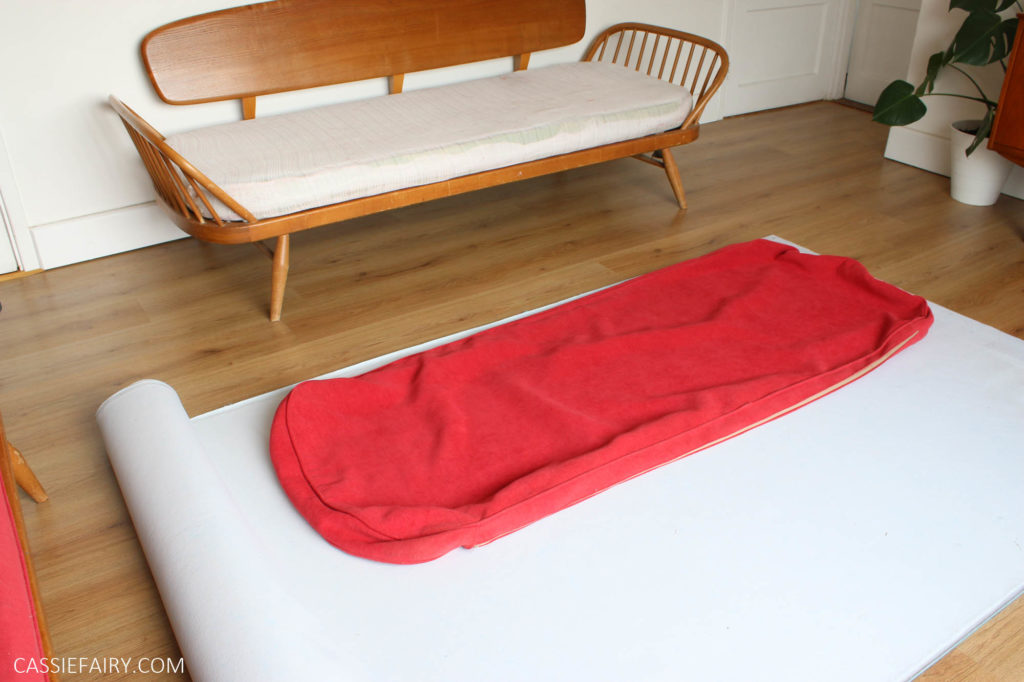
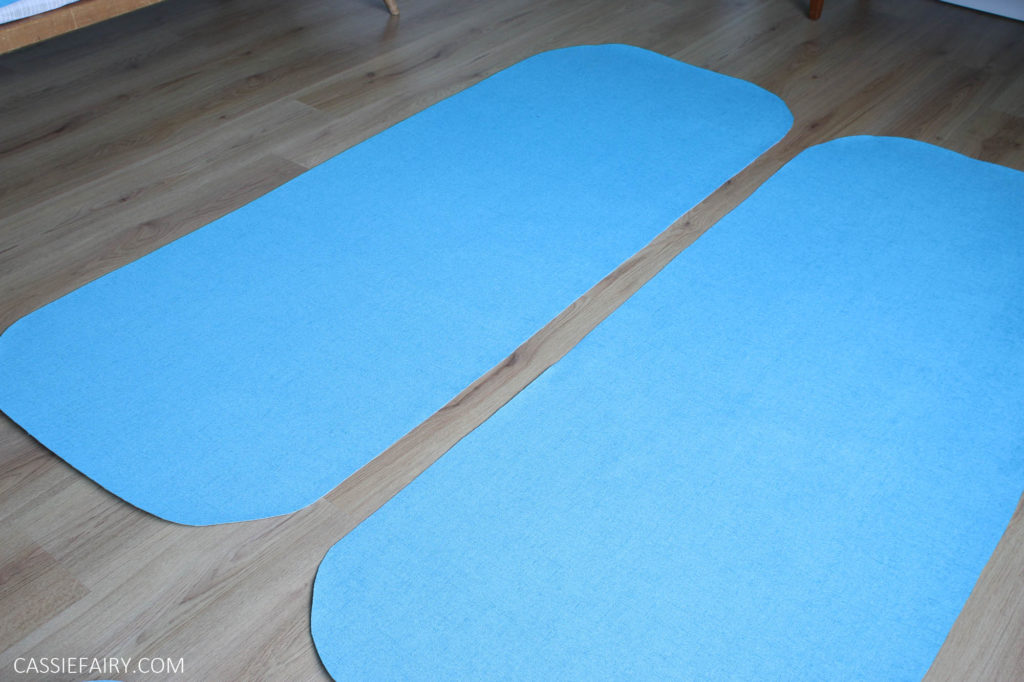
A good idea is to use an existing sofa cover as the template for the new project so I removed the old red cover from the foam base and laid it out to make a template for the new sofa covers. I then cut out a template and, the best way to make sure it’s even all the way round is to fold it in half and then into quarters. This will ensure that the corners or curves are perfectly balanced.
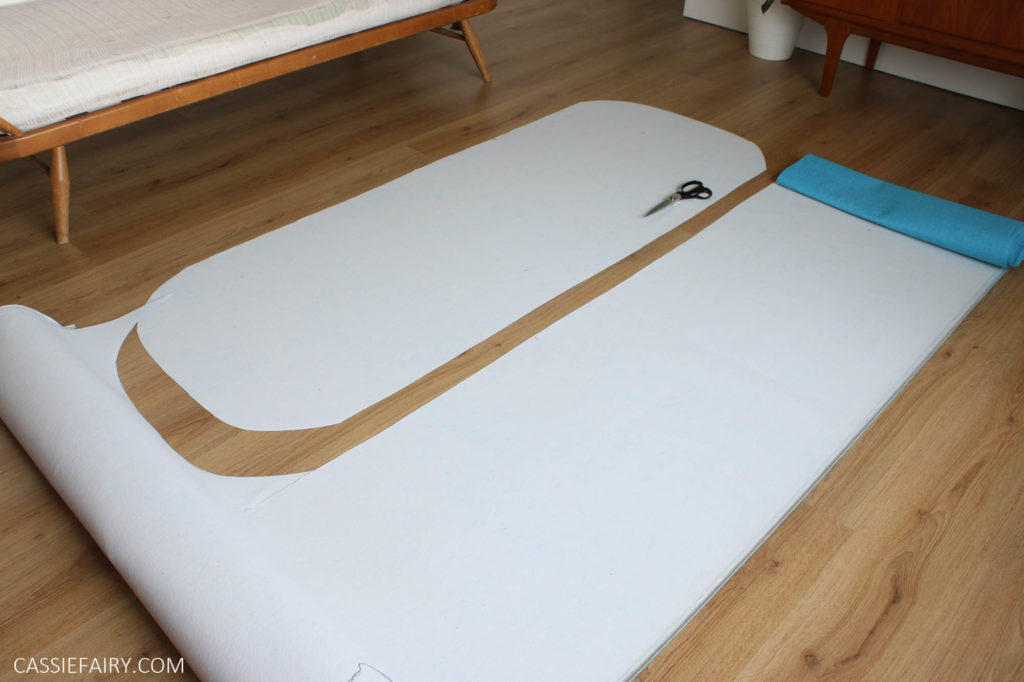
I cut out four pieces of the fabric for the base and then measured around the circumference of the foam pad to find out the length of the strip (to make the box-cushion shape) I needed to cut. It turned out to be FIVE METRES! And I needed to cut out two of these strips, yikes!
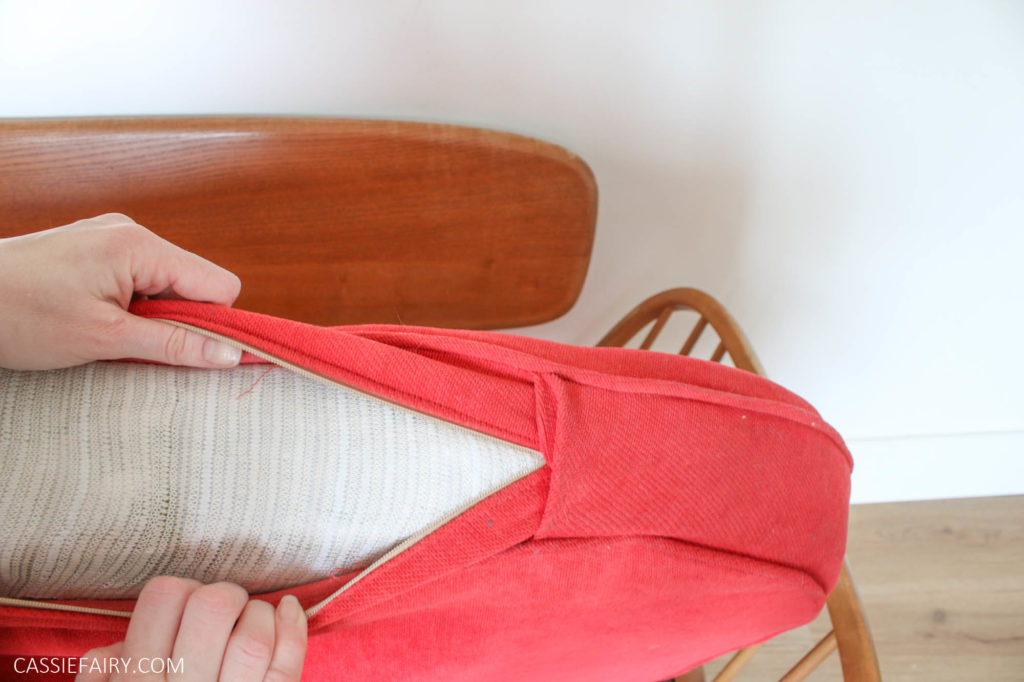
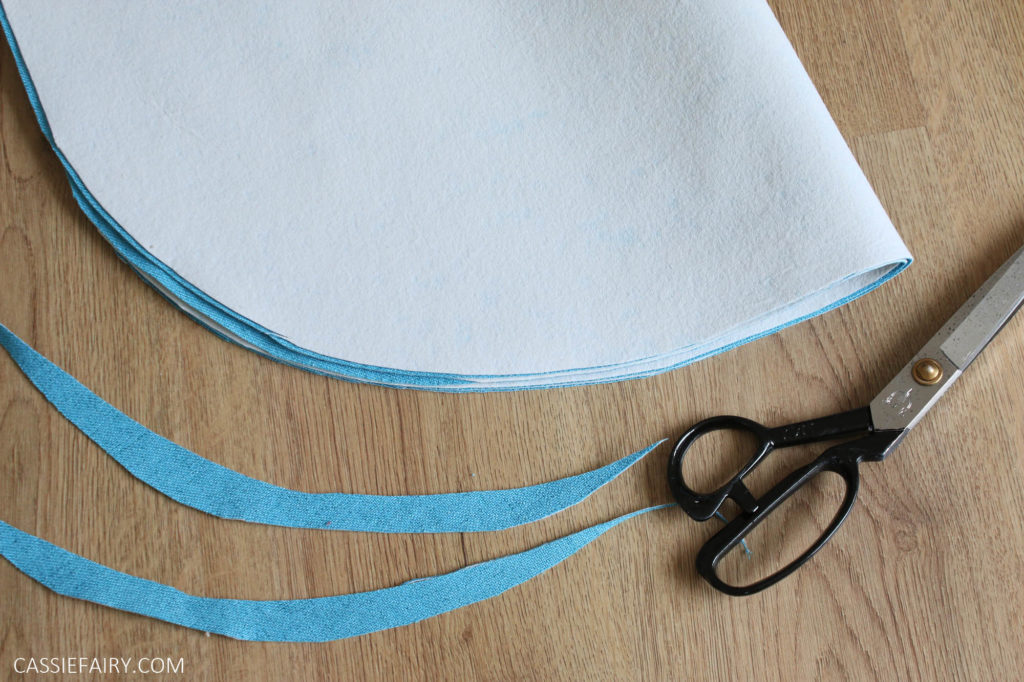
TIP 4 – SNIP AROUND CORNERS
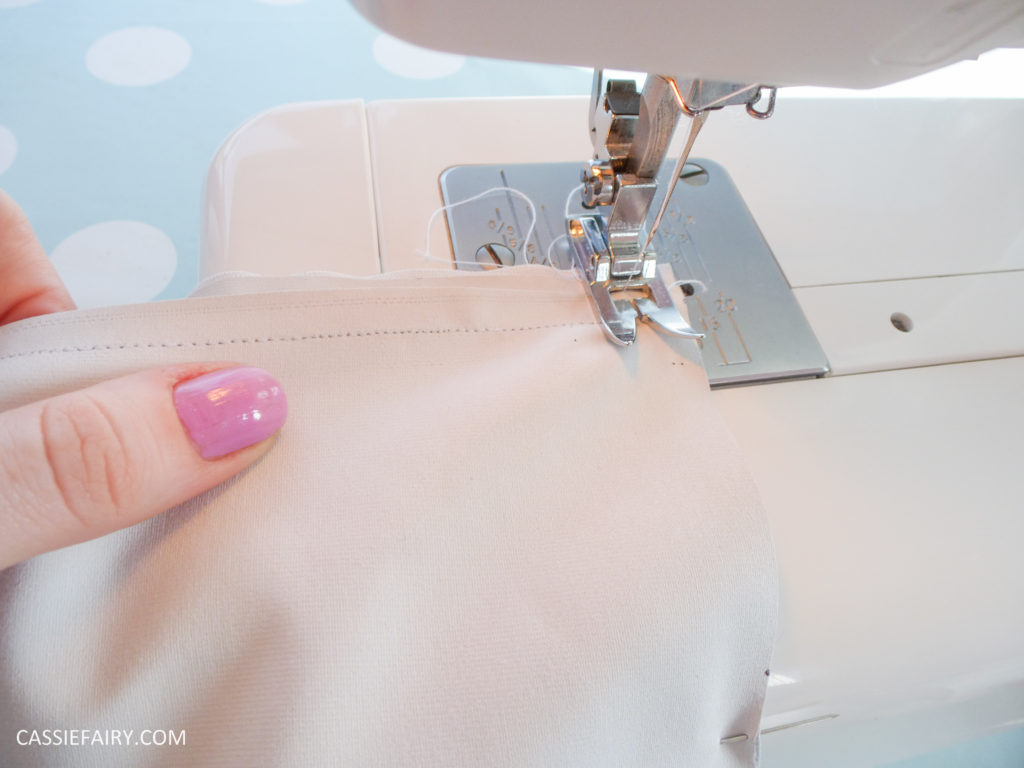
After all the measuring and cutting, I was excited to take the fabric over to my sewing machine and get started on the construction. I set myself up on the kitchen table and totally took over the room while I stitched the top piece to the side strip. If you’re working the fabric around corner to make a 3D cushion cover, it’s a good idea to snip into the seam allowance of the fabric to help ease it around the corner without creating any folds.
TIP 5 – REMEMBER TO LEAVE AN OPENING!
If I thought that it was difficult to wrestle a 2 metre base and a 5 metre long strip through the sewing machine, you can imagine how much more cumbersome it was when I added the bottom piece to the base and attached it to the side strip! I’m making it sound like a quick process but, in reality, I took my time and concentrated on the section I was feeding through the sewing machine. Eventually it all came together – and I remembered to leave an opening at the back to put the foam cushion in.
TIP 6 – KEEP A CLEANING CLOTH NEARBY
One thing to mention – I thought that the fabric was a little sticky to the touch on the underside and, while I was sewing, I found that the machine was getting a bit of residue on the needle plate and presser foot. As it got more sticky, it became harder to move the fabric through the machine.
I’ve since found out that the slight stickiness was down to the flame retardant treatment on the fabric and, because I was sewing the right sides together, the back of the fabric was in contact with the sewing machine the whole time. It wasn’t a problem for me as I simply kept a cloth beside the machine and wiped off the sticky residue at regular intervals. I got sticky hands at times but again, I just washed them whenever I had a break from sewing.
TIP 7 – GET A HELPING HAND
Can you imagine the relief I felt when I turned the cover right-side-out and it fitted onto the foam pad perfectly?? I’m not saying it wasn’t a struggle to get the foam cushion INTO the cover, just that it looked good once it was in there, phew. I managed to get the foam pad into the first cover by myself but after all the punching and wrestling with the first one, I decided to enlist the help of my husband for the second base!
I then hand-stitched the opening I’d left and stepped back to admire my handiwork. I had planned to add zips to the back of the base but after the 1.5 metre long zip broke while trying to insert it, I decided against it. I’m not going to be removing and washing the covers anyway, as this would remove the flame resistant coating, so they can be fixed covers instead of loose covers.
TIP 8 – MAKE COORDINATING CUSHIONS
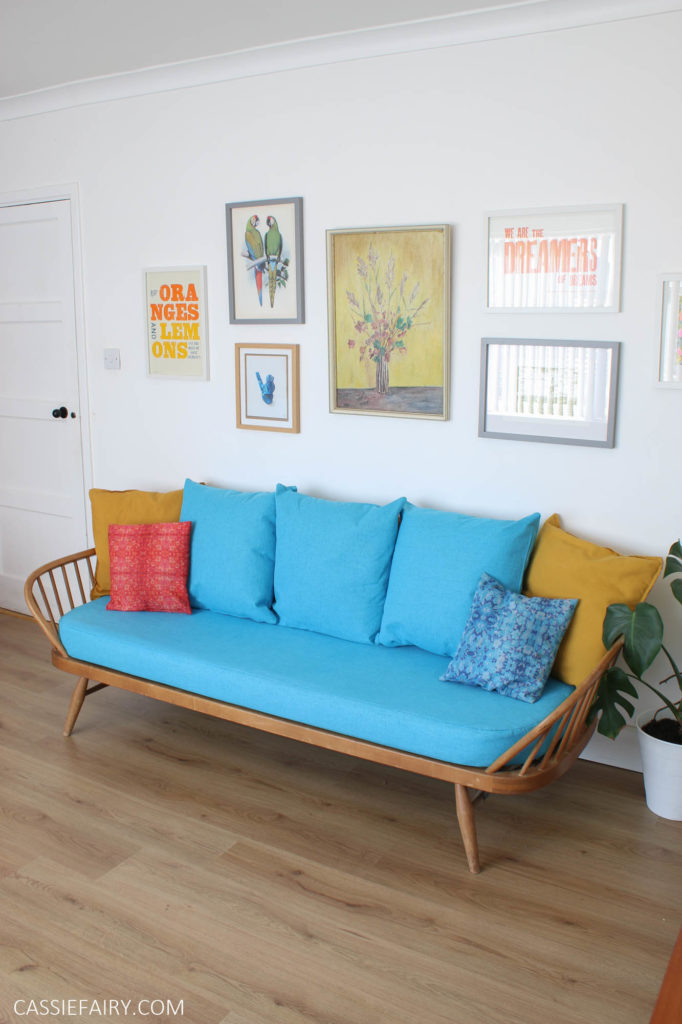
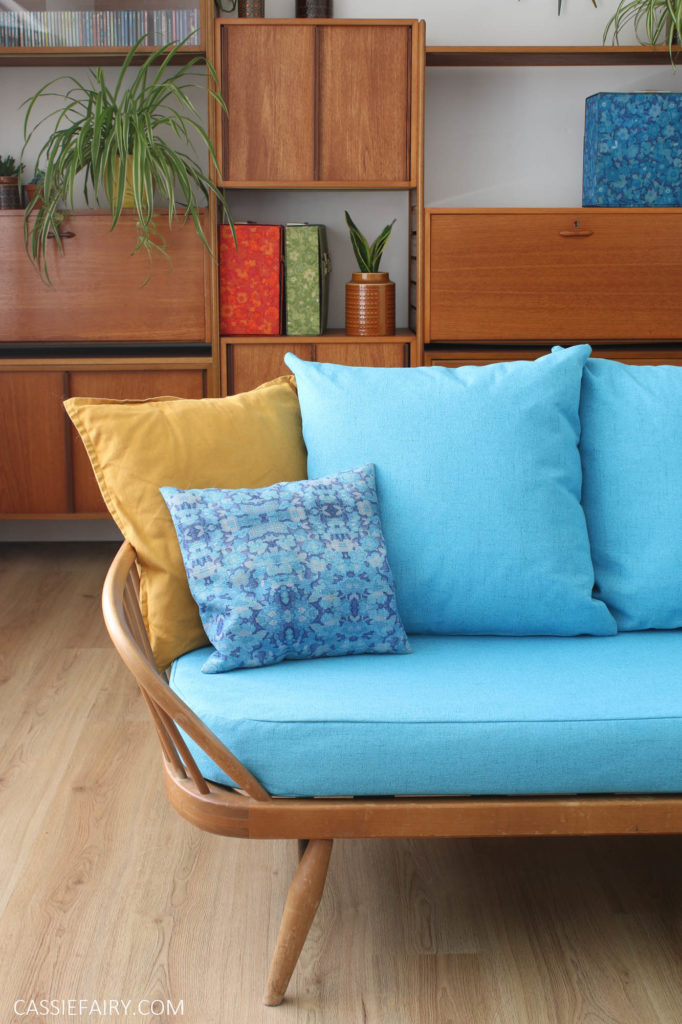
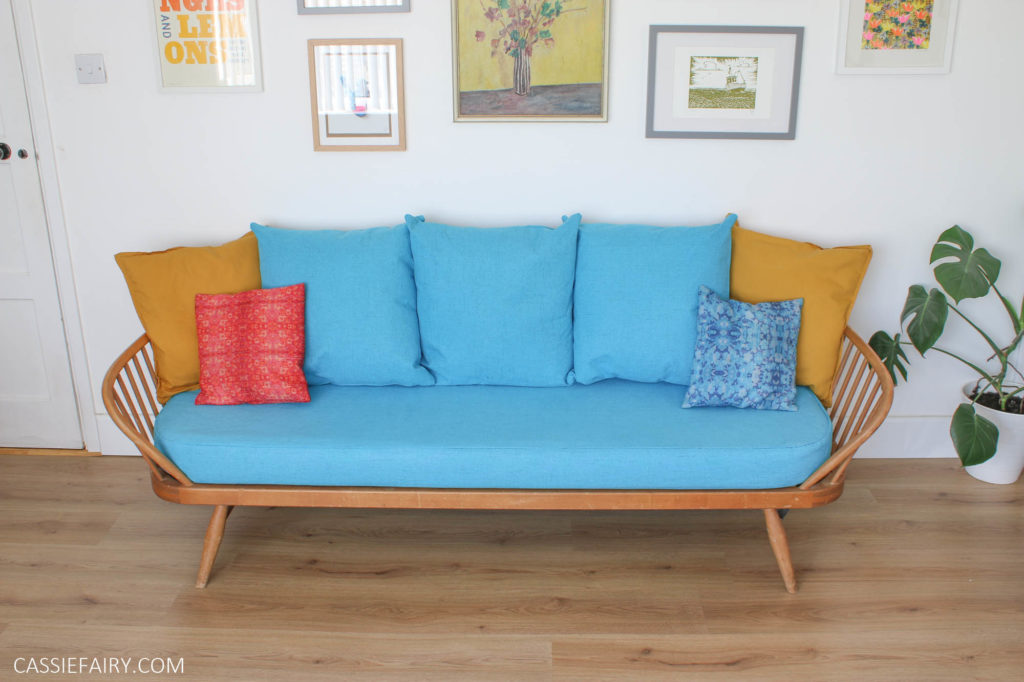
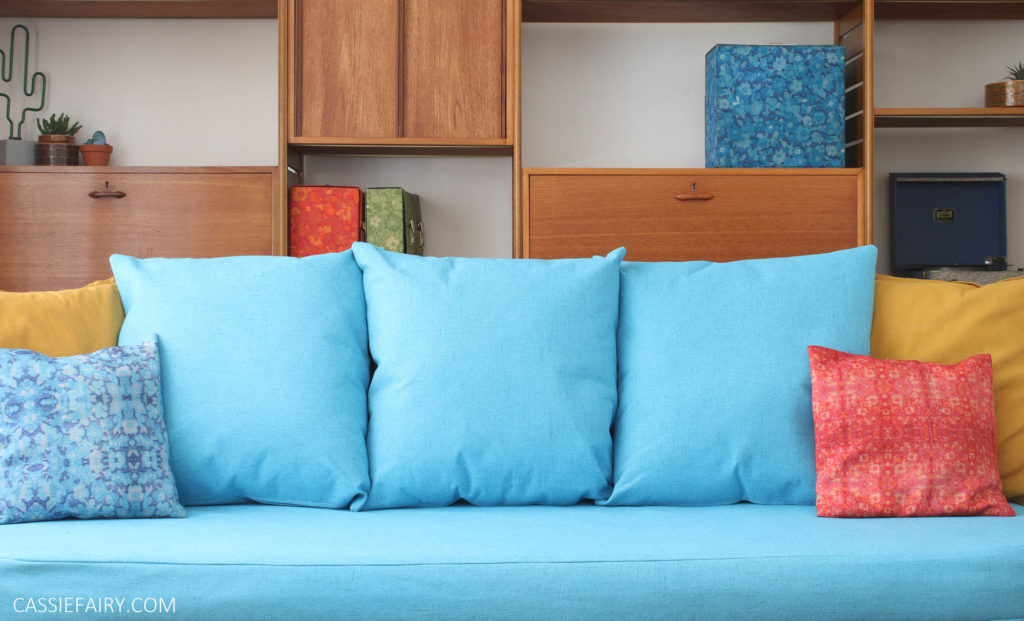
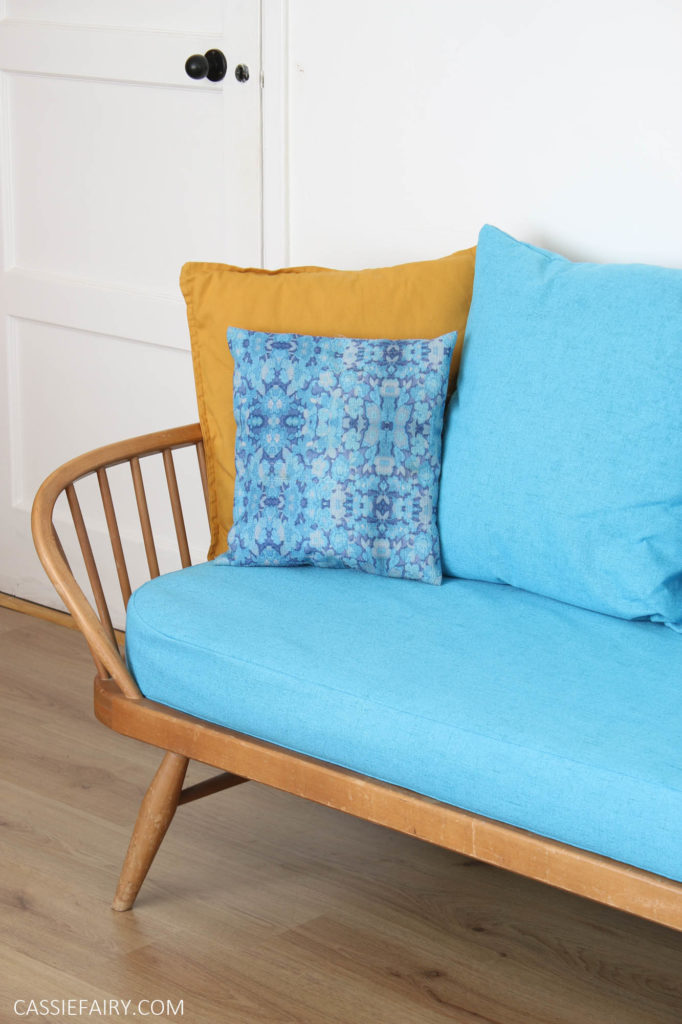
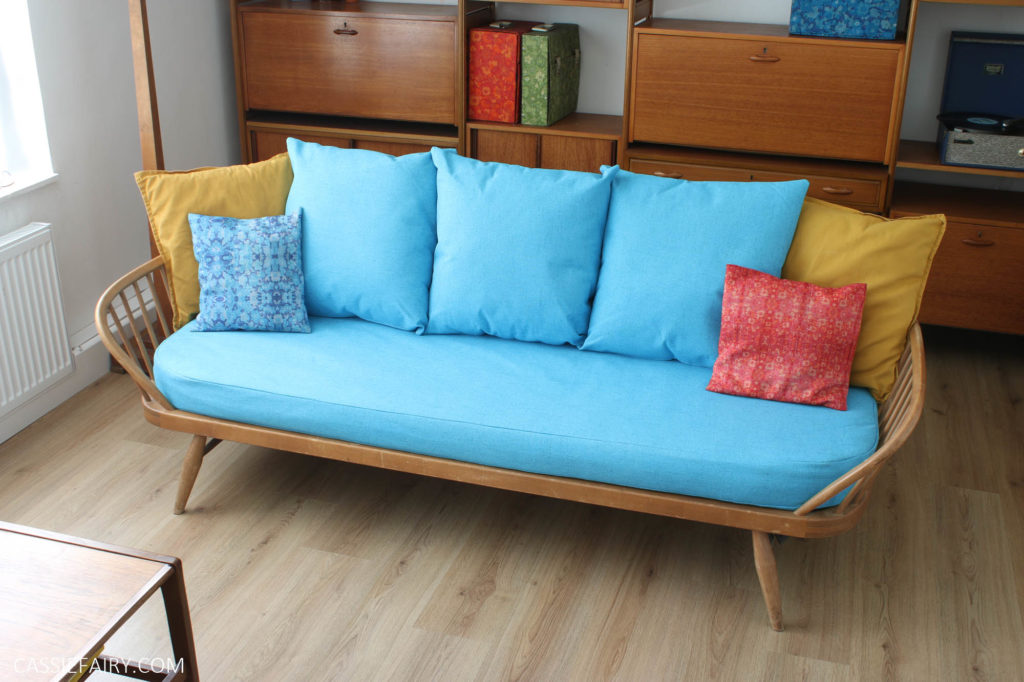
I then made six cushion covers – with zips this time! – to cover the large 55 x 55cm cushion inners that I also ordered with my fabric. These were easy to make, each only taking about half an hour to sew. I was SO thrilled when I put the last cushion in place and breathed a sigh of relief that my sofa makeover was complete.
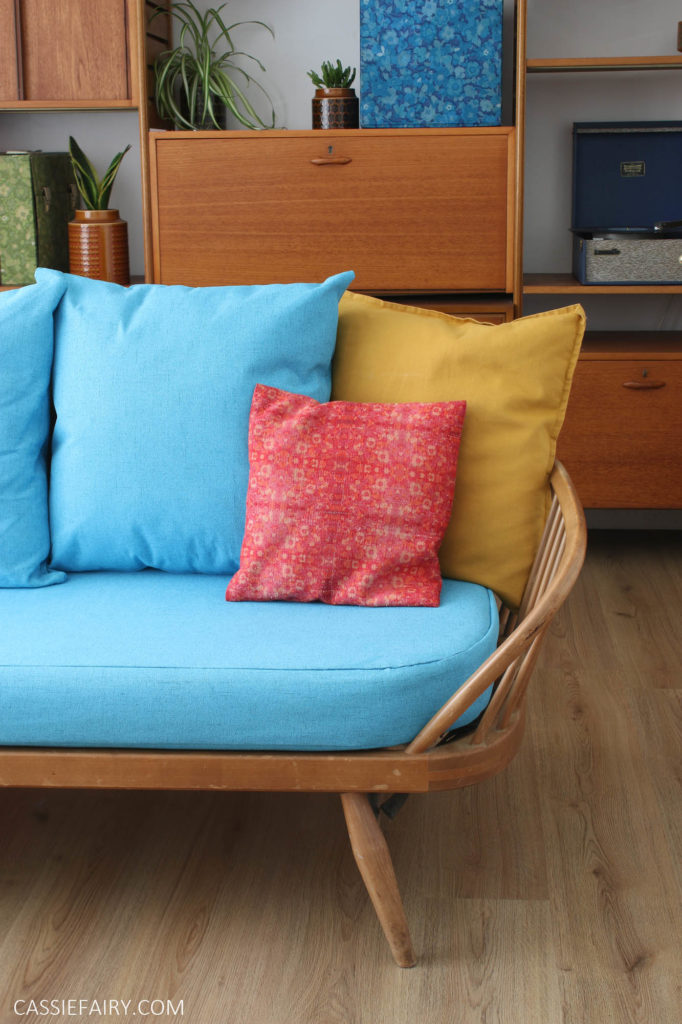
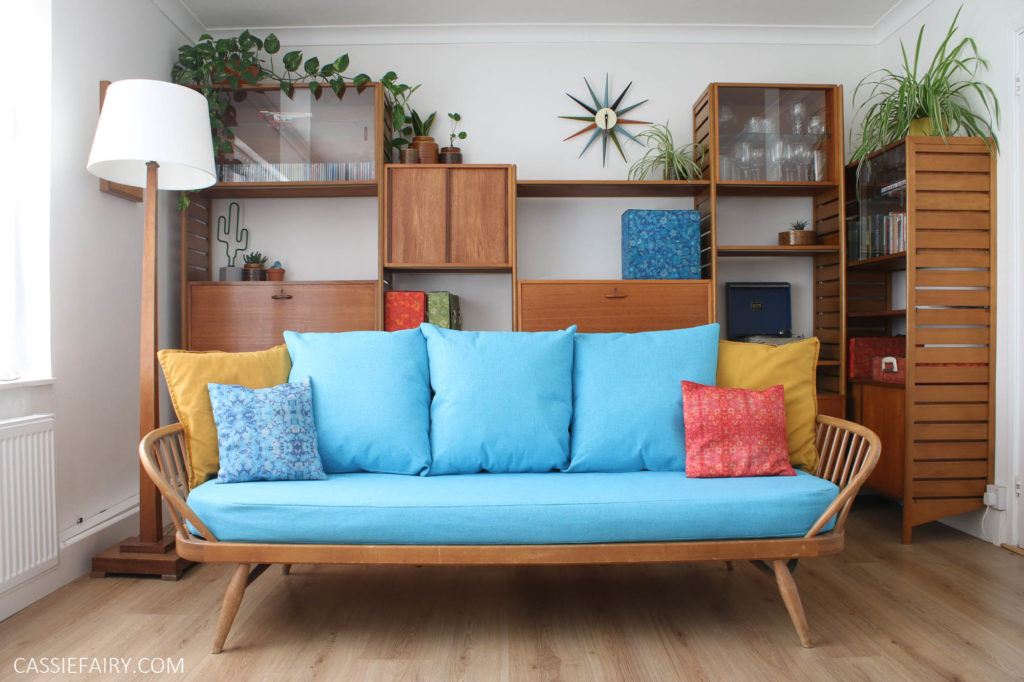
What do you think of my finished Ercol sofas? I added a couple of our existing yellow cushions either side and some small floral throw pillows that I made myself years ago. The fabric was custom-printed using photos of our vintage floral LP cases, which you can see on the teak shelves. I’m really happy with how colourful the sofas now look and the bright blue hue makes the room look sunny and vibrant even on cloudy days. It’s a great contrast with the teak wood too.
So would YOU have a go at making new sofa covers for yourself? Let me know in the comments below 🙂

PIN IT FOR LATER
Some items in this blog post have been gifted to me and the pink links indicate a gifted product, affiliate link or information source. All thoughts and opinions in this post are based on my own experience and I am not responsible for your experience 🙂


6 responses
Hi Molly, I think it was about ten metres, but I haven’t re-measured it so I can’t be 100% sure 🙂
Hi there Cassie, how much fabric did you need for the sofa overall, not including throw cushions? Thanks!
Hi Julieanne, your project sounds great! I can’t imagine why the side appears shorter after pinning. With my sofa base, I snipped around the curved corners (within the seam allowance) to ease the pattern pieces around the curved shape. Perhaps that would make a difference? 🙂
I am trying to do a footstool (341) I have done a pattern, for the top and the sides, giving myself more round the side, when I pin the side to the top the side falls short! I am so confused. Am I doing something wrong.
Thanks so much and best of luck with your project – it took me a while to complete these sofa covers but it was worth it in the end 🙂
You did a fabulous job Cassie. I have a similar sofa bed that I need to cover in addition to four chairs and a footstool. Although I attend a weekly upholstery course 3 hrs per week, it will take me a very long time until I get make these covers. Therefore, I am looking to buying them but, thanks to Brexit, the company I contacted no longer ship outside the UK.