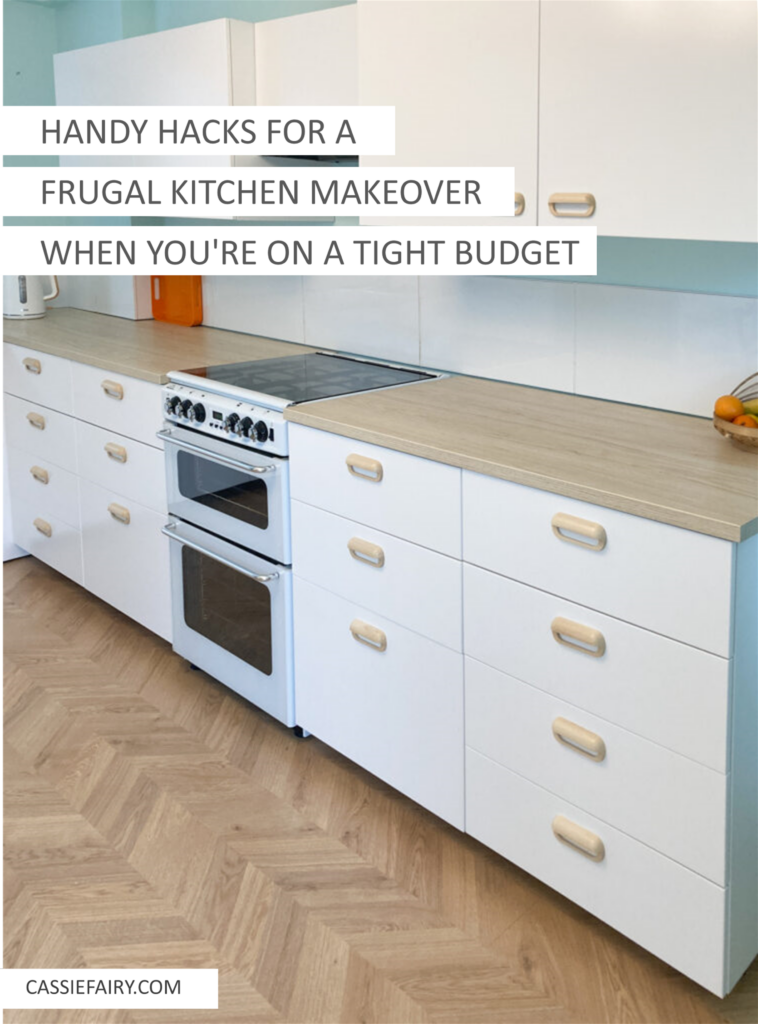
I’ve realised that I haven’t fully shared my recent kitchen makeover on my blog so today I’m putting together some tips to DIY your own kitchen revamp, without the massive expense. I thought this might help if you have been wondering: How can I get a new kitchen on a budget?
Believe me when I say that we had a tight budget but we managed to complete our new kitchen for much less than planned, even with the cost of new appliances, cabinets, flooring, electrics and decorating supplies. Here’s how:
What can you reuse?
My first tip for any project is to figure out what you already have that you can reuse. Are the cabinet carcases good enough that you only need to replace the doors? Do you have a freestanding fridge or oven that you can incorporate into your new room? Does the dishwasher work just fine so you can save on the cost of fitting a dishwasher by leaving it plumbed in?
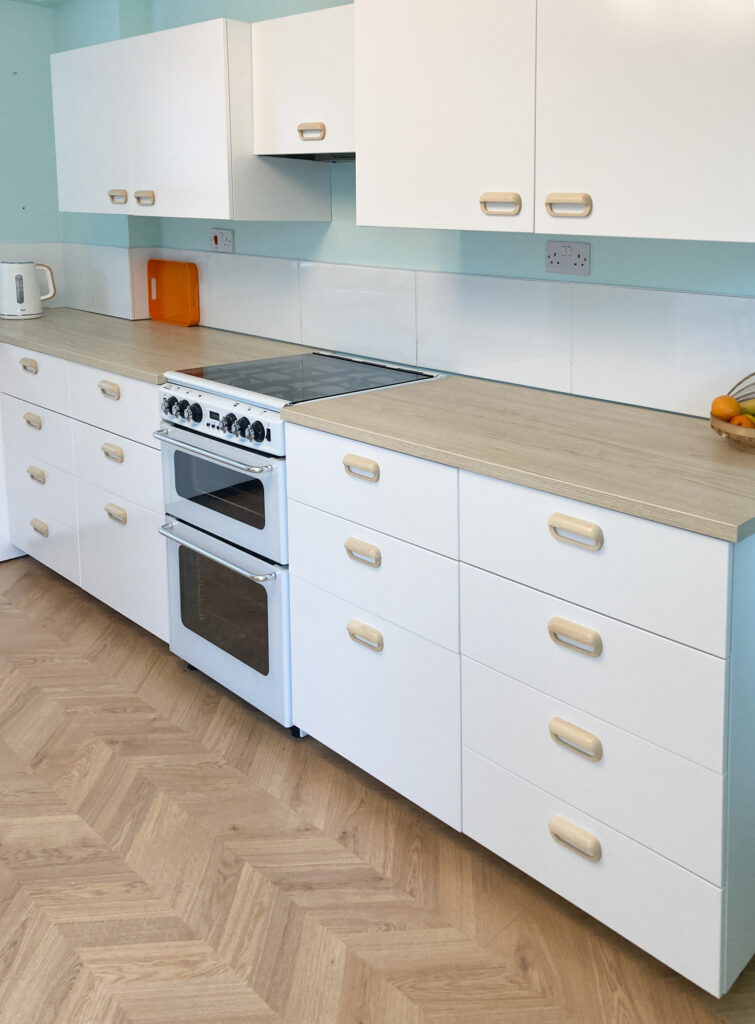
The more things you can save and reuse or rescue and upcycle, the lower the cost of your kitchen makeover will be. I kept my existing oven, which not only saved me the price of replacing it – about £600 – but also the fitting cost for a gas engineer to come to the house to disconnect the old one and install the new one.
I also kept the pantry, which we were considering removing to make more room in the kitchen. Keeping it saved me from having to buy extra cabinets for storing food, as I already had ample space in the pantry. Plus, it didn’t need redecorating: all we needed to do was continue the new flooring into the pantry to create a cohesive look.
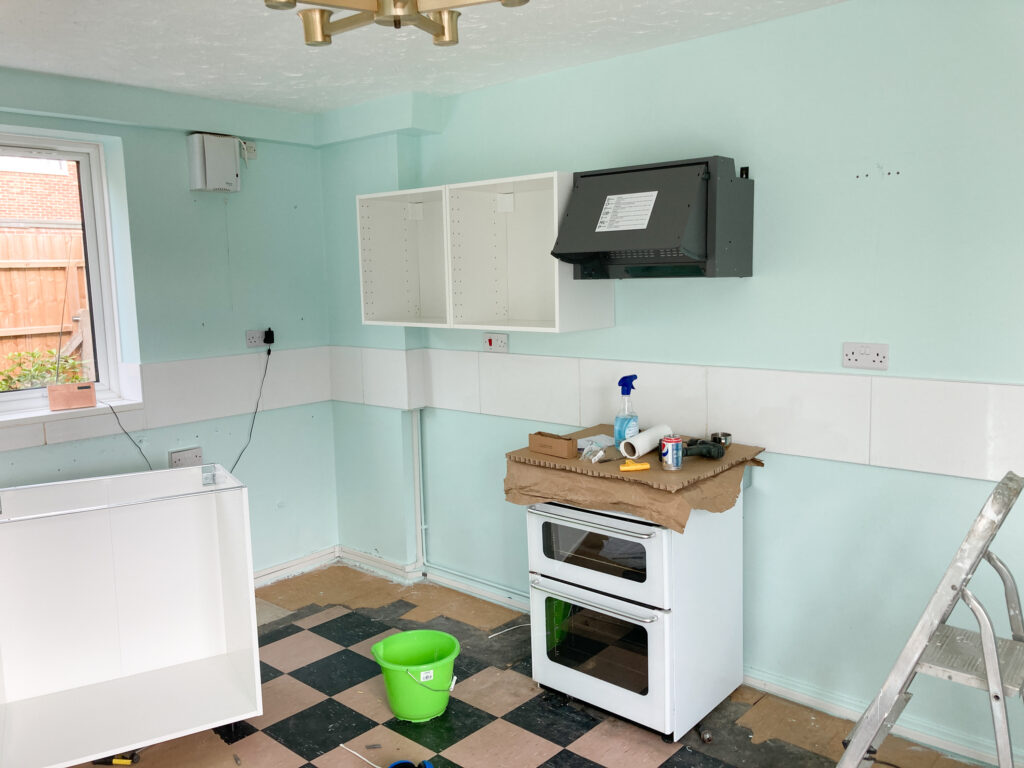
Finally, we also kept the splashback tiles that we’d previously installed. This was a little fiddly as we needed to make sure that the new cabinets and worktop finished at the same height as the bottom of the tiles, so there was a lot of measuring needed.
But it was worth it to not have spend out a second time for tiles (which had only been added a couple of years earlier) and, honestly, we didn’t want to have to install any more tiles. After tiling my bathroom, I’d be happy to never see grout again! By the way, just look at the wallpaper we found behind the old units – wow!

What can you do yourself?
I’d argue that the biggest cost of getting a new kitchen is the installation itself. The units don’t vary much in price – it’s only the doors that add on or reduce the cost of the kitchen. But it’s the labour costs of having the kitchen fitted that will almost double the budget of your project.
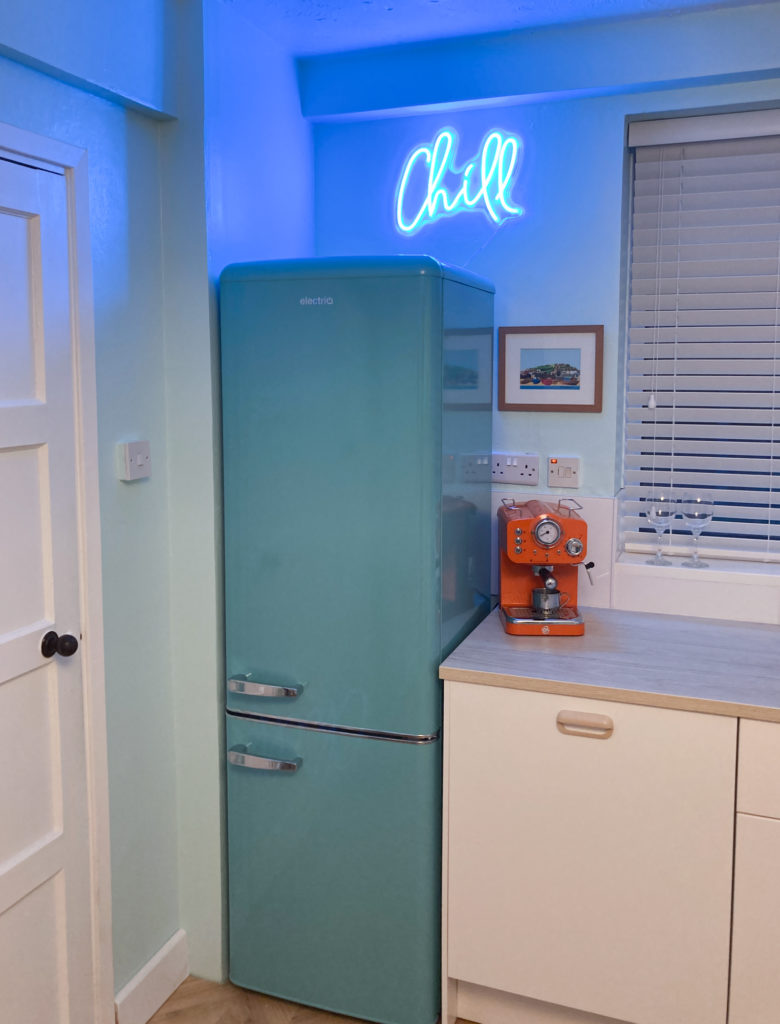
So, if you can have a go at building the cabinets and installing them yourself, you will make significant savings, which can be spent on other items – for example, we fitted the units so we could afford to buy a lovely teal fridge-freezer.
Honestly, it’s not hard to fit a kitchen. After all, they come with building instructions! If you’ve ever made flat-pack furniture, you’ll easily be able to build the frames and add the doors. Sure, it takes time – after the fourth set of kitchen drawers, I was getting rather tired, but that’s because it was 10pm and we’d already built and hung the wall units and fitted the under-sink cupboard.
If I can do it, anyone can – and you’ll save big on the cost of your kitchen if you build it yourself.
What you DO need to spend on…
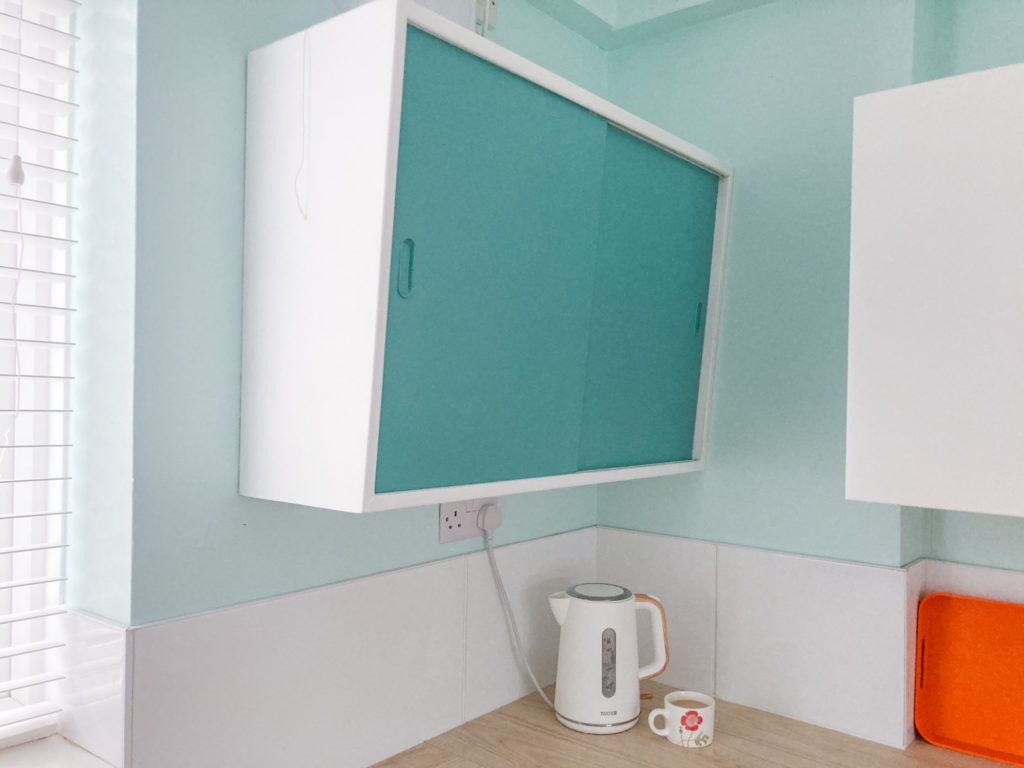
It’s important to make sure that the electrics are correct in the kitchen, as you’ll often have multiple appliances going at the same time and you want to make sure that the electrical supply can handle that. We already had a few sockets around the room but running power leads to them would be messy, with plugs and wires everywhere.
So, we got an extra ring of sockets fitted that were positioned in the correct places to power the dishwasher, washing machine, extractor and fridge. We even asked the electrician to add extra sockets in convenient locations for the microwave and coffee machine so that we could position them where we wanted then rather than the old sockets dictating the position.
Plumbing is also a key thing to get right, although I think of it as just a big version of a toy K’Nex building set – the pieces can be just pushed together, tightened up and technically should work. Even so, you don’t want leaks inside your new cupboards or creating a pool of water under your washing machine.
If you’re not reusing the existing pre-plumbed items (dishwasher, washing machine, sink) to save money, you’ll probably need to hire a plumber to get everything correctly plumbed in and working.
Make small mistakes rather than big ones
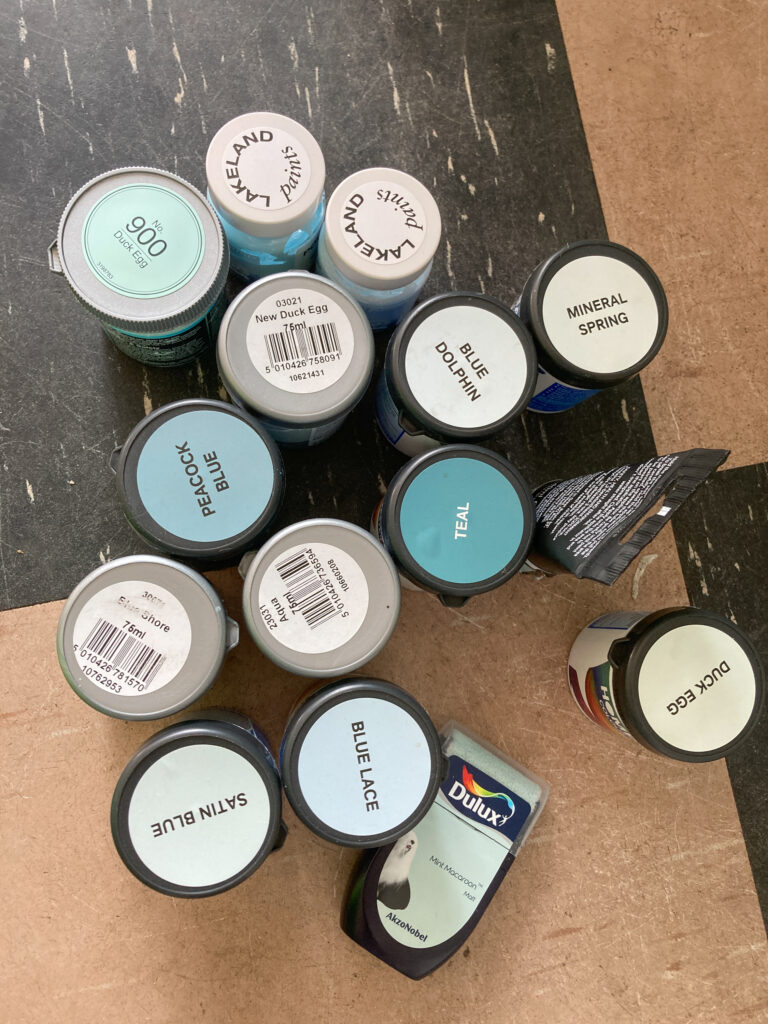
I’m mentioning this because we decided to make ‘little mistakes’ with the paint and finishes before we tacked the makeover so that we could see what the colours looked like in our space. And most of them, we decided against! Even though we bought 15 paint samples, this was a much cheaper exercise than buying tins of paint and deciding that the colour wasn’t right after all.
The problem we had was that the fridge-freezer was a lovely teal blue colour but so many of the lighter blue paint colours didn’t work with it at all. Luckily enough, the teal was exactly the same colour as the Rust-Oleum paint we’d previously used for our vintage cabinet and back door.
But finding a lighter version proved very difficult. If you’re interested, we eventually went for duck egg kitchen paint from Wickes, which is a lovely aqua-sky-blue-on-a-sunny-day.

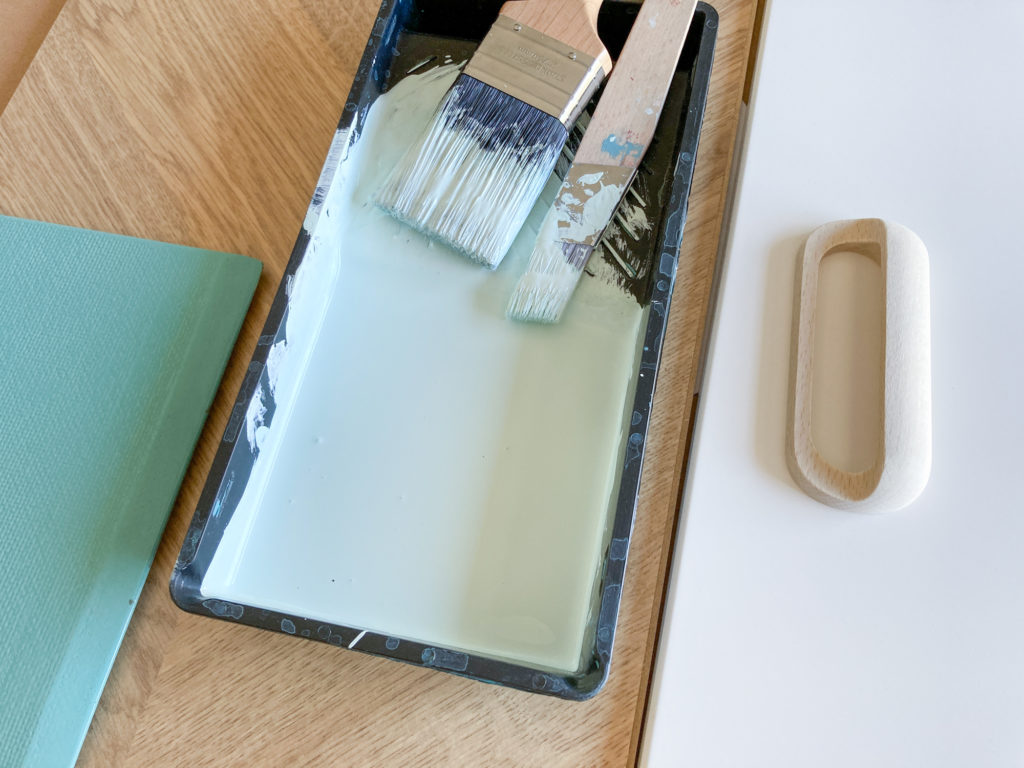
When it came to ordering the cabinets, we chose Ikea units because the prices were the lowest out there for the units we needed, and the quality was better than some of the other cheap cabinet frames we’d seen. But, similar to the paint situation, so many of the colours available wouldn’t have worked.
We discovered this by ordering samples of the smallest flat-pack kitchen piece – a drawer front – in a few colours. This allowed us to compare them in our home rather than in a showroom and that made up our minds. For example, a kitchen that looked like a lovely scandi green in a showroom ended up looking gloomy grey in our kitchen.
Thank goodness we didn’t order the whole kitchen in green and then have to remedy the situation after it had been fitted and didn’t look right – that could have been a costly mistake!
Anyway, that’s just a few of the tips I have for creating your own kitchen makeover and I hope that you’ve been inspired to have a go at doing your own remodelling in order to cut costs. Let me know your own handy hacks for kitchen DIYing in the comments below, I’d love to hear how you saved money on your kitchen project too.
Pin it for later
This article is a sponsored collaboration. The pink links in the content indicate a sponsored link or information source. The blog post reflects my own experience and the sponsor hasn’t had any control over my content 🙂