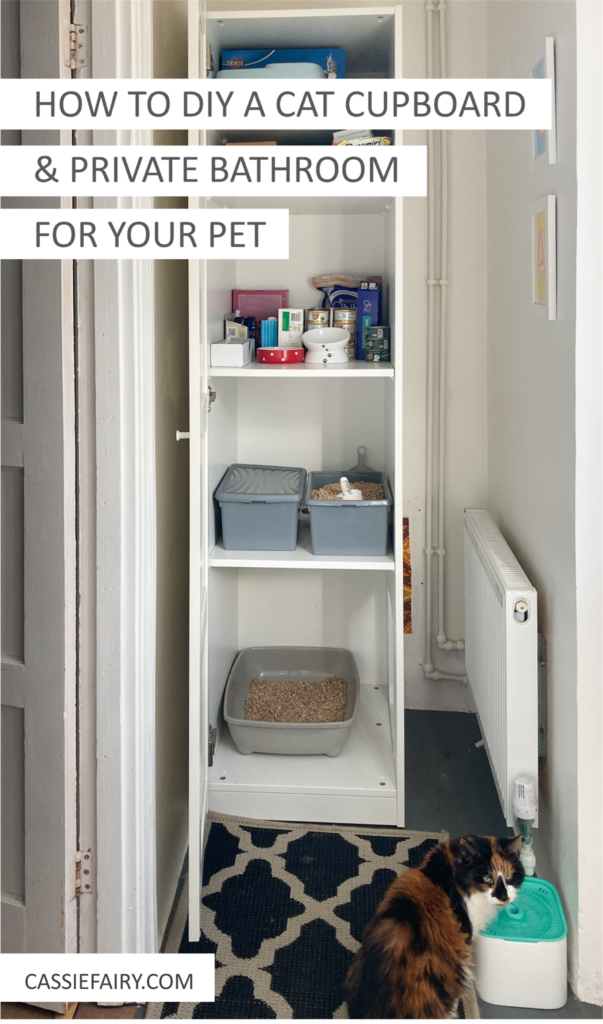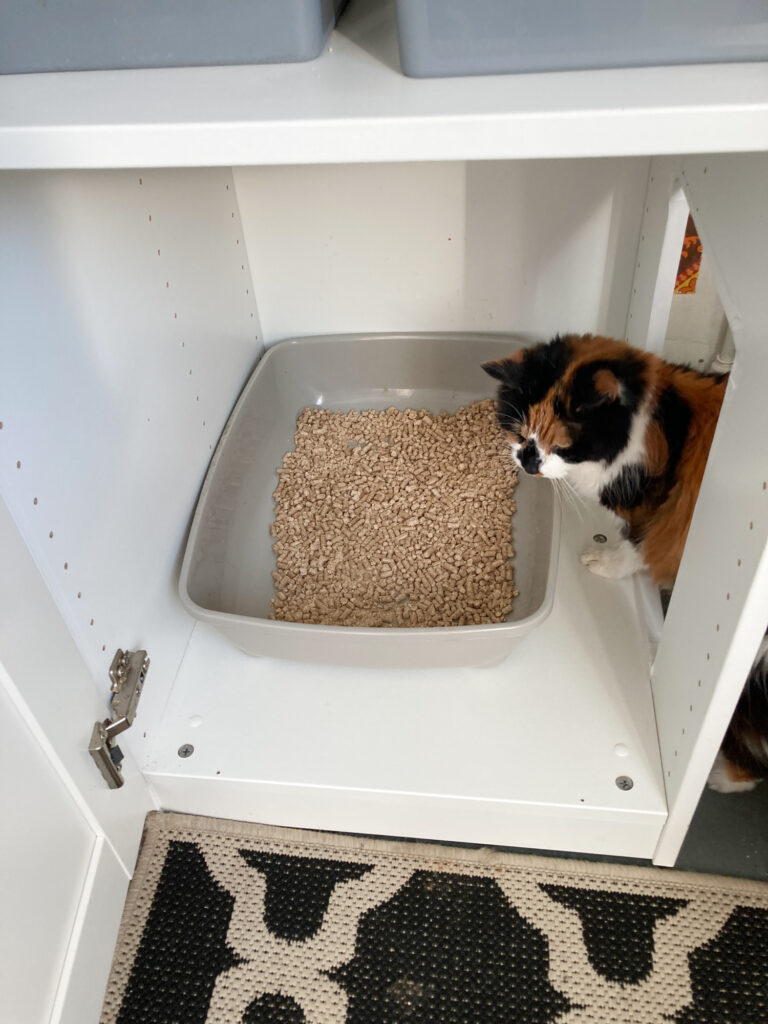
When I was renovating my porch and adding new storage, I also ordered one extra cupboard from Ikea. I had a plan – to create a cat cupboard to store my pet’s food, bowls and toys etc. But I also wanted to build a private bathroom for her…
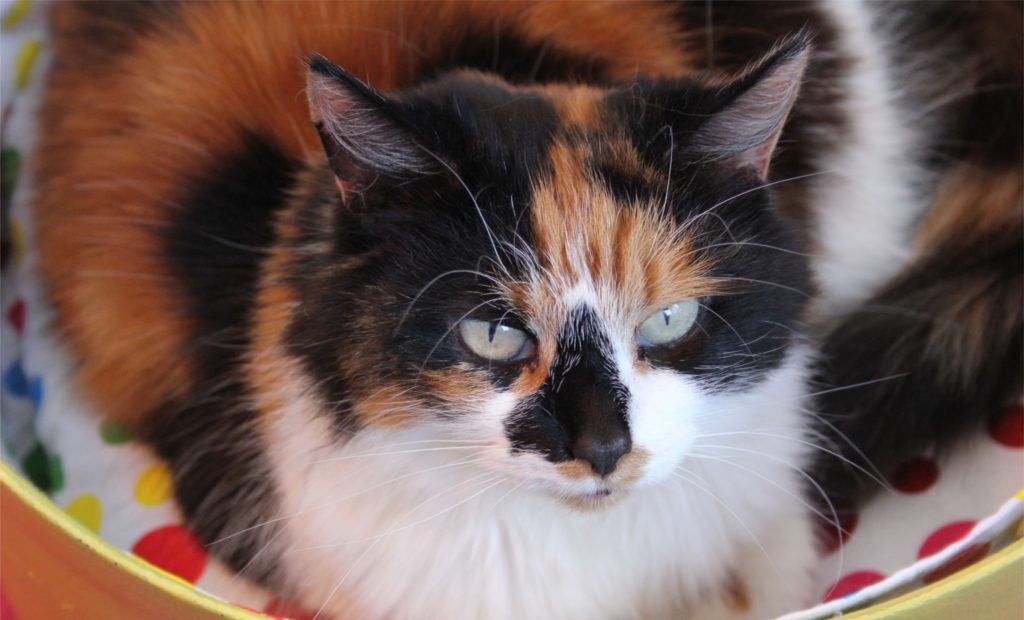
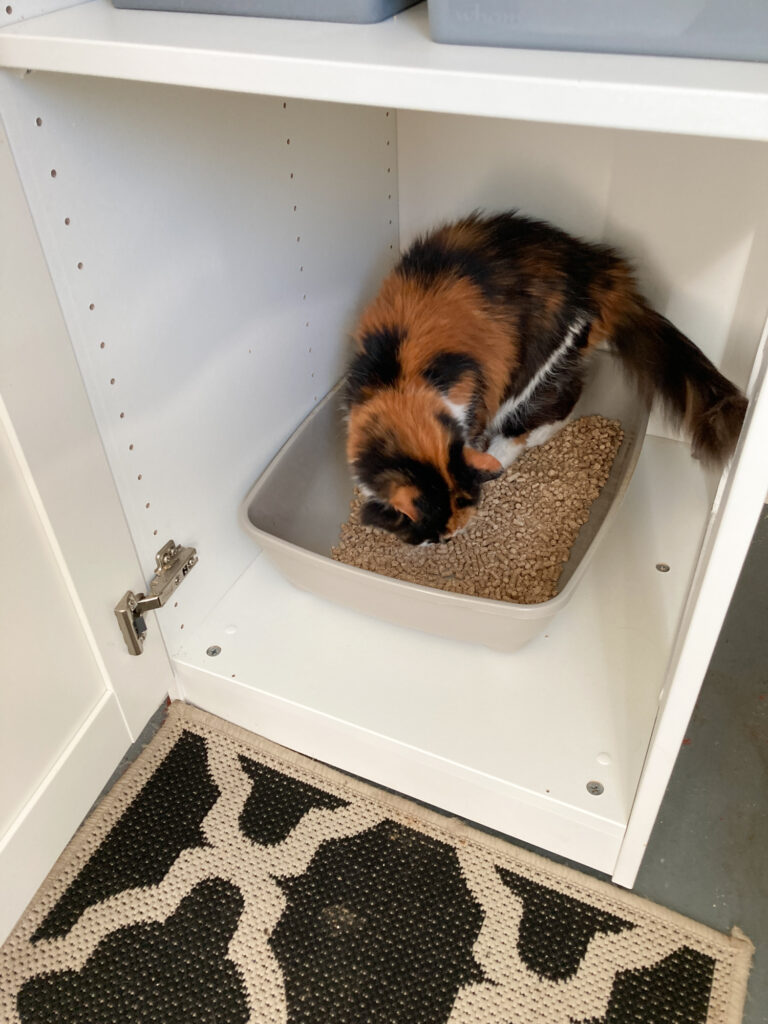
I know that cats like a little privacy when they’re using the litter tray and I wanted Muffin to feel extra comfortable now that I’m moving her tray out of the porch and into the hallway.
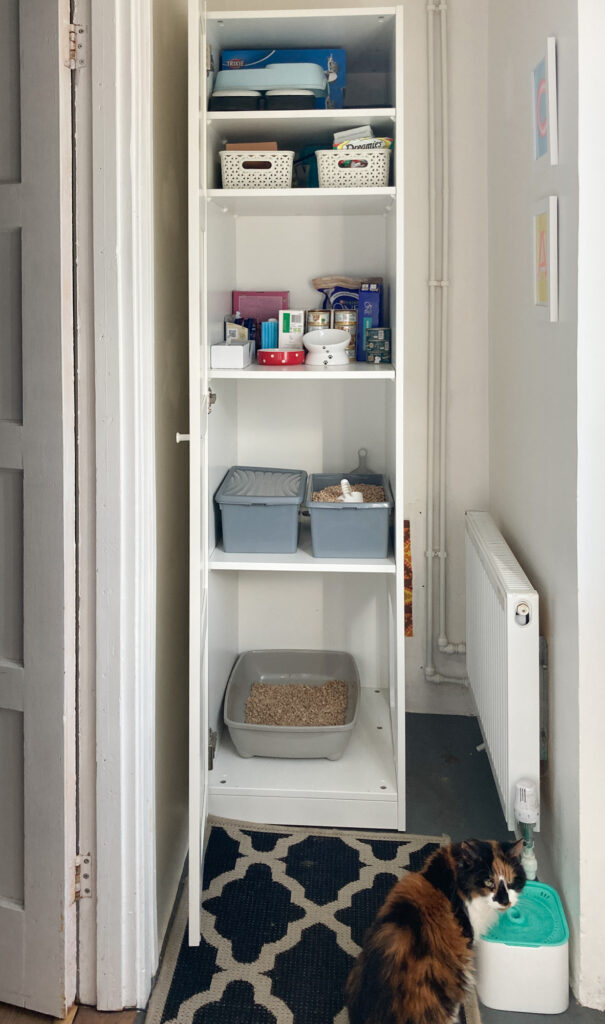
So, the hallway space is now all hers, with space for her food and water fountain in front of the cat cupboard, which features an enclosed bathroom for her.
Don’t worry, I’m not expecting her to open the door herself – I’ve DIY’d an entry into the bathroom!
You could use any flat-packed cupboard for this project that fits your space – you just need to make sure that it’s deep enough and wide enough to fit your cat’s little tray, with a bit of extra space around it to make sure it’s easy for your cat to get in and out.
I used a Pax 50cm wide wardrobe frame with a BERGSBO door, which is almost the same style as the original doors in my 1950s house. The tall frame is fixed to the wall, as recommended by Ikea’s instructions.
Step 1
Before you construct the flat-packed cupboard use a jig-saw to cut out an entry hole in the side panel. Make sure that you’ve considered the height of any floor plinth on the bottom so that the entry hole is flush with the inner floor of the cupboard.
Step 2
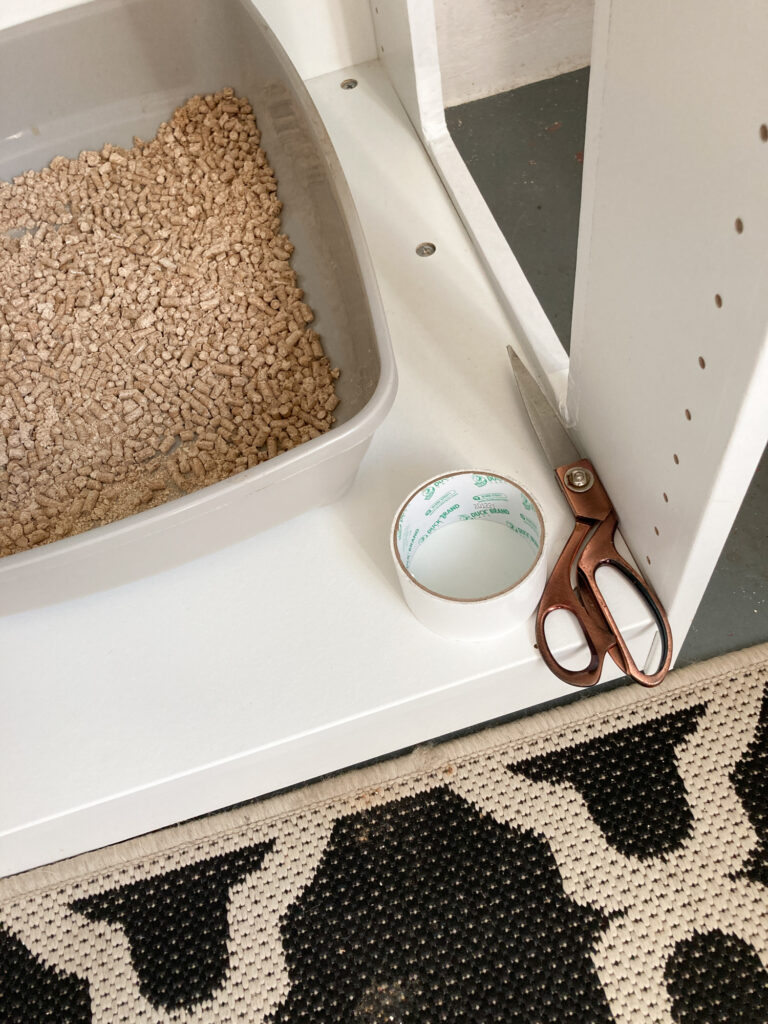
Use strong Duck tape to cover the raw edges of the entry hole. This will make sure that there are no rough edges or MDF splinters for your cat to catch themselves on.
Step 3
Build the cupboard following the instructions and attach it securely to the wall, again following the instructions that come with the flatpack unit.
Step 4
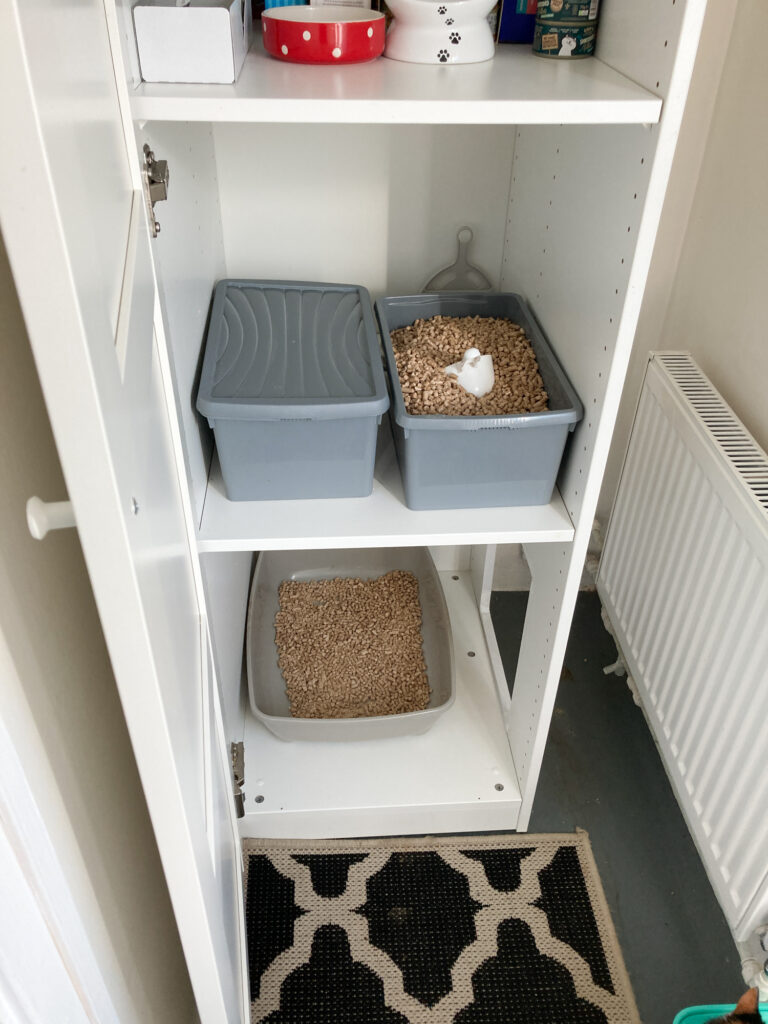
Add a shelf above the entry hole at a height that allows your cat to stand up and sit down inside the cupboard with plenty of free space so that they don’t feel restricted.
Step 5
You can add as many shelves above as needed to store their toys, medicines, treats, food and bowls etc. I’ve added two boxes on the lowest shelf – one with fresh litter and a scoop, plus one lidded bin for used litter. I made a bigger opening above the next shelf up so that it could be used for storing and serving my cat’s food.
Step 6
Add the door to the front and gradually train your cat how to use their private bathroom. At first, I left the door completely open so that she could find the litter tray straight away.

Then, after she had got used to it, I began closing the door after her when she went in to use the tray. That meant her only exit was through the side hole.
Eventually (it didn’t take more than a few days) she was happy to enter through the side hole as well as exit that way so now the cupboard door is always closed and she has all the privacy she needs.
The added bonus is that it keeps any smells enclosed so the house feels fresher too. And Muffin has never been more happy to go to her private bathroom. Yes, I sing Private Bathroom to her to the tune of Tina Turner’s Private Dancer.
Let me know if you have a go at making this project for your own pets. Just be sure to fix everything securely to the wall so that there’s no chance of the cabinet moving and give your pet plenty of room to manoeuvre, making sure your pet is 100% safe when using their private bathroom.
Pin it for later