If there’s one thing that I thought I’d never do in my life, it was probably fitting a shower in a bathroom. It seemed like such a difficult process and I thought that we’d probably end up with a soaking wet bathroom and no shower. But it turns out that fitting a shower was exactly what I ended up doing last week. I thought you might be interested to hear how I got on, and maybe give you some tips for your own bathroom if you’re considering starting a renovation.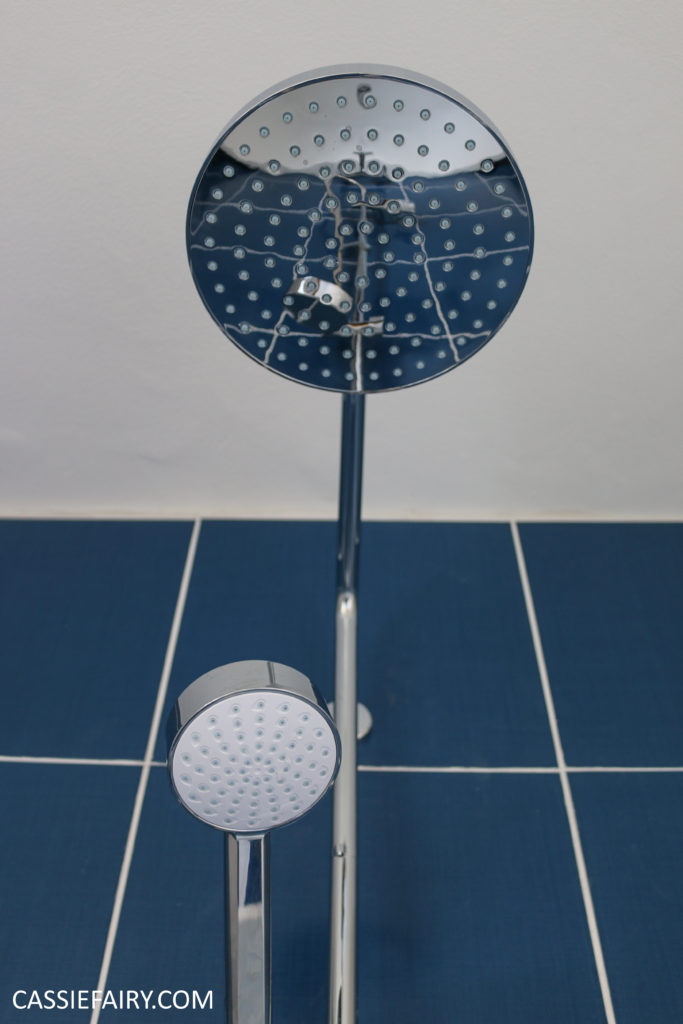 So, as you may have seen in my last blog post about the bathroom, we took out the whole suite and stripped the walls back to bare plaster. Of course, you don’t need to do this if you’re just fitting a shower, but we were going the whole-hog with a new bathroom and decided to do all the decorating at once. That kind of makes it sound like it was all done on one day, but trust me, it wasn’t! We actually worked on the bathroom over a period of two weeks, taking a break in the middle so that we didn’t completely wear ourselves out. Now, on to the topic of the shower…
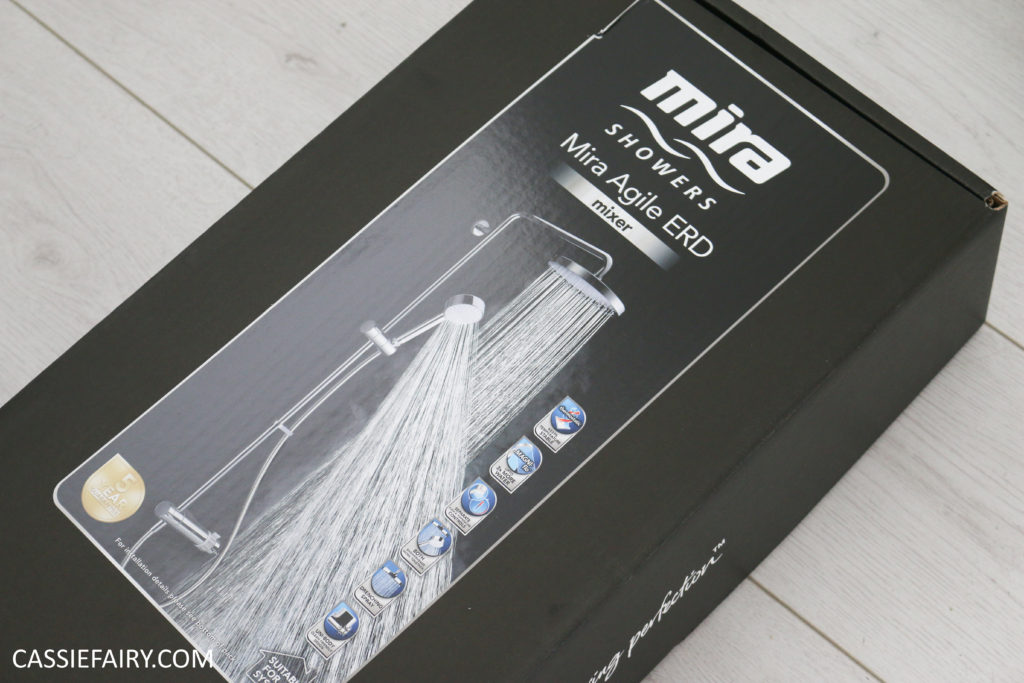
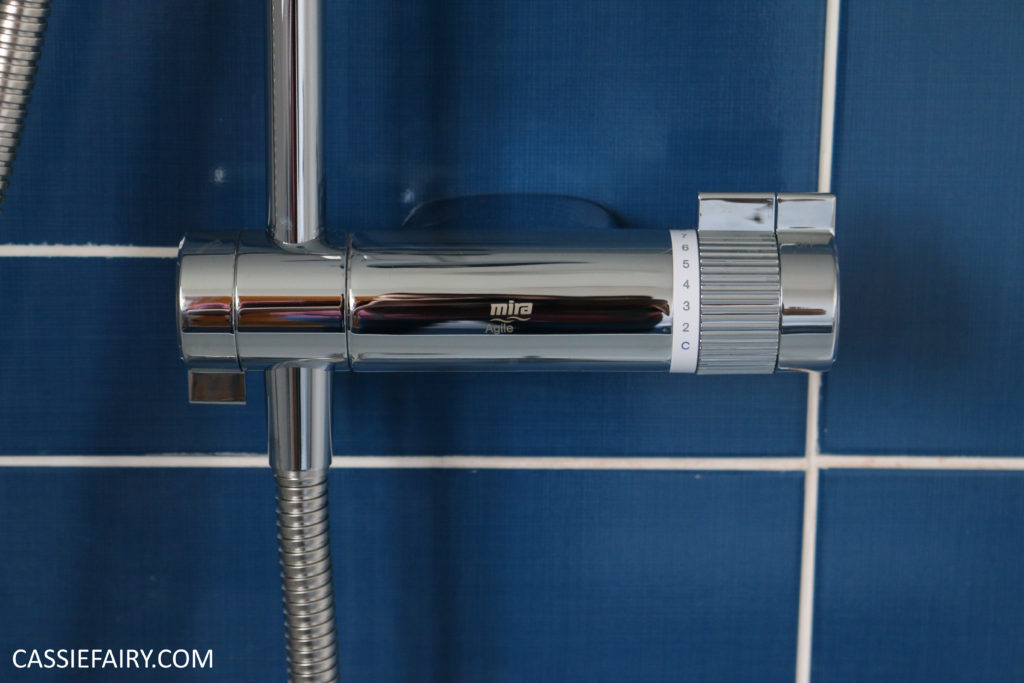
 We already planned to move the bath widthways across the room to make the space feel bigger and in doing so there would be a gap behind the bath where the alcove was. This provided the perfect space to house the plumbing for the shower and enabled us to ‘hide’ all the pipes behind a false wall. I went searching for a shower that was specifically designed to be fitted like this and came up with the Mira Agile shower.
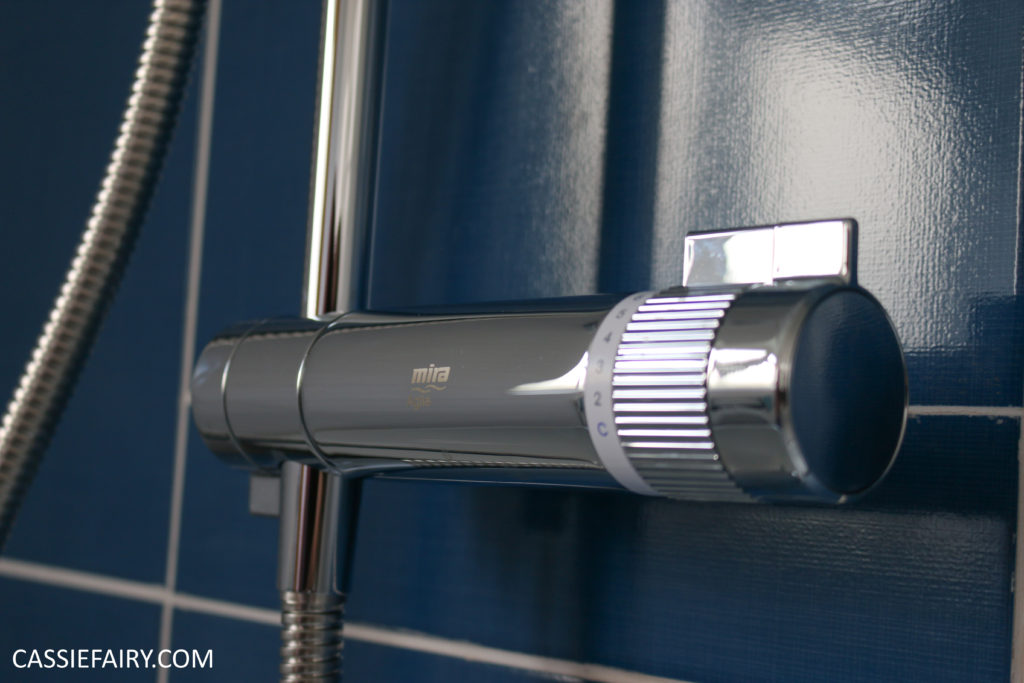 The control panel fits flush to the wall and there’s just a riser rail that holds the two shower heads. No other mechanisms or pipework to be seen. This shower unit is one that is fed from a hot and cold pipe so there’s no electricity flowing through it, phew! That was one of the things that worried me the most about fitting a shower, and if it was an a electric one there is NO WAY that I’d be DIYing it myself! That’s definitely a job for a professional!
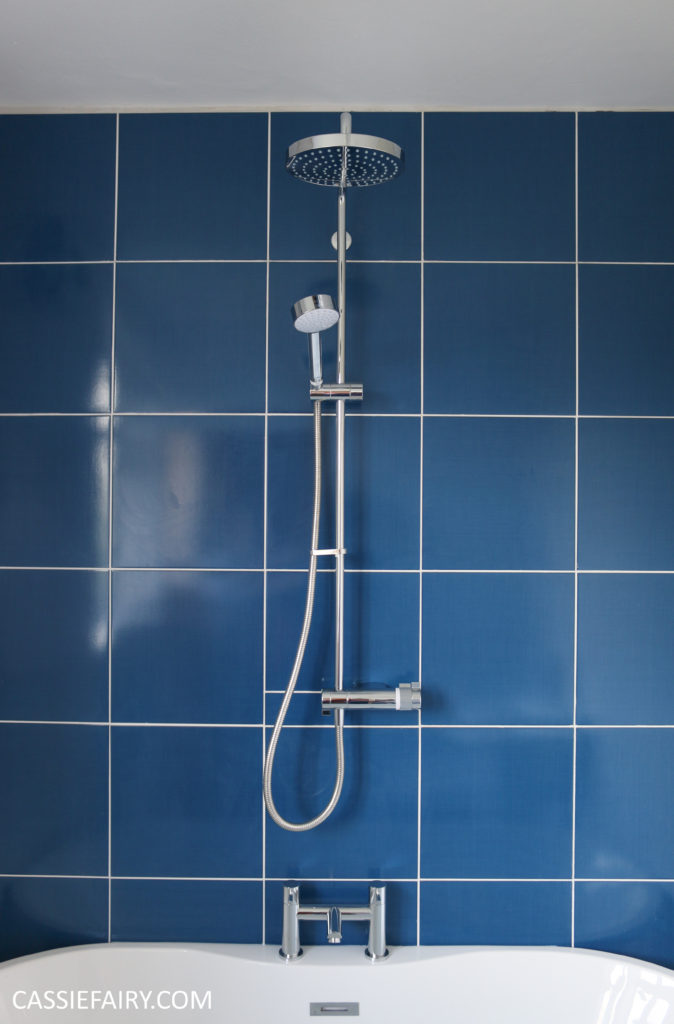 Thankfully, this shower fitting is almost the same as attaching a mixer tap to the pipes. The hot water comes straight from the boiler and feeds it through the pipes into the shower unit where it mixes with the cold water feed and provides the perfect shower temperature. So, how hard can it be to fit a mixer shower to some pipes, eh?
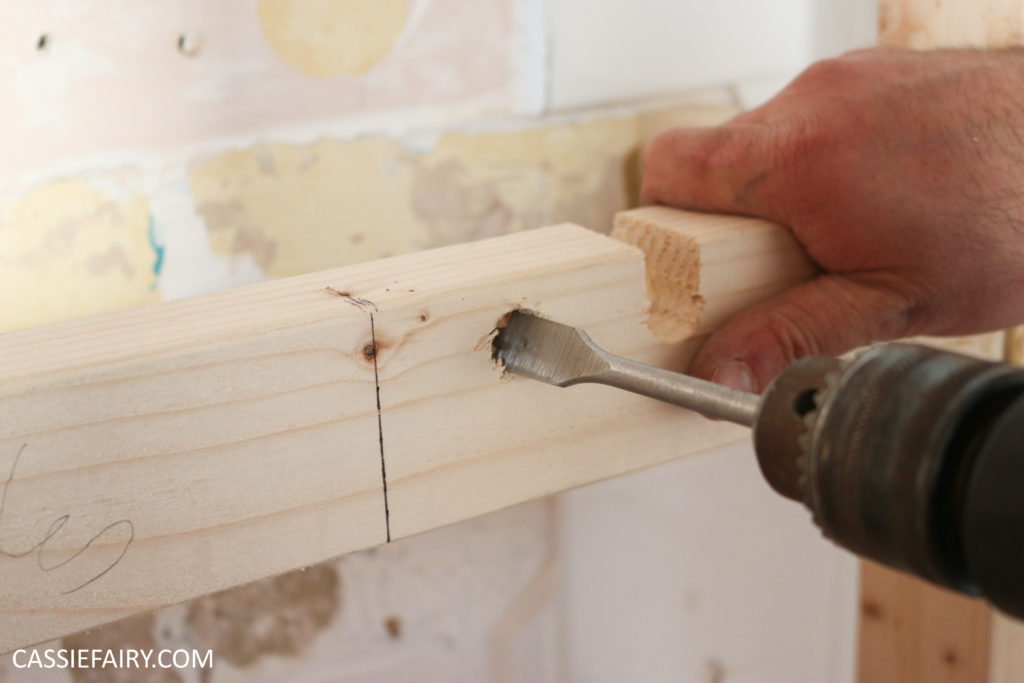
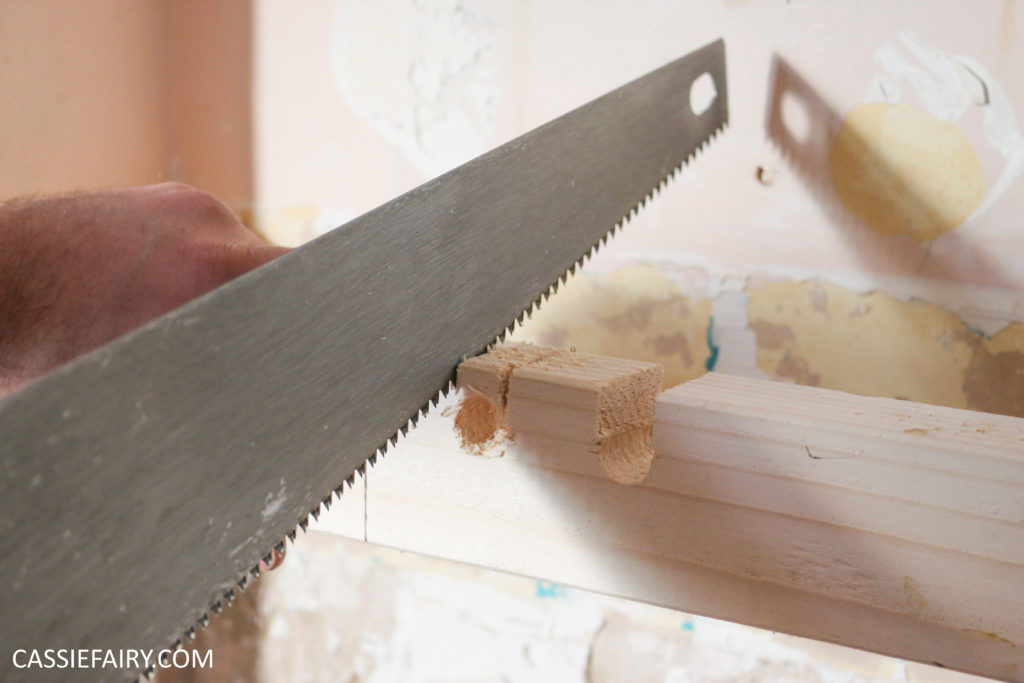 Well, the first step was getting the pipes into the right place. We took a hot and cold water supply from the existing pipes and extended the pipes up the wall, behind the space for the bath. It was at this stage that we had to build the false wall in front of the pipes to conceal them and a cross-beam ‘noggin’ (yes, that’s the word they use in the shower instruction manual!) had to be positioned in the right place to support the pipes. It has to be exactly behind the location of the shower mixer unit, so we measured the height and added the noggin.
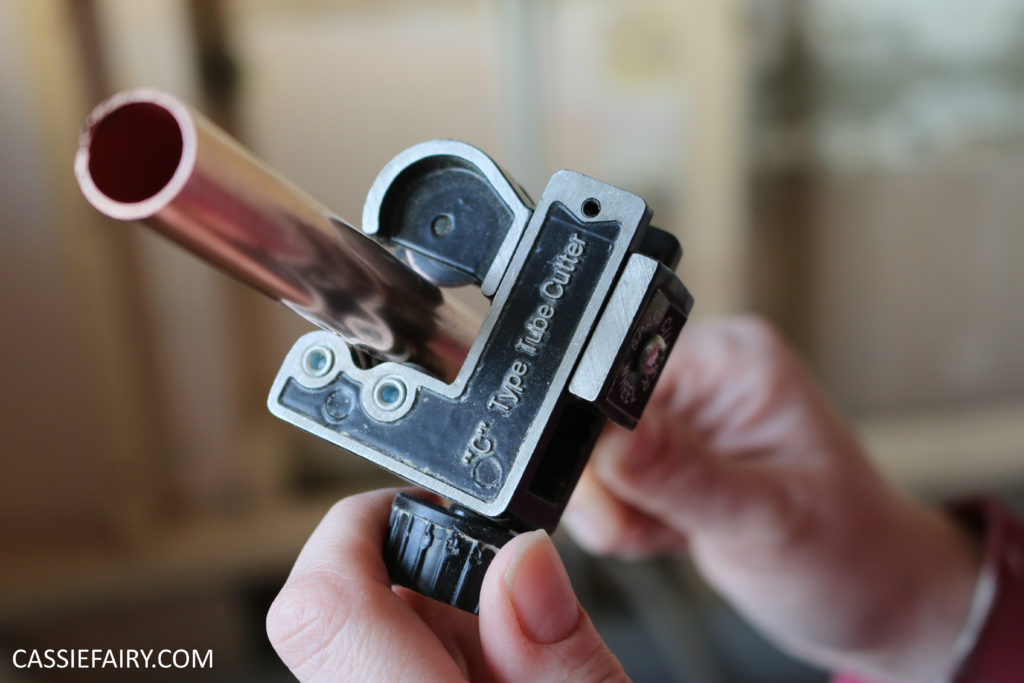
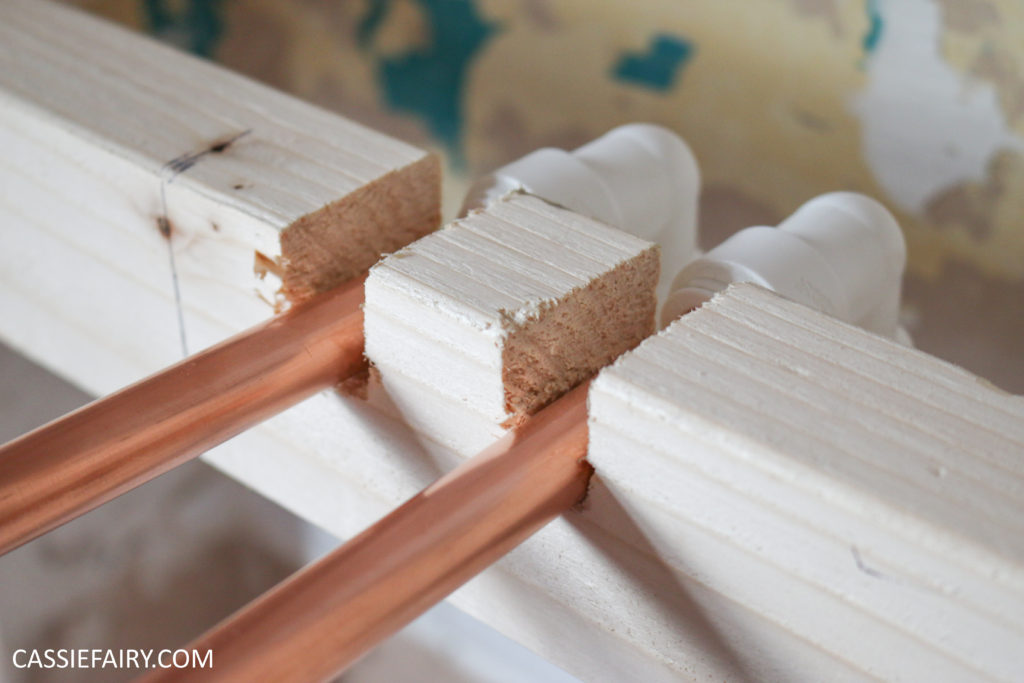
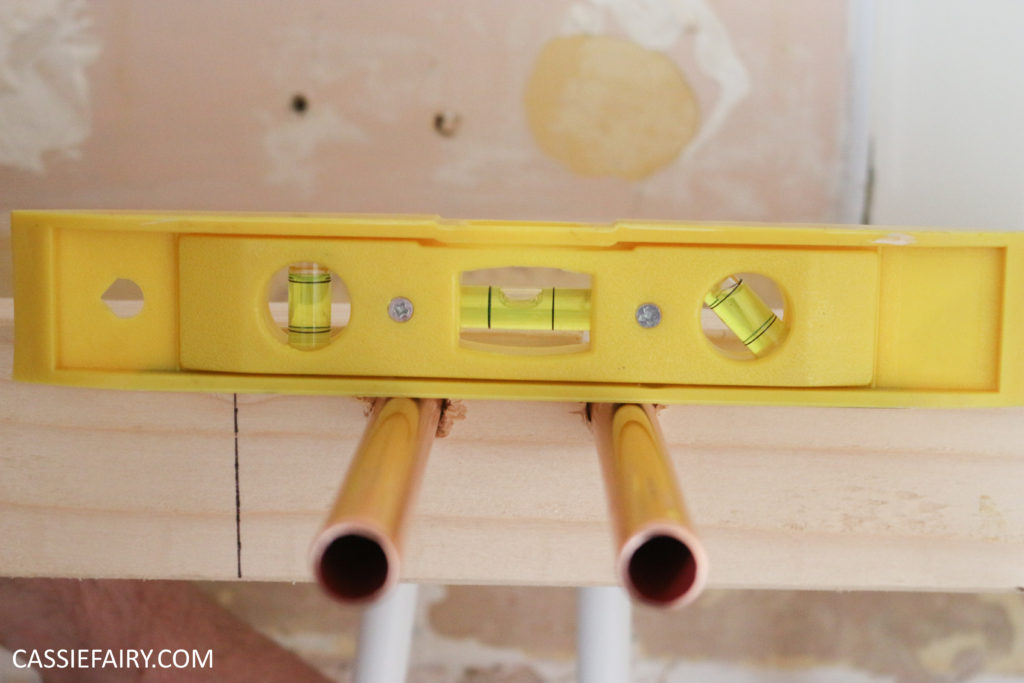 At this stage, two dips had to be cut out of the wooden noggin to support the ends of the pipes so we measured the position really carefully and cut them out. The angle of the pipes sat perfectly inside the noggin and we made sure that the copper pipe protruded out of the wall far enough for it to be plasterboarded and tiled and still be showing plenty of pipe. There was a lot of checking the pipes with a spirit level to make sure they were absolutely straight, otherwise the shower might fail.
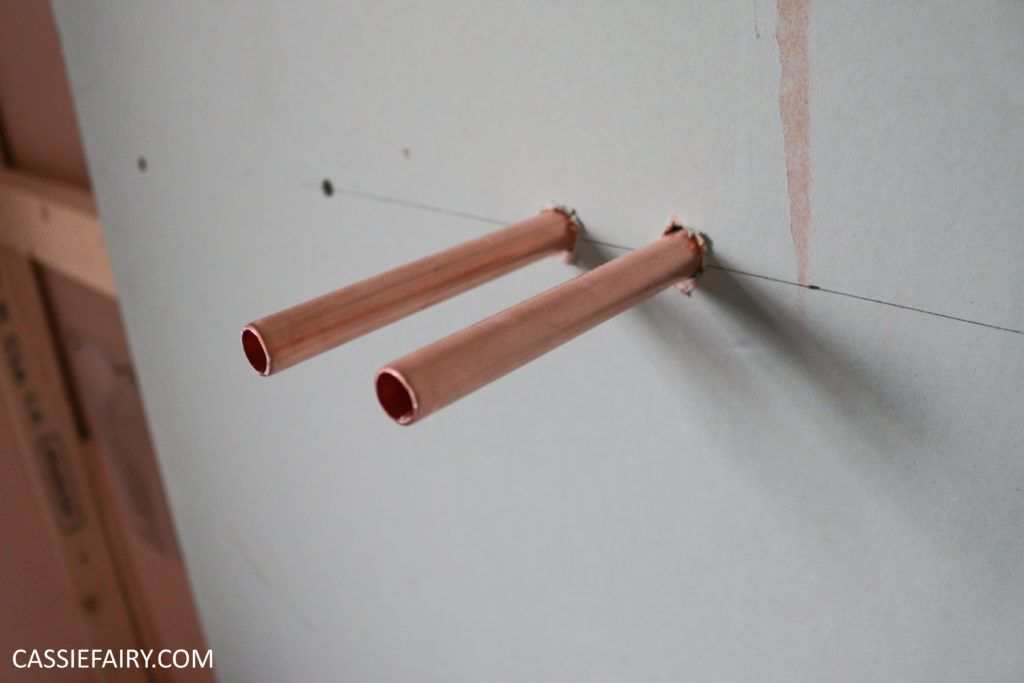
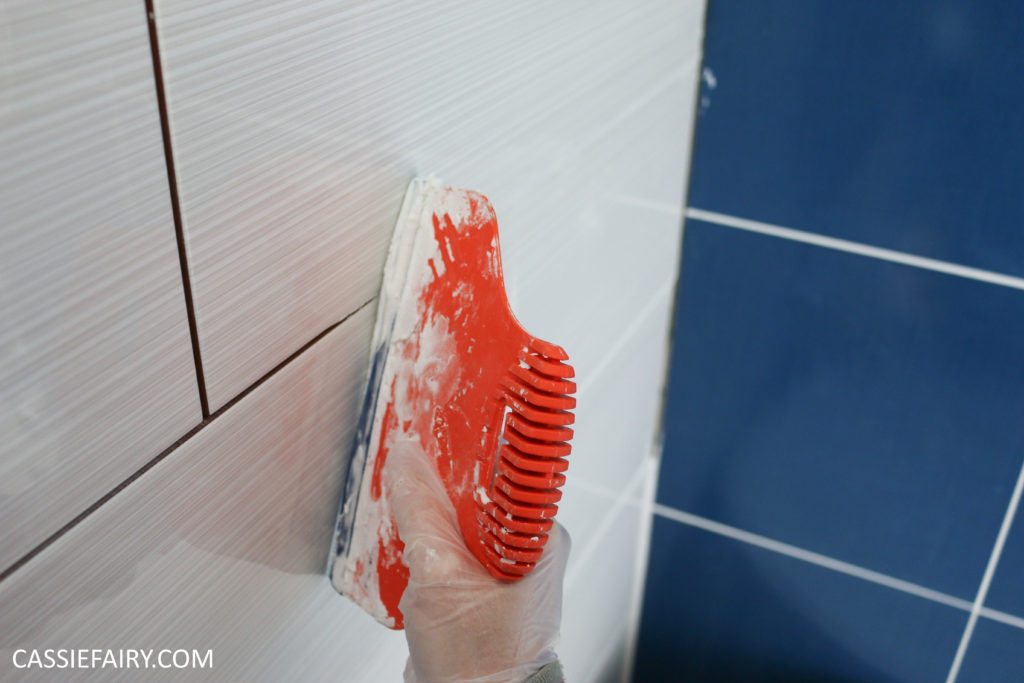
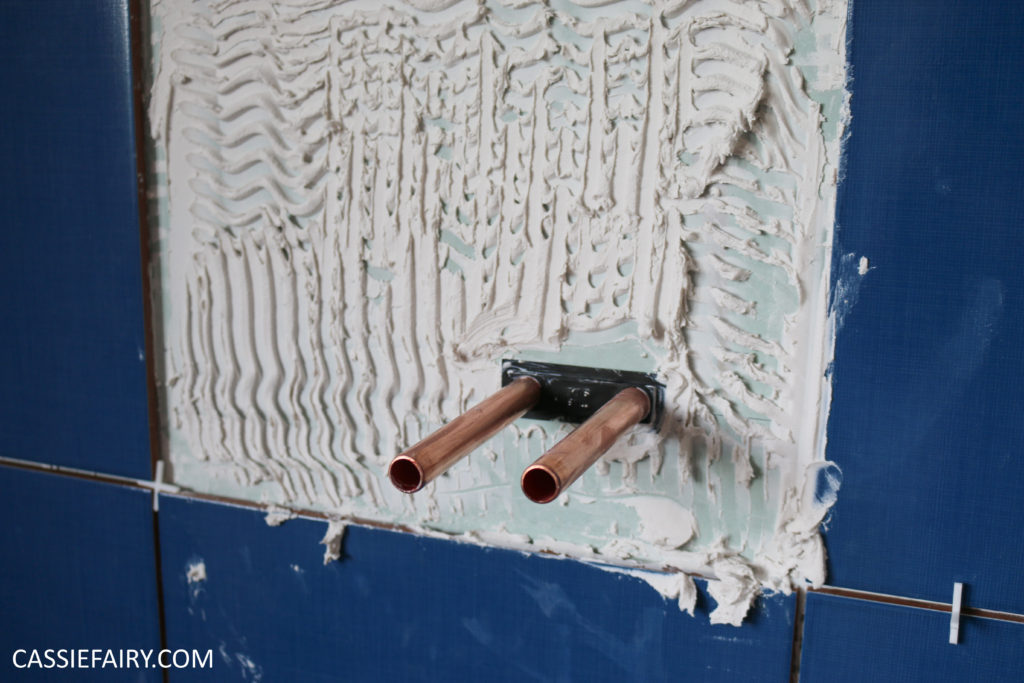 At this stage there was a pause in the shower-fitting process while we plasterboarded the false wall and tiled the whole thing. Tile adhesive had to dry out and grouting the wall almost drove me to tears. That said, the finished wall looked amazing and we nipped little circles out of the central tile to fit around the pipes so it looked really neat. Hubby used a diamond drill bit to drill holes in the tiles where the back-plate of the shower was to be screwed in. I imagined the tiles cracking at this stage but the drilling worked a treat. Thank goodness we had the right drill bit for the job!
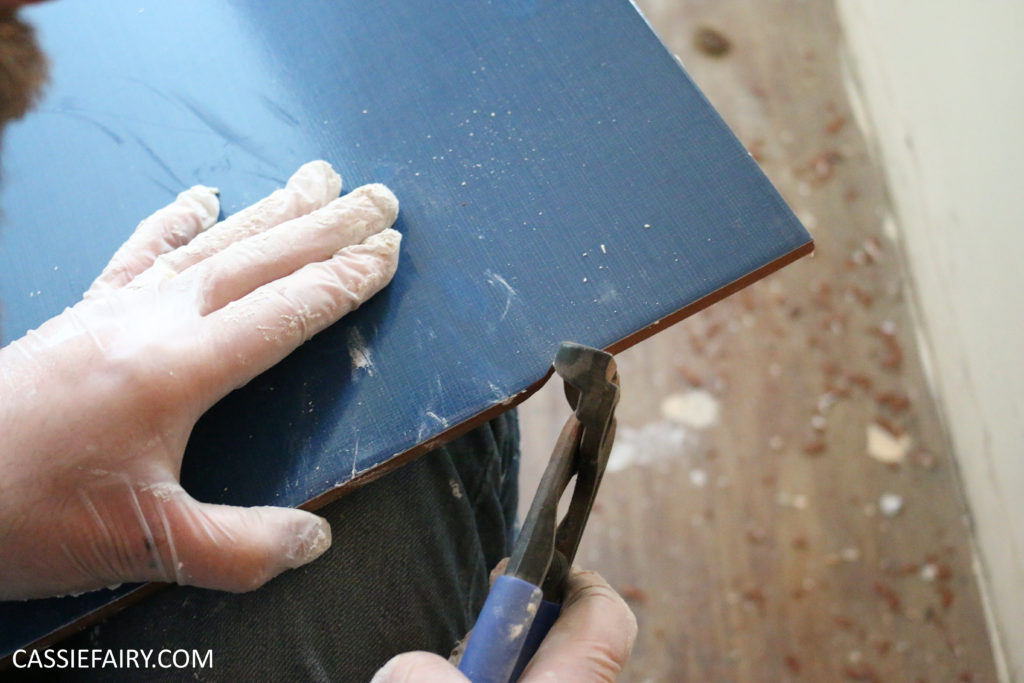
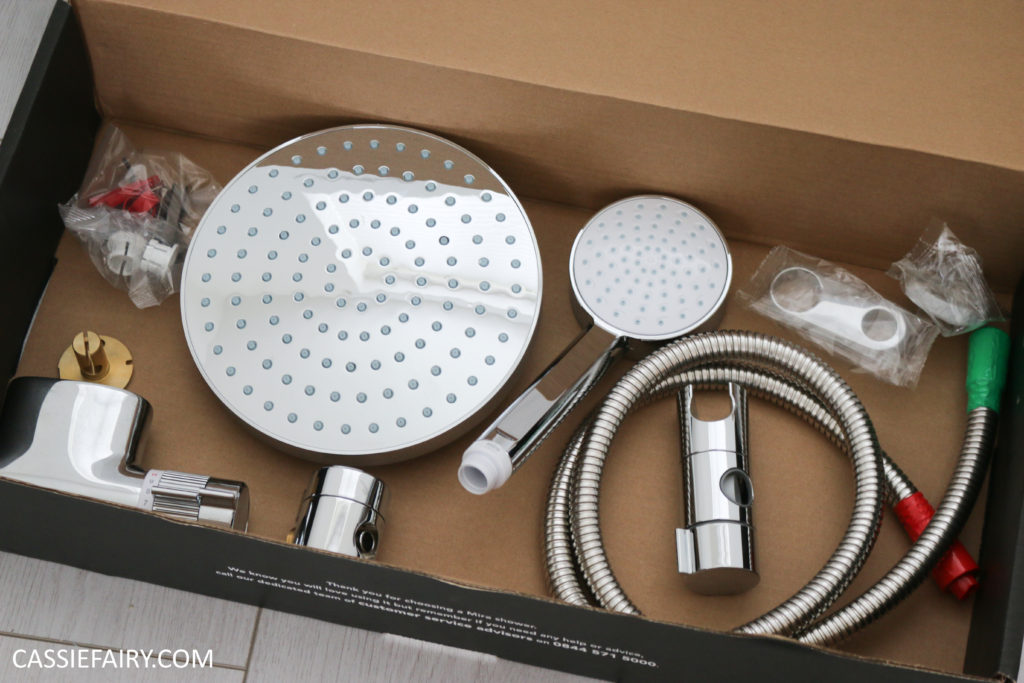
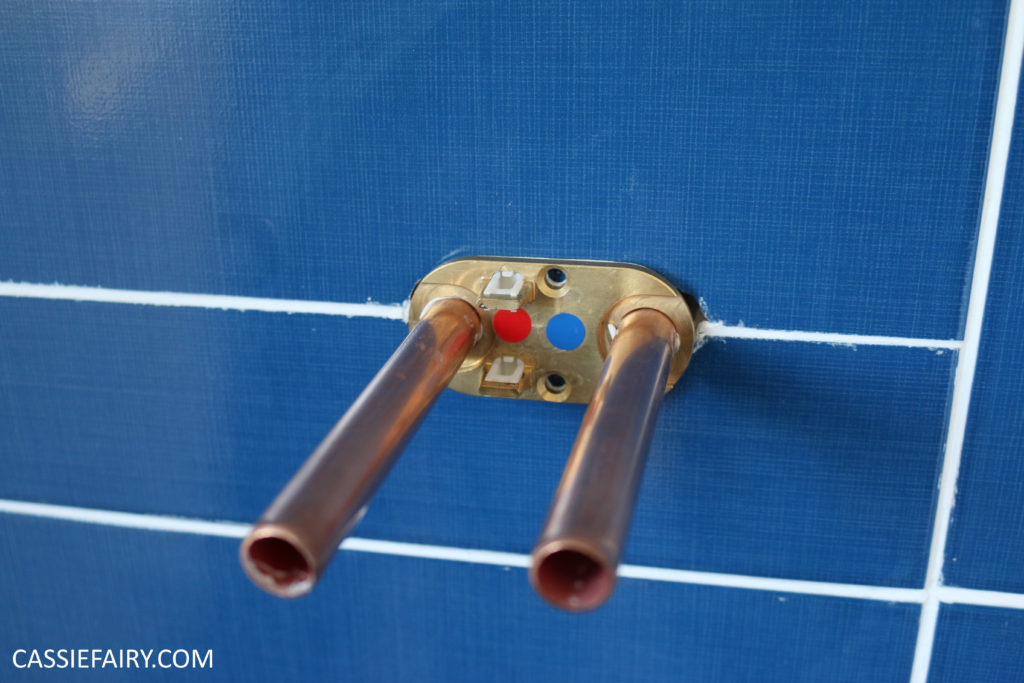
 When we came to fitting the shower unit it was simply a case of trimming the copper pipe down to 25mm from the wall and inserting the collars around the pipes and filters inside. Then the shower unit was just pushed onto the pipes and attached to the back plate. It was actually as simple as that. The control dials fit in the opposite end, et voila! The shower unit is complete.
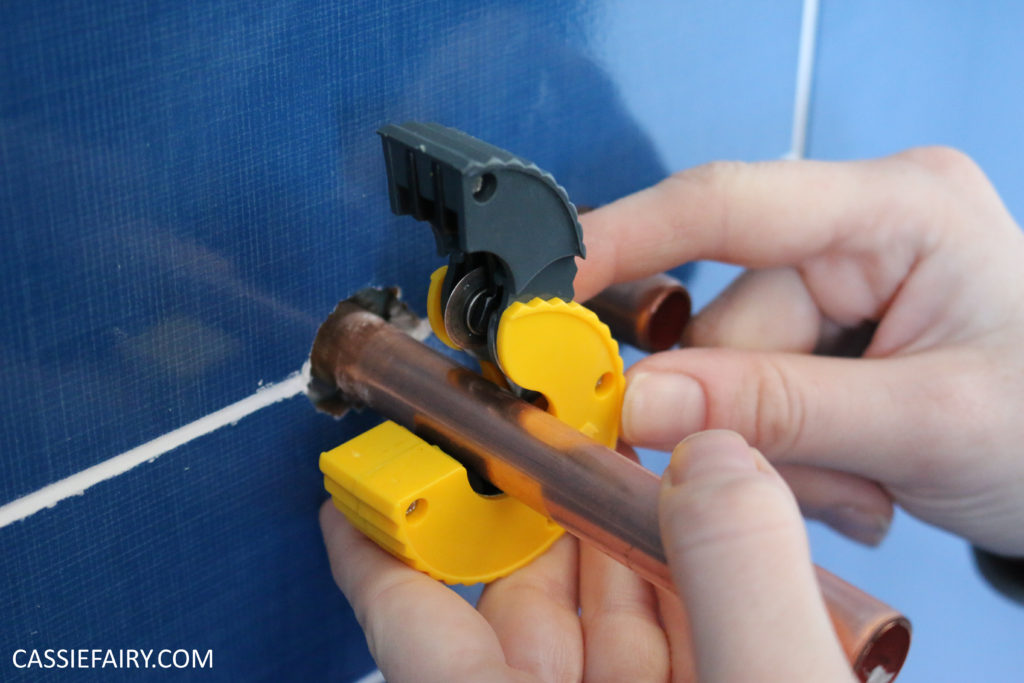
 I added the shower riser rail into the top of the unit and again we used the diamond drill-bit to make a hold in the tiles and screw in the support at the top of the rail. I attached the shower hose to the underside, screwed on the deluge shower head and the hand shower and stepped back to admire our handiwork.
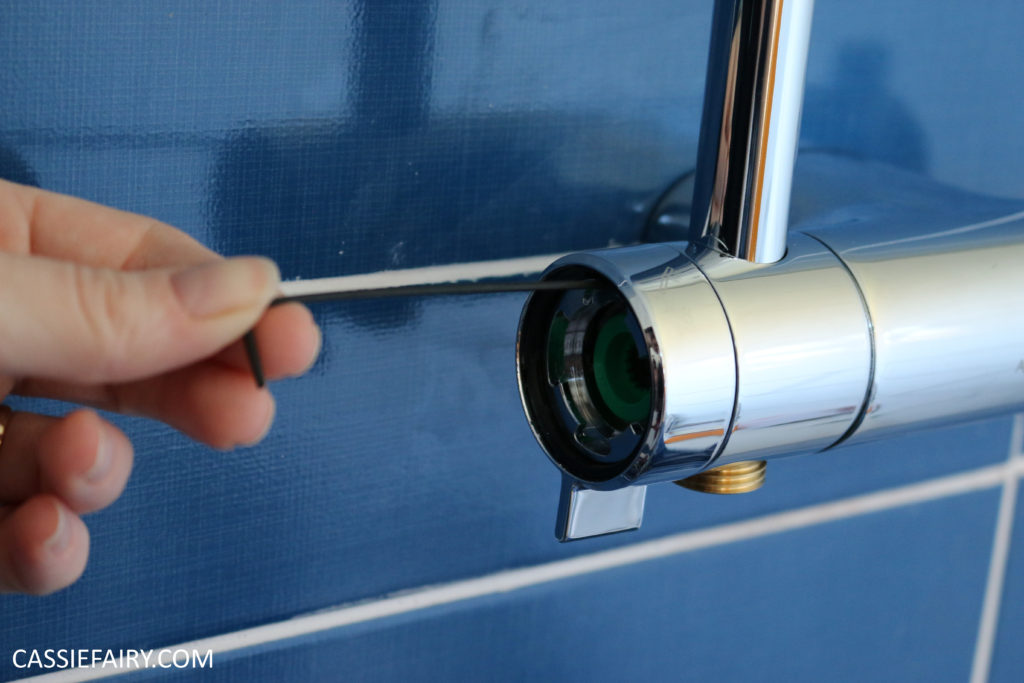
 It was a slightly tense moment when we turned the water supply on and tested the shower for the first time. But within seconds we knew that the fitting had been a success. Nope, water didn’t spurt all over the bathroom walls – it fell beautifully from the massive shower head into the centre of the bath like a perfect rain shower. And the hot water came through as intended to create the spa shower I’ve always dreamed of.What do you think of the finished shower? Would you have a go at DIYing a mixer shower in your own home? And definitely DO NOT have a go at fitting an electric shower, yikes! Let me know if you’ve had any funny experiences with plumbing or if you have any tips for finishing off my bathroom – I’d love to hear your ideas in the comments section below.
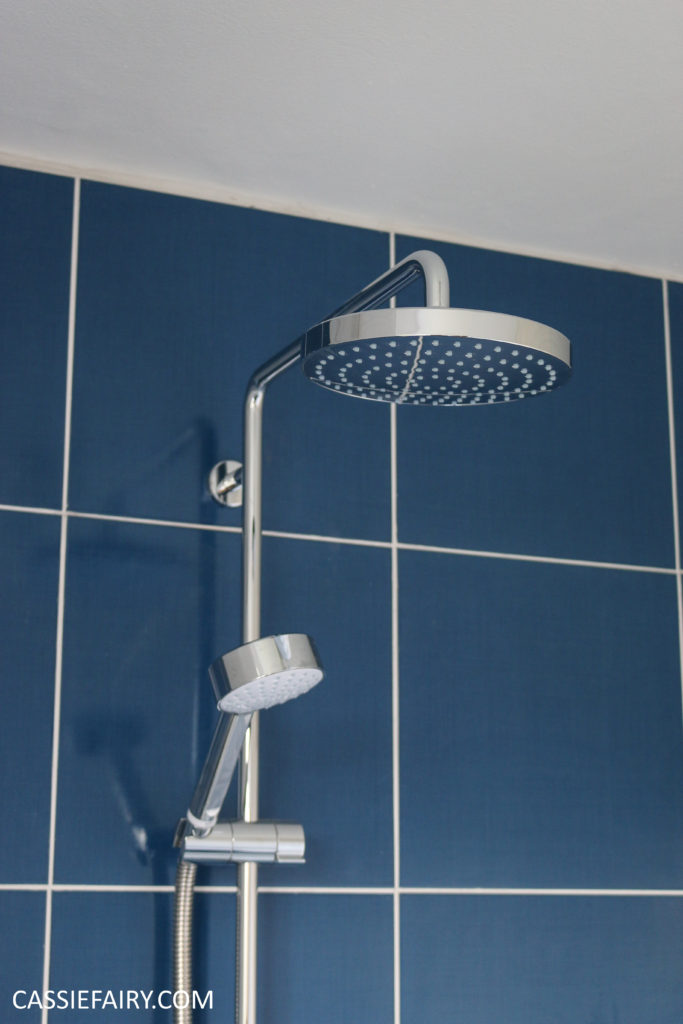
Some items in this blog post have been gifted to me and the pink links indicate a gifted product, affiliate link or information source. All thoughts and opinions in this post are based on my own experience and I am not responsible for your experience 🙂


