If you’re planning a thrifty kitchen revamp this year and are looking for some money-saving kitchen inspiration this sunny January morning, you’ve come to the right place. I was getting close to completing my DIY kitchen renovation and just had some finishing touches to include – but it all went spectacularly wrong last week. If you’ve already read my blog this year, you’ll know that my kitchen ceiling now has about 60 holes in it. Why? Have a read of my DIY disaster blog post if you’re intrigued (and to see the photos – eek! Anyway, today I’m taking it back to the drawing board with some more thrifty kitchen decor inspiration…
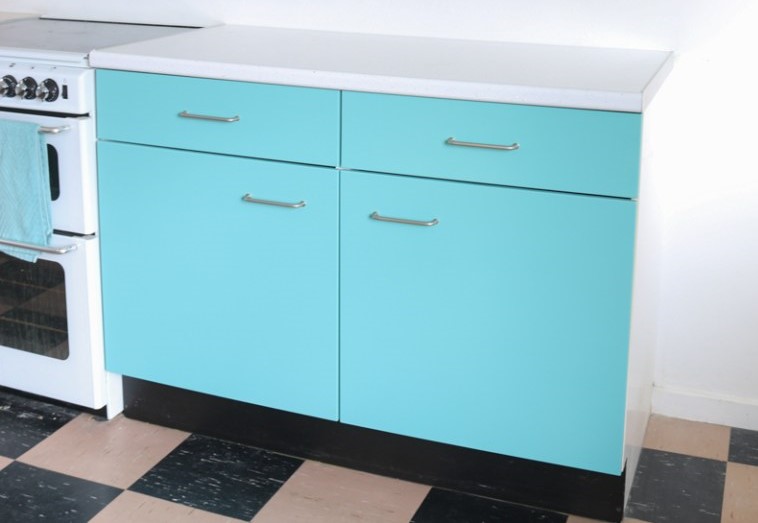
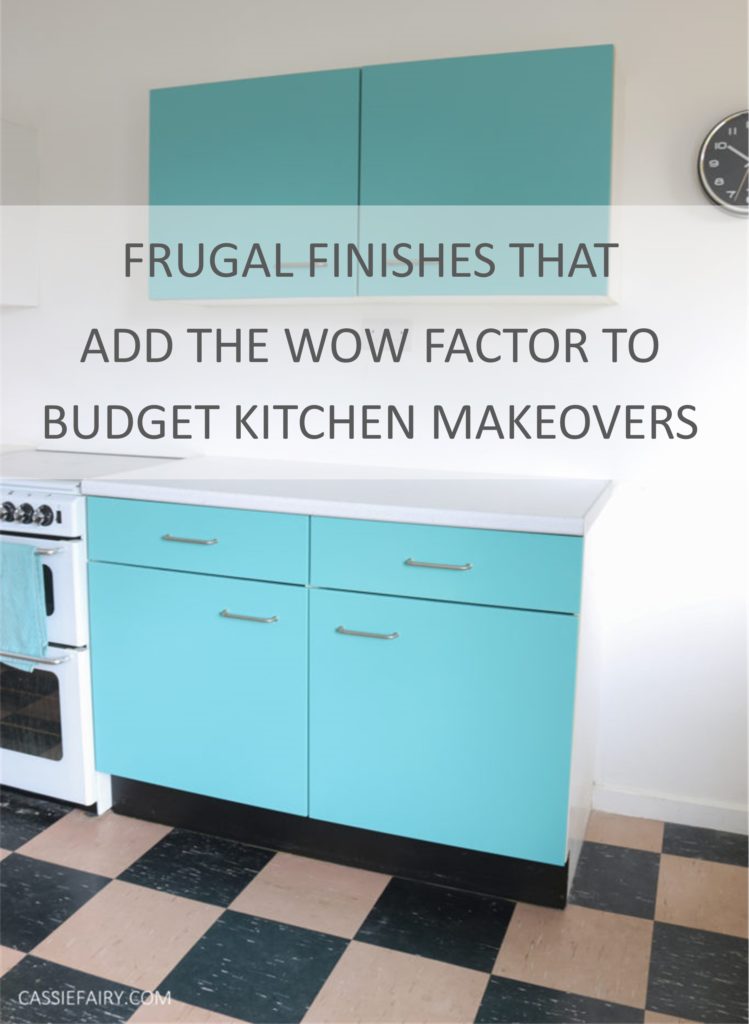
REVAMPED CUPBOARDS
If you’re looking to save money on your kitchen makeover, there’s no need to change all the existing cabinets. You don’t even need to switch out the cupboard doors (although that’s a good way to renovate on a budget). These days there are countless DIY brands who make paint especially for kitchen cupboards. You can buy either brush-on or spray paint and sometimes you don’t even need to use a primer. This can give your current kitchen a whole new look and you’re only paying for the price of the paint.
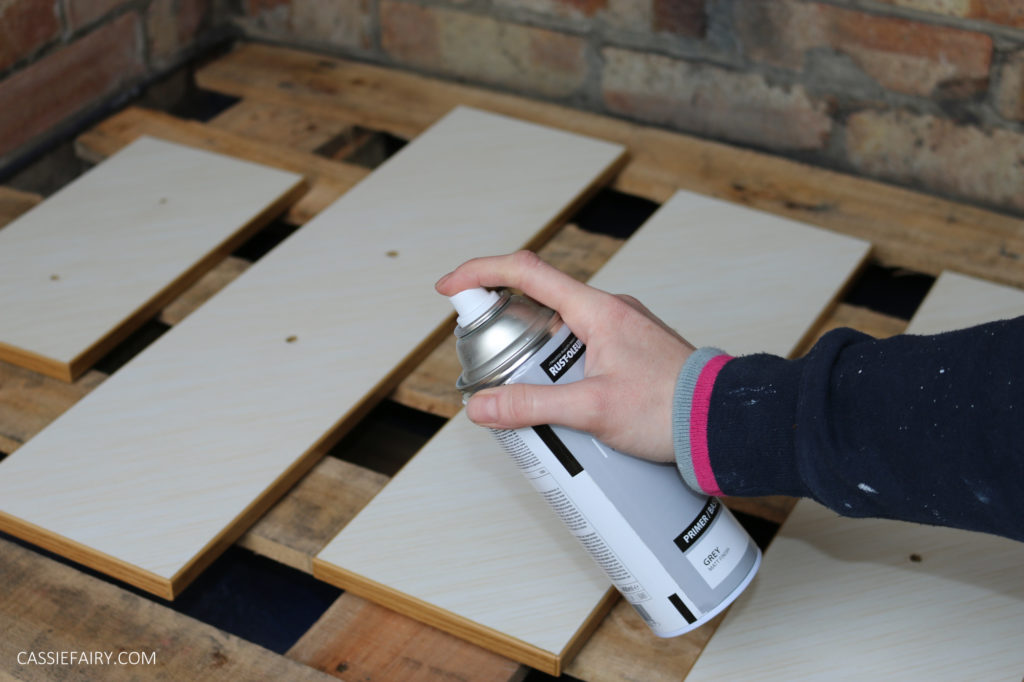
We used Rust-Oleum’s Mode paint on our melamine kitchen cupboards and I’m still pleased with the smooth turquoise finish after many months of use. This paint requires a primer coat before you add the coloured paint, but it dries quickly and you can build up fine layers to achieve a strong colour. The range includes neutrals like white, grey, cream and charcoal, as well as vibrant hues like red, pink and lime.
BUDGET WORKTOPS
The existing worktop in our kitchen was ingrained with years of dirt and there was no way it could be reused. Although this week I did watch a YouTube video where sticky vinyl was applied to a worktop and it looked rather good! But we have already replaced the worktop with a fresh new run of inexpensive worktop and it was the finishing touch that the kitchen needed to elevate the cabinets.
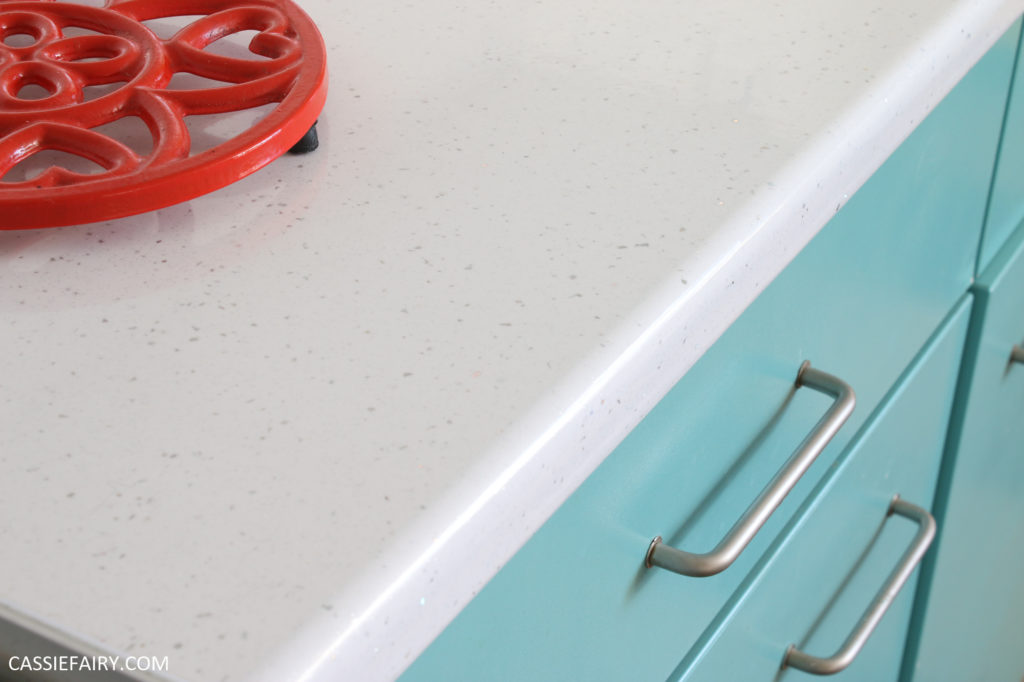
When we were shopping around for a worktop, there was NO WAY we were going to be able to afford stone or marble so that was quickly crossed off the list. Wood would require regular treating and still wasn’t a budget-friendly option. When I looked at quartz worktops, I discovered that it possible to get the same feel and look of stone, concrete or granite but it wouldn’t need regular polishing or sealing. Plus, it”s considerably cheaper than the real deal. That said, we were on the tightest of tight budgets and in the end we went for a quartz effect laminate worktop, which looks great and was so easy to install.
BACK DOOR MAKEOVER
Another ‘give it a go’ DIY that I’ve done in my kitchen is my back door makeover. It was an ugly, stained old PVC back door that would need replacing (I can’t emphasise how disgusting it was). Again, I used a spray paint to refresh the PVC, not really knowing if it would work but I had nothing to lose. You can use white paint to bring it back to its original best but seeing as I was painting the plastic surround anyway, I thought I might as well go big or go home.
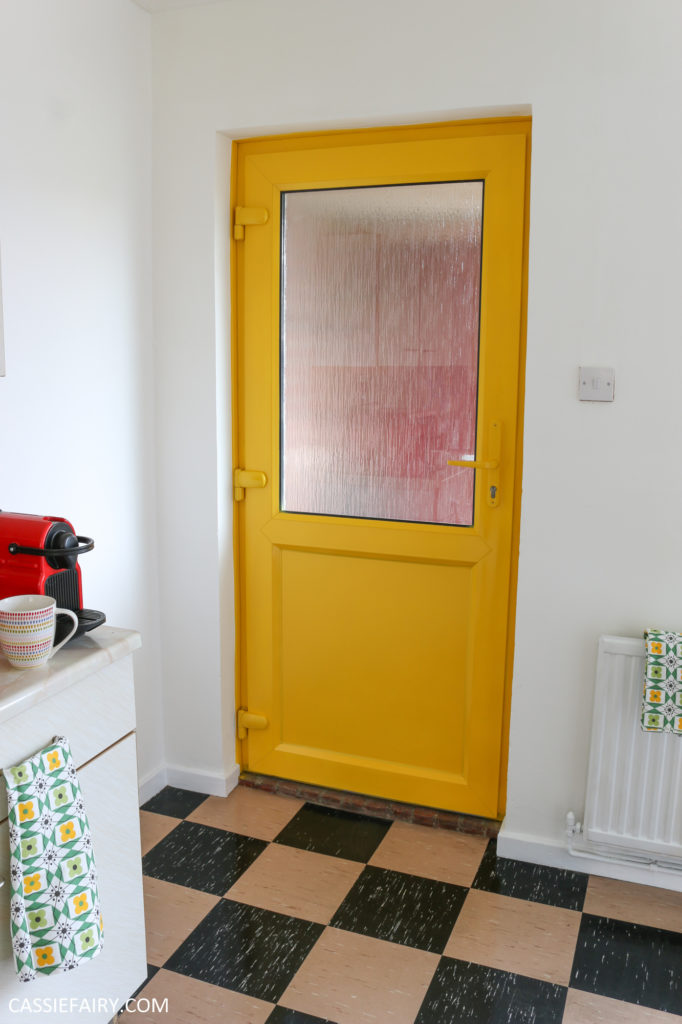
So now my back door is yellow! I used a All-surface spray paint to give the gross back door a makeover and now it brings a burst of sunlight into our space every day. It’s saved me £££s in replacing the old door and the paint job is holding up well – only the handle has chipped off a bit after months of use. I’ve shared a video on YouTube about the process of painting the PVC door so have a watch if you’re interesting in revamping your own doors.
What do you think? Would you include any of these finishes in your own kitchen makeover? Despite the setbacks, I’m cracking on with my own DIY renovation and I promise that there’ll be photos of the finished kitchen coming soon – watch this space..! 🙂
PIN IT FOR LATER
This article is a sponsored collaboration. The pink links in the content indicate a sponsored link or information source. The blog post reflects my own experience and the sponsor hasn’t had any control over my content 🙂