You may have spotted in my previous blog posts that I’m in the midst of decluttering and spring cleaning my home. It’s been an epic mission this spring because, during all the lockdowns, I’ve been less worried about keeping my home presentable as I know that no-one’s going to be visiting! Nonetheless, I do enjoy having a tidy home and it causes me stress when there’s too much clutter around, so I’ve been getting super organising. Here’s how…
I started my spring cleaning efforts in all the usual places – steam-cleaning the bathroom, clearing out my wardrobe and tidying my kitchen cabinets (which made me decide to bring my kitchen renovation forward – but that’s another story for another blog post!). But what I’ve found to be the most stressful element of my spring cleaning efforts is my office and I’ll tell you why.
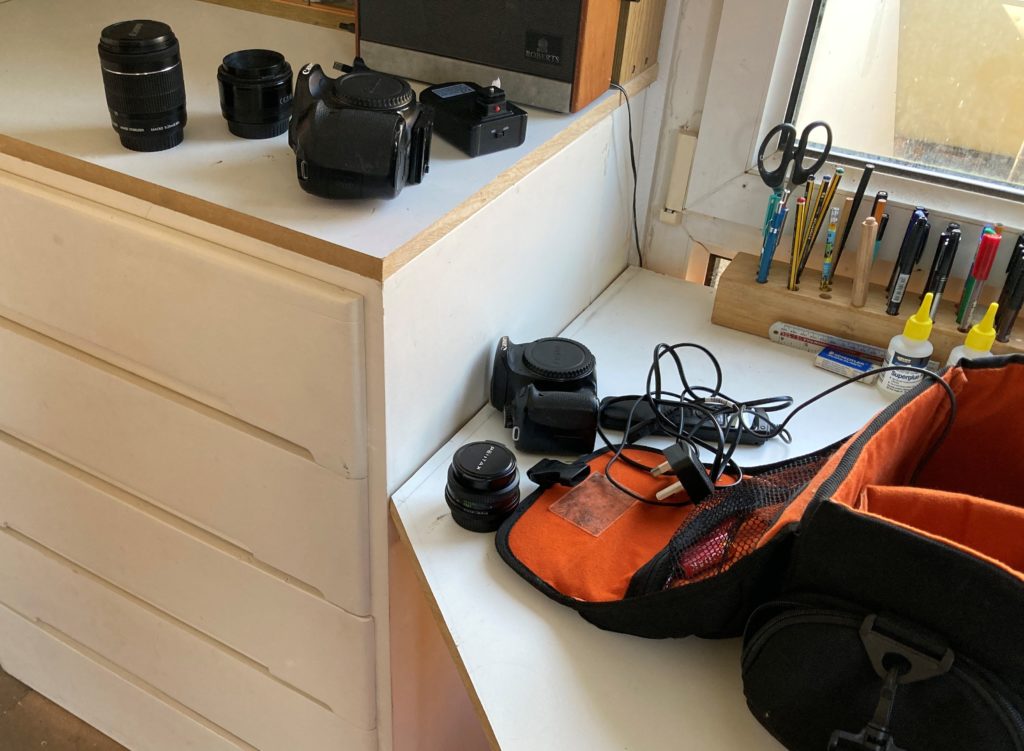
Without sensible storage options in place, I’m always worried that my equipment is going to get damaged. And, as a thrifty girl, I would be so disappointed if I damaged a camera lens or some recording gear and had to pay out to replace it just because it didn’t have somewhere safe to be stored. Or even worse – if my important data on a hard-drive was corrupted after falling out of a drawer or being knocked about. Argh, it doesn’t bear thinking about.
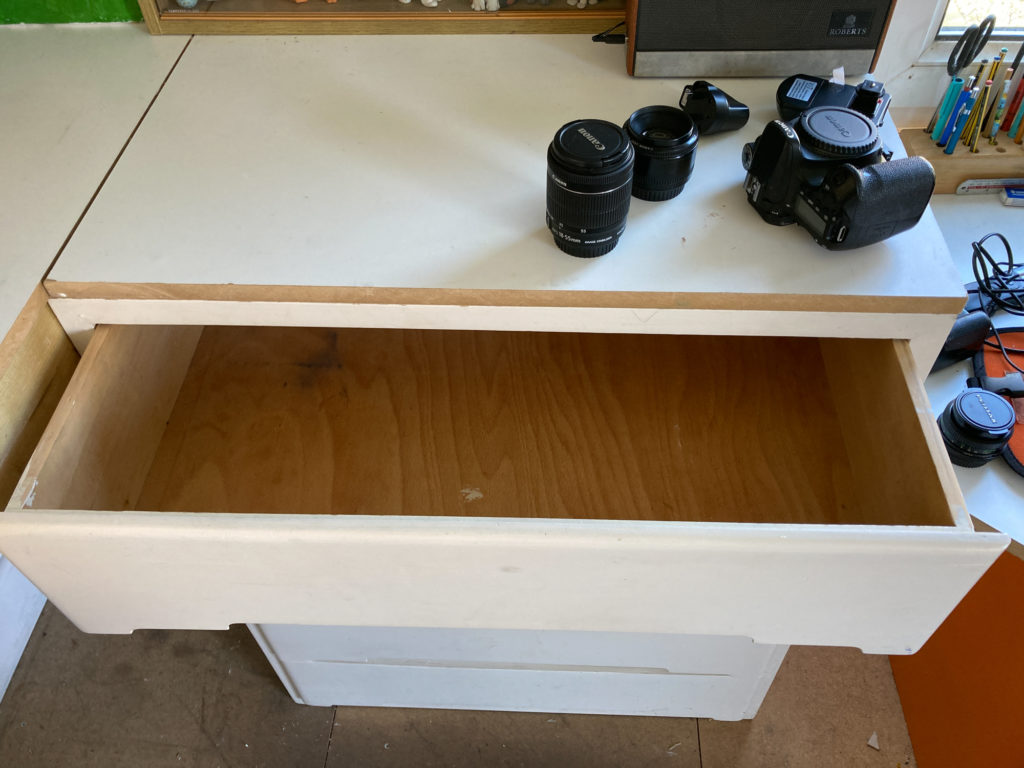
So, I decided that it was time to get my office organised and find a safer way to store my equipment. At the moment, most of our photography gear is stuffed into one padded camera bag. It’s better than nothing BUT it’s a disorganised mess with lenses piled on top of each other and accessories rammed in. Remote controls and cables are loose and tangled at the bottom of the bag so you have to take everything out to find the thing you want. So, faffing around with it wastes time as well as making me feel disorganised and worrying about whether something will break.
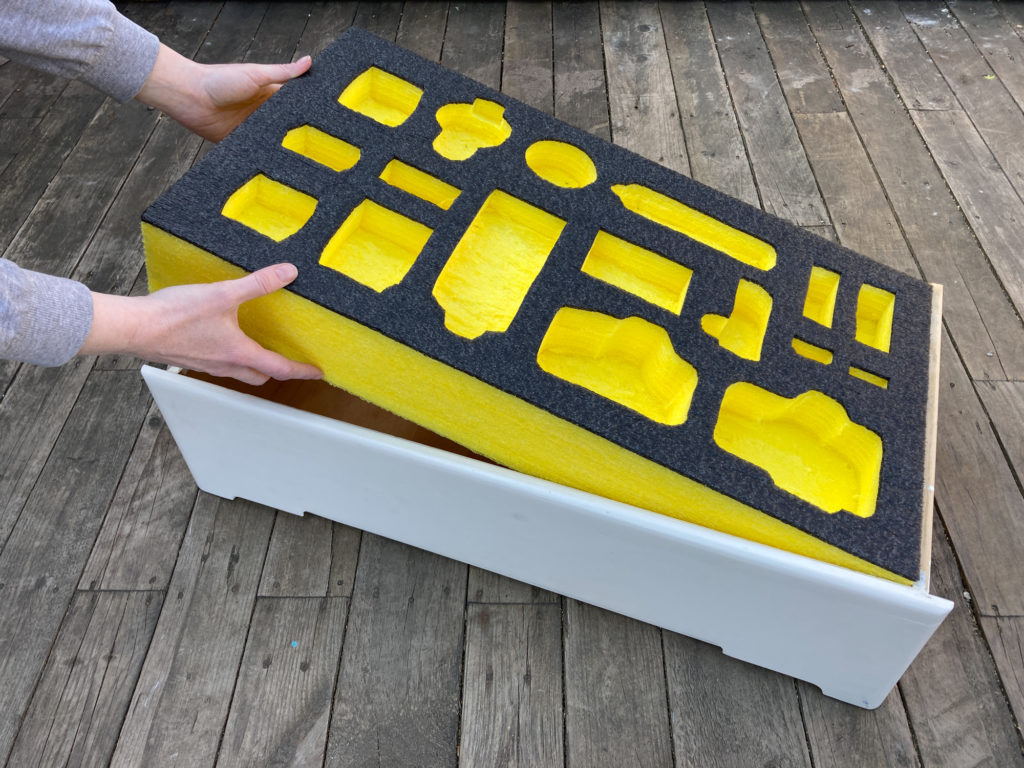
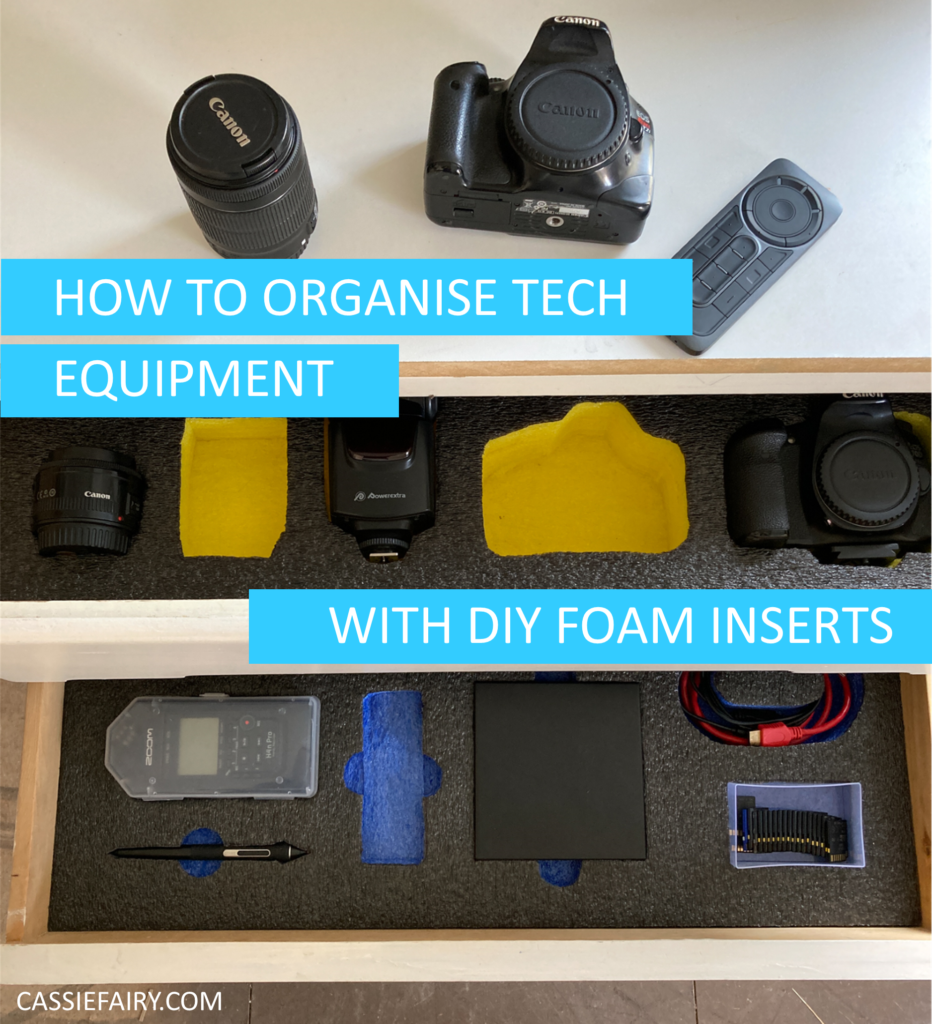
I’ve allocated a drawer for the equipment but I don’t want it to just float about in there – the lenses tend to roll around and things could get knocked about, which would be worse than keeping them in the small camera bag. I heard about foam inserts you can buy for tool boxes and I wondered if it would be possible to create a similar thing for my photography gear. This led me to The Case Farm, who make foam inserts for drawers that you can customise yourself. As you can probably guess from all the photos I’ve shared so far, that’s the option I went for!
Here’s how I created a custom drawer insert for my important equipment:
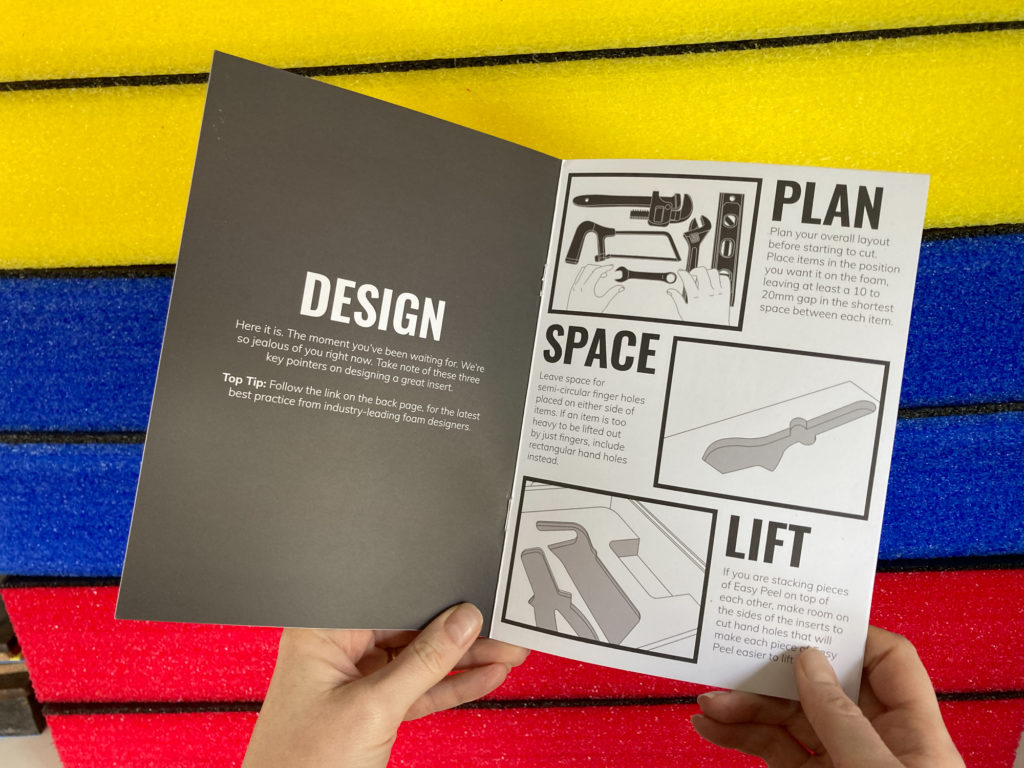
STEP 1 – PLAN
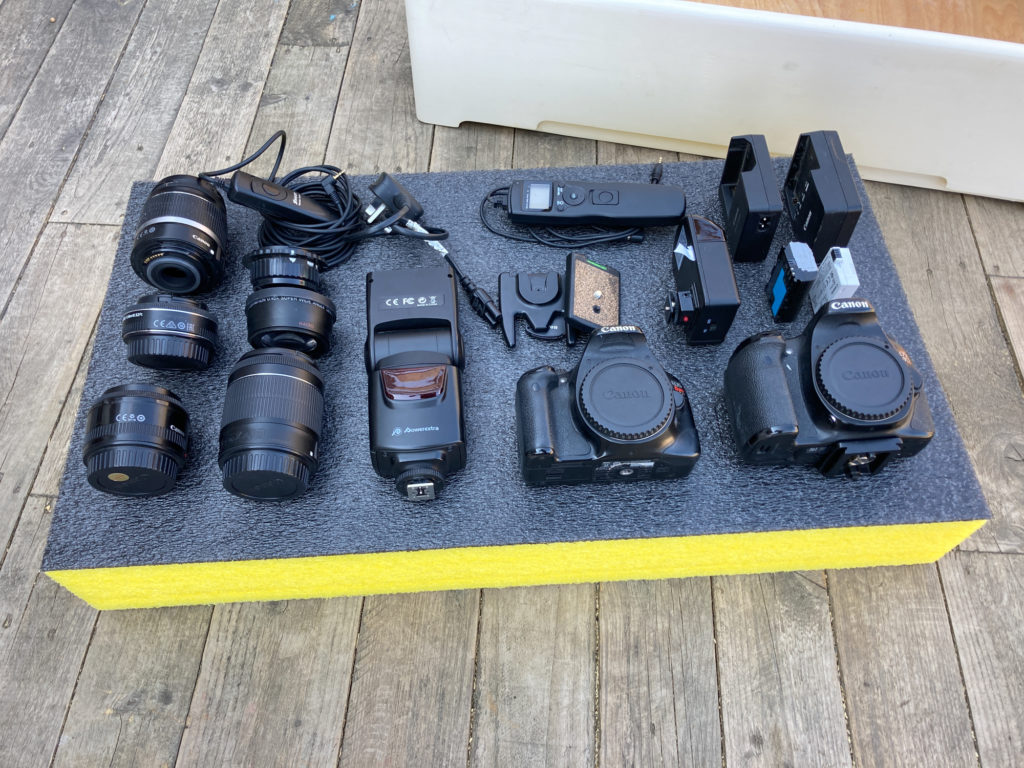
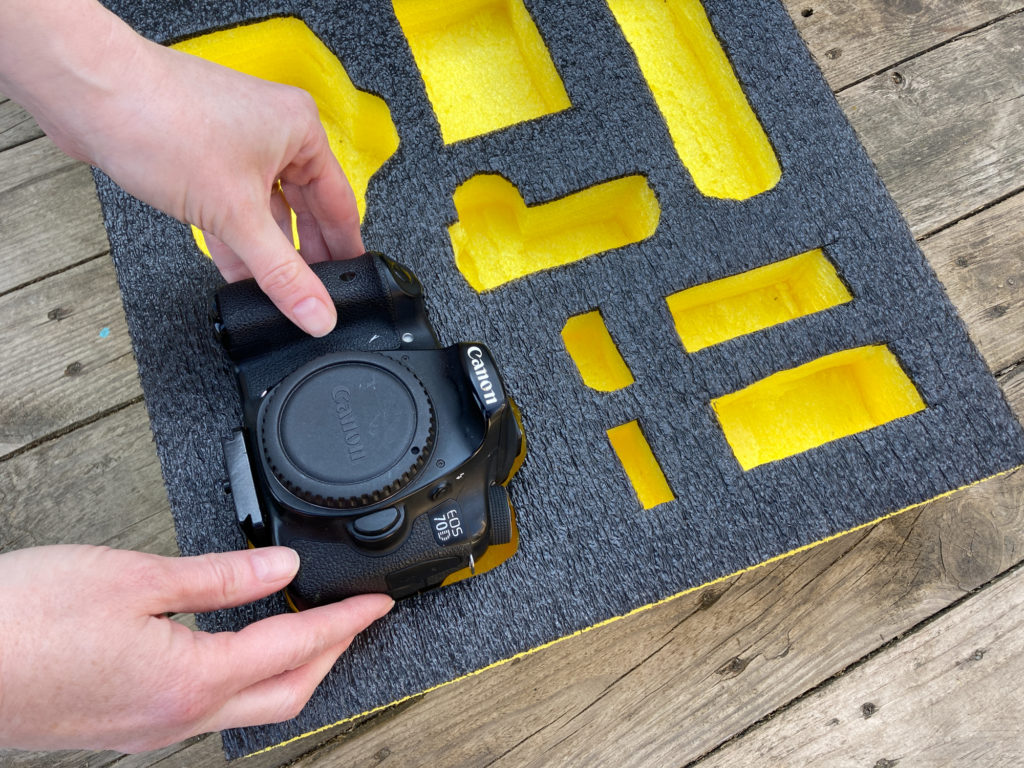
Measure your drawer and order a foam insert to fit the dimensions. Then you can lay out all the equipment you want to store in the drawer on top of the foam, leaving a suitable gap of ‘padding’ between each item of at least 1-2cm.
STEP 2 – DRAW
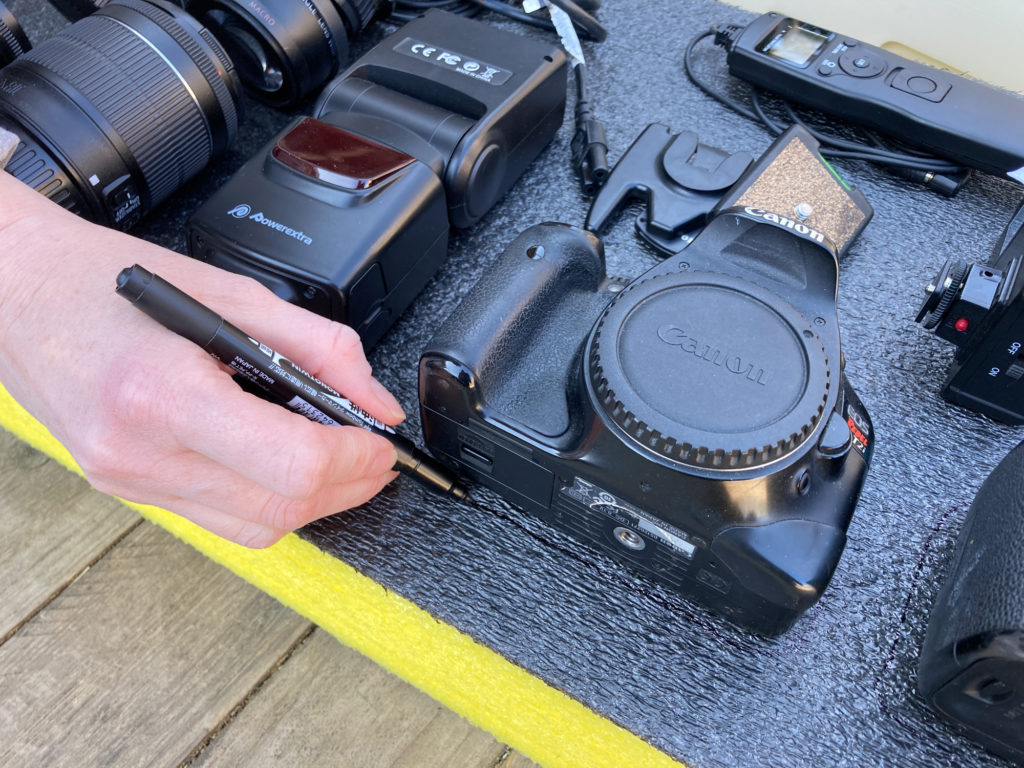
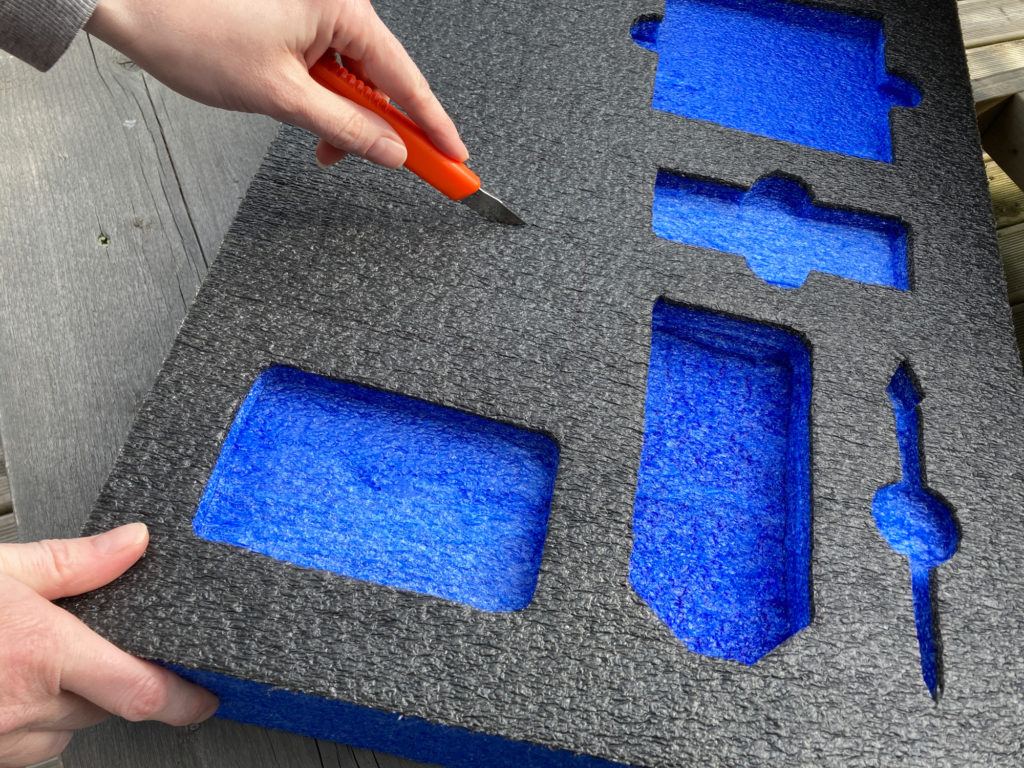
Draw around the items with a marker to give you an outline to cut around. If you were using the insert for tools, you may be able to cut directly around the tool with a craft knife, but I thought it wouldn’t be a good idea to use a knife that close to my camera gear!
STEP 3 – CUT
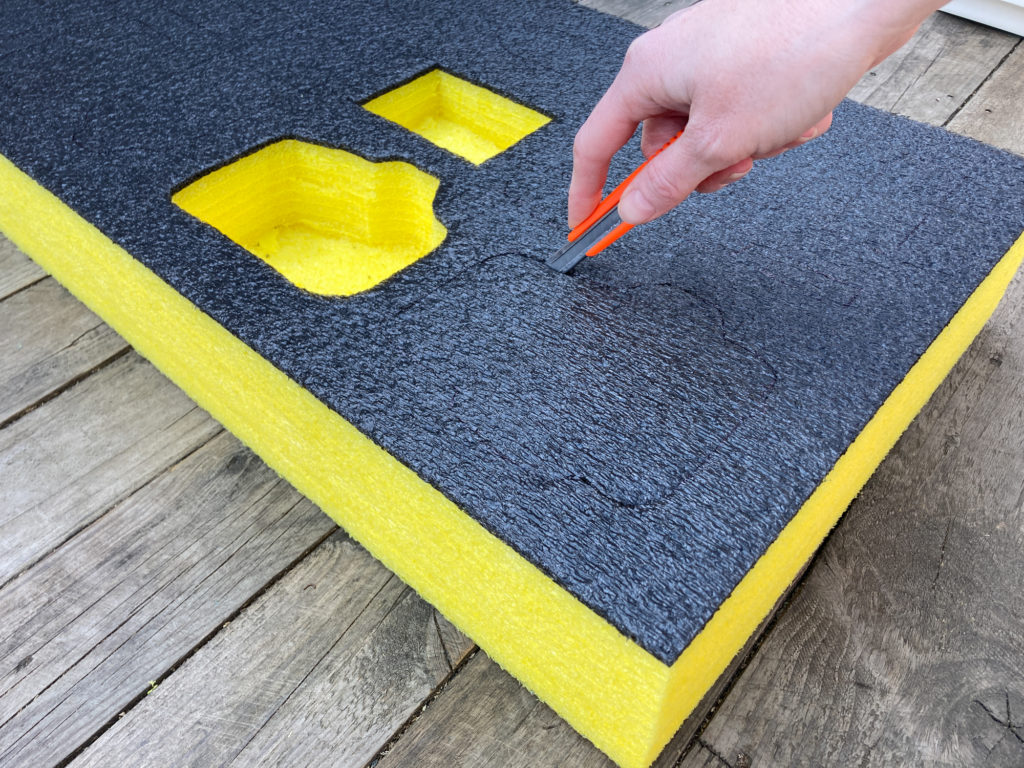
Use a craft knife to cut through the layers of foam to create a ‘pocket’ space for the items. A tip here is to measure the depth that you want the item to sit at and then lengthen the cutting blade on the craft knife to that depth – but please be super-careful if you do this, as there’ll be more of the blade exposed than usual.
STEP 4 – PEEL
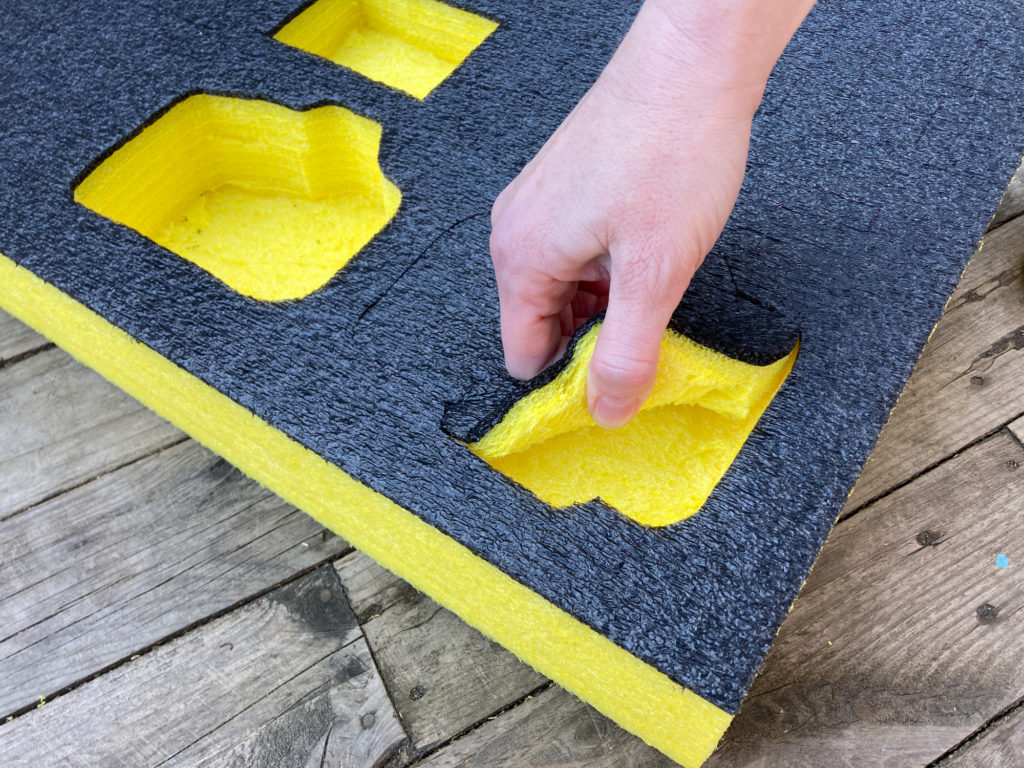
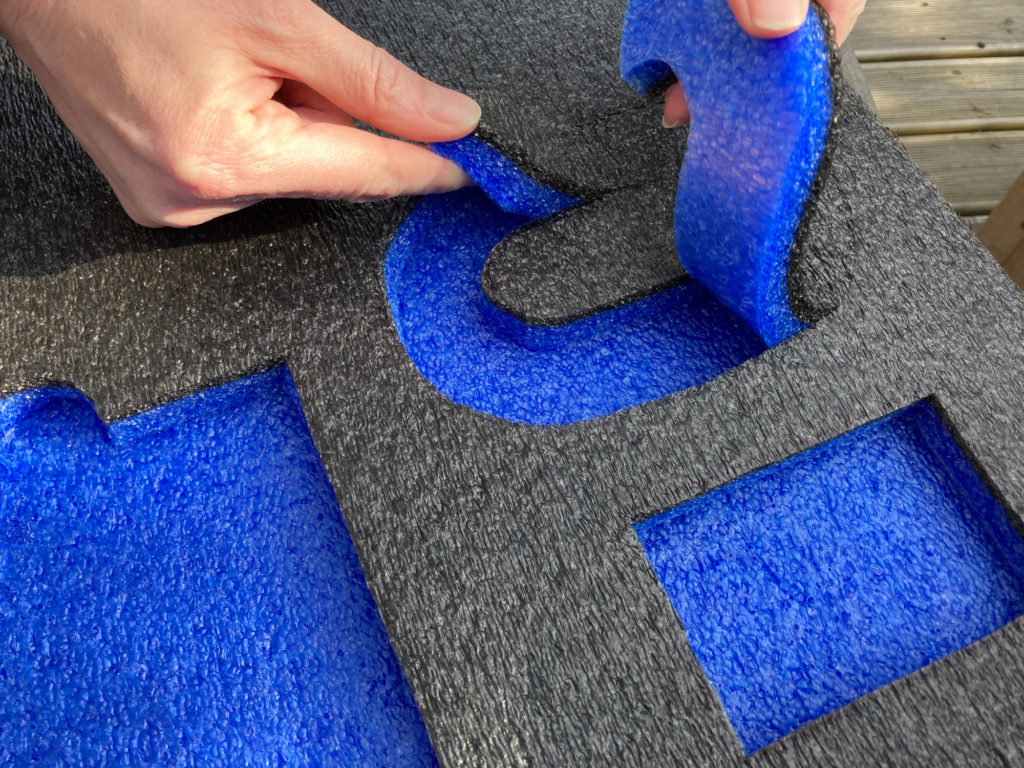
Peel away the layers to create the space for your item. I found it useful to use a metal ruler (take care when doing this) to help me lift up the edge and wiggle it into the layers of foam. The I could use my fingers to peel away the rest of the foam. I then trimmed off any less-than-neat internal edges.
STEP 5 – CHECK DEPTH
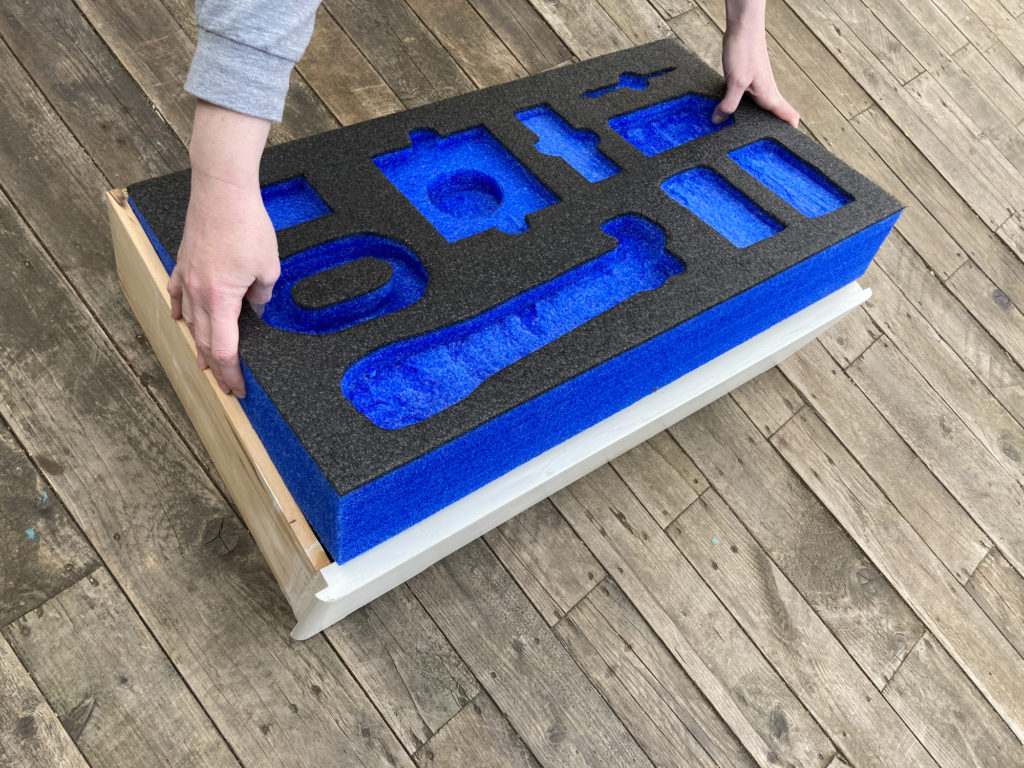
Check the depth against the item you’re planning to store in the space. If it needs to sit deeper, you can carry on cutting down into the space with the craft knife. I was going for an 8-layers depth for the cameras so I needed to do this in stages. It’s much easier to peel a couple of layers at a time than to try to do 8 at once.
STEP 6 – ORGANISE
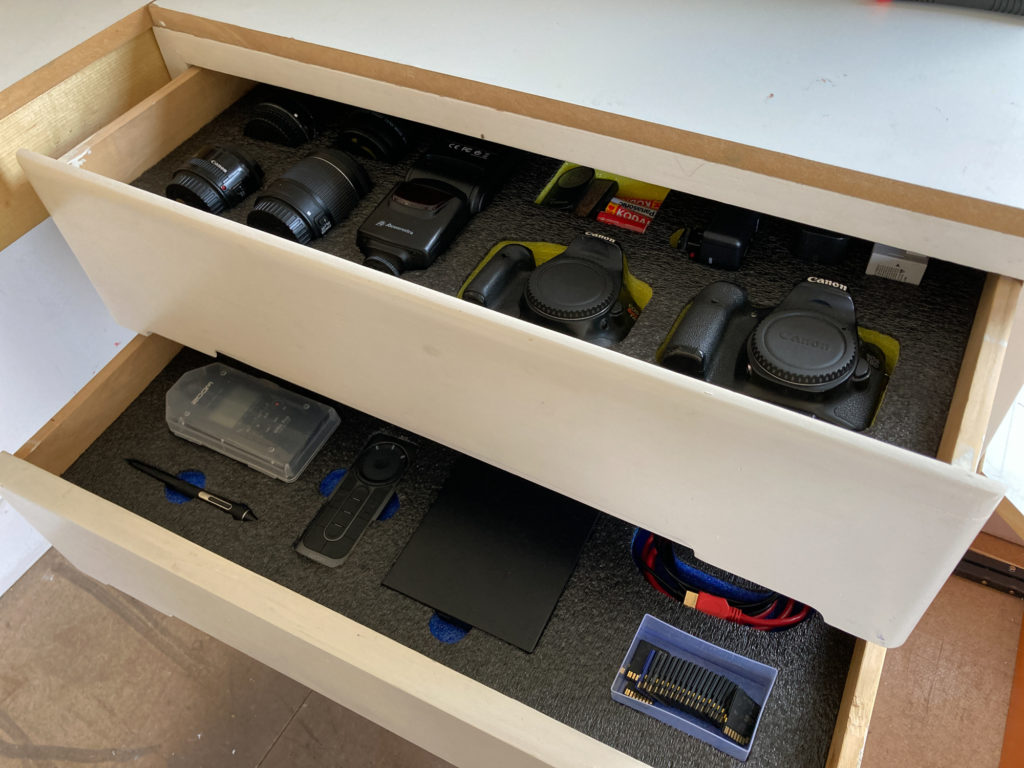
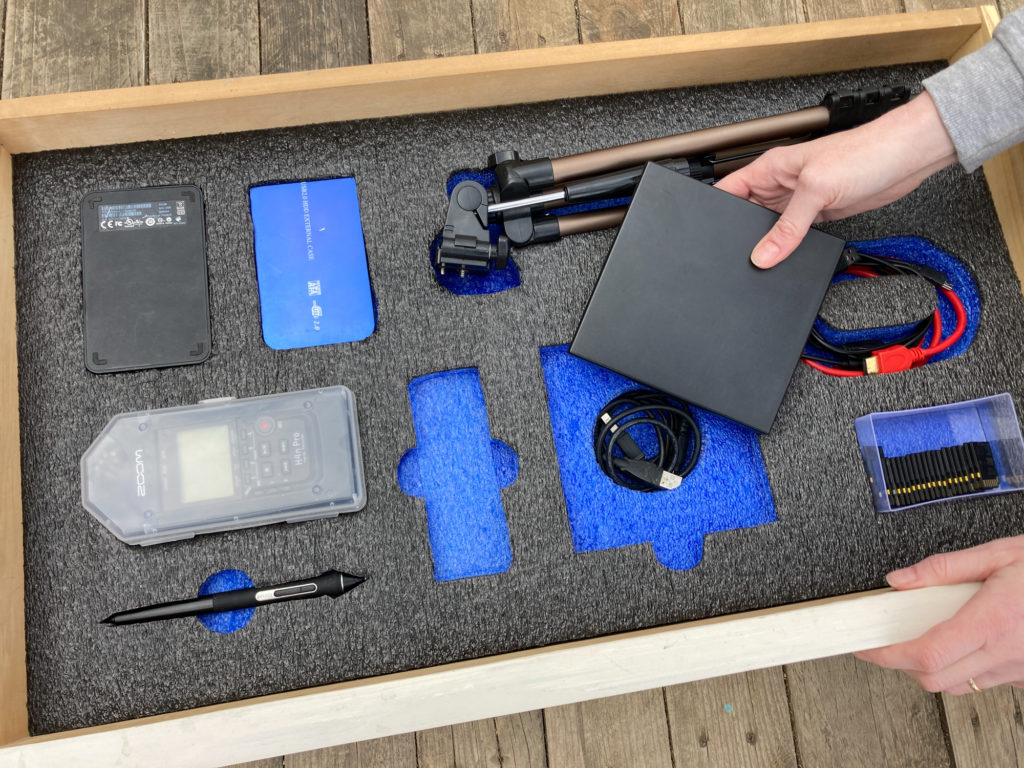
Once all the holes are cut out, you can push the foam insert into the drawer and add all your equipment. Ta-da! Everything is safely stored, neatly organised and ready to use.
TOP TIP 1
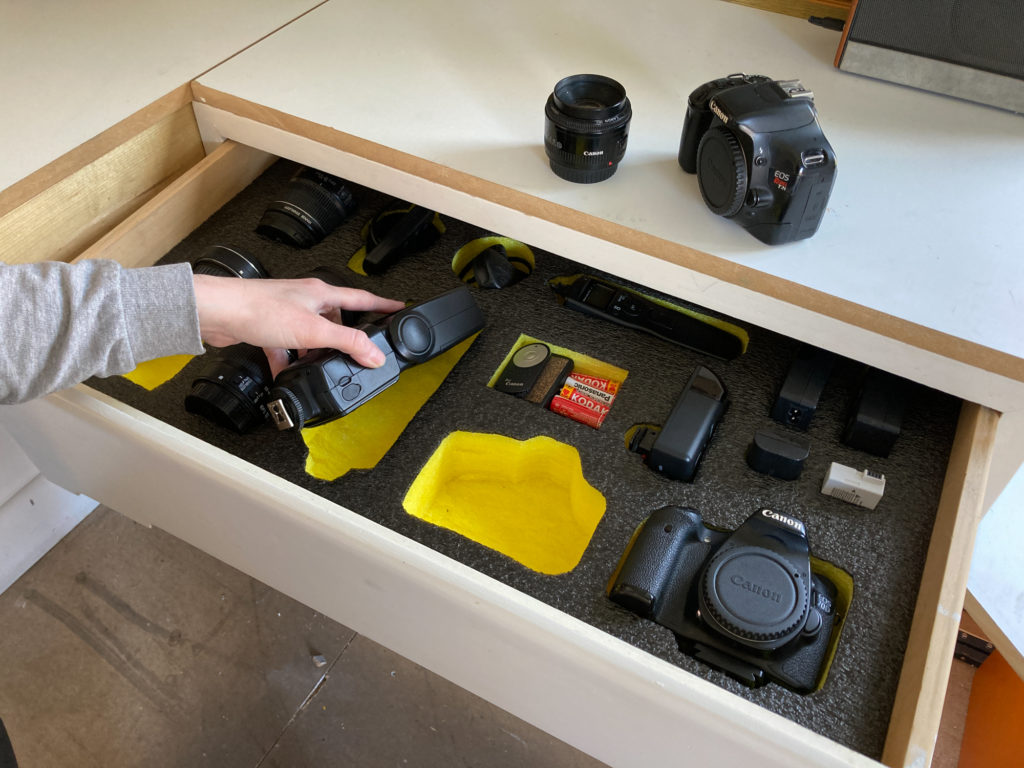
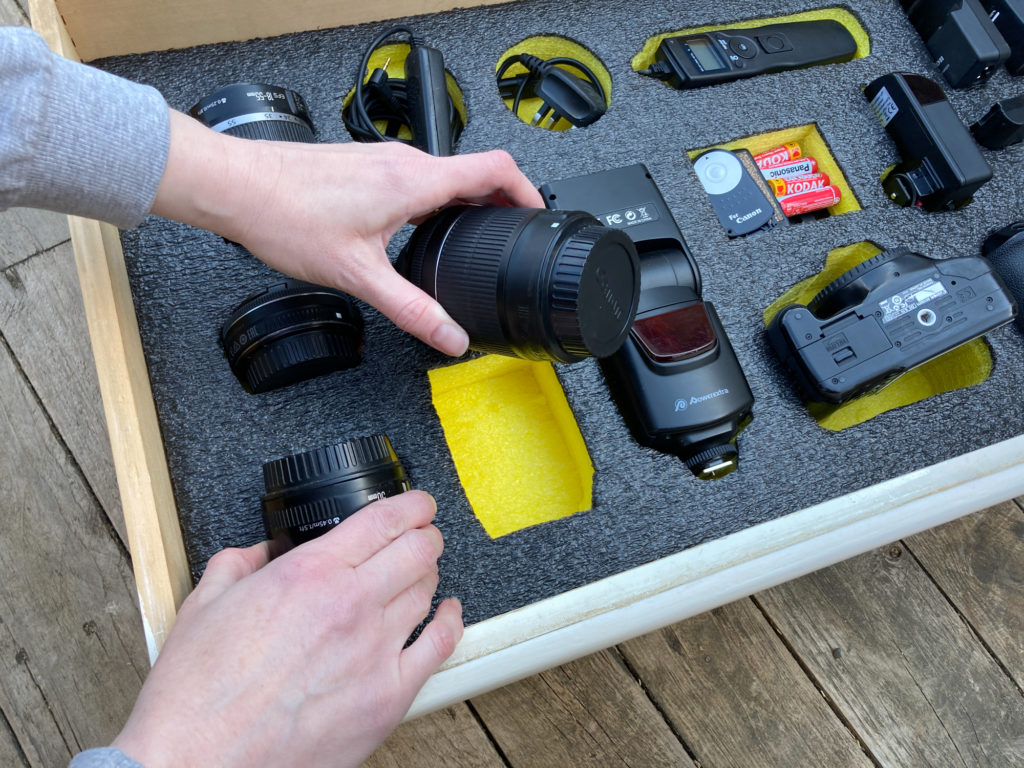
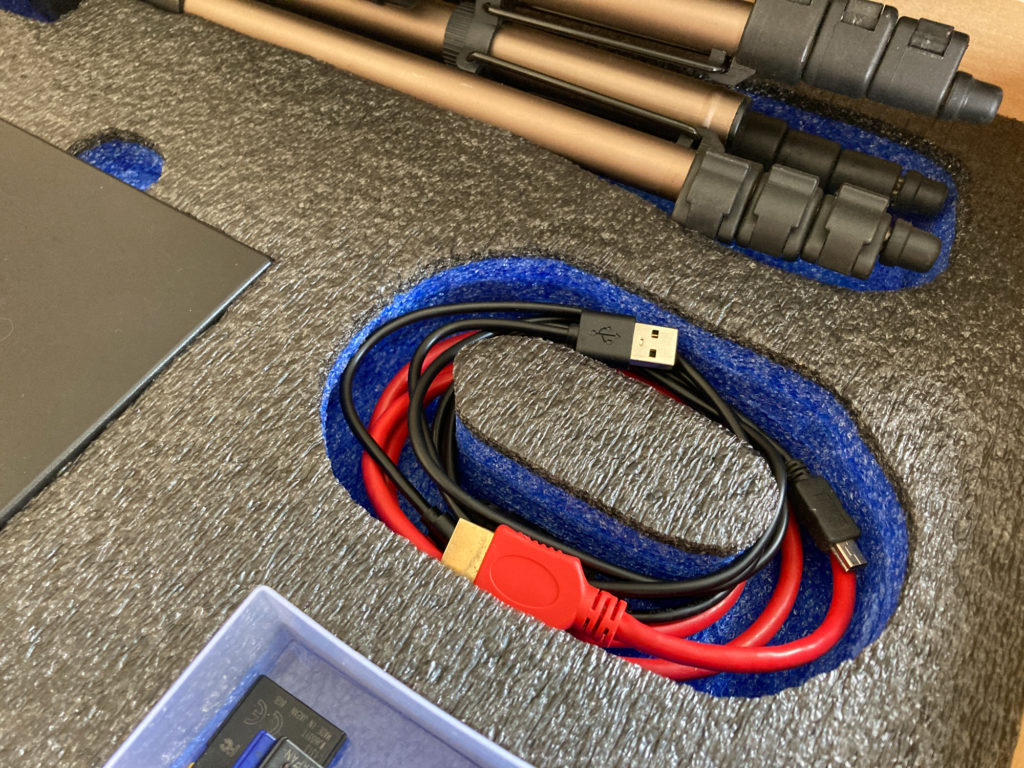
You can store cables and plugs by cutting holes or loops into the foam and winding the cables into the gaps. I find it so much nicer to store cables in this way rather than having them tangled up in a laptop bag or tucked in that dusty space behind my computer.
TOP TIP 2
Add a deeper hole beneath the shape you’ve cut to store hard-drives, recording gear and disk-drives so that you can store their corresponding cable underneath the item. That way you’ll always have the right cable at hand so that you can use the hardware easily.
TOP TIP 3
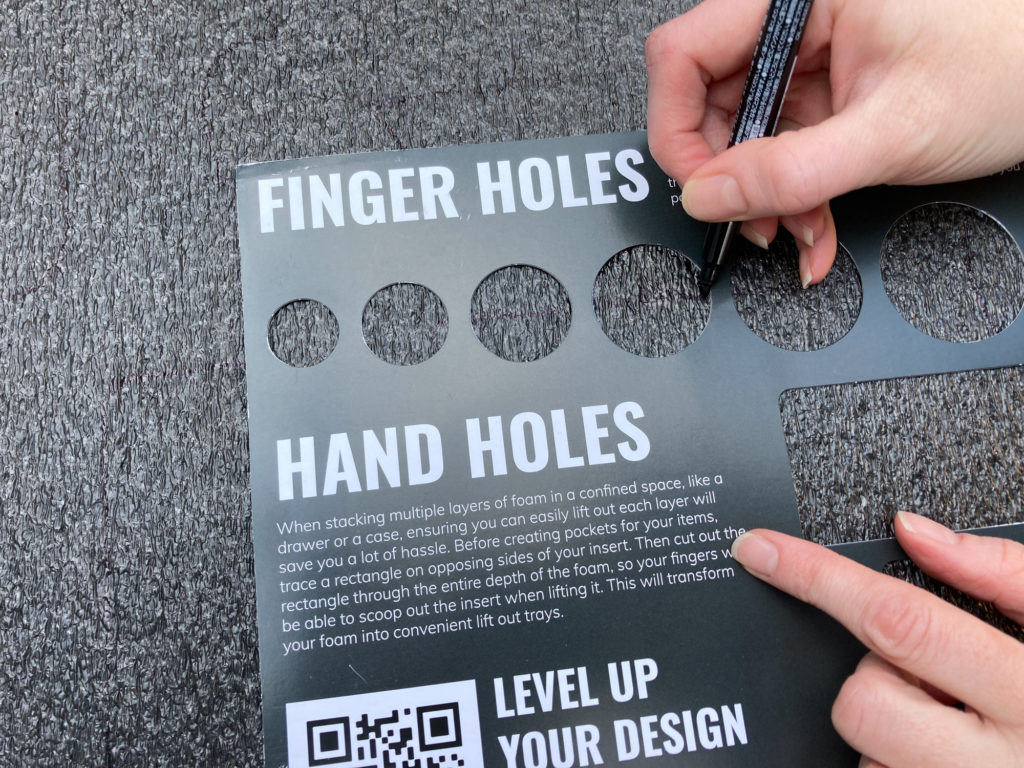
Add finger holes beside flat items that might otherwise be hard to get hold of. This will make it easier to lift items out of the foam inserts and means you can keep the pocket spaces ‘tight’ around items to protect them and keep them securely in place.
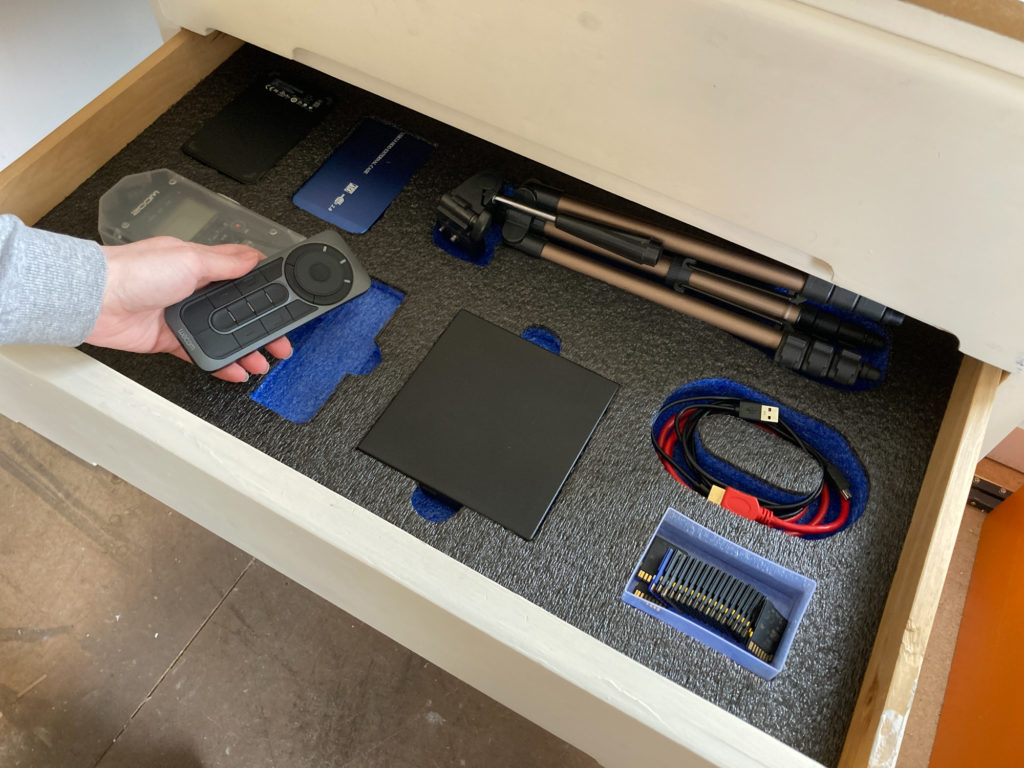
That’s such a pleasing result, isn’t it? I love how it’s so much easier to find the items I need – there’s no more fumbling at the bottom of camera bags or pulling tangled cables out of drawers to get to my equipment. But most of all, I’m so pleased to know that nothing is rolling around, being crushed or getting damaged when I close the drawer, which is a huge relief.
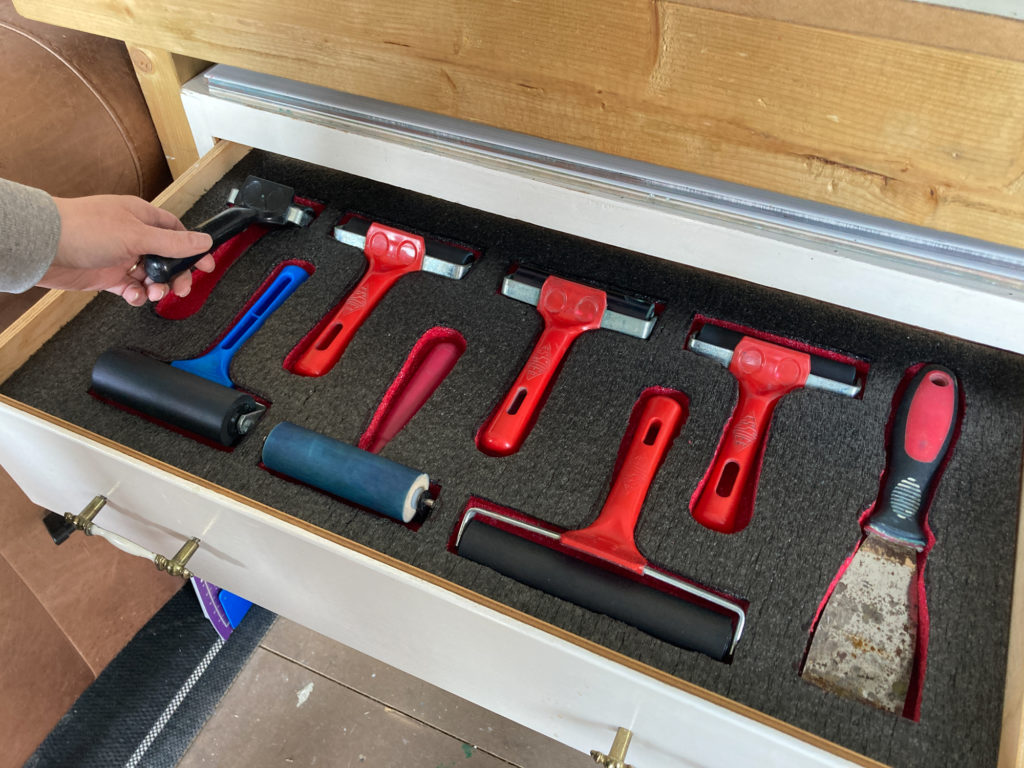
There’s no limit to what you can store using these foam inserts. Although I initially only planned to make storage for my photography equipment and important tech gear, I’ve made an extra one for our printmaking tools too. They don’t need to be kept particularly safe (although some rollers and lino cutters are not cheap) but it’s so much easier to keep them organised this way. Do you have a hobby that would benefit from this type of storage too? Maybe jewellery making tools, metal embossing gear or a pyrography kit?
Let me know how you like to store your important tech and keep your equipment safe. And if you have any tips for storing cables and accessories etc please let me know in the comments below, I’d love to hear your ideas. 🙂
PIN IT FOR LATER
This article is a sponsored collaboration. The pink links in the content indicate a sponsored link or information source. The blog post reflects my own experience and the sponsor hasn’t had any control over my content 🙂