Fancy creating DIY videos? As you’re probably aware it can end up costing quite a bit to produce video content. Obviously, if you hire a professional team to create videos your YouTube channel will look fantastic, but that would set you back hundreds of pounds! Even if you do it yourself you could still find that the costs add up.

I’ve made a few videos for my own YouTube channel (just don’t want the instagram stories ones eek!) and there are a few that hit the cutting room floor, never to be seen. That being said it is definitely possible to produce professional-looking and impressive video content on a tight budget – you just need to know how to go about it, and the following tips should help with that…
1 PLAN EVERY DETAIL IN ADVANCE
One of the main reasons why costs often spiral out of control when producing DIY video content is because the video wasn’t thoroughly planned beforehand. Without a detailed plan of the project you are bound to face surprises that you didn’t account for. To make sure that doesn’t happen, you should plan every detail of the video to come up with a thorough estimated budget. That should let you know how feasible it is to create the project video, and let you figure out ways to save on costs if possible by ordering online in advance.
2 MAKE DO WITH WHAT YOU ALREADY HAVE
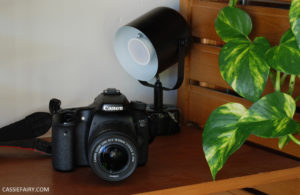
As a rule you should always try to make do with what you already have when producing video content on a budget. That starts with equipment, and assuming you (or someone you know) owns a decent video camera that can record 1080p videos – there’s no need to invest in a new one.

Try to apply this rule to other areas as well. For example you could use props from items around your house, build budget DIY lighting, and so on. If possible cast yourself in the video, or a friend or family member – the ultimate ‘use what you have’ option for a presenter, haha! One of my most watched-videos on YouTube is the shoe-dying DIY above and I just used natural light by doing the project in front of the window.
INVEST WHERE IT MATTERS MOST
Assuming you do have at least a little bit of budget to spend on your YouTube videos make sure you invest it where it will have the most effect. That will vary depending on your video, but there are a few areas that you could normally look at such as decent mid-range microphones or better lighting equipment. In short you should identify the areas that you feel would have the most impact on your videos, and don’t feel guilty about investing in them.

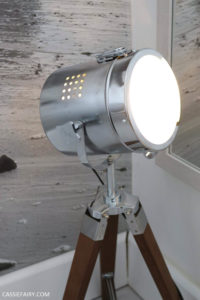
I got my lamp from Iconic Lights
As far as editing the video is concerned, you could find a user-friendly editor and do most of the editing work yourself. For example with Movavi Video Editor you can add subtitles by following the steps at https://www.movavi.com/support/how-to/how-to-add-subtitles-to-video.html and tidy up various parts of your video. That being said it may be a good idea to hire a professional editor to cut the video together. It is an area that requires some skill, and can have a big impact on how your video content turns out. This is definitely an skill that I struggle with and my videos would benefit from a little professional help!
If you want to start creating video content you’ve just got to go for it. Give it a go using whatever equipment and tools you already have and you should be able to end up with a good piece of video content – and won’t have had to break the bank to produce it. Let me know your own tips for making YouTube videos in the comments below.
This blog post is an advertisement feature that has been written in collaboration with a sponsor. The pink links in this post indicate a sponsored link 🙂


