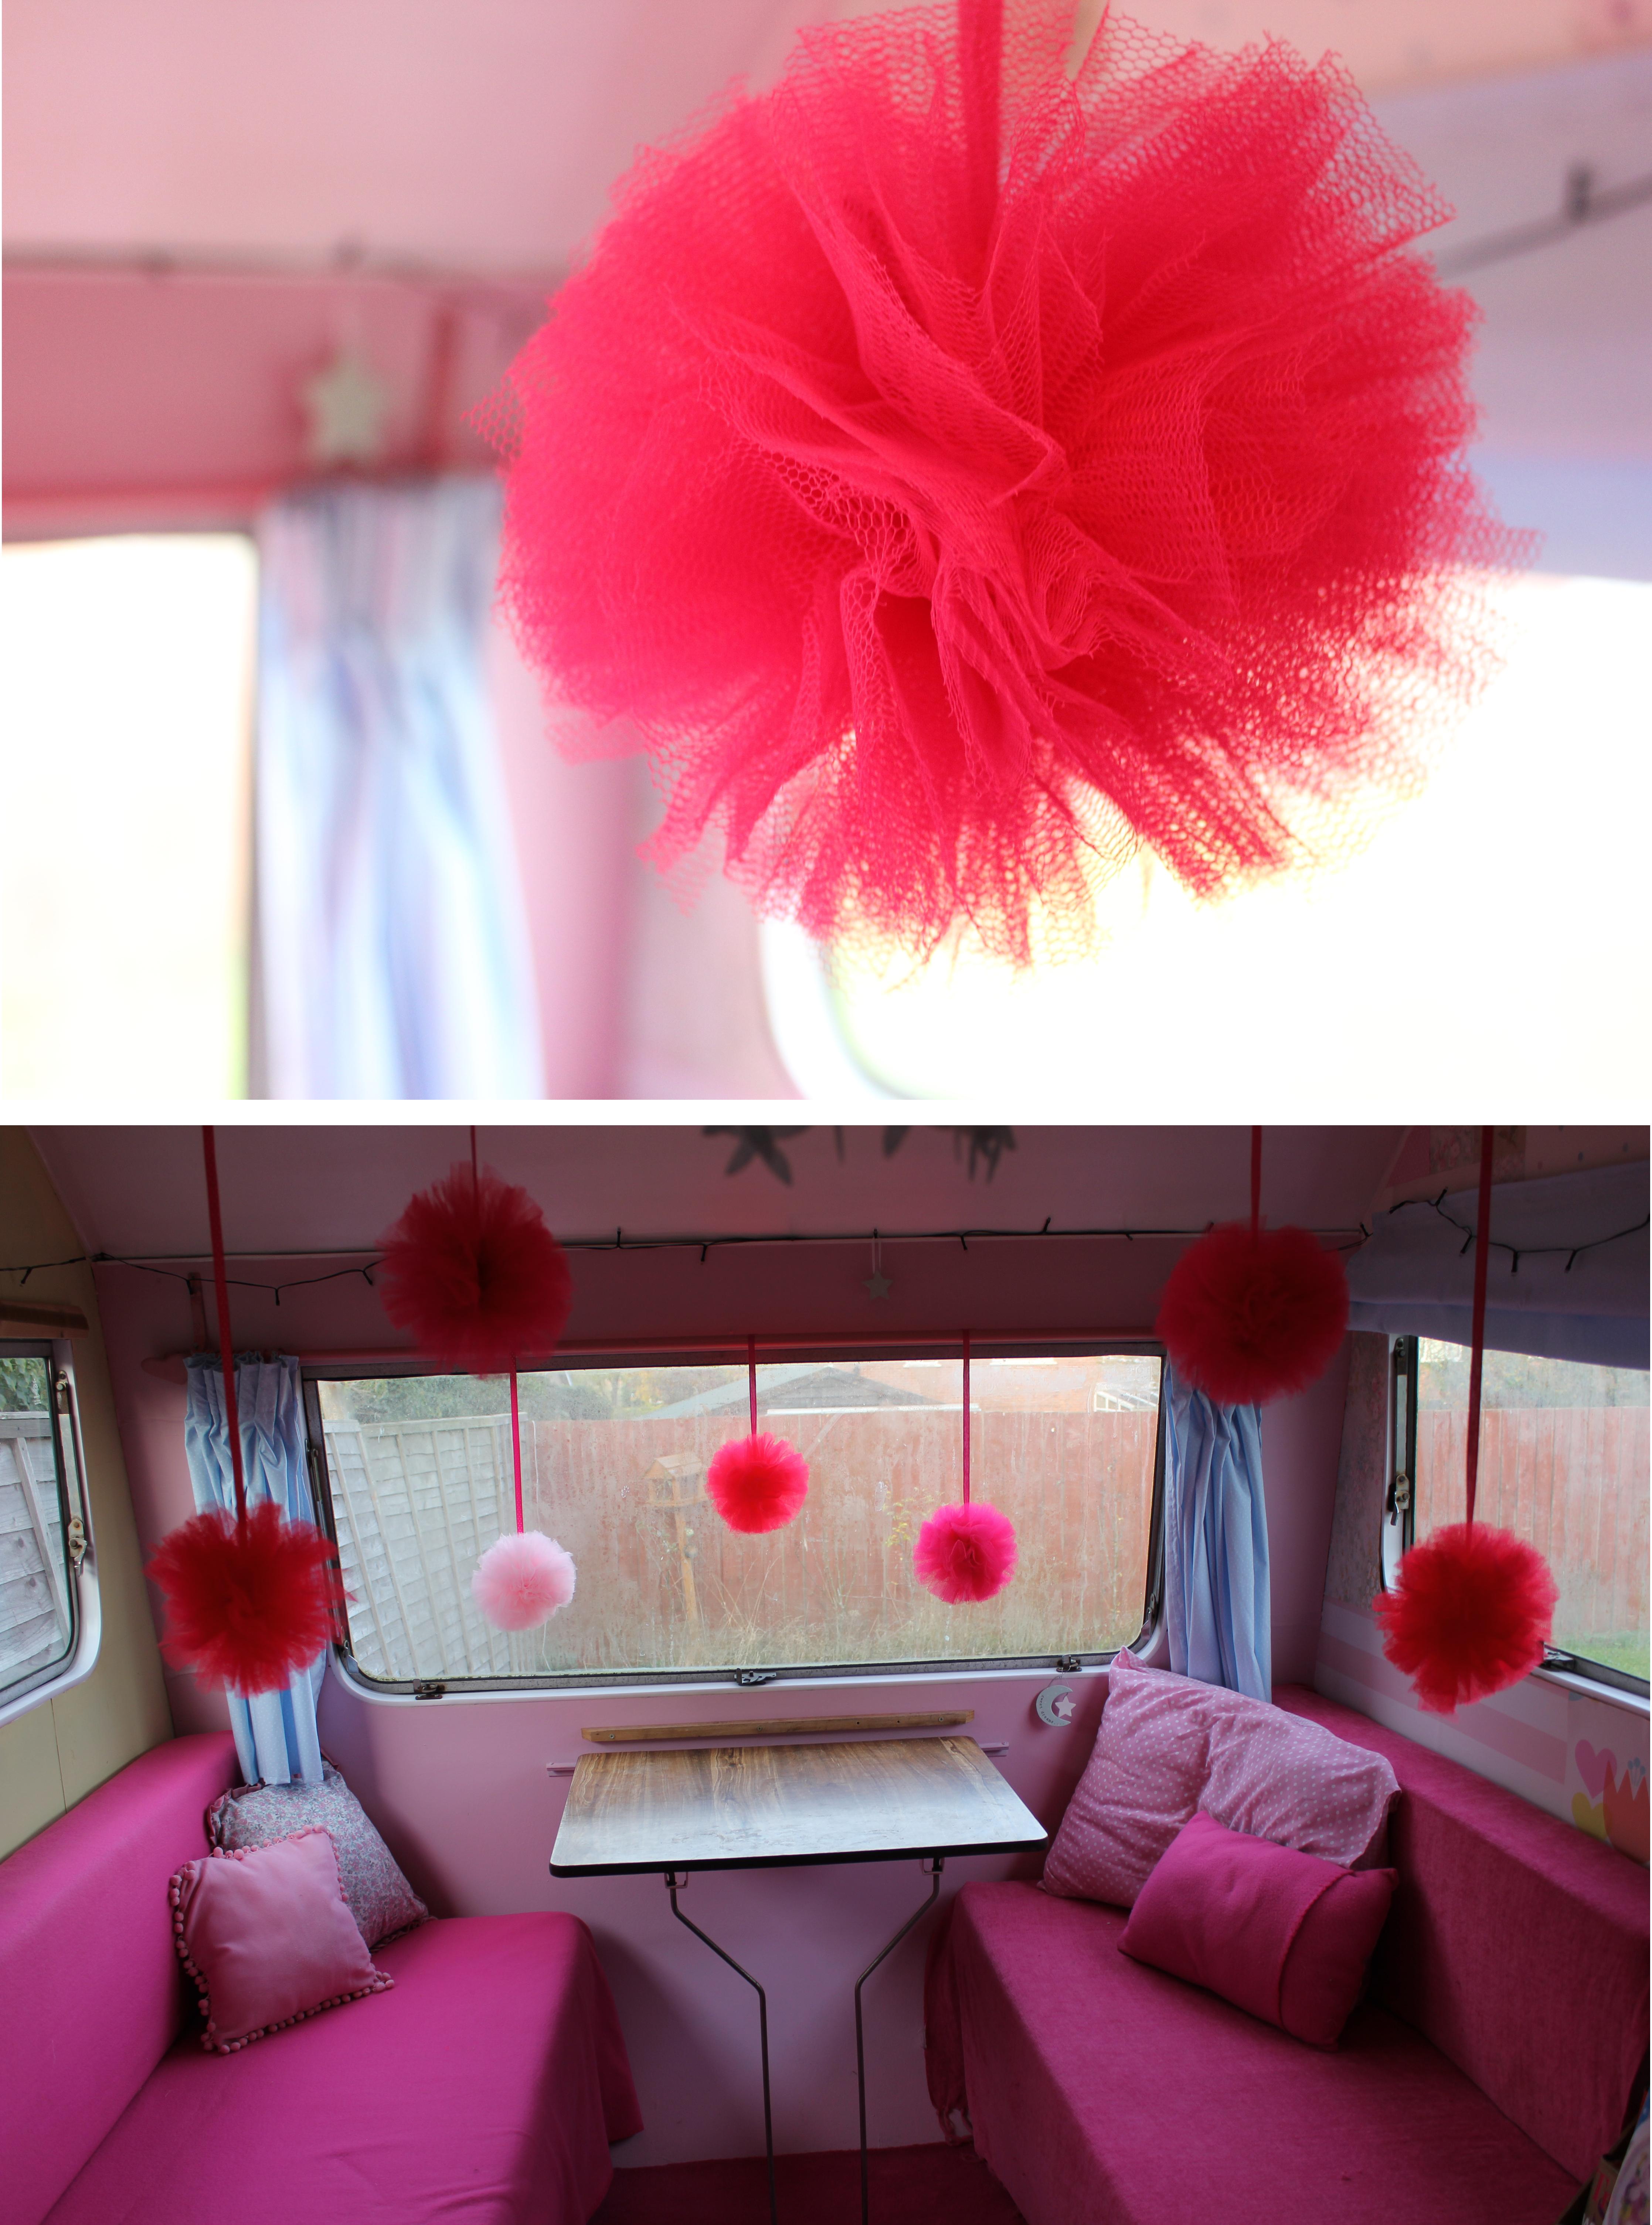
![]() I’m planning a red and pink theme for my birthday celebration and have shared my ideas on the blog via this moodboard. One of the decoration idea that I was keen to replicate was hanging pom-poms, but I wanted something more permanent than tissue paper, so I decided to use tulle to create fluffy pom-poms that can be used for this party and may possibly continue to decorate the caravan afterwards.
I’m planning a red and pink theme for my birthday celebration and have shared my ideas on the blog via this moodboard. One of the decoration idea that I was keen to replicate was hanging pom-poms, but I wanted something more permanent than tissue paper, so I decided to use tulle to create fluffy pom-poms that can be used for this party and may possibly continue to decorate the caravan afterwards.
I used the standard pom-pom-making technique of using two pieces of cardboard together and threading the tulle through and wrapping it round until it was thick – similar to making wool pom-poms, which I remember doing as a child. Draw around a plate that is similar to the size you’d like your finished pom-pom to be and cut out 2 circles. Cut smaller circles in the centre of each and make a cut from the outside into the centre so that you can easily slip the cardboard discs off the pom-poms later. You don’t need to cut thin strands of tulle – it usually comes on 140cm width roll, so cut approx 25cm, so that you have a piece of tulle 140cm x 25cm and gather it up to wind it through the centre and around the rings. You’ll need to repeat this process with a second piece, so each pom-pom will use approx half a metre of tulle.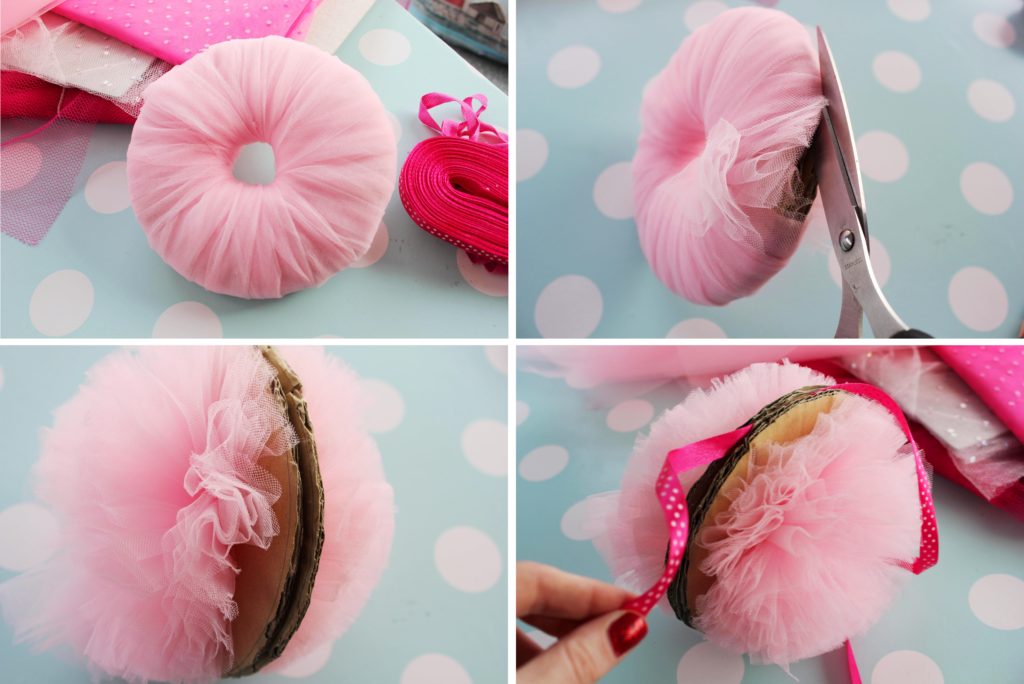 I then cut through the tulle layers in between the middle of the cardboard rings and slipped a ribbon down between the cardboard and secured with a knot to keep the centre of the tulle pom-pom in place. I then took the cardboard hoops out and used the length of ribbon to attach the pom-poms to the roof of the caravan and around my window. I made 7 pom-poms and it took me less than an hour whilst watching TV so although I thought it would be a difficult task at first, it turned out to be fairy straightforward and now I’ll be able to make pom-poms for any occasion! I will probably be re-using the red pom-poms for my christmas decorations and add a few white ones (snowballs, anyone?!) too. Let me know how you get on if you have a go at making these easy pom-poms yourself 🙂
More caravan articles
- My little vintage caravan project – all posts (cassiefairy.com)
- Pink party inspirations (cassiefairy.com)
- My little vintage caravan project ~ Sprucing up the woodwork (cassiefairy.com)
- My little vintage caravan project ~ Floored or flawed? (cassiefairy.com)
- My little vintage caravan project ~ Clearing out the old… (cassiefairy.com)
- My little vintage caravan ~ Clearing up the glitter (cassiefairy.com)





3 responses
Ooh that sounds fantastic Eve, good luck with the makeover! I’d love to see photos of it 🙂
My daughter has just bought a little vintage caravan for her 9-year-old daughter as a play house to chill out with her friends and I am going to make the curtains and re-cover the settees, so I was so pleased to find your web site and have already seen your easy way to make the settee covers. So off to the material shop tomorrow. The intention is to paint it in yellow and the covers to be in red gingham, I will send your link to my daughter (she lives in France) as I am sure she will be very interested and it will be a big help.
Thankyou.