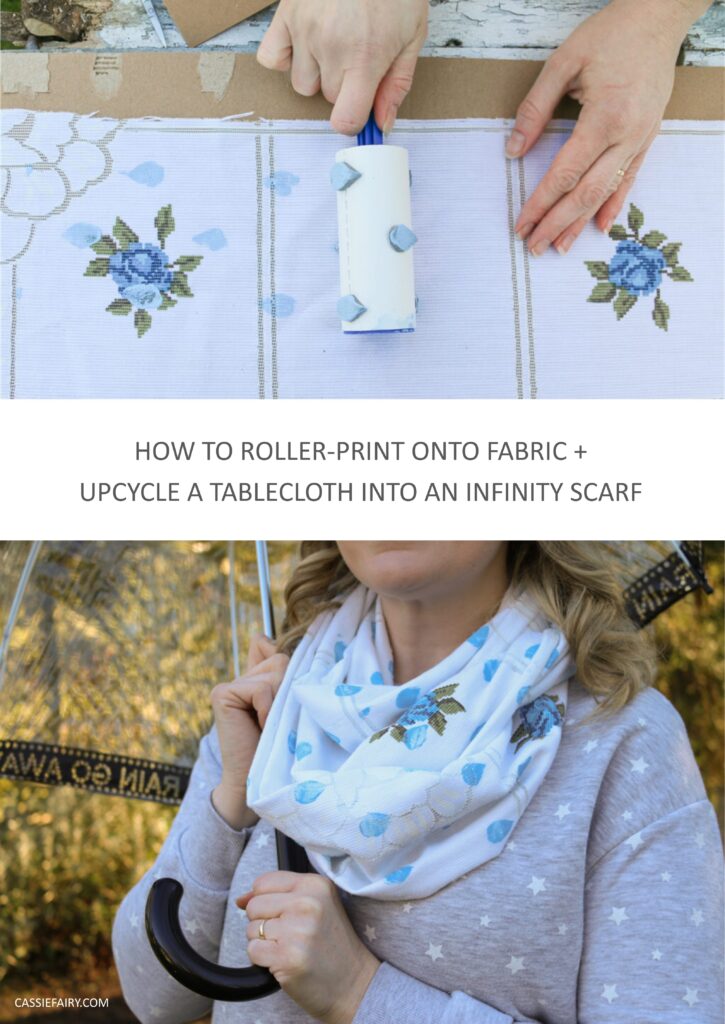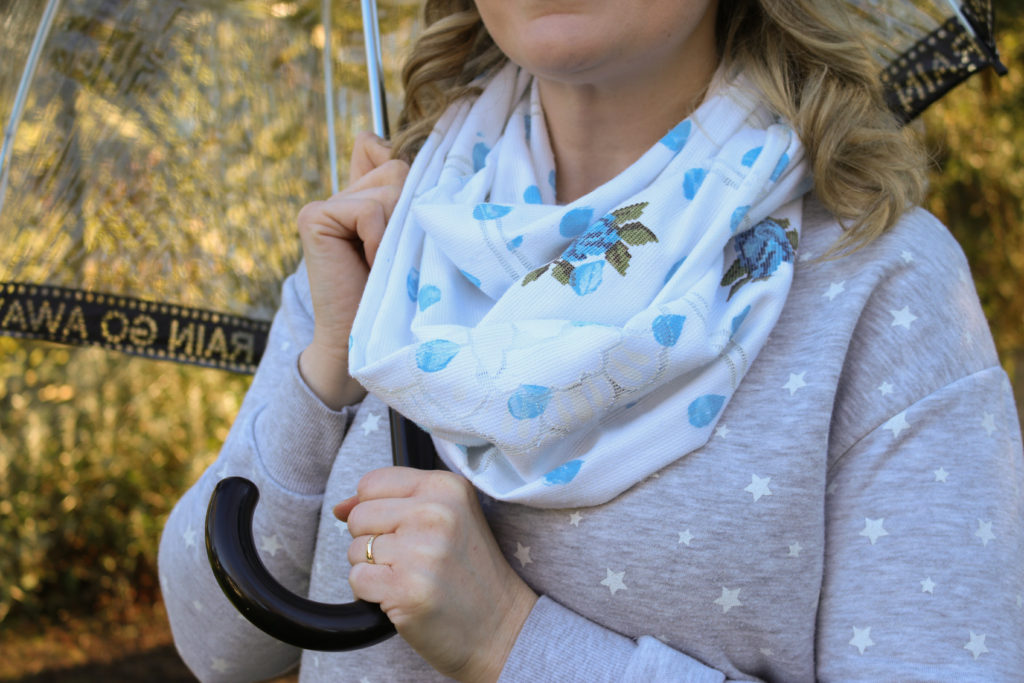
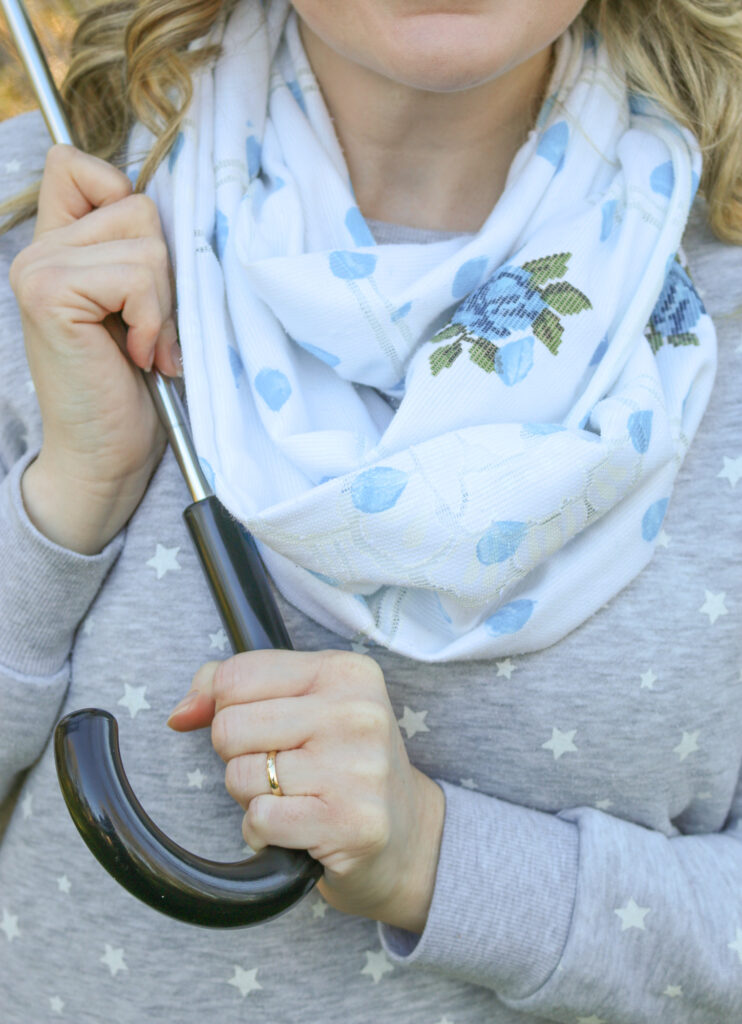
Inspired by the inevitable ‘April Showers’ at this time of year (which, let’s face it, runs from February through to May!) I’ve created a lightweight scarf that I’ve printed myself with a fun raindrops pattern in fresh, bright blue.
You can use any cotton or linen fabric, such as an upcycled tablecloth, to make this project. This creates a scarf that’s light enough for bright spring days but will keep you warm enough when there’s a nip in the air.
I’ve sewn it in an infinity scarf design, so it can be wrapped twice or three times around the neck to get different looks and to keep you cosy during the rainy season.
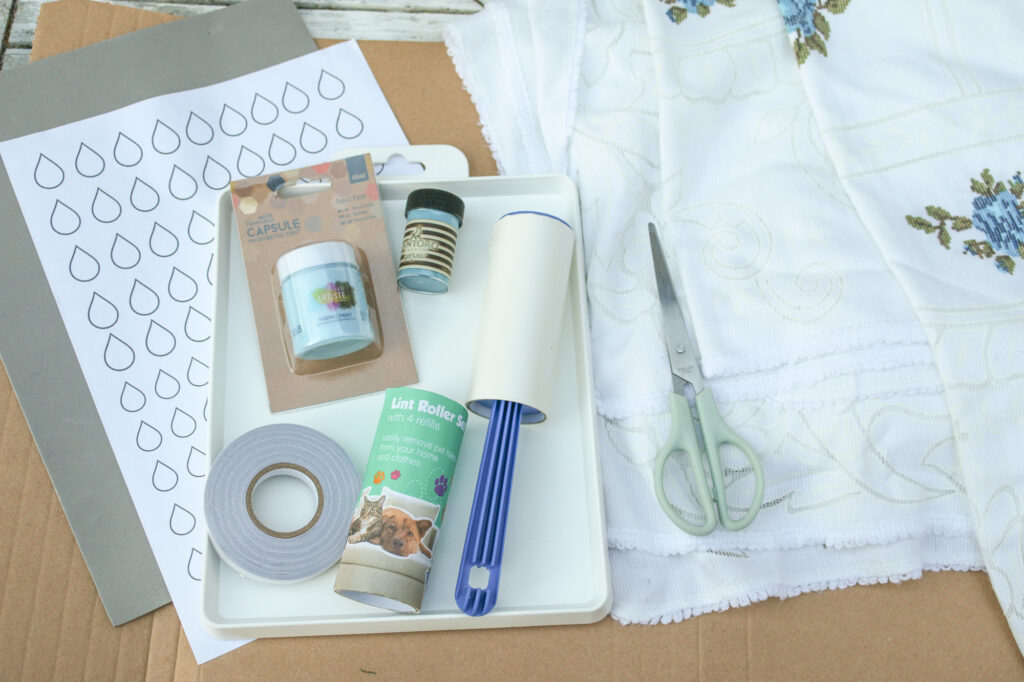
You will need
- A4 craft foam
- Double-sided tape
- White A4 paper
- Docrafts Capsule fabric paint 40ml in sky blue
- Old tablecloth or cotton/linen fabric
- Printer or pen
- Scissors
- Lint roller
- Ink tray
- Iron
- Sewing machine or sewing needle
- White cotton thread
Preparation
Cut pieces of fabric from the old tablecloth or from whatever fabric you have. You will need one piece that measures 220cm long by 40cm wide for the infinity scarf. If you don’t have this length in your tablecloth, you can make up this measurement using two, three or four rectangles of the fabric.
Step 1
Craft foam is very low-cost (you can find it in the kids’ stationery section in discount stores) but it IS thin, and I found that one sheet wasn’t thick enough to print the raindrops clearly. So, I suggest covering half of an A4 sheet of craft foam with double-sided tape. Remove the tape backing and fold the foam sheet in half and press to stick together to create a thicker foam.
Step 2
Draw multiples of the shape you wish to use on the foam, or print out a design onto paper. Stick your template to the foam sheet using double-sided tape. Use scissors to cut out each shape. Sharp nail scissors are good for carefully cutting out intricate designs. For my project, I’ve used a simple raindrop motif, which was quick and easy to cut out.
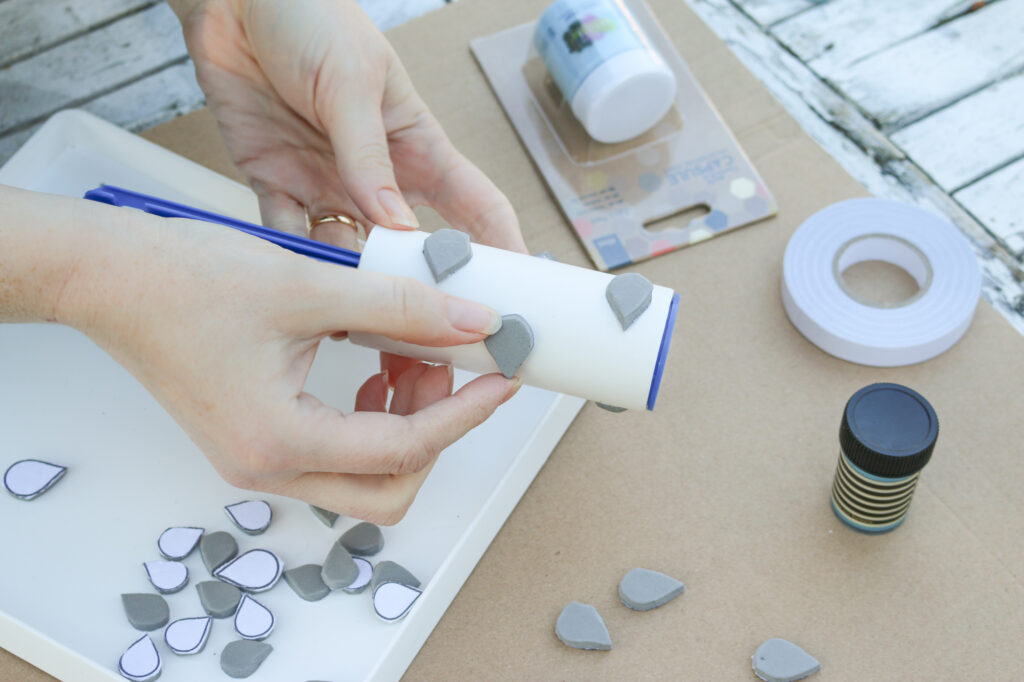
Step 3
The handy thing about a lint roller is that it already has a sticky surface, which is ideal for sticking the foam shapes to. So, peel off the protective top sheet of paper on the lint roller to reveal the sticky surface and space out the foam raindrops. Press them firmly onto the lint roller to stick in place.
Step 4
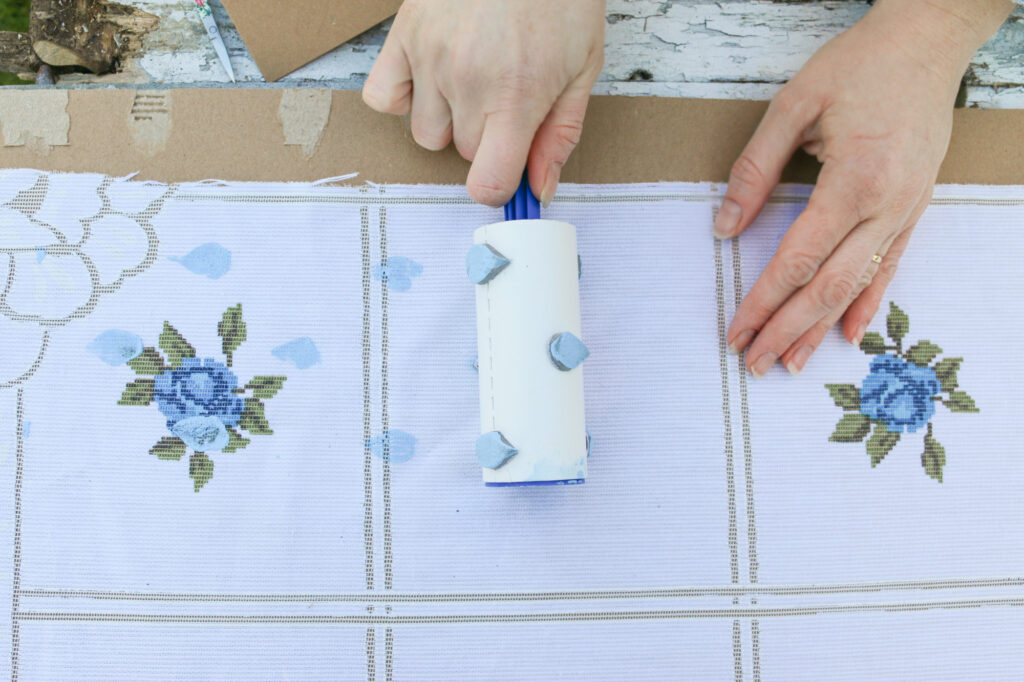
Fill an ink tray (or even a baking tray, or a paper plate) with fabric paint and spread it out over the surface. Carefully roll the lint roller into the fabric paint so that the raindrops pick up an even coat of paint.
Place the fabric onto a piece of cardboard with the right side up. Use the lint roller to print the raindrops onto the fabric. When the print becomes patchy, re-roll in more fabric paint and continue.
Step 5
If you’d like to print a second colour or a layer up different sizes of raindrops, wait until the first layer of fabric paint has completely dried and then print the second coat. Allow to dry again before ironing on the reverse to set.
When you have finished printing, allow the paint to dry for at least 6 hours and follow the instructions on the fabric paint to ‘set’ the paint. In this instance, the dry fabric paint needs to be ironed on the reverse for 5 minutes to set it in place and make it machine washable.

Sewing the scarf
If you have smaller pieces of fabric, join them together to create one long piece of fabric that measures 220cm x 40cm. When stitching them together, take a moment to make sure that the printed design is all running in the same direction.
Fold the fabric strip in half widthwise with the right sides together and pin in place. Use a sewing machine to stitch along the edge with a 1cm seam allowance to form a long ‘tube’ of fabric.
Turn the long tube of fabric right-side out and tuck one end inside the other. Fold under the loose edges of the outer piece of fabric and pin in place before stitching straight across to join the ends together and create your infinity scarf.
I hope you enjoy creating a customised scarf for Spring and I’d hear about the pattern you’ve printed, so please leave me a comment below. Here’s wishing you a cosy and hopefully sunny season!
Pin it for later