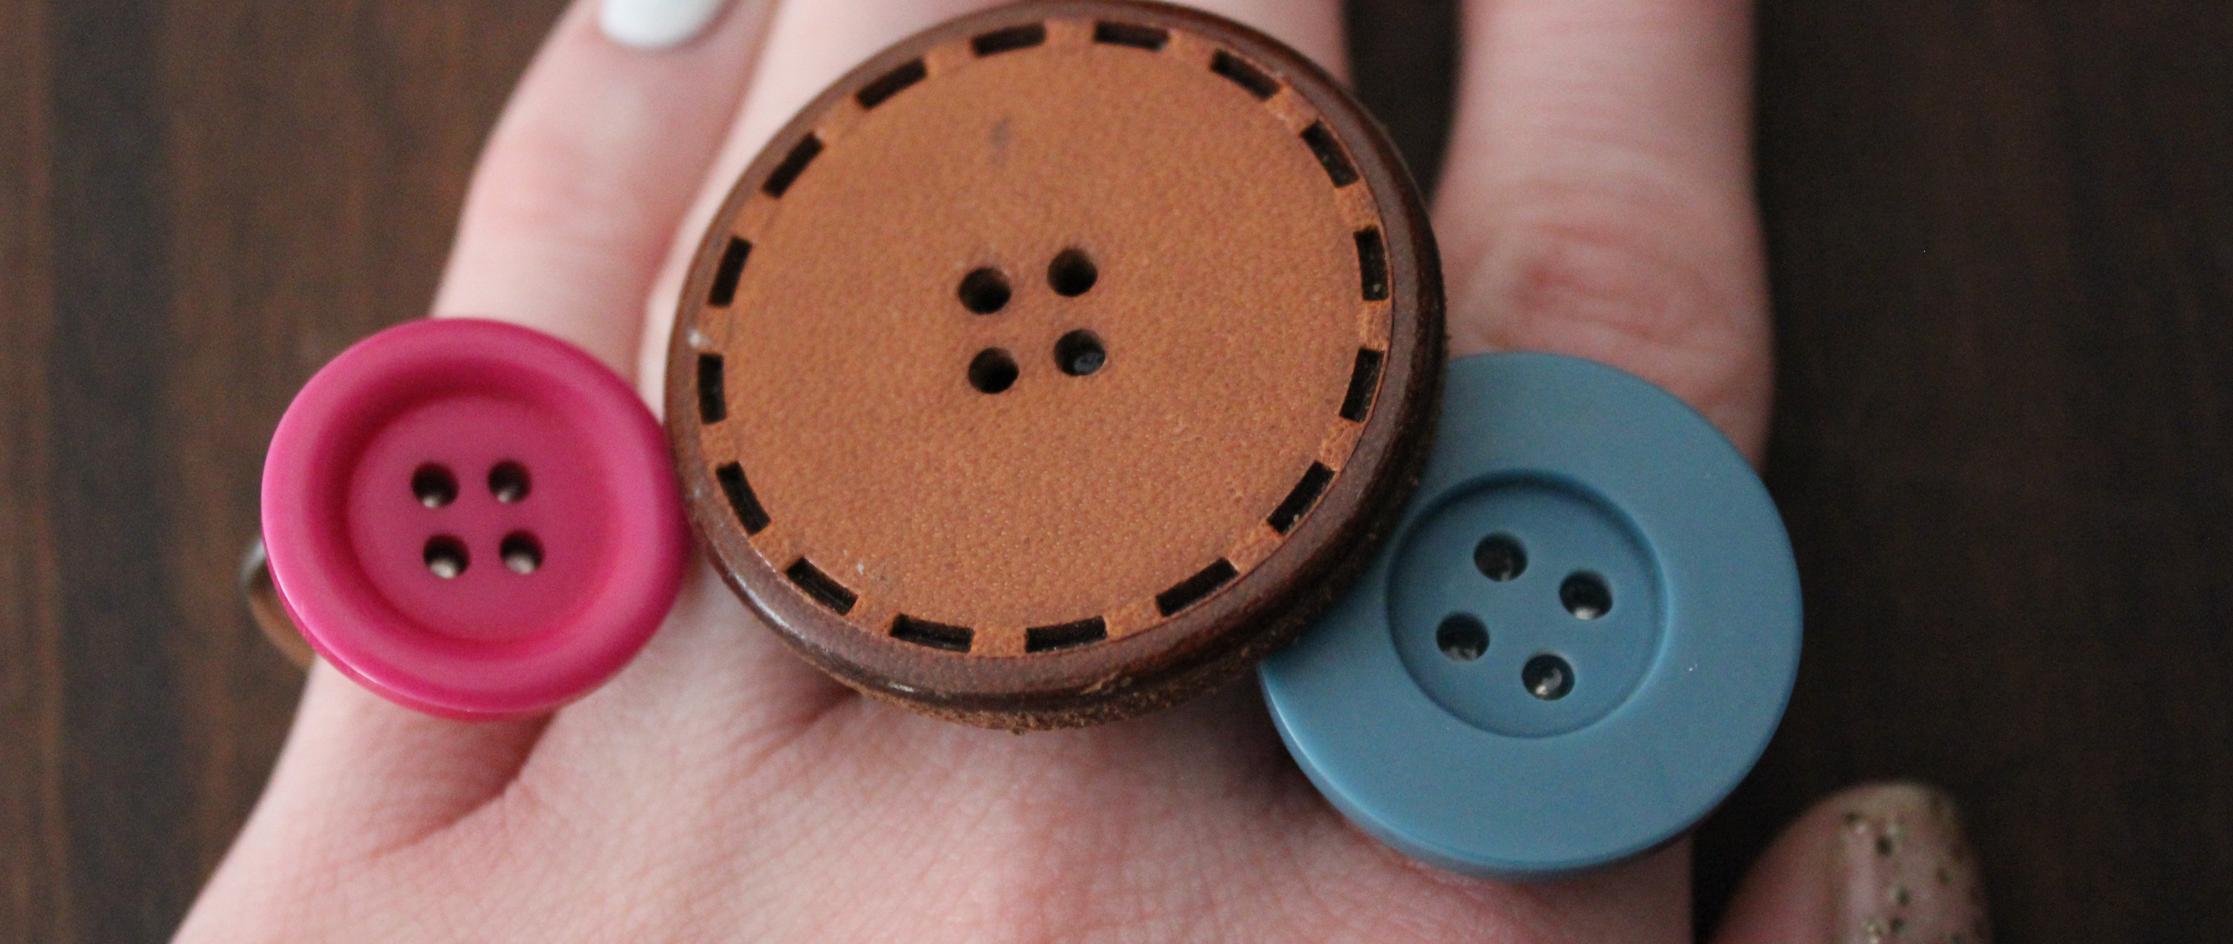
Here’s a fun craft project that you can have a go at on this weekend – making some rings, hair clips and brooches from old buttons. I don’t know how, but I have collected tons of buttons over the years (I can’t even imagine where some have come from) and now have a box full of them. I occasionally dip into it for a button to replace one I’ve broken on my favourite cardi, and sometimes I can find a matching set to use in a sewing project. But mostly they are odds and ends that will stay in the box forever. And that’s not fair on the poor buttons. So I’ve decided to do something with them because really they are too pretty to leave hidden away in the box.
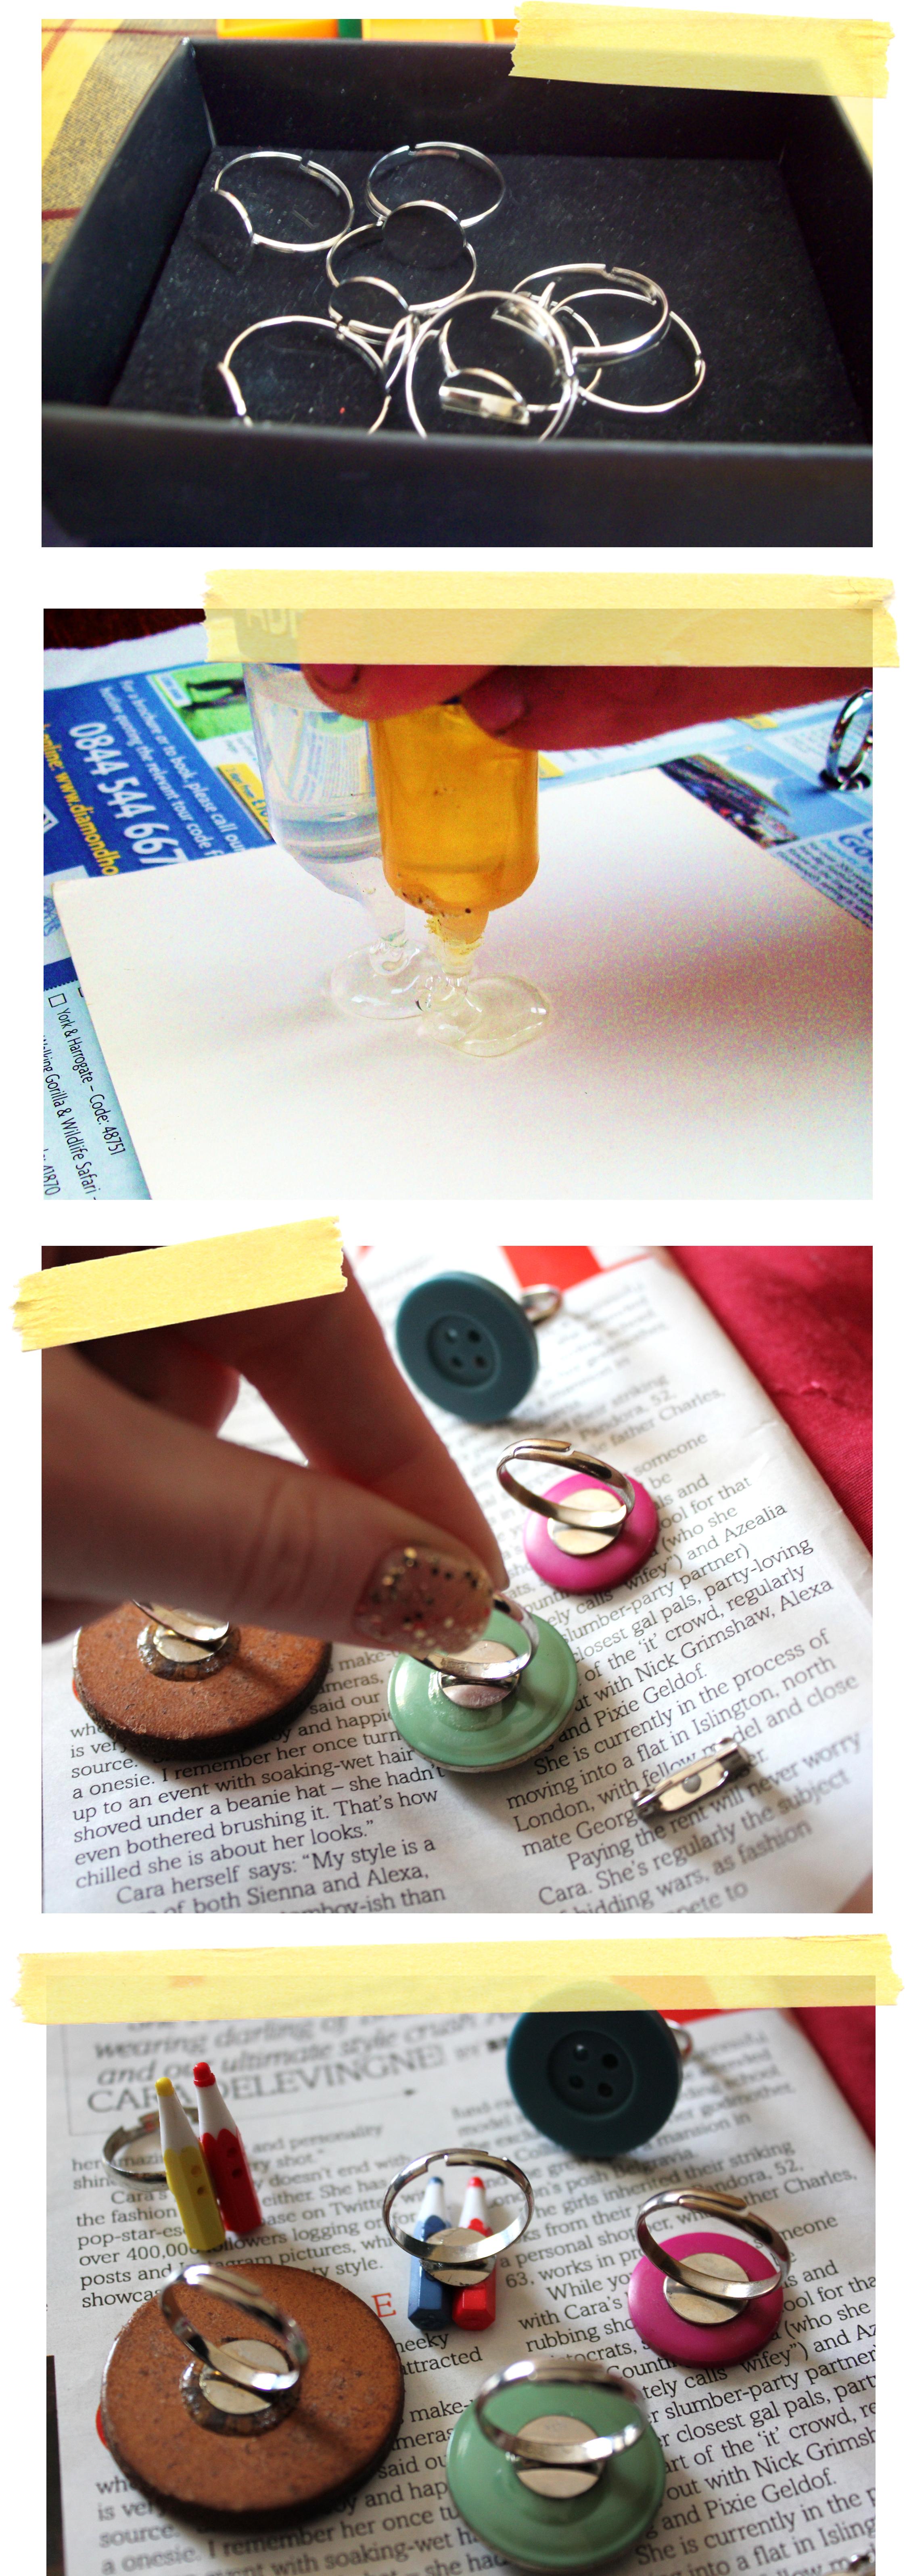
Firstly, you’ll want to get yourself some ring-backs, brooch blanks or hair clips ready to attach your buttons to, all of which are pretty cheap to buy. I hopped onto Ebay to find the ring backs, but you can easily find hairclips, grips and slides from places like Wholeport and brooch bars from Hobby Craft in the UK. You also need a really super super-glue or an epoxy resin to attach the buttons to the backs. A hot glue gun might do the trick, but they buttons sometimes pop off while you’re wearing them when attached this way – I’ve gone for resin because, as long as you let it dry for long enough, it holds everything in place pretty solidly!
So, put down newspaper and mix up your epoxy resin glue according to the packet instructions. Next dip your ring-back, brooch bar or clip into the glue and wait a minute so that it can goe a little tacky (but don’t test it with your finger or you will become the fashion accessory!). I then placed the ring-back onto the back of the button and pressed down, enough so that the glue squeezes into the holes of the button. Leave your ring to dry for the full amount of setting time recommended in the glue instructions.
Ta-dahh! You have something new from something old and have upcycled your prettiest buttons into a special accessory. And don’t forget – when everyone asks where you got your new statement ring, you can proudly tell them that you handmade it yourself!
More quick & easy craft tutorials from Cassiefairy:
- Fabric craft project – padded letters (cassiefairy.com)
- Get crafty in your local charity shop (cassiefairy.com)
- DIY furniture project – blanket cupboard (cassiefairy.com)
- Craft project by Molly Moo – button fairy house (cassiefairy.com)





2 responses
Thanks very much! 🙂
I think is a new idea. Very Interesting.